Table of Contents
Advertisement
Quick Links
Advertisement
Table of Contents

Related Manuals for I WARM MCS 300


Summary of Contents for I WARM MCS 300
- Page 1 Mobile Comfort System Technical Certificate. User Manual Thermostat MCS 300...
-
Page 2: Table Of Contents
CONTENTS: Introduction ....................3 Control and indication ..............8 2. Installation guide ................. 9 Floor temperature sensor installation............9 Thermostat mounting................. 11 Thermostat installation................13 3.Technical specification ..............16 4.Your safety ....................17 5.Warranty obligations .................18 Warranty Certificate ..................19 РЭА.00065.01П(ИП) РОСС RU.AB87.B03861 Good for printing 16.07.2013. -
Page 3: Introduction
INTRODUCTION Thermostat MCS 300 is a brand new Wi-Fi device, which will make your life even more warm, cozy and comfortable. MCS 300 is designed to control indoor electric heating systems (heating mats, film heaters or heating cable sections). Thermostat automatically maintains a preset temperature of the heated surface using readings from the floor temperature sensor (included in the delivery set). - Page 4 To begin the thermostat operation it is required to perform a few simple procedures: 1. Install thermostat MCS 300 as described in the installation guide below. Introduction...
- Page 5 2. Download the free app for your iPhone in AppStore by entering MCS 300 in search. You may also find a reference to this app on the website www.ses-pro.ru or on the QR code, printed in the end of the manual on its cover.
- Page 6 Internet * — If you do not have a Wi-Fi router, you can control the thermostat MCS 300 directly. In that case the thermostat acts as an access point. Control would be possible only with one thermostat at a time.
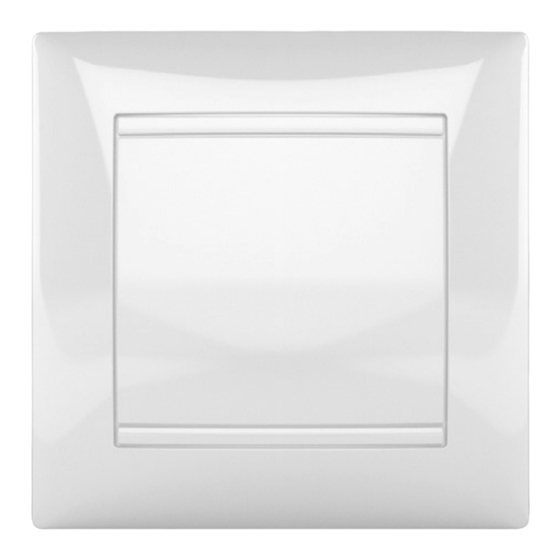
- Page 7 Delivery set of the thermostat MCS 300 includes: 1. Thermostat MCS 300 1 pcs. 2. Remote floor temperature sensor TST02 1 pcs. 3. Technical Certificate, Installation Manual 1 pcs. 4. Packing box 1 pcs. Fig. 1. Outside view of MCS 300 thermostat...
-
Page 8: Control And Indication
CONTROLS AND INDICATION The front cover does not have any LED signals or buttons (see fig. 1). If the cover is open, as it is shown on fig. 6, there are LED signals and control buttons under it (see fig. 2). 1. - Page 9 Fig. 2. Thermostat MCS 300 with opened front cover Controls and indication Introduction...
-
Page 10: Installation Guide
INSTALLATION GUIDE Installation floor temperature sensor Mounting the floor temperature sensor is carried out at the stage of the heating element installation. The floor temperature sensor should be placed inside the corrugated tube (see fig. 3), the end of the tube should be closed with sealing blank cover to prevent concrete mixture or tile adhesive glue penetration at the warm floor system installation. - Page 11 50–60 Fig 3. Thermostat and heating cable section installation Tools and materials necessary for installation: Corrugated plastic tube with the diameter at least 16 mm (length of the tube depends on the place where the module will be installed); 2. Standard plastic junction box; 3.
-
Page 12: Thermostat Mounting
Thermostat mounting Preparation electrical connections Install junction box or terminal box. Approach the power line cables, installation wires of the heating mat or section and floor t emperature sensor installation wire to the junction box. Apply voltage to power line cable, determine phase and neutral cores by the phase indicator and mark them accordingly. - Page 13 temperature temperature sensor 220VA sensor 220VAC Double-core heating cable Single-core heating cable Fig. 4. Connection diagram of heating section and mats to two-conductor power network network earthing network conductor earthing conductor external external screw terminal screw terminal temperature temperature sensor sensor 220VAC 220VA...
- Page 14 Fig. 5. Connection diagram of heating sections and mats to three-conductor power network Installation guide...
-
Page 15: Thermostat Installation
Thermostat installation The thermostat needs to be disassembled before installation. Remove the front cover of the device. To do so, unlock the cover by inserting a flat blade screwdriver into the locking grooves located on both sides of the front cover (fig. 6). Remove the cover (fig. 7). Locking Locking Locking... - Page 16 Fig. 7. Thermostat without cover Installation guide...
- Page 17 Mount the device into the junction box and fix it with at least two screws located along its horizontal axis (fig. 8). Assembly of the thermostat is carried out in reverse order. Carefully install the front cover of the thermostat back to its place, pressing by hand till both clamps click.
- Page 18 Thermostat MCS 300 has a removable frame. If it is necessary you may remove it and install the thermostat into the junction box without the frame. You may also use standard stopper plugs of some manufacturers of electric equipment. They may be installed instead of the MCS 300 frame and attached to the terminal box by screws.
-
Page 19: Technical Specification
TECHNICAL SPECIFICATIONS THERMOST AT MCS Suppl 220 V Maxi 16 А Powe Weig 100 g Dime 83×83 nsion ×48 Store settin mont IP21 rating Prote ction Floor TST02 temp Senso Opera from ting +5 °С Permi 80 % ssible Maint от... -
Page 20: Your Safety
YOUR SAFETY All operations for installation and connection of the thermostat must be carried out by a qualified electrician who has carefuly studied this manual! Do not attempt to carry out the procedures on installation and repair of the thermostat without disconnecting the power supply. Do not attempt to make any changes in the design of the thermostat. - Page 21 Your safety...
-
Page 22: Warranty Obligations
WARRANTY OBLIGATIONS Manufacturer guarantees compliance of the Thermostat quality to the requirements of Technical Specification TU 3428-711-68134775- 2012 assuming that the transportation rules and installation and operation in- structions are followed. The warranty period is 2 years from the date of sale. - Page 23 Warranty obligations...
- Page 24 WARRANTY CERTIFICATE Thermostat 300, Date of manufacture Has passed acceptance tests and is declared acceptable service. stamp Seller Date sale Seller’s stamp Manufacturer: I-WARM ELECTRIC HEATING (SHENZHEN) CO. LTD. 4/F South, Office Building, Dacheng Industrial Park,...
-
Page 25: Warranty Certificate
Jihua Road East, Buji, Shenzhen, China, 518112 Warranty certificate...
Need help?
Do you have a question about the MCS 300 and is the answer not in the manual?
Questions and answers