Table of Contents
Advertisement
Quick Links
Advertisement
Table of Contents

Related Manuals for SnowEx SP-8500


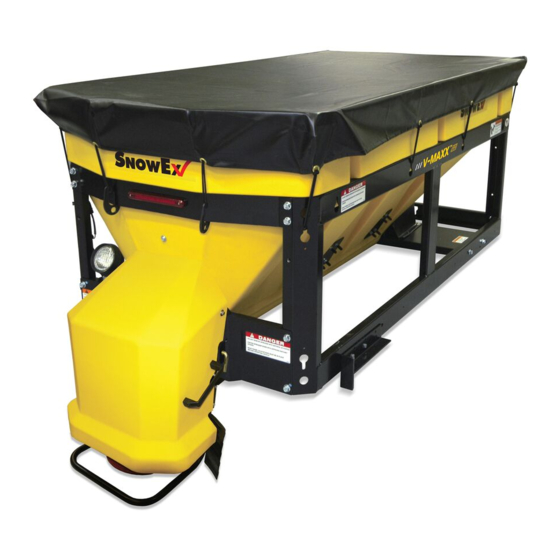
Summary of Contents for SnowEx SP-8500
- Page 1 Auger Drive Assembly Parts Breakdown Model # SP-8500...
- Page 2 Auger Drive Assembly Parts Breakdown Model # SP-8500 . y t - " 1- 1/2” Hex Bolt " 8 Serrated Flange Nut " 2 - " " 4 - " l i a 4121 - " " 1 f l e...
- Page 3 Spinner Drive Assembly Parts Breakdown Model # SP-8500...
- Page 4 Spinner Drive Assembly Parts Breakdown Model # SP-8500 . y t D 5293 5/16-18 x 1-1/8 Socket Head Cap Screw D 5249 5/16 Flat Washer D 5349 Spinner Shroud D 6138 5/16-18 Nylox Zinc Plastic Handle D 5248 D 4135...
- Page 5 Hopper Assembly Parts Breakdown Model # SP-8500...
- Page 6 Hopper Assembly Parts Breakdown Model # SP-8500 . y t 6576 5/16-18 x 1-1/4 HHCS 3/8 Serrated Flange Nut 6165 " 6 Flat Washer " 6 D 6874 #14 1-1/2” Tek w/Neo Washer t l o r o t e l f...
- Page 7 It is not recommended to attach to fuel or brake lines for obvious reasons. Do not route close to exhaust system or engine, even though Snowex uses high temperature wiring. It still could melt under extreme heat and short the spreader electrical system, as well as the vehicle electrical system.
- Page 8 Control and Harness Diagram Model # SP-8500 Truck Cab. IMPORTANT: In the off season remove control Power Under Dash and put in a cool dry place. The interior summer Auger Motor temperatures could damage circuit board and void warranty. Vibrator...
-
Page 9: Controller Wiring Diagram
Controller Wiring Diagram Model # SP-8500 Auger Auger Black Negative (–) Red Positive (+) 20 Amp Circuit Breaker Black Pre-Wetting System OUTPUT Negative (–) Output Data Port Spinner Red Positive (+) Spinner Black Negative (–) Vibrator Vibrator Red Positive (+) Black Negative (–) - Page 10 Spreader Power Harness Circuit Diagram Model # SP-8500 SPINNER Blue Positive (+) SPINNER Orange Negative (–) AUGER VIBRATOR Red Positive (+) Yellow Positive (+) VIBRATOR AUGER Green Negative (–) Black Negative (–) MAIN POWER PLUG SPREADER Yellow Positive (+) Orange Negative (–)
- Page 11 Vehicle Harness Circuit Diagram Model # SP-8500 CONTROL OUTPUT PLUG AUGER BUMPER SPINNER/VIBRATOR CIRCUIT PLUG Anderson CIRCUIT Anderson OUTPUT Block Block (2) Pos (4) Pos VIBRATOR Green Negative (–) VIBRATOR OUTPUT Yellow Positive (+) VIBRATOR Yellow Positive (+) Positive (+)
- Page 12 Center High Mount Stop Lamp (CHMSL) Model # SP-8500 With spreader mounted on vehicle, plug vehicle (CHMSL) harness into spreader stop lamp harness. Using supplied harness clamps and screws, route harness along side wall lower corner or so that harness will be out of the way when spreader is in use.
- Page 13 Mounting System Strapping Techniques Model # SP-8500 Figure 1 Cross Left Upper to Right Lower Cross Right Upper to Left Lower. Stop Bars & Strap from rear of Ratchet Straps vehicle to front corner. Figure 2: Frame Mounting Bolts i r c i t p .
-
Page 14: Mounting Instructions
Mounting Instructions Model # SP-8500 Step 1: Remove tailgate from pickup bed. Step 2: Load spreader on to truck bed and mount spinner assembly. Step 3: Slide spreader forward until deflector/chute assembly makes contact with vehicle. Then, slide spreader back approx. -
Page 15: Troubleshooting
Model # SP-8500 Whenever service is necessary, your local SnowEx Dealer knows your Spreader best. Take your Spreader to your local dealer for any maintenance or service needs on your unit. If this is not possible, the Troubleshooting Guide below may assist you in identifying the problem. - Page 16 Troubleshooting Model # SP-8500 CONTROLLER TURNS ON DEFINITION: SWITCH OFF & ON SPREADER OL CODE JAMMED MATERIAL CLEAR JAM BEEP SHUTS OFF AMP DRAW FOR AUTO-REVERSE DOES NOT RUN DISPLAYS ERROR CODE TOO HIGH FUNCTION BAD MOTOR TEST 4 TO 20 AMP DRAW...
- Page 17 Troubleshooting Material Flow Model # SP-8500 MATERIAL CHECK BAFFLE 18" CORRECT MATERIAL ISSUE FREE FLOWS LENGTH CHECK BAFFLE SHOULD TOUCH HOPPER MATERIAL ISSUE POSITION ON 3 SIDES MATERIAL MATERIAL REMOVE MATERIAL ISSUE DOES NOT FLOW OBSTRUCTION OBSTRUCTION RUN 12 VOLT TO...
-
Page 18: Determining Vehicle Payload
Useful Formulas Model # SP-8500 Determining Vehicle Payload Example: Material Type Coarse Salt – Dry 6'/8' Vee Pro Equipment installed when vehicle SP-8500 was weighed Front Gross Axle Weight Rating (RGAWR) 8600 Rear Vehicle Weight Rating (GVWR) (lb.) – –... - Page 19 Warranty Registration and Customer Survey To initiate the warranty on your new SnowEx spreader and assure prompt warranty service, please complete the following warranty registration and customer survey, sign and mail it back to the factory within 30 days of purchase.
Need help?
Do you have a question about the SP-8500 and is the answer not in the manual?
Questions and answers