Advertisement
Quick Links
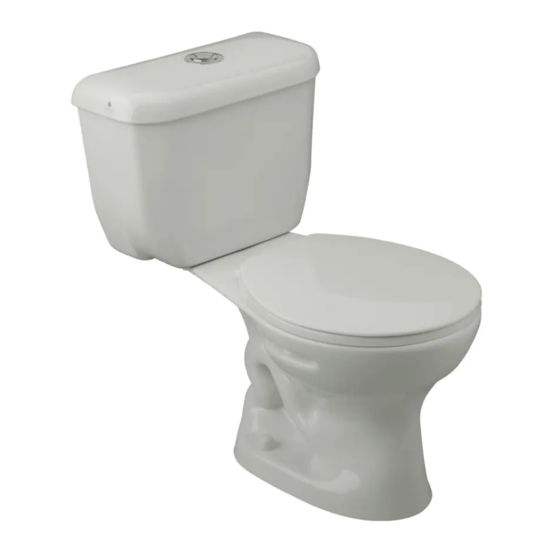
Inodoro P- Trap Ginebra / P-Trap Toilet Ginebra
Código:
E149
RECOMENDACIONES:
Asegúrese que la persona que vaya a instalar el
producto sea un profesional en la materia, para
prevenir errores que afecten las instalaciones o
el correcto funcionamiento del producto.
Realice los ajuste del sanitario UTILIZANDO
una herramienta adecuada para que la
superficie y el acabado del producto no se raye
o lastime.
Recuerde que todos los productos tienen un
mecanismo de control que debe ser revisado y
cambiado de ser necesario, ya que este puede
deteriorarse debido a la frecuencia de uso.
RECOMMENDATIONS:
To prevent any error that may affect the facilities
or the correct functioning of the product, make
sure that the person who is going to install the
product is a professional. Install the product
using suitable tools, so that it is not scratched.
Remember that all products have a control
mechanism that must be reviewed and changed
if necessary, since it can deteriorate due to the
frequency of use.
FV se reserva el derecho de modificar,
cambiar, mejorar y/o anular materiales,
Colores Disponibles/
productos y/o diseños sin previo aviso.
Available Colors:
• Blanco / White : BL
• Otros colores pueden estar disponibles para
otros mercados. / Other colors available
depending on the market.
INSTRUCCIONES DE INSTALACIÓN/ INSTALLATION INSTRUCTIONS:
LEA LAS INSTRUCCIONES COMPLETAMENTE ANTES DE INSTALAR / READ ALL INSTRUCTIONS BEFORE EXECUTING ANY WORK
1. Realice la acometida de agua y el desagüe de acuerdo a las medidas sugeridas
en el gráfico.
Build the water supply and drainage according to the measures suggested in
the graph.
pared terminada /
finished wall
2. Verifique la alineación del inodoro respecto de la pared y marque en el piso los
orificios para su fijación
Check the alignment of the toilet to the wall, and mark the holes in the floor to
mount the product correctly.
MEDIDAS / MEASURES:
MEDIDAS SUGERIDAS PARA LA INSTALACIÓN (en cm):
Dimensiones en milímetros / Dimensions in millimeters
Dimensiones en pulgadas / Dimensions in inches
desagüe del inodoro /
toilet drain
acometida de agua /
water connection
piso terminado /
finished floor
E101.04-BL
E147.1-BL
3. Retire el inodoro para perforar. Coloque los tacos y pernos de fijación EPEC-
DH-BL (no incluidos).
Remove the toilet to drill and fit the EPER-DH-BL fitting plugs (not included) in
order to attach the toilet to the floor.
INSTALACIÓN CON ACOPLE: EMPAQUE HP.01.157 Y TUBO DE PVC
CAMPANA 369.01.30 / COUPLING INSTALLATION
4. Coloque silicona alrededor del tubo campana
como indica el gráfico 1.
Put silicone around of the pipe bell as shown in
the graph 1.
Una el tubo campana con el empaque como
indica el gráfico 2.
Combine the pipe bell with the seal as shown in
the graph 2.
Coloque silicona al rededor de la salida del
desagüe (gráfico 3).
Put silicone around of the exit of the trap, (graph
3).
430
16-15/16"
146
146
146
5-3/4"
363
14-9/32"
E150.2.2
E150.2.1
desagüe del inodoro /
toilet draining
acometida de agua /
perno de fijación /
water connection
fixation bolt screw
agujeros para fijación /
fixation holes
3
E102.13
1
tubo campana
2
empaque
Advertisement

Related Manuals for FV E149


Summary of Contents for FV E149
- Page 1 E150.2.2 FV se reserva el derecho de modificar, cambiar, mejorar y/o anular materiales, Colores Disponibles/ productos y/o diseños sin previo aviso.
- Page 2 FV - ÁREA ANDINA S.A. se re ser va el de re cho de mo di fi car, cam biar, me jo rar y/o anu lar ma te ria les, pro duc tos y/o di se ños sin pre vio avi so.
Need help?
Do you have a question about the E149 and is the answer not in the manual?
Questions and answers