Table of Contents
Advertisement
Available languages
Available languages
Quick Links
M1.1.TPT1300-TPT2000.NLFREN 08122017
P.02 Gelieve te lezen en voor later gebruik bewaren
NL
P.15 Veuillez lire et conserver pour consultation ultérieure
FR
P.28 Please read and keep for future reference
EN
HANDLEIDING - MODE D'EMPLOI - MANUAL
TPT1300 (829700102)
TPT2000 (829700103)
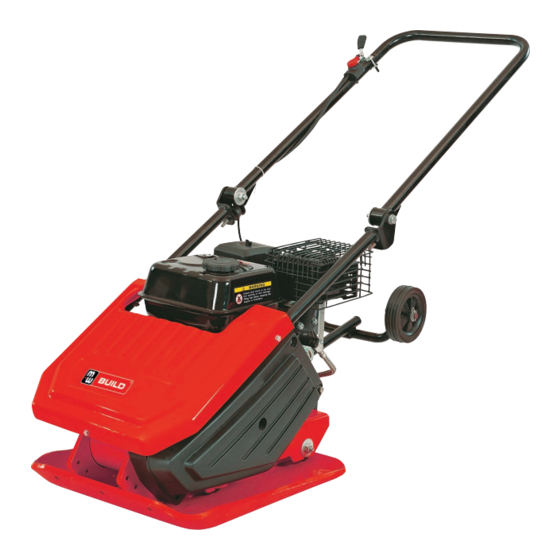
Trilplaat
Plaque vibrante
Plate compactor
Advertisement
Table of Contents

Subscribe to Our Youtube Channel
Related Manuals for MW TPT1300

Summary of Contents for MW TPT1300
- Page 1 M1.1.TPT1300-TPT2000.NLFREN 08122017 HANDLEIDING - MODE D’EMPLOI - MANUAL TPT1300 (829700102) TPT2000 (829700103) Trilplaat Plaque vibrante Plate compactor P.02 Gelieve te lezen en voor later gebruik bewaren P.15 Veuillez lire et conserver pour consultation ultérieure P.28 Please read and keep for future reference...
- Page 2 M1.1.TPT1300-TPT2000.NLFREN 08122017 Inhoud 1 Veiligheid ................................2 2 Specificaties en omschrijving van de machine ......................3 3 Leveringomvang ..............................6 4 Montage ................................7 5 De machine heffen en transporteren .......................... 8 6 Bediening ................................8 7 Onderhoud ................................9 8 Opslag ................................
- Page 3 M1.1.TPT1300-TPT2000.NLFREN 08122017 1.2 Veiligheidsvoorschriften 1. Lees en begrijp de handleiding en de op de machine aangebrachte labels. Leer het toepassingsgebied van de machine, alsook de grenswaarden en mogelijke risico’s van de machine. 2. Verzeker u ervan, dat u de bedieningselementen en hun werking goed kent. Weet hoe de machine snel te stoppen en de bedieningen uit te schakelen.
- Page 4 M1.1.TPT1300-TPT2000.NLFREN 08122017 KNOW YOUR MACHINE Features and Controls Gashendel Throttle Control Handgreep Operation Handle Geluidsdemper Muffler Luchtfilter Air Cleaner Benzinetank Fuel Tank Riemdeksel Belt Guard Oil Drain Hose Olieaftapslang Exciter Excitator Base Plate Basisplaat Watersproeier kit Optional water sprinkler kit...
- Page 5 M1.1.TPT1300-TPT2000.NLFREN 08122017 Bediening brandstofklep De brandstofklep opent en sluit de doorgang tussen de brandstoftank en de carburator. De brandstofklep moet op de positie ON zijn om de motor te doen draaien. Wanneer de motor niet gebruikt wordt, laat de brandstofklep op OFF, om de voorkomen dat de carburator verzopen raakt en de risico op brandstoflekkage te reduceren.
- Page 6 After M1.1.TPT1300-TPT2000.NLFREN 08122017 all the parts have been removed from the carton, you should have: CONTENTS SUPPLIED Basic Models 3 Leveringomvang The plate compactor comes partially assembled CONTENTS SUPPLIED and is shipped in carefully packed carton. After...
- Page 7 M1.1.TPT1300-TPT2000.NLFREN 08122017 Throttle Control ASSEMBLY Throttle Control ASSEMBLY 4 Montage Gashendel Throttle Control Throttle Control ASSEMBLY ASSEMBLY Following the assembly directions below, you Following the assembly directions below, you Door onderstaande instructies te volgen, kunt u in enkele will assemble the plate compactor in a few minuten de montage van uw trilplaat voltooien.
- Page 8 M1.1.TPT1300-TPT2000.NLFREN 08122017 Paving Pad Kit (Optional) The transparent rubber Paving Pad allows to compact concrete paving slabs, stones, bricks and blocks silently and gently. 2. Trek de veerbout en omhoog en plaats de bovenste buis van de wielensteun in de montagebeugel.
- Page 9 M1.1.TPT1300-TPT2000.NLFREN 08122017 Verdichten AANDACHT! Gebruik de machine niet op beton of andere zeer harde, droge en compacte oppervlakken. De plaat zal springen in plaats van trillen, en dit kan de machine en de motor beschadigen. 1. Nadat de motor opgewarmd is, trek op de gashendel om de motorsnelheid te verhogen. De trilplaat begint te trillen en vooruit te gaan.
- Page 10 Turn off engine. Engine must be cool. Remove the belt guard to access the M1.1.TPT1300-TPT2000.NLFREN 08122017 V-belt(s). Check the condition of the V-belt(s). If any V-belt is cracked, frayed, or glazed, it should be replaced as soon as convenient. Check the V-belt tension by squeezing Gebruik nooit een hogedrukreiniger om de machine schoon te maken.
- Page 11 Remove the belt guard to access the V-belt(s). that the clutch pulley is in alignment 29242 / 29255 / 29260 / 29265 TPT1300 - TPT200 with exciter pulley. Check the condition of the V-belt(s). If any V- belt is cracked, frayed, or glazed, it should be replaced as soon as convenient.
- Page 12 #29240, there is only one belt.) Let exciter cool before changing exciter oil. M1.1.TPT1300-TPT2000.NLFREN 08122017 Loose 4 engine mount bolts (do not remove) only enough to move the engine Basic Models forward. Loosen the jam nuts B and bolts A shown in above figure.
- Page 13 60 ml 80 ml 100 ml 130 ml 130 ml This helps prevent deposits from forming 7. Vul olie in door de vulopening. TPT1300: 100 ml inside the carburetor and possible engine TPT2000: 130 ml damage. Vul niet te veel, omdat dit tot een te hoge temperatuur in de excitator kan leiden.
- Page 14 M1.1.TPT1300-TPT2000.NLFREN 08122017 Pull up the spring bolt and fold up the wheels bracket. 7. Vouw de bovenhandgreep zoals afgebeeld. Maak zeker dat de kabels niet geknipt of gebogen worden. 8. Sla de trilplaat op in verticale positie, in een schone, droge en goed verluchte ruimte.
-
Page 15: Table Of Contents
M1.1.TPT1300-TPT2000.NLFREN 08122017 Table des matières 1 Sécurité ................................15 2 Spécifications et description de l’appareil ........................ 16 3 Contenu de la livraison ............................19 4 Montage ................................20 5 Levage et transport ............................... 21 6 Utilisation ................................21 7 Entretien ................................22 8 Rangement ................................ -
Page 16: Spécifications Et Description De L'appareil
M1.1.TPT1300-TPT2000.NLFREN 08122017 1.2 Consignes de sécurité 1. Lisez et comprenez le manuel d’utilisation et les étiquettes apposées sur la machine. Apprenez le champ d’application de la machine, ainsi que ses limites et les risque potentiels liés à son utilisation. 2. Assurez-vous que vous connaissez bien les commandes et leur bon fonctionnement. Sachez comment rapidement arrêter la machine et débrayer les commandes. - Page 17 M1.1.TPT1300-TPT2000.NLFREN 08122017 KNOW YOUR MACHINE Features and Controls Commande des gaz Throttle Control Poignée Operation Handle Silencieux Muffler Filtre à air Air Cleaner Réservoir d’essence Fuel Tank Garde-courroie Belt Guard Oil Drain Hose Tuyau de vidange d’huile Excitateur Exciter Base Plate...
- Page 18 M1.1.TPT1300-TPT2000.NLFREN 08122017 Contrôle de la vanne de carburant La vanne de contrôle ouvre et ferme le passage entre le réservoir d’essence et le carburateur. La vanne de carburant doit être en position ON pour que le moteur tourne. Quand le moteur doit rester à l’arrêt, mettez le levier de la vanne en position OFF pour éviter de noyer le carburateur et réduire le risque de fuite de carburant.
-
Page 19: Contenu De La Livraison
After all the parts have been removed from the carton, M1.1.TPT1300-TPT2000.NLFREN 08122017 you should have: CONTENTS SUPPLIED Basic Models 3 Contenu de la livraison The plate compactor comes partially assembled CONTENTS SUPPLIED and is shipped in carefully packed carton. After La plaque vibrante est livrée partiellement montée et emballée... -
Page 20: Montage
M1.1.TPT1300-TPT2000.NLFREN 08122017 Throttle Control ASSEMBLY Throttle Control ASSEMBLY 4 Montage Commande des gaz Throttle Control Throttle Control ASSEMBLY ASSEMBLY Following the assembly directions below, you Following the assembly directions below, you En suivant les instructions ci-dessous, vous terminerez will assemble the plate compactor in a few le montage de votre machine en quelques minutes. -
Page 21: Levage Et Transport
Slide the bolt in and secure with the clips. M1.1.TPT1300-TPT2000.NLFREN 08122017 Paving Pad Kit (Optional) The transparent rubber Paving Pad allows to compact concrete paving slabs, stones, bricks and blocks silently and gently. 2. Tirez le boulon à ressort et placez le tube supérieur du support des roues dans le support de montage. -
Page 22: Entretien
M1.1.TPT1300-TPT2000.NLFREN 08122017 Compactage ATTENTION ! N’utilisez pas la machine sur du béton ou d’autres surfaces très dures, sèches et compactes. La plaque va sauter au lieu de vibrer, et cela pourra endommager la machine et le moteur. 1. Une fois que le moteur est chaud, tirez la commande des gaz pour augmenter la vitesse. La plaque va commencer à vibrer et à... - Page 23 Turn off engine. Engine must be cool. Remove the belt guard to access the M1.1.TPT1300-TPT2000.NLFREN 08122017 V-belt(s). Check the condition of the V-belt(s). If any V-belt is cracked, frayed, or glazed, it should be replaced as soon as convenient. Check the V-belt tension by squeezing N’utilisez jamais un nettoyeur haute pression pour votre machine.
- Page 24 Remove the belt guard to access the V-belt(s). that the clutch pulley is in alignment 29242 / 29255 / 29260 / 29265 TPT1300 - TPT200 with exciter pulley. Check the condition of the V-belt(s). If any V- belt is cracked, frayed, or glazed, it should be replaced as soon as convenient.
- Page 25 #29240, there is only one belt.) Let exciter cool before changing exciter oil. M1.1.TPT1300-TPT2000.NLFREN 08122017 Loose 4 engine mount bolts (do not remove) only enough to move the engine Basic Models forward. Loosen the jam nuts B and bolts A shown in above figure.
-
Page 26: Rangement
60 ml 80 ml 100 ml 130 ml 130 ml This helps prevent deposits from forming 7. Remettez de l’huile par l’ouverture de remplissage. TPT1300: 100 ml inside the carburetor and possible engine TPT2000: 130 ml damage. Ne remplissez pas trop, car cela pourrait provoquer une température excessive dans l’excitateur. -
Page 27: Résolution Des Problèmes
Lift using handles at base of plate. M1.1.TPT1300-TPT2000.NLFREN 08122017 Pull up the spring bolt and fold up the wheels bracket. 7. Repliez la poignée supérieure. Veillez à ne pas écraser ou plier les câbles de commande. - Page 28 M1.1.TPT1300-TPT2000.NLFREN 08122017 Contents 1 Safety ................................. 28 2 Specifications and description ..........................29 3 Contents supplied ..............................32 4 Assembly ................................33 5 Lifting and transporting ............................34 6 Operation ................................34 7 Maintenance ............................... 35 8 Storage ................................39 9 Troubleshooting ..............................
- Page 29 M1.1.TPT1300-TPT2000.NLFREN 08122017 1.2 Safety instructions 1. Read and understand the operator’s manual and labels affixed to the machine. Learn its application and limitation as well as the specific potential hazards. 2. Make sure thoroughly familiar with the controls and their proper operation. Know how to stop the machine and disengage the controls quickly.
- Page 30 M1.1.TPT1300-TPT2000.NLFREN 08122017 KNOW YOUR MACHINE Features and Controls Throttle Control Operation Handle Muffler Air Cleaner Fuel Tank Belt Guard Oil Drain Hose Exciter Base Plate Optional water sprinkler kit Fuel Valve Control Engine Switch The fuel valve opens and closes the passage The engine switch enables and disables the between the fuel tank and the carburetor.
- Page 31 M1.1.TPT1300-TPT2000.NLFREN 08122017 Fuel valve control The fuel valve opens and closes the passage between the fuel tank and the carburetor. The fuel valve lever must be in the ON position for the engine to run. When the engine is not in use, leave the fuel valve lever in the OFF position to prevent carburetor flooding and to reduce the possibility of fuel leakage.
- Page 32 The plate compactor comes partially assembled and is shipped in carefully packed carton. After M1.1.TPT1300-TPT2000.NLFREN 08122017 all the parts have been removed from the carton, you should have: CONTENTS SUPPLIED Basic Models 3 Contents supplied The plate compactor comes partially assembled CONTENTS SUPPLIED and is shipped in carefully packed carton.
- Page 33 M1.1.TPT1300-TPT2000.NLFREN 08122017 Throttle Control ASSEMBLY Throttle Control ASSEMBLY Throttle Control 4 Assembly Throttle control ASSEMBLY Throttle Control Throttle Control ASSEMBLY ASSEMBLY Following the assembly directions below, you Following the assembly directions below, you Following the assembly directions below, you will...
- Page 34 Slide the bolt in and secure with the clips. M1.1.TPT1300-TPT2000.NLFREN 08122017 Paving Pad Kit (Optional) The transparent rubber Paving Pad allows to compact concrete paving slabs, stones, bricks and blocks silently and gently. 2. Pull up the spring bolt and put the upper pipe of the wheels bracket into the mounting bracket.
- Page 35 M1.1.TPT1300-TPT2000.NLFREN 08122017 Compaction WARNING! Do not operate plate on concrete or on extremely hard, dry, compacted surfaces. The plate will jump rather than vibrate and could damage both plate and engine. 1. After engine warms up, pull throttle lever to accelerate engine speed. Plate will begin vibrating and move forward.
- Page 36 Turn off engine. Engine must be cool. Remove the belt guard to access the M1.1.TPT1300-TPT2000.NLFREN 08122017 V-belt(s). Check the condition of the V-belt(s). If any V-belt is cracked, frayed, or glazed, it should be replaced as soon as convenient. Check the V-belt tension by squeezing Never use a “pressure washer”...
- Page 37 Remove the belt guard to access the V-belt(s). that the clutch pulley is in alignment 29242 / 29255 / 29260 / 29265 TPT1300 - TPT200 with exciter pulley. Check the condition of the V-belt(s). If any V- belt is cracked, frayed, or glazed, it should be replaced as soon as convenient.
- Page 38 Let exciter cool before changing exciter oil. Loose 4 engine mount bolts (do not M1.1.TPT1300-TPT2000.NLFREN 08122017 remove) only enough to move the engine Basic Models forward. Loosen the jam nuts B and bolts A shown in above figure. When adjusting the belt, make sure that the clutch pulley is in alignment with exciter pulley.
- Page 39 60 ml 80 ml 100 ml 130 ml 130 ml This helps prevent deposits from forming 7. Fill the exciter housing with exciter oil. TPT1300: 100 ml inside the carburetor and possible engine TPT2000: 130 ml damage. Do not overfill – overfilling can result in excessive temperatures in the exciter.
- Page 40 M1.1.TPT1300-TPT2000.NLFREN 08122017 Pull up the spring bolt and fold up the wheels bracket. 7. Carefully fold the upper handle down. Do not allow control cables to become pinched or bent. 8. Store your plate compactor in upright position in a clean, dry building that has good ventilation.
-
Page 41: Pièces Détachées
M1.1.TPT1300-TPT2000.NLFREN 08122017 10 Onderdelen 10 Pièces détachées 10 Spare parts PLATE COMPACTOR... - Page 42 M1.1.TPT1300-TPT2000.NLFREN 08122017 29242 / 29255 / 29260 /29265 Plate Compactor Chassis with Engine and Transmission Description Q'ty Description Q'ty Washer 10 Washer 20 Nut M10 V-Belt Lower Handle Circlip 68 Nut M8 Clutch Pulley Shock Absorber Circlip 40 Bolt M10X60...
- Page 43 M1.1.TPT1300-TPT2000.NLFREN 08122017 Optional Paving Pad Kit Optional Water Sprinkler Kit Description Q'ty Description Q'ty Bolt M10X25 16* Bolt Washer 10 Clip Mounting Bar 18* Tank Cap Paving Pad 19* Water Tank 20* Outlet Pipe Hose Clamp D10-16 Optional Foldings Wheels Kit...
-
Page 44: 11 Déclaration De Conformité Ce
M1.1.TPT1300-TPT2000.NLFREN 08122017 11 EG conformiteitsverklaring 11 Déclaration de conformité CE 11 EC declaration of conformity Fabrikant/Invoerder Vynckier Tools sa Fabricant/Importateur Avenue Patrick Wagnon, 7 Manufacturer/Retailer ZAEM de Haureu B-7700 Mouscron Verklaart hierbij dat het volgende product : Déclare par la présente que le produit suivant :...
Need help?
Do you have a question about the TPT1300 and is the answer not in the manual?
Questions and answers