Table of Contents
Advertisement
Quick Links
Advertisement
Table of Contents

Related Manuals for Bilanciai SELECTA INTEGRA


Summary of Contents for Bilanciai SELECTA INTEGRA
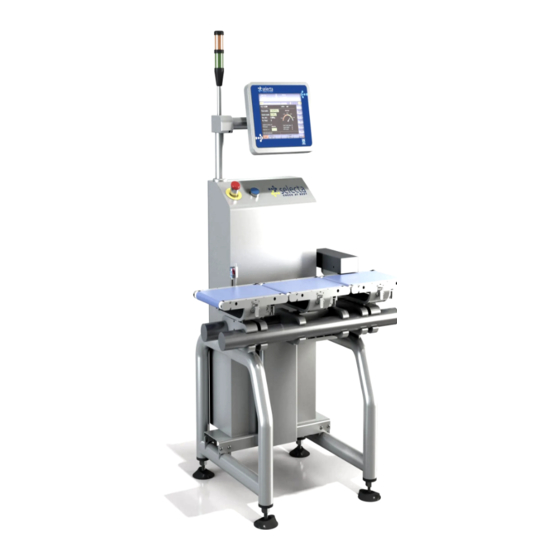
- Page 1 SELECTA User Manual Code 81320497 Ver.1.0 April 2014...
-
Page 2: Table Of Contents
Selecta: User Manual_______________ List of Contents GET TO KNOW THE USER INTERFACE ............... 4 Organization of Displayed Screens ..............4 1.1.1 Path ......................4 1.1.2 Selecting Lines in a Grid ................5 1.1.3 Accessing a Record of a Grid or Modifying a Field ........5 1.1.4 Scrolling the Records of a Grid .............. - Page 3 Selecta: User Manual_______________ 2.18.2 Notes ......................22 2.19 Adjusting Dosage Via Feedback ..............22 2.19.1 Notes about the Parameters ..............24 2.20 Exporting Lot Data in CSV Format ..............24 2.21 Managing Multiple Weight Ranges ..............26 2.21.1 Weight Bounding: Introduction ..............26 2.21.2 3 Way Selector ..................
-
Page 4: Get To Know The User Interface
Selecta: User Manual_______________ 1 GET TO KNOW THE USER INTERFACE 1.1 Organization of Displayed Screens Main page: Upper part, weight and metrological plate Centre, list of the products currently configured in the instrument Lower left corner, a set of buttons to access all the functions of the machine. Top left corner, “BACK”... -
Page 5: Selecting Lines In A Grid
Selecta: User Manual_______________ 1.1.2 Selecting Lines in a Grid To select a line in a grid, just tap it anywhere in the line. In the main window, as simply selecting a line is aimless, tapping starts the process straight away. 1.1.3 Accessing a Record of a Grid or Modifying a Field Keep the line pressed or tap twice. -
Page 6: Calibrating The Touch Screen
Selecta: User Manual_______________ Every textual element that can be modified in the archives (e.g. lot names and the button custom texts, plu names and so on) can be entered selecting a different language from the current set language for the interface. Thus, whenever it is possible to enter a text, the relevant window shows two additional buttons to select the language concerning such text (PgUp), and to add to the text possible symbols which are not in the keyboard (PgDn), picking them from a special dropdown field. - Page 7 Selecta: User Manual_______________ Passwords are set in the page ARCHIVES/SETTINGS/PASSWORD SETTING and is naturally allowed only for the own level and lower. It is allowed only starting from the 5 level.
-
Page 8: Weighing And Checking Production Lots
Selecta: User Manual_______________ 2 WEIGHING AND CHECKING PRODUCTION LOTS 2.1 Applications This checkweigher can be used both in legal-for-trade mode and in not-legal-for- trade mode. The legal-for-trade version produces prepacked lots meeting the European norms in force, that is directive 76/11/CEE. In general, this checkweigher applies a set of modifiable thresholds to select products meeting the following criteria: Discard of products above threshold and below threshold. - Page 9 Selecta: User Manual_______________ Access the “PLU” menu Press the “NEW” button Enter a PLU name (brand new) The instrument creates a new line in the grid. To modify data in an existing PLU, select the PLU and access data keeping the PLU line pressed or tapping twice.
- Page 10 Selecta: User Manual_______________ Limit ++: threshold T2 defined by symmetry: modifiable Options CTRL: to select the acceptance range of weights among the following options: From - to ++ with threshold %: all products which weight is between limit – and limit ++ are accepted;...
- Page 11 Selecta: User Manual_______________ WEIGHT_FROM WEIGHT_TO ERR_% WEIGHT_ERR 1000 9999 10000 14999 MOVEMENTS: Rate: It is the max supposed operating rate of the line and determines the relevant speed of the transport system making sure just one item is on the scale. Entry belt speed: If the machine is equipped with the first little belt for separating items, its speed can be separately adjusted thanks to this parameter;...
-
Page 12: Carrying A Product Dynamic Calibration Out
Selecta: User Manual_______________ Note: an already processed PLU cannot be modified, if its bound process (see below) has not been previously closed. 2.3 Carrying a Product Dynamic Calibration Out Before processing a new PLU, the operation of DYNAMIC CALIBRATION needs to be carried out. -
Page 13: Copying A Calibration
Selecta: User Manual_______________ 2.3.1 Copying a Calibration If two PLUs refer to the same product, when a PLU is copied, the relevant calibration value is copied too. If the PLU is loaded on the machine remotely, it is possible to copy only the calibration value from an existing PLU pressing the button CALIB COPY, provided that the speed value set in the destination PLU is the same as the origin PLU. -
Page 14: Defining Macros For Quick Modifications Of Plu Data
Selecta: User Manual_______________ 2.5 Defining Macros for Quick Modifications of Plu Data If the modification of one or more PLU fields is a frequent operation, it is possible to speed it up defining one or more MACRO, that is the storage of sequences of fields to be modified in succession to be bound to a free button of the window. -
Page 15: Zeroing The Scale
Selecta: User Manual_______________ Note: this operation does not physically cancel the macro, which is still available to be bound to a button in process, but simply sets free the button bound to it. There is no procedure to physically cancel already defined macro. The operation, which is only useful to keep the macro archive of the instrument clean, is always available for the service technicians. -
Page 16: Displaying Process Data
Selecta: User Manual_______________ increate without asking the operator the new lot. Sequence numbers are the machine global data, which can be modified anytime accessing machine configuration (ctrl MENU, parameter NO. CTRL SEQUENCE) Date + sequence: the lot code is the date when it is generated (in the format ddmmyyyy), and the sequence number. -
Page 17: Graph Page
Selecta: User Manual_______________ 2.9.2 Graph Page The graph page, accessible from the PAG GRAPHIC button, draws the histogram of the occurrence of the weights between thresholds –T2 and +T2. Where, at every frequency the interval is divided in, there can be both accepted and rejected weights (if in the presence of the option always granting the average greater than the nominal weight), two overlapping bars are drawn, one is green for the numerosity of accepted weights, the other, for the rejected pieces, is red. -
Page 18: Quickly Modifying Data In Process
Selecta: User Manual_______________ 2.11 Quickly Modifying Data in Process There are two ways to modify the process temporary data, accessing the “MODIFY DATA” page or with MACROs, that is thanks to the available buttons in the process pages properly customized. 2.11.1 Modifying Data Press the “MODIFY DATA”... -
Page 19: Closing A Lot
Selecta: User Manual_______________ From main page, access the “LIST PLU OPEN” menu. A grid lists the PLUs linked to a process, that is which have been processed at least once but not closed. Now it is possible to close a single PLU (“CLOSE PLU” button) or the whole PLU list (“CLOSE ALL”... -
Page 20: Printing Statistical Reports
Selecta: User Manual_______________ 2.17 Printing Statistical Reports Reports are automatically printed by default whenever a lot is closed. Such function can be disabled pressing both the ALT and L keys in process. At power up, the printing is nevertheless enabled. If also the packing list function is enabled, every time ALT-L are pressed at the same time, printing options are enabled/disabled;... -
Page 21: Sample Report
Selecta: User Manual_______________ 2.17.1 Sample Report... -
Page 22: Ejecting Accepted Products
Selecta: User Manual_______________ 2.18 Ejecting Accepted Products This operation enables the SELECTOR output (output BIT1) every accepted product (instead of rejected). This configuration is the outcome of the following settings: parameter SELECTOR in CONFIGURATION on DEVIATOR 1; parameter SELECTOR in PLU on DEVIATOR 1 The ejecting time can be set in the EXPULSION TIME (ms) parameter usually needed to manage a rejected item. - Page 23 Selecta: User Manual_______________ important to notice that the maximum dosage accuracy is detected by the dosing scale; even if the line has a higher accuracy, the system does not provide better performance. In case the dosing system is more accurate than our weighing and labelling machine, the adjusting mechanism compensates possible disturbance which value is at most the same as the division of our scale.
-
Page 24: Notes About The Parameters
Selecta: User Manual_______________ PCS WAIT TO START: number of packages not to be used in the calculation of the average value after the start of the process. PCS WAIT FOR ADJUST.: number of packages not to be considered before resuming the calculation of the adjustment average weight after an adjustment has been carried out. - Page 25 Selecta: User Manual_______________ on the device identified by the ip address in the IP USB KEY parameter in SETTINGS OTHER, which can refer to a pc running an FTP server (such as Filezilla server) or the device allowing the connection of an USB flash drive to the instruments. The outcome file is in the format: lot - hh.mm.ss - dd.mm.yy.csv where:...
-
Page 26: Managing Multiple Weight Ranges
Selecta: User Manual_______________ 2.21 Managing Multiple Weight Ranges 2.21.1 Weight Bounding: Introduction The Weight Bounding mode (weight classes) weighs the incoming products on the line in a different way than the range of weight they belong to. Up to 9 ranges are available and each range is characterized by a minimum and maximum weight limit included in the scale capacity. -
Page 27: Export The Individual Weighing Operations In Csv Format
Selecta: User Manual_______________ for every SLAVE PLU of weight bounding the correct selection way is set in the SELECTOR parameter of the plu; in this case the item DEVIATOR matches with DEVIATOR 1, while selecting NO DEVIATOR, the accepted products for that particular PLU go along the idle way. -
Page 28: Structure Of Weighing Operations
Selecta: User Manual_______________ REC.TOT1 WGHTS: enables the storage of every single weighing operation of total 1 on file; REC.TOT1 REV: enables the storage of every single weighing operation of (manual or network) cancelled total 1 on file (starting from rel. 5.5.15); REC.TOT1 REV: enables the storage of every single weighing operation of total 2 on file;... - Page 29 Selecta: User Manual_______________ TOT2FLD.CFG = field list of total 2 weighing operations (download here a sample file); If the storage function is enabled but its respective configuration file is not present, or its structure is not correct, at power up or when exiting configuration, an error window is displayed.
-
Page 30: The Line As A Conveyor Belt
Selecta: User Manual_______________ 3 THE LINE AS A CONVEYOR BELT If the line must be used as a conveyor belt, press the CONVEYOR BELT in the HOME page. Enter the speed, in percentage in respect to maximum speed. During conveyor belt mode, it is not possible to carry out other operation on board machine. -
Page 31: Metal Detector
Selecta: User Manual_______________ 4 METAL DETECTOR The opportunity to connect metal detectors has been introduced. At the process entrance, the machine programs the recipe detailed in the process (parameter inside the METAL group) in the metal detector. The storage of the recipe in the metal detector must be carried out on board metal through the procedure of data capture/calibration.
Need help?
Do you have a question about the SELECTA INTEGRA and is the answer not in the manual?
Questions and answers