Table of Contents
Advertisement
Quick Links
Advertisement
Table of Contents

Related Manuals for e-survey E3L


Summary of Contents for e-survey E3L
- Page 1 TOTAL STATION USER GUIDE 1st Edition V1.1 Shanghai eSurvey GNSS Co., Ltd.
- Page 3 SHANGHAI ESURVEY GNSS CO., LTD. Copyright © Shanghai eSurvey GNSS Co., Ltd. 2021. All rights reserved. No part of this document may be reproduced or transmitted in any form or by any means without prior written consent of Shanghai eSurvey GNSS Co., Ltd. Trademarks and Permissions and other eSurvey trademarks are trademarks of Shanghai eSurvey GNSS Co., Ltd.
- Page 4 SHANGHAI ESURVEY GNSS CO., LTD.
-
Page 5: Table Of Contents
1.1.1 Warning ....................... 1 1.1.2 Caution ........................ 1 1.2 Exceptions from Responsibility ................2 1.3 Safety Standards for Laser ..................2 2 E3L at a Glance ..................3 2.1 Overview ........................3 2.2 Trigger Key ....................... 3 2.3 Operating Panel ......................4 2.4 Display ........................ - Page 6 SHANGHAI ESURVEY GNSS CO., LTD. 4.7 Free-Coding ......................19 4.8 Laser Pointer ......................20 4.9 Check Tie ........................ 20 4.10 Main Settings ......................21 4.11 Tracking ........................ 21 4.12 Light On/Off ......................21 4.13 Units ........................21 5 Menu Key ....................22 5.1 Overview .........................
- Page 7 SHANGHAI ESURVEY GNSS CO., LTD. 5.2.5.4 Start Tie Distance ..................46 5.2.6 Area and Volume ....................48 5.2.6.1 Set a Job ..................... 50 5.2.6.2 Set the Station ..................... 50 5.2.6.3 Set the Orientation ..................50 5.2.6.4 Start Area and Volume ................50 5.2.7 Remote Height ....................
- Page 8 SHANGHAI ESURVEY GNSS CO., LTD. 5.4.2 Atmospheric Parameters ................... 78 5.4.3 Times of Distance Measuring ................79 5.4.4 Projection Scale ....................79 5.4.5 Signal Intensity ....................79 5.5 Job Menu......................... 80 5.5.1 Job ........................80 5.5.2 Fixed points ....................... 81 5.5.3 Measurements ....................
- Page 9 SHANGHAI ESURVEY GNSS CO., LTD. 8 Appendix ....................102 8.1 Atmospheric Correction Formula and Chart (Just for reference) ....102 8.2 Correction for Refraction and Earth Curvature ..........103 8.3 Assembling and Disassembling for the Three-jaw Tribrach ......104...
- Page 10 SHANGHAI ESURVEY GNSS CO., LTD.
-
Page 11: Before You Start
Please do not cover the charger when charging. Otherwise, fire may occur. Please do not use wet battery or charger, defective power cable, socket or plug, and power cable and battery not specified by e-Survey. Otherwise, fire or electronic shock may occur. -
Page 12: Exceptions From Responsibility
Usage not explained in the user guide. 1.3 Safety Standards for Laser E3L adopts the safe and visible laser on the basis of Specification Standard of radiant products (FDA CDRH.21CFR Part 1040.10 and 1040.11) and Safety of laser products –... -
Page 13: E3L At A Glance
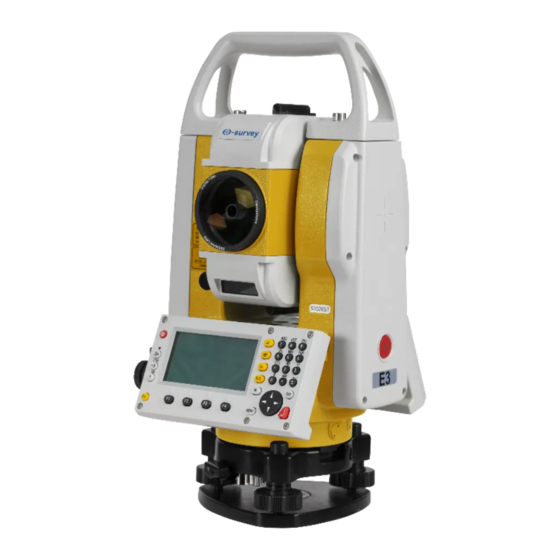
SHANGHAI ESURVEY GNSS CO., LTD. 2 E3L at a Glance E3L is a high-quality electronic total station, designed for the construction site. Its innovative technology and simple operations make the daily surveying jobs easier. Undoubtedly, it is ideally suited for simple construction surveys and stake out tasks. -
Page 14: Operating Panel
SHANGHAI ESURVEY GNSS CO., LTD. 2.3 Operating Panel The operating panel is as follows: What it does Power key To turn on the instrument in no time or turn off the instrument. Backlight key To turn on / off the backlight. Laser pointer key To turn on / off the laser pointer. -
Page 15: Display
SHANGHAI ESURVEY GNSS CO., LTD. 2.4 Display E3L is equipped with two large LCD screens (240 * 128dots). And the LCD could display 8 lines with 24 characters per line. Note: Please do not touch the display with sharp things. -
Page 16: Symbols
SHANGHAI ESURVEY GNSS CO., LTD. 2.4.2 Symbols Symbols indicate a particular operating status of E3L. Main symbols include the following: Symbols What it means It indicates the level of the remaining battery capacity. The compensator is on. The compensator is off. -
Page 17: Input Mode
SHANGHAI ESURVEY GNSS CO., LTD. 2.5 Input Mode Insert Characters If a character is skipped (e.g.13 instead of 123), you can insert it later by doing the following: 1. Place the cursor on 1. 2. To insert an empty character on the right of 1, press F1 INSERT. 3. -
Page 18: Replace And Mount The Battery
SHANGHAI ESURVEY GNSS CO., LTD. 2.6.1 Replace and Mount the Battery To replace and mount the battery, do the following: 1. Turn the battery lock button to unlock status 2. Pull the battery lock button out to open the battery cover. 3. -
Page 19: Quick Start
SHANGHAI ESURVEY GNSS CO., LTD. 3 Quick Start The process of quick start is as follows: Note: When the instrument is working, it is normal if you hear the noise from instrument motor, it will not affect the instrument work. -
Page 20: Set Up The Instrument
SHANGHAI ESURVEY GNSS CO., LTD. 3.1 Set up the Instrument To set up the instrument, do the following: 1. To set up the tripod, do the following: a. Extend the extension legs to suitable lengths. b. Tighten the screws on the legs, and make sure the legs are spaced at equal intervals and the head is approximately level. -
Page 21: Do Levelling-Up
SHANGHAI ESURVEY GNSS CO., LTD. 3. Optional: To adjust the lightness of the laser plummet, press ▲ / ▼. 4. Loosen the center screw of the tripod, move the base plate on the tripod head until the laser spot coincides with the mark point on ground, and tighten the center screw. -
Page 22: Do Accurate Levelling-Up With The Tubular Level
SHANGHAI ESURVEY GNSS CO., LTD. 3.3.2.1 Do Accurate Levelling-up with the Tubular Level To do accurate levelling-up with the tubular level, do the following: 1. Loosen the horizontal motion clamp, turn the instrument till the tubular level is parallel to a line shaped with screws A and B, and adjust the screws A and B to make the bubble in the center of the level. -
Page 23: Set Edm
SHANGHAI ESURVEY GNSS CO., LTD. 3.4 Set EDM 5.4 EDM Menu for details. 3.5 Start Measurement After switching on and setting up correctly, E3L is immediately ready for measurement. 5.2.1 Surveying for details. -
Page 24: Function Key
SHANGHAI ESURVEY GNSS CO., LTD. 4 Function Key Under Function key, the following functions can be activated: Level / Plummet Target Offset Target Set Delete Last Record Height Transfer Hidden Point Free-Coding Laser Pointer ... -
Page 25: Target Set
SHANGHAI ESURVEY GNSS CO., LTD. To set offset values, do the following: 1. To select Target Offset, press Fn, and press F2 / 2. TARGET OFFSET display shows: 2. Input the offset values (T offset, L offset and H offset) according to the principle. 3. -
Page 26: Height Transfer
SHANGHAI ESURVEY GNSS CO., LTD. To delete the last record, do the following: 1. To select Delete Last Record, press Fn, and press F4 / 4. The following display shows: 2. Press F4 YES. 4.5 Height Transfer It is used to determine the height of the instrument by measurements five known points at most in two faces. -
Page 27: Hidden Point
SHANGHAI ESURVEY GNSS CO., LTD. 2. Select a known point and input the reflector height. 3. To trigger the measurement, press F1 ALL. The calculated height H0 is displayed: 4. To add another height of a known point, press F1 ADDP. 5. - Page 28 SHANGHAI ESURVEY GNSS CO., LTD. 2. Optional: To define the rod and EDM settings, press F4 ROD/ED. ROD LENTHT SET display shows: o EDM Mode: to change the EDM Mode. 5.4 EDM Menu for details. o Prism Type: to change the prism type. 5.4 EDM Menu for details.
-
Page 29: Free-Coding
SHANGHAI ESURVEY GNSS CO., LTD. 4. To measure the second prism, press F1 ALL. The data is automatically saved and the following display shows: o The range is not exceeded: At this time, press F1 ACCEPT to finish measuring a hidden point. o The range is exceeded: At this time, press F4 NEW, and repeat step 2 ~ 4 to measure a hidden point again. -
Page 30: Laser Pointer
SHANGHAI ESURVEY GNSS CO., LTD. 4.8 Laser Pointer It is used to turn on or off the visible laser beam for illuminating the target point. To turn on / off the laser pointer, press Fn and do one of the following: ... -
Page 31: Main Settings
SHANGHAI ESURVEY GNSS CO., LTD. 4.10 Main Settings Its function is totally same with the SETS menu page. 5.3 Setting Menu for details. 4.11 Tracking It is used to enable / disable the tracking measurement mode. And it can only be activated from within the same EDM mode and prism type. -
Page 32: Menu Key
SHANGHAI ESURVEY GNSS CO., LTD. 5 Menu Key 5.1 Overview With MENU key, you enter the following menu pages: You can enter menu pages by press MENU:... -
Page 33: Program Menu
SHANGHAI ESURVEY GNSS CO., LTD. 5.2 Program Menu This menu contains programs that precede the application programs, and is used to set up and organize data collection. With this menu, you can achieve the following: You can enter all programs by pressing MENU and F1 PROG / 1:... -
Page 34: Surveying
SHANGHAI ESURVEY GNSS CO., LTD. 5.2.1 Surveying To set surveying, do the following: 1. To enter Program menu page, press MENU and press F1/ 1. 2. Press F1 or 1: : it indicates that settings are done. : it indicates that settings are not done. 3. -
Page 35: Set The Station
SHANGHAI ESURVEY GNSS CO., LTD. 5.2.1.2 Set the Station It is used to set the coordinates of the station. To set the station, do the following: 1. To enter SET STATION display, in MEASURE SET display, press F2 / 2: 2. -
Page 36: Start Survey
SHANGHAI ESURVEY GNSS CO., LTD. 2. Do one of the following: o Manually set the orientation: i. To enter MANUAL INPUT display, press F1 / 1. ii. Set backsight point, reflector height and Hz-direction (Azimuth). iii. Press F1 ALL to trigger measurement. The display shows Data Saved and Orientated. -
Page 37: Stake Out
SHANGHAI ESURVEY GNSS CO., LTD. 3. Optional: To set the code, and do one of the following: o To directly input a code, input a code into the input box of Code. The code is stored along with the corresponding measurement. o To search the code from the codelist, press ↓... -
Page 38: Start Staking Out
SHANGHAI ESURVEY GNSS CO., LTD. 5.2.2.4 Start Staking out To start staking out, do the following: 1. In STAKE OUT display, press F4 / 4: 2. Do one of the following: o To start measuring and calculation of the stake-out elements, select the target point, and press F2 DIST. - Page 39 SHANGHAI ESURVEY GNSS CO., LTD. The result of staking out is as follows (there are three displays of the result, and you can switch the display by pressing PAGE): Polar Stake out The principle is as follows:...
- Page 40 SHANGHAI ESURVEY GNSS CO., LTD. Orthogonal Stake out The principle is as follows:...
-
Page 41: Free Station
SHANGHAI ESURVEY GNSS CO., LTD. Cartesian Stake out The principle is as follows: 5.2.3 Free Station This program is used to determine the instrument position from measurements of 2 ~ 5 known points. The principle is as follows:... -
Page 42: Set A Job
SHANGHAI ESURVEY GNSS CO., LTD. To set free station, do the following: 1. To enter Program menu page, press MENU and F1 PROG / 1. 2. Press F3 / 3: : it indicates that settings are done. : it indicates that settings are not done. 3. -
Page 43: Start Free Station
SHANGHAI ESURVEY GNSS CO., LTD. 5.2.3.3 Start Free Station To start free station, do the following: 1. To enter FREE STATION-STATION display, in FREE STATION display, press F4 / 2. Input of the name of the station and the height of the instrument, and press F4 ENT for confirmation: 3. -
Page 44: Cogo
SHANGHAI ESURVEY GNSS CO., LTD. 5. To add another point, do the following: a. Press F2 AddPt. b. Do one of the following, and press F3 ENT for confirmation: To find a known point, press F1 FIND / F2 LIST. ... -
Page 45: Set A Job
SHANGHAI ESURVEY GNSS CO., LTD. 3. Do the following: Set a Job If you have done it before, you can skip it. Set the Station If you have done it before, you can skip it. Set the Orientation If you have done it before, you can skip it. Start COGO 5.2.4.1 Set a Job 5.2.1.1 Set a Job... -
Page 46: Set Inverse Computation
SHANGHAI ESURVEY GNSS CO., LTD. 5.2.4.4.1.1 Set Inverse Computation The principle of inverse computation is as follows: To set inverse computation, do the following: 1. To select Inverse, press F1 / 1 in COGO display, and press F1 / 1. 2. -
Page 47: Set Traverse Computation
SHANGHAI ESURVEY GNSS CO., LTD. 5.2.4.4.1.2 Set Traverse Computation The principle is as follows: To set traverse computation, do the following: 1. To select Traverse, press F1 / 1 in COGO display, and press F2 / 2. 2. Input data, and press F2 CALC for computing. TRAVERSE RESULT display shows: 3. -
Page 48: Set Intersections
SHANGHAI ESURVEY GNSS CO., LTD. 5.2.4.4.2 Set Intersections To set intersections, do the following: 1. In COGO display, press F2 / 2. INTERSECTIONS display shows: 2. Do one of the following: Set Bearing-bearing Set Bearing-distance Set Distance-distance Set Four Points 5.2.4.4.2.1 Set Bearing-bearing The principle is as follows: To set bearing-bearing, do the following:... -
Page 49: Set Bearing-Distance
SHANGHAI ESURVEY GNSS CO., LTD. 2. Input data, and press F2 CALC for computing. BEARING-BEARING display shows: 3. Input a name for the new point and press F4 REC for record. The display shows Data Saved and automatically returns to BEARING-BEARING display. 5.2.4.4.2.2 Set Bearing-distance The principle is as follows: To set bearing-distance, do the following:... -
Page 50: Set Distance-Distance
SHANGHAI ESURVEY GNSS CO., LTD. 3. Input a name for the new point and press F4 REC for record. The display shows Data Saved and automatically returns to BEARING-DISTANCE display. 5.2.4.4.2.3 Set Distance-distance The principle is as follows: To set distance-distance, do the following: 1. -
Page 51: Set Four Points
SHANGHAI ESURVEY GNSS CO., LTD. 5.2.4.4.2.4 Set Four Points The principle is as follows: To set four points, do the following: 1. In INTERSECTIONS display, press F4 / 4. 2. Input data, and press F2 CALC for computing. DISTANCE-DISTANCE display shows: 3. -
Page 52: Set Offset
SHANGHAI ESURVEY GNSS CO., LTD. 5.2.4.4.3 Set Offset To set offset, do the following: 1. In COGO display, press F3 / 3. OFFSET display shows: 2. Do one of the following: Set Distance-offset Set Point by 5.2.4.4.3.1 Set Distance-offset The principle is as follows: To set distance-offset, do the following: 1. -
Page 53: Set Point By
SHANGHAI ESURVEY GNSS CO., LTD. 2. Define the base line, and press F2 CALC for computing. OFFSET RESULT display shows: 3. Input a name for the new point and press F4 REC for record. The display shows Data Saved and automatically returns to DISTANCE-OFFSET display. 5.2.4.4.3.2 Set Point by The principle is as follows: To set point by, do the following:... -
Page 54: Set Extension
SHANGHAI ESURVEY GNSS CO., LTD. 2. Define the base line, input offset and line, and press F2 CALC for computing. SET POINT BY display shows: 3. Input a name for the new point and press F4 REC for record. The display shows Data Saved and automatically returns to SET POINT BY display. -
Page 55: Tie Distance
SHANGHAI ESURVEY GNSS CO., LTD. 3. Input a name for the new point and press F4 REC for record. The display shows Data Saved and automatically returns to EXTENSION display. 5.2.5 Tie Distance This program is used to calculate the slant distance, horizontal distance, height difference and azimuth of two target points measured in real time. -
Page 56: Set A Job
SHANGHAI ESURVEY GNSS CO., LTD. To set tie distance, do the following: 1. To enter Program menu page, press MENU and F1 or 1. 2. Press PAGE to go to the second page, and press F1 or 5: : it indicates that settings are done. : it indicates that settings are not done. - Page 57 SHANGHAI ESURVEY GNSS CO., LTD. 2. To select a measuring method, do one of the following: o To select Poly, press F2 / 1. o To select Radial, press F3 / 2. 3. To determine the first target point, press F1 ALL. The display shows Data Saved: 4.
-
Page 58: Area And Volume
SHANGHAI ESURVEY GNSS CO., LTD. 5. Do the following based on your needs: o In polygonal method To abandon the result and start measurement again, press F1 NewTie. To start measurement for a new point, press F2 NEWP. At this time, the result is based on the previously last measurement point and the new point. - Page 59 SHANGHAI ESURVEY GNSS CO., LTD. The calculated area is projected onto the horizontal plane (2D) or projected onto the sloped reference plane defined by 3 points (3D). Furthermore a volume with constant height can be calculated with respect to the area (2D/3D):...
-
Page 60: Set A Job
SHANGHAI ESURVEY GNSS CO., LTD. To set area and volume, do the following: 1. To enter Program menu page, press MENU and F1 or 1. 2. Press PAGE to go to the second page, and press F2 or 6: : it indicates that settings are done. : it indicates that settings are not done. -
Page 61: Remote Height
SHANGHAI ESURVEY GNSS CO., LTD. 2. To determine area points, do one of the following: o To start measurement for the current point, press F1 ALL. The display shows Data Saved: o To search for points from the internal memory, press ↓ twice and press F3 FIND, or press ↓... -
Page 62: Set A Job
SHANGHAI ESURVEY GNSS CO., LTD. To set remote height, do the following: 1. To enter Program menu page, press MENU and F1 or 1. 2. Press PAGE to go to the second page, and press F3 or 7: : it indicates that settings are done. : it indicates that settings are not done. -
Page 63: Reference Line/Arc
SHANGHAI ESURVEY GNSS CO., LTD. 3. Aim at the inaccessible remote point. The value of dVD and H shows: 4. To save the measured data, press F4 SAVE. 5.2.8 Reference Line/Arc To set reference line/arc, do the following: 1. To enter Program menu page, press MENU and F1 or 1. 2. -
Page 64: Start Reference Line/Arc
SHANGHAI ESURVEY GNSS CO., LTD. 5.2.8.4 Start Reference Line/Arc To start reference line/arc, do the following: 1. To enter REFERENCE LINE/ARC display, in REFERENCE LINE/ARC display, press F4 / 4: 2. Do one of the following: o To Set Reference Line, press F2 / 1. - Page 65 SHANGHAI ESURVEY GNSS CO., LTD. 4. Input remotion parameters, and press F2 MEASURE to enter LINE OFFSET MEASURE display, input data, and press F1 ALL to trigger measurement in LINE OFFSET MEASURE display: 5. In REFERENCE LINE-MAIN display, press F3 STAKE: 6.
-
Page 66: Set Reference Arc
SHANGHAI ESURVEY GNSS CO., LTD. 5.2.8.4.2 Set Reference Arc To set reference arc, do the following: 1. To select REFARC, in REFERENCE LINE/ARC display, press F2 / 1: 2. Do one of the following. REFERENCE ARC display shows: o To select CP and SP, press F1 / 1. o To select SP, EP, radius, press F2 / 2. - Page 67 SHANGHAI ESURVEY GNSS CO., LTD. 5. In REFERENCE ARC-MAIN display, press F4 STAKE: 6. Do staking out: a. Select a method to stake out: To select Stake Out Point, press F1 / 1: To select Stake Out Arc, press F2 / 2: ...
- Page 68 SHANGHAI ESURVEY GNSS CO., LTD. To select Stake Out Angle, press F4 / 4: b. Input data, and press F4 ENT for confirmation: c. Press F1 DIST to trigger measurement. d. Optional: To start staking out for the next point, press F3 AddPt and repeat step 2 ~ 3.
-
Page 69: Construction
SHANGHAI ESURVEY GNSS CO., LTD. 5.2.9 Construction This program is used to define a construction site by combining set-up of the instrument along with a construction line, measuring and stake out points relative to the line. To set construction, do the following: 1. -
Page 70: Continue The Previous Site
SHANGHAI ESURVEY GNSS CO., LTD. 3. To determine the end point, press F1 ALL. The display shows Data Saved, and STAKE OUT display shows: The figure shows the position of the prism in relation to the stake out point. Furthermore, the accurate values are displayed, combined with the arrows indicating the direction. -
Page 71: Lead Measure
SHANGHAI ESURVEY GNSS CO., LTD. 5.2.10 Lead Measure This program is used for survey of hierarchical control traversing and mapping traversing etc. and adjustment and computation of closure. To set the lead measurement, do the following: 1. To enter Program menu page, press MENU and F1 or 1. 2. -
Page 72: Set The Lead
SHANGHAI ESURVEY GNSS CO., LTD. 5.2.10.2.1 Set the Lead To set the lead, do the following: 1. In LEAD MEASURE display, press F1 / 1. The following display shows: 2. Set the following: o New Lead: a new lead name. o Lead Desc.: lead description. -
Page 73: Set The Station
SHANGHAI ESURVEY GNSS CO., LTD. Note: The horizontal angle defaults to tolerance of engineering first-order traverse, and vertical angle defaults to tolerance of the fifth class triangular elevation. 5. Press F4 SET for confirmation. 5.2.10.2.2 Set the Station To set the station, do the following: 1. -
Page 74: Calculate The Lead
SHANGHAI ESURVEY GNSS CO., LTD. 4. Turn the face, aim at the same point, and press F1 ALL to trigger measurement. The measurement order is backsight (face left) → foresight (face left) → foresight (face right) → backsight (face right). 5.2.10.2.4 Calculate the Lead Before calculating the lead, make sure all station surveys are complete. -
Page 75: View Data
SHANGHAI ESURVEY GNSS CO., LTD. 5.2.10.2.5 View Data To view data, do the following 1. In LEAD MEASURE display, press PAGE to go to the second page, and press F1 / 5. The following display shows: 2. Select the target lead, and press F4 VIEW. 5.2.10.2.6 Transfer Data It is used to send data to your PC. -
Page 76: Set A Job
SHANGHAI ESURVEY GNSS CO., LTD. 3. Do the following: Set a Job If you have done it before, you can skip it. Set the Station If you have done it before, you can skip it. Set the Orientation If you have done it before, you can skip it. Start 2D-Road 5.2.11.1 Set a Job 5.2.1.1 Set a Job... -
Page 77: Define Road
SHANGHAI ESURVEY GNSS CO., LTD. 5.2.11.4.1 Define Road To define road, do the following: 1. To enter ROAD DEFINE display, in ROAD MENU display, press F1 / 1: Set a Reference Point Define Road(2D) Data 5.2.11.4.1.1 Set a Reference Point Point here means reference point (control point), including each grade of the known plane point and known elevation point that can be used for setting station and orientation. -
Page 78: Define Road(2D) Data
SHANGHAI ESURVEY GNSS CO., LTD. 5.2.11.4.1.2 Define Road(2D) Data It is used to describe and determine road center lines. There are the following models available for definition of road(2D): Main point Intersection point To define road(2D) data, do the following: 1. -
Page 79: Set Main Point
SHANGHAI ESURVEY GNSS CO., LTD. 5.2.11.4.1.2.1 Set Main Point Utilizing main point information relative to the line to describe the entire road, it is the key point where the line type changes along with the line. It is used to solve any complicated line type including ramp. -
Page 80: Set Intersection Point
SHANGHAI ESURVEY GNSS CO., LTD. 5.2.11.4.1.2.2 Set Intersection Point It is used to describe the entire road with information of intersection point of the route. This method is appropriate for the line type whose intersection points are symmetrical (i.e. their corresponding tangent lines are equilong), and start point and end point of the route are on the straight line segment or its vertex points. -
Page 81: Set Road Staking Out
SHANGHAI ESURVEY GNSS CO., LTD. 5.2.11.4.2 Set Road Staking out To set road staking out, do the following: 1. To enter ROAD STAKE OUT display, in ROAD MENU display, press F2 / 2: 2. Do one of the following: o To select Peg Stake Out, press F1 / 1: o To select Transect Measure, press F2 / 2: 3. -
Page 82: View Data
SHANGHAI ESURVEY GNSS CO., LTD. 5.2.11.4.3 View Data It is used to realize data view of peg staking out and transect measurement. All the results can be scanned and deleted but cannot be edited and modified. To view data, do the following: 1. -
Page 83: Transfer Data
SHANGHAI ESURVEY GNSS CO., LTD. 5.2.11.4.4 Transfer Data It is used to upload known data (control point and plane alignment) and download results of staking out and measurement. During transferring data, please do not power off or do other operations. To transfer data, do the following: 1. -
Page 84: Setting Menu
SHANGHAI ESURVEY GNSS CO., LTD. 5.3 Setting Menu With this menu, you can achieve the following: You can set the following in SETS menu page by pressing MENU and F2 SETS / 2: Contrast It is used to adjust the display contrast. You can also set it by Star key. - Page 85 SHANGHAI ESURVEY GNSS CO., LTD. Trigger key It is used to define the side red key as a fixed function: o ALL: to start distance and angle measurements and save measured values. o DIST: to start distance and angle measurements without saving measured values.
- Page 86 SHANGHAI ESURVEY GNSS CO., LTD. Beep o On: to enable the beep. With it enabled, you can hear a sound after pressing each key. o Off: to disable the beep. Horizontal Incrementation o Right: to set right horizontal incrementation for clockwise direction measurement.
-
Page 87: Edm Menu
SHANGHAI ESURVEY GNSS CO., LTD. Face I Definition o Face_I: I means face left, and II means face right. o Face_II: I means face right, and II means face left. Data Output o Intern: all data is recorded in the internal memory. o RS232: data is recorded via the serial interface. -
Page 88: Atmospheric Parameters
SHANGHAI ESURVEY GNSS CO., LTD. Prism Type and Prism Contrast o When a prism is used, the selection includes: Prism Type Prism Constant Circle prism MINI 17.2 JPMINI 34.4 360° 23.1 360° Mini User define Self-adjustment (Range: -999.9mm ~ +999.9mm) o When a sheet is used, the prism type includes: ... -
Page 89: Times Of Distance Measuring
SHANGHAI ESURVEY GNSS CO., LTD. 5.4.3 Times of Distance Measuring You can set the times of distance measuring by pressing MENU and F3 EDM / 3 to select EDM menu, and pressing F2 TIMES in EDM SETTINS display: 5.4.4 Projection Scale You can set the scale of projection by pressing MENU and F3 EDM / 3 to select EDM menu, and pressing F4 ↓... -
Page 90: Job Menu
SHANGHAI ESURVEY GNSS CO., LTD. 5.5 Job Menu This menu contains all functions for entering, editing and checking data in the field. With this menu, you can achieve the following: 5.5.1 Job Jobs are a summary of data of different types, e.g. fixed points, measurements, codes, results, etc. -
Page 91: Fixed Points
SHANGHAI ESURVEY GNSS CO., LTD. 5.5.2 Fixed points Valid fixed points contain at least PtID and coordinates (East, North) or (Height). You can enter VIEW FIXPOINTS display by pressing MENU and F4 JOB / 4, and pressing F2 / 2 in FILE MANAGEMENT display: In this display, you can achieve the following: ... -
Page 92: Codes
SHANGHAI ESURVEY GNSS CO., LTD. 5.5.4 Codes It is used to create a new code, and edit / delete the selected code. You can enter CODE VIEW / DELETE display by pressing MENU and F4 JOB / 4, and pressing F4 / 4 in FILE MANAGEMENT display: In this display, you can achieve the following: ... -
Page 93: Memory Statistics
SHANGHAI ESURVEY GNSS CO., LTD. 5.5.6 Memory Statistics You can enter MEMORY INFORMATION display by pressing MENU and F4 JOB / 4, and pressing PAGE to go to the second page and pressing F2 / 6 in FILE MANAGEMENT display: In this display, you can check the following information: ... -
Page 94: Usb
SHANGHAI ESURVEY GNSS CO., LTD. 5.5.8 USB It is used to send and select data from a flash disk. Please plug a flash disk into the USB interface firstly. Otherwise, the following display shows: 5.5.9 File Copy You can enter MSD Copy to SD display by pressing MENU and F4 JOB / 4, and pressing PAGE to go to the third page, and pressing F1 / 9 in FILE MANAGEMENT display: 5.5.10 DAT Data Change You can enter DAT Data Change display by pressing MENU and F4 JOB / 4, and... -
Page 95: Adjust Menu
SHANGHAI ESURVEY GNSS CO., LTD. 5.6 Adjust Menu With this menu, you can achieve the following: 5.6.1 Horizontal Collimation If the sight line of the telescope is not perpendicular to the horizontal axis, the collimation error will appear. Besides, the assembling, transportation and operation will also cause this error. - Page 96 SHANGHAI ESURVEY GNSS CO., LTD. To adjust the horizontal collimation error, do the following: 1. To select Hz-Collimation, Press MENU, press PAGE to go to the second page, press F1 ADJ / 5, and press F1 / 1 in CHECK &ADJUST display: 2.
- Page 97 SHANGHAI ESURVEY GNSS CO., LTD. 4. Judge if the error is within allowable range: Note: You can calculate the horizontal collimation error by formula (Fl - F2 ± 180° ) / 2. o If the error is less than 8'', press F4 NO to exit. o If the error is greater than 8'' but less than 30'', press F3 YES to view calibration data: o If the error is greater than 30'', press F4 NO to exit and do reticle adjustment:...
-
Page 98: Vertical Index
SHANGHAI ESURVEY GNSS CO., LTD. 5.6.2 Vertical Index The deviation between vertical circle zero position and horizontal direction is vertical index. It is necessary to concern this error when measuring vertical angle. Because of the close relationship between vertical index and compensator zero position, it is necessary to check and adjust compensator zero position when adjusting the vertical circle, to keep the value stable when reading. - Page 99 SHANGHAI ESURVEY GNSS CO., LTD. 2. To get the face left angle reading F1, aim at the cross-hairs of collimator or the obvious target at a distance at telescope left, and press F3 ENT: 3. To get the face right angle reading F2, aim at the cross-hairs of collimator or the obvious target at a distance at telescope right, and press F3 ENT.
-
Page 100: View Adjustment Value
SHANGHAI ESURVEY GNSS CO., LTD. 5.6.3 View Adjustment Value To view adjustment value, do the following: 1. To select View Adjustment Value, Press MENU, press PAGE to go to the second page, press F1 ADJ / 5, and press F3 / 3 in CHECK &ADJUST display: 2. - Page 101 SHANGHAI ESURVEY GNSS CO., LTD. To adjust the tilt offset, do the following: 1. To select Tilt Offset, press MENU, press PAGE to go to the second page, press F1 ADJ / 5, and press F4 / 4 in CHECK &ADJUST display: 2.
-
Page 102: Com Menu
SHANGHAI ESURVEY GNSS CO., LTD. 5.7 Com Menu To achieve data transfer between PC and the instrument, the communication parameters of RS232 serial interface must be set. With this menu, you can achieve the following: You can set communication parameters by pressing MENU, pressing PAGE to go to the second page, and pressing F2 COM / 6: ... -
Page 103: Download Menu
SHANGHAI ESURVEY GNSS CO., LTD. COMType o RS232 o BLUETOOTH: when it is set to this type, symbol shows in the display. 5.8 Download Menu With the help of this function measured data can be transferred via the serial interface to a receiver (e.g. -
Page 104: Start Menu
SHANGHAI ESURVEY GNSS CO., LTD. 5.9 Start Menu It is used to set the start-up sequence. With this menu, you can achieve the following: To set the start-up sequence, do the following: 1. To enter START-UP SEQUENCE display, press MENU, press PAGE to go to the second page, and press F4 START / 8: 2. -
Page 105: Info Menu
SHANGHAI ESURVEY GNSS CO., LTD. 5.10 Info Menu It is used to check battery, instrument temperature, and data of the system. To check the system information, do the following: 1. To enter SYSTEM INFO display, press MENU, press PAGE to go to the third page, and press F1 INFO / 9: 2. -
Page 106: Maintenance
SHANGHAI ESURVEY GNSS CO., LTD. 6 Maintenance 6.1 Cleaning and Drying About cleaning and drying, please note the following: Please wipe up the painted surface. Please blow dust off lenses. Please use only a clean degreasing cotton for cleaning up. If necessary, please moisten the cotton with little pure alcohol. -
Page 107: Check And Correction
SHANGHAI ESURVEY GNSS CO., LTD. 7 Check and Correction 7.1 Instrument Constant Before delivery, the distance plus constant of the instrument has been calibrated to zero. Considering the distance plus constant may change, it shall, if possible, be subject to regular precise measurement based on the existing baseline, or if impossible, be measured by using the following method: Note: Both centering error and collimation error of the instrument and prism may... -
Page 108: Tubular Level
SHANGHAI ESURVEY GNSS CO., LTD. 7.2 Tubular Level To do checking and correction for the tubular level, do the following: 1. Place the instrument on a stable device (such as a tripod or instrument calibration table), and fix it. 2. Do basic levelling-up. 3. -
Page 109: Optical Sight Of The Telescope
SHANGHAI ESURVEY GNSS CO., LTD. 7.4 Optical Sight of the Telescope To do checking and correction for the optical sight of the telescope, do the following: 1. Put the instrument on a tripod and fix it. 2. Set a cross mark target 50 m away from the instrument. 3. -
Page 110: Vertical Line Of The Telescope Reticle
SHANGHAI ESURVEY GNSS CO., LTD. 9. Turn the three foot screws on the instrument base to make the laser point overlap with the cross mark target on the ground. 10. Horizontally rotate the instrument 180° , make fine adjustment of two screws by using a calibration pin, moving the cross mark target on the ground half distance toward the laser point. -
Page 111: Collimation Error Of The Instrument
SHANGHAI ESURVEY GNSS CO., LTD. 6. Turn the eyepiece end until the vertical line of the reticle overlaps with point A: 7. Tighten the four screws fixing the reticle. 8. Repeat calibration until point A always moves along the vertical line of the reticle. After doing correction for the vertical line of the telescope reticle, check the collimation error and index error of the instrument. -
Page 112: Appendix
SHANGHAI ESURVEY GNSS CO., LTD. 8 Appendix 8.1 Atmospheric Correction Formula and Chart (Just for reference) The related information is as follows: Factory setting: temperature: 20℃, pressure:1013 hpa, 0 ppm Correction: Kpt = 274.417-0.2904 * p / (1 + 0.0036 * t) Where: ... -
Page 113: Correction For Refraction And Earth Curvature
SHANGHAI ESURVEY GNSS CO., LTD. Horizontal axis: the measured temperature. Vertical axis: the pressure. Diagonal line: the required atmospheric correction value. 8.2 Correction for Refraction and Earth Curvature Considering the correction of refraction and earth curvature for distance measurement, the formula for slope distance, horizontal distance and vertical distance applied in the instrument are as followings: ... -
Page 114: Assembling And Disassembling For The Three-Jaw Tribrach
SHANGHAI ESURVEY GNSS CO., LTD. The conversion formula for horizontal and vertical distance is as follows when correction for refraction and earth curvature is not applied: HD = SD * COSξ VD = SD * |SIN|ξ Note: The factory setting for the refraction coefficient K is 0.142. 8.3 Assembling and Disassembling for the Three-jaw Tribrach It is convenient to assemble or disassemble the instrument from the tribrach by loosening or tightening the tribrach clamp. - Page 116 To be the leading provider of high-precision professional, solution & service in the global geospatial industry Shanghai eSurvey GNSS Co., Ltd. Address: Building 4, No.651 Wanfang Rd, Pujiang Town, Minhang District, Shanghai, China E-mail: Sales: info@esurvey-gnss.com Support: support@esurvey-gnss.com Hote-line: +86 21 54467213 Website: https://esurvey-gnss.com/...
Need help?
Do you have a question about the E3L and is the answer not in the manual?
Questions and answers