
Related Manuals for Clearfield StreetSmart Pre-Assigned FDH

Summary of Contents for Clearfield StreetSmart Pre-Assigned FDH
- Page 1 StreetSmart Pre-Terminated FDH Cabinet Installation Manual ______________________________________________________ Manual 021814 REV A - Jan 2021...
-
Page 2: Table Of Contents
StreetSmart Pre-Terminated FDH Cabinet Installation Manual _________________________________________________________ Table of Contents Application Description Technical Specifications Mounting Base to Vault Lid Mounting Cabinet to Base Pole Mount Installation Pre-Loaded Splitters Connector Cleaning Procedure Standard Warranty Proprietary Notice Technical Support Direct: 763.476.6866 • National: 800.422.2537 • www.SeeClearfield.com • techsupport@clfd.net Manual 021814 REV A - Jan 2021... -
Page 3: Application
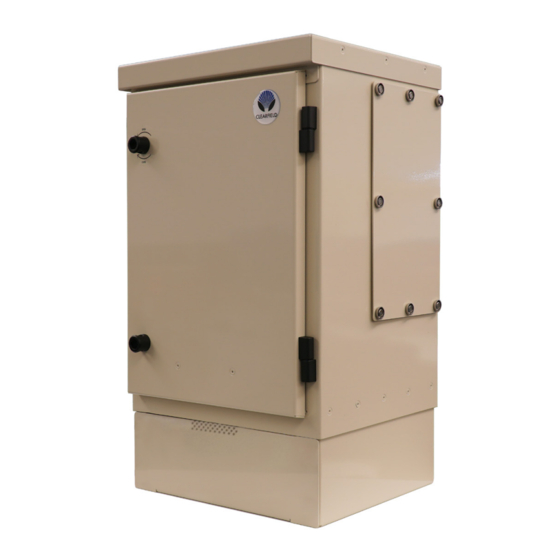
Description The StreetSmart Pre-Assigned FDH PON Cabinet provides a turn-key solution for up to 288 distribution fibers for an outside plant FTTx PON application. WaveSmart High Density 1 x 32 Splitters are installed and pre-assigned into Clearfield’s 12 pack SC/APC module adapters, allowing the service provider to instantly turn-up revenue-generating circuits. -
Page 4: Mounting Base To Vault Lid
StreetSmart Pre-Terminated FDH Cabinet Installation Manual _________________________________________________________ Mounting Base to Vault Lid Remove the access door from the back of the cabi- net base with a 7/16” socket or can wrench. Remove the nuts from the threaded studs holding the cabinet to the base and lift the cabinet from the base. - Page 5 StreetSmart Pre-Terminated FDH Cabinet Installation Manual __________________________________________________________ Place the rectangular washer plates over the round cutouts in the cabinet base. Insert the J-bolts through the base of the rectangular washer plates, ensuring that the J hook is hooked under a rib of the vault lid underneath.
-
Page 6: Mounting Cabinet To Base
StreetSmart Pre-Terminated FDH Cabinet Installation Manual _________________________________________________________ Mounting Cabinet to Base Feed the cables through the cabinet base and vault lid as you lower the cabinet onto the base. Carefully align all the threaded studs on the bottom of the cabinet with the holes in the top of the base as you seat it into place. -
Page 7: Pole Mount Installation
__________________________________________________________ Pole Mount Installation Note: Clearfield does not provide the mounting hardware. Required hardware includes a 5/8” threaded rod (3” longer than pole diameter), washers, lock washers, nuts and Lock Tight (red). Note: 288 PON FSC cabinet shown for reference. Pre-Terminated FDH cabinet will be mounted to the pole using the same method. - Page 8 Note: Clearfield does not recommend using lag bolts to mount cabinet to pole. Clearfield recommends using hardware with a minimum of 5/8” diameter. Care should be taken to avoid over-tightening and deforming the hoist plate. Lock tight (red) should be used on nuts to prevent loosening of nuts.
- Page 9 StreetSmart Pre-Terminated FDH Cabinet Installation Manual __________________________________________________________ 6. Level cabinet and drill 5/8” hole through lower bracket and pole, and install 5/8” rod, washers and nuts. Note: Care should be taken to avoid over-tightening and deforming the hoist plate. 7. Cabinet Fully Mounted Direct: 763.476.6866 •...
-
Page 10: Pre-Loaded Splitters
StreetSmart Pre-Terminated FDH Cabinet Installation Manual _________________________________________________________ Pre-Loaded Splitters The StreetSmart Pre-Terminated FDH Cabinet will come with 1x32 WaveSmart HD Splitters pre-insttalled. Splitter 1’s feeder leg will be connected to feeder port 1, and its distribution legs will be connected to distribution ports 1-32. Splitter 2 will connect to feeder port 2, and distribution ports 33-64, and so on, for the number of splitters pre-installed in the ordered configuration. -
Page 11: Connector Cleaning Procedure
Inspect Then Connect These are Clearfield recommended products/applications. Use the product you feel will complete your cleaning procedures. Create a “best practice” for your company and follow those procedures. - Page 12 StreetSmart Pre-Terminated FDH Cabinet Installation Manual _________________________________________________________ Cleaning the Ferrule • Lightly moisten the fiber optic swab (2.5mm/38542F or 1.25mm/38040) by spotting a small amount (about 1”) of Electro-Wash PX or Electro-Wash MX pen onto the QbE. Hold the swab, 1 side down to the wetted area and hold for a count of 1-2-3-4-5.
- Page 13 StreetSmart Pre-Terminated FDH Cabinet Installation Manual __________________________________________________________ Cleaning an MPO/MTP Connector Male Connector • Use of Chemtronics MTP Connector Cleaning Swabs (CC505F) is rec- ommended. Even after cleaning with a probe cleaner, you should always clean the pins with this (or an equivalent) type swab. Cleans ALL MTP/ MPO connector end faces.
- Page 14 StreetSmart Pre-Terminated FDH Cabinet Installation Manual _________________________________________________________ • Use the hole on end of pad to clean one alignment pin, then press the end of the swab into the other pin to clean. • Check your work with a fiber scope.
- Page 15 StreetSmart Pre-Terminated FDH Cabinet Installation Manual __________________________________________________________ Cleaning Using a Probe-Style Cleaning Tool • The probe style cleaning tools are capable of cleaning a connector end face separately or through the adapter. • Slightly engage probe by pulling back but do not allow to click. Lightly “spot” a QbE-2 wipe on the platen with Elec- tro-Wash PX Fiber Optic Cleaner, this will help alleviate “over saturation”...
-
Page 16: Standard Warranty
Clearfield shall repair or replace the defective Product at its sole option and discretion, and return the repaired or replacement Product to Cus- tomer’s site, freight prepaid Note: If the Product is not found to be defective by Clearfield, the product will be returned to the Customer and the customer billed for freight in both directions. -
Page 17: Proprietary Notice
__________________________________________________________ Proprietary Notice Information contained in this document is copyrighted by Clearfield, Inc. and may not be duplicated in full or part by any person without prior written approval of Clearfield, Inc. Its purpose is to provide the user with adequately detailed documentation to efficiently install the equipment supplied. Every effort has been made to keep the information contained in this document current and accurate as of the date of publication or revision.
Need help?
Do you have a question about the StreetSmart Pre-Assigned FDH and is the answer not in the manual?
Questions and answers