Table of Contents
Advertisement
Quick Links
K U 7 3 0
K U 7 3 0
U S E R G U I D E
T h i s d o c u m e n t i s t h e u s e r g u i d e f o r t h e L G K U 7 3 0 3 G V i d e o M o b i l e
P h o n e . A l l r i g h t s f o r t h i s d o c u m e n t a r e r e s e r v e d b y L G E l e c t r o n i c s .
C o p y i n g , m o d i f y i n g a n d d i s t r i b u t i n g t h i s d o c u m e n t w i t h o u t t h e c o n s e n t
o f L G E l e c t r o n i c s a r e p r o h i b i t e d .
Advertisement
Table of Contents

Related Manuals for LG KU730


Summary of Contents for LG KU730
- Page 1 K U 7 3 0 K U 7 3 0 U S E R G U I D E T h i s d o c u m e n t i s t h e u s e r g u i d e f o r t h e L G K U 7 3 0 3 G V i d e o M o b i l e P h o n e .
- Page 2 ﺩﻟﻴﻞ ﺍﻟﻤﺴﺘﺨﺪﻡ K U 7 3 0 ﻣﻦ ﺍﻟﺠﻴﻞ ﺍﻟﺜﺎﻟﺚLG KU730 ﻫﺬﻩ ﺍﻟﻮﺛﻴﻘﺔ ﻫﻲ ﺩﻟﻴﻞ ﻣﺴﺘﺨﺪﻡ ﺍﻟﻬﺎﺗﻒ ﺍﻟﺠﻮﺍﻝ ﻭﻣﺰﻭﺩ ﺑﺈﻣﻜﺎﻧﻴﺎﺕ ﺗﺼﻮﻳﺮ ﺍﻟﻔﻴﺪﻳﻮ. ﻛﻞ ﺍﻟﺤﻘﻮﻕ ﺍﻟﻤﺘﻌﻠﻘﺔ ﺑﻬﺬﻩ ﺍﻟﻮﺛﻴﻘﺔ ﻣﺤﻔﻮﻇﺔ ﻟﺸﺮﻛﺔ ﺇﻝ ﺟﻲ ﺍﻟﻜﺘﺮﻭﻧﻴﻜﺲ. ﻭﻳﺤﻈﺮ ﻧﺴﺦ ﺃﻭ ﺗﻌﺪﻳﻞ ﺃﻭ ﺗﻮﺯﻳﻊ ﻫﺬﻩ ﺍﻟﻮﺛﻴﻘﺔ ﺩﻭﻥ ﺍﻟﺤﺼﻮﻝ ﻋﻠﻰ...
- Page 3 ﺍﻟﻤﺤﺘﻮﻳﺎﺕ ٤٢ ﺩﻓﺘﺮ ﺍﻟﻌﻨﺎﻭﻳﻦ ٢٥ ﺍﻟﻮﻇﺎﺋﻒ ﺍﻟﻌﺎﻣﺔ ﺗﻮﺟﻴﻬﺎﺕ ﻣﻦ ﺃﺟﻞ ﺍﻻﺳﺘﺨﺪﺍﻡ ﺟﻬﺎﺕ ﺍﻻﺗﺼﺎﻝ ٦ ﺍﻵﻣﻦ ﻭﺍﻟﻔﻌﺎﻝ ﺍﺳﻢ ﺟﺪﻳﺪ ﺍﺭﻗﺎﻡ ﺍﻻﺗﺼﺎﻝ ﺍﻟﺴﺮﻳﻊ ٣٠ ﺍﻟﻘﺎﺋﻤﺔ ﺍﻟﺮﺋﻴﺴﻴﺔ ١٠ ﺃﺟﺰﺍء ﺍﻟﻬﺎﺗﻒ ﻣﺠﻤﻮﻋﺎﺕ ٤٣ ﺃﺭﻗﺎﻡ ﺍﻻﺗﺼﺎﻝ ﺑﺎﻟﺨﺪﻣﺔ ٣٣ ﺍﻟﻤﻜﺎﻟﻤﺎﺕ ١٣ ﺍﻟﺒﺪﺍﻳﺔ ﺭﻗﻢ ﻫﺎﺗﻔﻲ ﻣﻜﺎﻟﻤﺎﺕ ﺍﻟﻔﻴﺪﻳﻮ ﺍﻹﻋﺪﺍﺩﺍﺕ...
- Page 4 ٥٤ ﺍﻟﺮﺳﺎﺋﻞ ٥٠ ﺍﻟﻮﺳﺎﺋﻂ ٤٤ ﺍﻹﻋﺪﺍﺩﺍﺕ ﺭﺳﺎﻟﺔ ﺟﺪﻳﺪﺓ ﻛﺎﻣﻴﺮﺍ ﺍﻟﻔﻴﺪﻳﻮ ﺍﻟﺘﺎﺭﻳﺦ ﻭﺍﻟﻮﻗﺖ ٦٤ ﻣﺴﻮﺩﺍﺕ ٥١ ﺍﻟﺘﻘﺎﻁ ﺻﻮﺭﺓ ٤٥ ﺍﻟﺸﺒﻜﺔ ٦٥ ﺻﻨﺪﻭﻕ ﺍﻟﺒﺮﻳﺪ ٥٢ ﻣﺴﺠ ّ ﻞ ﺍﻟﺼﻮﺕ ﻧﻘﺎﻁ ﺍﻟﻮﺻﻮﻝ ٦٦ ﻣﺴﻮﺩﺍﺕ ٤٦ ﺇﻋﺪﺍﺩﺍﺕ ﺍﻟﺤﻤﺎﻳﺔ ٦٧ ﺻﻨﺪﻭﻕ ﺍﻟﺼﺎﺩﺭ ٤٨ ﺍﻟﻠﻐﺔ ﺍﻟﻌﻨﺎﺻﺮ ﺍﻟﻤﺮﺳﻠﺔ ﺣﺎﻟﺔ...
- Page 5 ﺍﻟﻤﺤﺘﻮﻳﺎﺕ ٨٤ ﺃﻟﻌﺎﺏ ﻭﺗﻨﺰﻳﻼﺕ ٧٧ ﺃﻟﺒﻮﻡ ﺍﻟﻮﺳﺎﺋﻂ ٧٤ ﺍﻟﻤﺘﺼﻔﺢ ﺃﻟﻌﺎﺏ ﻭﺗﻄﺒﻴﻘﺎﺕ ﺍﻟﺼﻮﺭ ﺍﻟﺼﻔﺤﺔ ﺍﻟﺮﺋﻴﺴﻴﺔ ﺃﻟﻌﺎﺏ ﺇﺿﺎﻓﻴﺔ ٧٨ ﻣﻘﺎﻃﻊ ﻓﻴﺪﻳﻮ ﺍﻟﻌﻼﻣﺎﺕ ﺗﻨﺰﻳﻼﺕ ٨٠ ﺍﻟﺼﻮﺕ ﺍﻟﺼﻔﺤﺎﺕ ﺍﻟﻤﺤﻔﻮﻇﺔ ٨١ ﺍﻟﺘﻄﺒﻴﻘﺎﺕ ﺍﻟﺬﻫﺎﺏ ﺍﻟﻰ ﻋﻨﻮﺍﻥ ﺍﻟﻤﻮﻗﻊ ﺃﺧﺮﻯ ﺇﻋﺪﺍﺩﺍﺕ ﺍﻟﺤﻤﺎﻳﺔ ﺑﻠﻮﺗﻮﺙ ٧٥ ﺍﻹﻋﺪﺍﺩﺍﺕ ٨٥ ﺍﻟﻤﺰﻳﺪ ٨٢ ﺫﺍﻛﺮﺓ...
- Page 6 ٩٨ ﺍﻟﺘﻘﻮﻳﻢ ٩٦ ﺍﻻﻭﺿﺎﻉ ٩٤ ﺷﺎﺷﺔ ﺍﻟﻌﺮﺽ ﺍﻟﺘﻘﻮﻳﻢ ﻋﺎﺩﻱ ﺳﻤﺔ ﺍﻟﺸﺎﺷﺔ ٩٩ ﺍﻟﻤﻬﺎﻡ ﺻﺎﻣﺖ ﺳﻤﺔ ﺍﻟﺸﺎﺷﺔ ﺍﻷﻣﺎﻣﻴﺔ ١٠٠ ﺍﻟﻤﺬﻛﺮﺓ ﺍﻫﺘﺰﺍﺯ ﻓﻘﻂ ٩٥ ﺍﻹﺿﺎءﺓ ﺍﻟﺨﻠﻔﻴﺔ ﻣﺬﻛﺮﺓ ﺳﺮﻳﺔ ﺑﺎﻟﺨﺎﺭﺝ ﺍﻟﺨﻂ ﻣﺤﺪﺩ ﺍﻟﺘﺎﺭﻳﺦ ﻫﺎﺗﻒ ﻧﻈﺎﻡ ﺍﻟﻬﺎﺗﻒ ﻋﺪﺍﺩ ﺍﻟﺘﺎﺭﻳﺦ ١ ﻣﺨﺼﺺ ﺗﻨﺰﻳﻞ ﺍﻟﻤﺰﻳﺪ ١٠١ ﺍﻹﻋﺪﺍﺩﺍﺕ...
- Page 7 ﻟﻼﺳﺘﺨﺪﺍﻡ ﻓﻲ ﺍﻷﺫﻥDASY4 ﻟﻤﻮﺩﻳﻞ ﺍﻟﻬﺎﺗﻒ ﻫﺬﺍ ﺑﺘﻘﻨﻴﺔ (ﻣﻌﻠﻮﻣﺎﺕ ﺣﻮﻝ ﺍﻟﺘﻌﺮﺽ ﻟﻤﻮﺟﺎﺕ ﺍﻟﺮﺍﺩﻳﻮ )ﺍﻟﻼﺳﻠﻜﻴﺔ .(ﻭﻗﺪ ﺑﻠﻐﺖ ١٨٫١ ﻭﺍﺕ/ ﻛﻴﻠﻮﺟﺮﺍﻡ )٠١ ﺟﺮﺍﻡ (SAR) ﻭﻣﻌﺪﻝ ﺍﻻﻣﺘﺼﺎﺹ ﺍﻟﻨﻮﻋﻲ ﺑﺤﻴﺚ ﻳﺘﻮﺍﻓﻖ ﻣﻊKU730 ﻟﻘﺪ ﺗﻢ ﺗﺼﻤﻴﻢ ﻣﻮﺩﻳﻞ ﺍﻟﻬﺎﺗﻒ ﺍﻟﺠﻮﺍﻝ ﺍﻟﻌﻨﺎﻳﺔ ﺑﺎﻟﻬﺎﺗﻒ ﻭﺻﻴﺎﻧﺘﻪ .ﺷﺮﻭﻁ ﺍﻟﺴﻼﻣﺔ ﺍﻟﺴﺎﺭﻳﺔ ﻭﺍﻟﺨﺎﺻﺔ ﺑﺎﻟﺘﻌﺮﺽ ﻟﻠﻤﻮﺟﺎﺕ ﺍﻟﻼﺳﻠﻜﻴﺔ !ﺗﺤﺬﻳﺮ...
- Page 8 ﻳﺠﺐ ﺍﻟﺤﻔﺎﻅ ﻋﻠﻰ ﺍﻟﻮﺣﺪﺓ ﺑﻌﻴﺪﺍ ً ﻋﻦ ﻣﺼﺎﺩﺭ ﺍﻟﺤﺮﺍﺭﺓ ﻣﺜﻞ ﺇﺳﺘﻌﻤﻞ ﻣﻠﺤﻘﺎﺕ، ﻣﺜﻞ ﺳﻤﺎﻋﺎﺕ ﺍﻟﺮﺃﺱ ﻭﺳﻤﺎﻋﺎﺕ ﺍﻻﺫﻥ ◄ ◄ ﺑﺤﺬﺭ. ﺗﺄﻛﺪ ﻣﻦ ﺍﺩﺧﺎﻝ ﺍﻟﻜﺎﺑﻼﺕ ﺑﺴﻼﻣﺔ ﻭﻻ ﺗﻘﻮﻡ ﺑﻠﻤﺲ ﻫﻮﺍﺋﻲ .ﺃﺟﻬﺰﺓ ﺍﻟﺘﺪﻓﺌﺔ ﺃﻭ ﺃﻓﺮﺍﻥ ﺍﻟﻄﺒﺦ ﺍﻟﺘﻠﻔﻮﻥ ﺑﺪﻭﻥ ﺿﺮﻭﺭﺓ ﻻ ﺗﻀﻊ ﺃﺑ ﺪ ً ﺍ ﻫﺎﺗﻔﻚ ﻓﻲ ﻓﺮﻥ ﺍﻟﻤﺎﻳﻜﺮﻭﻳﻒ ﻷﻥ ﺫﻟﻚ ﺳﻴﺆﺩﻱ ﺍﻟﻰ ◄...
- Page 9 ﺗﻮﺟﻴﻬﺎﺕ ﻣﻦ ﺃﺟﻞ ﺍﻻﺳﺘﺨﺪﺍﻡ ﺍﻵﻣﻦ ﻭﺍﻟﻔﻌﺎﻝ ﻣﻨﺎﻃﻖ ﺗﻔﺠﻴﺮ ﺍﻷﻟﻐﺎﻡ .ﺍﻋﻂ ﺍﻟﻘﻴﺎﺩﺓ ﺍﻧﺘﺒﺎﻫﻚ ﺍﻟﻜﺎﻣﻞ ◄ ﺍﺳﺘﻌﻤﻞ ﻃﻘﻢ ﺍﻻﺳﺘﺨﺪﺍﻡ ﻏﻴﺮ ﺍﻟﻴﺪﻭﻱ )ﺗﺤﺮﻳﺮ ﺍﻟﻴﺪﻳﻦ(، ﺇﺫﺍ ﻛﺎﻥ ◄ ﻻ ﺗﺴﺘﺨﺪﻡ ﺍﻟﻬﺎﺗﻒ ﺃﺛﻨﺎء ﺍﻟﻘﻴﺎﻡ ﺑﻌﻤﻠﻴﺎﺕ ﺍﻟﺘﻔﺠﻴﺮ. ﺍﻧﺘﺒﻪ ﻟﻠﺤﺪﻭﺩ . ً ﺫﻟﻚ ﻣﺘﻮﺍﻓﺮﺍ .ﺍﻟﻤﺴﻤﻮﺡ ﺑﻬﺎ. ﻭﻗﻢ ﺑﺎﺗﺒﺎﻉ ﺃﻱ ﻟﻮﺍﺋﺢ ﺃﻭ ﻗﻮﺍﻧﻴﻦ ﺗﻮﻗﻒ...
- Page 10 ◄ ﻓﺒﺨﻼﻑ ﺑﻘﻴﺔ ﺃﻧﻈﻤﺔ ﺍﻟﺒﻄﺎﺭﻳﺎﺕ ﺍﻷﺧﺮﻯ، ﻻ ﻳﻮﺟﺪ ﺃﻱ ﺗﺄﺛﻴﺮ .ﻟﻠﺬﺍﻛﺮﺓ ﻣﻦ ﺷﺄﻧﻪ ﺃﻥ ﻳﻀﻌﻒ ﻣﻦ ﺃﺩﺍء ﺍﻟﺒﻄﺎﺭﻳﺔ ﻓﻘﻂ. ﻟﻘﺪ ﺗﻢ ﺗﺼﻤﻴﻢLG ﻻ ﺗﺴﺘﺨﺪﻡ ﺳﻮﻯ ﺑﻄﺎﺭﻳﺎﺕ ﻭﺷﺎﺣﻦ ◄ . ﻟﻴﺰﻳﺪ ﻣﻦ ﻋﻤﺮ ﺍﻟﺒﻄﺎﺭﻳﺔLG ﺷﺎﺣﻦ .ﻻ ﺗﻘﻢ ﺑﻔﻚ ﺣﺰﻣﺔ ﺍﻟﺒﻄﺎﺭﻳﺔ ﺃﻭ ﻗﺼﺮ ﺩﺍﺋﺮﺗﻬﺎ...
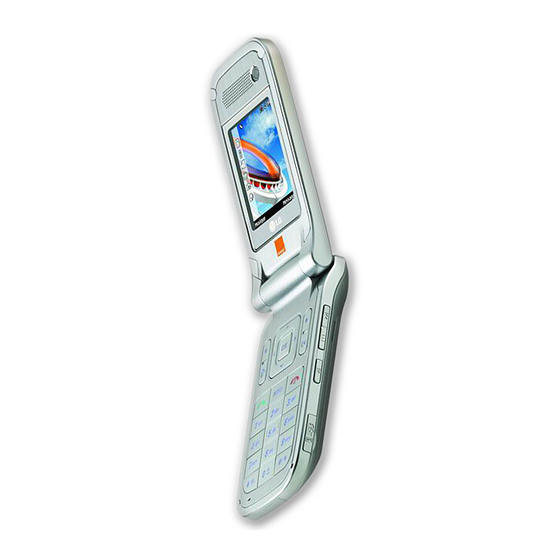
- Page 11 ﺃﺟﺰﺍء ﺍﻟﻬﺎﺗﻒ ﻣﻨﻈﺮ ﺧﻠﻔﻲ ﺍﻟﻤﻨﻈﺮ ﺍﻷﻣﺎﻣﻲ ﺍﻟﻬﻮﺍﺋﻲ ﺍﻟﻌﺪﺳﺎﺕ ﺍﻟﺨﺎﺭﺟﻴﺔ ﻓﺘﺤﺔ ﻟﺤﺰﺍﻡ ﺍﻟﺤﻤﻞ ﻟﻠﻜﺎﻣﻴﺮﺍ ﻣﺰﻻﺝ ﺗﺤﺮﻳﺮ ﺍﻟﺒﻄﺎﺭﻳﺔ ﺍﻟﺸﺎﺷﺔ ﺍﻷﻣﺎﻣﻴﺔ USIM ﻣﻨﻔﺬ ﺑﻄﺎﻗﺔ ﺃﻃﺮﺍﻑ ﺍﻟﺒﻄﺎﺭﻳﺔ ﻣﻨﻔﺬ ﺗﻮﺻﻴﻞ ﺟﻬﺎﺯ ﺑﻄﺎﺭﻳﺔ ﻗﻴﺎﺳﻴﺔ ﺍﻟﺸﺤﻦ/ﺍﻟﻜﺎﺑﻞ ﻣﻼﺣﻈﺔ ﻻ ﺗﻠﻤﺲ ﺃﺑ ﺪ ً ﺍ ﺍﻟﻬﻮﺍﺋﻲ ﺃﺛﻨﺎء ﺇﺟﺮﺍء ﻣﻜﺎﻟﻤﺔ ◄...
- Page 12 ﻣﻨﻈﺮ ﻣﻦ ﺍﻟﺠﺎﻧﺐ ﺍﻷﻳﻤﻦ ﻣﻨﻈﺮ ﻣﻦ ﺍﻟﺠﺎﻧﺐ ﺍﻷﻳﺴﺮ ﻣﻔﺎﺗﻴﺢ ﺍﺧﺘﺼﺎﺭ ﻣﺸﻐﻞ ﻣﻠﻔﺎﺕ ﺍﻟﺼﻮﺕ/ ﺍﻟﻔﻴﺪﻳﻮ : ﺍﻟﻤﺎﺩﺓ ﺍﻟﻤﺴﺠﻠﺔ ﺍﻟﺘﺎﻟﻴﺔ/ ﺗﻘﺪﻳﻢ ﺳﺮﻳﻊ ﻣﻔﺎﺗﻴﺢ ﻣﺴﺘﻮﻯ ﺍﻟﺼﻮﺕ : ﺍﻟﻤﺎﺩﺓ ﺍﻟﻤﺴﺠﻠﺔ ﺍﻟﺴﺎﺑﻘﺔ/ﺍﻟﺘﺮﺟﻴﻊ ﻣﻔﺘﺎﺡ ﺗﺸﻐﻴﻞ ﺍﻟﻜﺎﻣﻴﺮﺍ ﺍﻟﺴﺮﻳﻊ : )ﺍﺿﻐﻂ ﻟﻔﺘﺮﺓ ﻃﻮﻳﻠﺔ( ﻓﺘﺢ/ﻏﻠﻖ ﻗﺎﺋﻤﺔ .ﺍﻟﺘﺸﻐﻴﻞ. ﻳﻮﻗﻒ ﺍﻟﺘﺸﻐﻴﻞ )ﺍﻟﻀﻐﻂ...
- Page 13 ﺃﺟﺰﺍء ﺍﻟﻬﺎﺗﻒ ﻣﻨﻈﺮ ﻓﺘﺢ ﺍﻟﻬﺎﺗﻒ ﺍﻟﻌﺪﺳﺎﺕ ﺍﻟﺪﺍﺧﻠﻴﺔ ﻟﻠﻜﺎﻣﻴﺮﺍ ﺍﻟﺴﻤﺎﻋﺔ )ﻣﻮﺍﻓﻖ( + ﻣﻔﺘﺎﺡ ﺍﻟﺘﻨﻘﻞ ﺭﺑﺎﻋﻲOK ﻣﻔﺘﺎﺡ ﺍﻻﺗﺠﺎﻫﺎﺕ ﺍﻟﺸﺎﺷﺔ ﺍﻟﺮﺋﻴﺴﻴﺔ ﻣﻔﺘﺎﺡ ﺍﻻﺧﺘﻴﺎﺭ ﺍﻷﻳﻤﻦ ﻳ ُﻨﺸﻂ ﺍﻟﻤﺆﺷﺮﺍﺕ ﺍﻟﻤﻌﺮﻭﺿﺔ ﻋﻠﻰ ﺍﻟﺸﺎﺷﺔ ﺍﻹﻧﺘﺮﻧﺖ ﺭﺳﺎﻟﺔ .ﻓﻲ ﻣﺮﺑﻊ ﺍﻻﺧﺘﻴﺎﺭ ﺍﻷﻳﻤﻦ ﻣﻔﺘﺎﺡ ﺍﻻﺧﺘﻴﺎﺭ ﺍﻷﻳﺴﺮ ﻳﻨﺸﻂ ﺍﻟﻤﺆﺷﺮﺍﺕ ﺍﻟﻤﻌﺮﻭﺿﺔ ﻋﻠﻰ ﺍﻟﺸﺎﺷﺔ ﻣﻔﺘﺎﺡ...
- Page 14 ﺍﻟﺒﺪﺍﻳﺔ ﻭﺍﻟﺒﻄﺎﺭﻳﺔUSIM ﺗﺮﻛﻴﺐ ﺑﻄﺎﻗﺔ USIM ١. ﺇﺩﺧﺎﻝ ﺑﻄﺎﻗﺔ ﻋﻠﻰ ﺭﻗﻢ ﺍﻟﻬﺎﺗﻒ ﻭﺗﻔﺎﺻﻴﻞ ﺍﻟﺨﺪﻣﺔUSIM ﺗﺤﺘﻮﻱ ﺑﻄﺎﻗﺔ .ﻭﺟﻬﺎﺕ ﺍﻻﺗﺼﺎﻝ ﻭﻳﺠﺐ ﺇﺩﺧﺎﻟﻬﺎ ﻓﻲ ﺍﻟﻬﺎﺗﻒ ﻣﻦ ﻫﺎﺗﻔﻚ ﻓﺴﻴﺼﺒﺢ ﻏﻴﺮ ﻗﺎﺑﻞUSIM ﺇﺫﺍ ﺃﺧﺮﺟﺖ ﺑﻄﺎﻗﺔ ﻟﻼﺳﺘﺨﺪﺍﻡ )ﻓﻴﻤﺎ ﻋﺪﺍ ﻣﻜﺎﻟﻤﺎﺕ ﺍﻟﻄﻮﺍﺭﻱء( ﺣﺘﻰ ﻳﺘﻢ ﺇﺩﺧﺎﻝ ...
- Page 15 ﺍﻟﺒﺪﺍﻳﺔ ٣. ﺇﺧﺮﺍﺝ ﺍﻟﺒﻄﺎﺭﻳﺔ ٢. ﺇﺩﺧﺎﻝ ﺍﻟﺒﻄﺎﺭﻳﺔ ﺃﻭﻗﻒ ﺍﻟﻬﺎﺗﻒ. )ﺇﺫﺍ ﺃﺑﻘﻴﺖ ﺍﻟﻬﺎﺗﻒ ﻳﻌﻤﻞ، ﺳﻴﻜﻮﻥ ﻫﻨﺎﻙ ﺍﺣﺘﻤﺎﻝ ﺃﺩﺧﻞ ﺍﻟﺒﻄﺎﺭﻳﺔ ﻣﻊ ﻣﺤﺎﺫﺍﺓ ﺍﻟﻤﻨﻄﻘﺔ ﺍﻟﺬﻫﺒﻴﺔ ﻓﻲ ﺍﻟﺒﻄﺎﺭﻳﺔ ﻣﻊ ﺃﻃﺮﺍﻑ ﺑﻔﻘﺪ ﺃﺭﻗﺎﻡ ﺍﻟﻬﺎﺗﻒ ﻭﺍﻟﺮﺳﺎﺋﻞ ﺍﻟﻤﺨﺰﻧﺔ.( ﺍﺿﻐﻂ ﻣﺰﺍﻟﻴﺞ ﺗﺤﺮﻳﺮ ﺍﻟﺒﻄﺎﺭﻳﺔ )ﺍﻟﻤﻨﻄﻘﺔ ﺍﻟﺬﻫﺒﻴﺔ( ﻓﻲ ﻣﻜﺎﻥ ﺗﺮﻛﻴﺐ ﺍﻟﺒﻄﺎﺭﻳﺔ. ﺛﻢ ﺍﺿﻐﻂ .ﺍﻟﺒﻄﺎﺭﻳﺔ...
- Page 16 ﺷﺤﻦ ﺍﻟﺒﻄﺎﺭﻳﺔ .٢. ﺻﻞ ﺍﻟﻄﺮﻑ ﺍﻵﺧﺮ ﻣﻦ ﺷﺎﺣﻦ ﺍﻟﺴﻔﺮ ﺑﻤﻘﺒﺲ ﺍﻟﺘﻴﺎﺭ ﺍﻟﺮﺋﻴﺴﻲ .ﻻ ﺗﺴﺘﺨﺪﻡ ﺳﻮﻯ ﺟﻬﺎﺯ ﺍﻟﺸﺤﻦ ﺍﻟﻤﺮﻓﻖ ﺑﻌﺒﻮﺓ ﺍﻟﻬﺎﺗﻒ .ﻳﺠﺐ ﺗﺮﻛﻴﺐ ﺍﻟﺒﻄﺎﺭﻳﺔ ﻗﺒﻞ ﺗﻮﺻﻴﻞ ﺷﺎﺣﻦ ﺍﻟﺴﻔﺮ ﺑﺎﻟﻬﺎﺗﻒ ١. ﻭﺍﻟﺴﻬﻢ ﻓﻲ ﻣﻮﺍﺟﻬﺘﻚ ﻛﻤﺎ ﻫﻮ ﻣﻮﺿﺢ ﻓﻲ ﺍﻟﺸﻜﻞ، ﺍﺩﻓﻊ ﺍﻟﻘﺎﺑﺲ ﺍﻟﺨﺎﺹ ﺑﻤﻬﺎﻳﻰء ﺍﻟﺒﻄﺎﺭﻳﺔ ﺩﺍﺧﻞ ﺍﻟﻤﻘﺒﺲ ﺍﻟﻤﻮﺟﻮﺩ ﻓﻲ ﺍﻟﺠﺰء .ﺍﻟﺴﻔﻠﻲ...
- Page 17 ﺍﻟﺒﺪﺍﻳﺔ ﻓﺼﻞ ﺟﻬﺎﺯ ﺍﻟﺸﺤﻦ ﻣﻼﺣﻈﺔ .ﺗﺄﻛﺪ ﻣﻦ ﺷﺤﻦ ﺍﻟﺒﻄﺎﺭﻳﺔ ﺗﻤﺎﻣﺎ ً ﻗﺒﻞ ﺍﺳﺘﺨﺪﺍﻡ ﺍﻟﻬﺎﺗﻒ ◄ ﺍﻓﺼﻞ ﺷﺎﺣﻦ ﺍﻟﺴﻔﺮ ﻣﻦ ﺍﻟﻬﺎﺗﻒ ﺑﺎﻟﻀﻐﻂ ﻋﻠﻰ ﺯﺭﻳﻪ ﺍﻟﺠﺎﻧﺒﻴﻴﻦ ﻛﻤﺎ . ﺃﺛﻨﺎء ﺍﻟﺸﺤﻦUSIM ﻻ ﺗﻘﻢ ﺑﺈﺧﺮﺍﺝ ﺍﻟﺒﻄﺎﺭﻳﺔ ﺃﻭ ﺑﻄﺎﻗﺔ .ﻫﻮ ﻣﺒ ﻴ ّﻦ ﻓﻲ ﺍﻟﺮﺳﻢ ﺍﻟﺘﺨﻄﻴﻄﻲ ◄...
- Page 18 ٣. ﺃﺩﺧﻞ ﺑﻄﺎﻗﺔ ﺍﻟﺬﺍﻛﺮﺓ ﻓﻲ ﺍﻟﻔﺘﺤﺔ. ﻳﺠﺐ ﺃﻥ ﺗﺘﻼﻣﺲ ﻣﻨﺎﻃﻖ microSD ﻛﻴﻔﻴﺔ ﺍﺳﺘﺨﺪﺍﻡ ﺑﻄﺎﻗﺎﺕ ﺍﻟﺬﺍﻛﺮﺓ .microSD ﺍﻻﺗﺼﺎﻝ ﺍﻟﺬﻫﺒﻴﺔ ﺍﻟﺠﺰء ﺍﻟﺨﻠﻔﻲ ﻣﻦ ﺑﻄﺎﻗﺔ ﻛﺜﻴﺮ ً ﺍ. ﺇﺫﺍ ﻟﻢ ﺗﺘﻤﻜﻦ ﻣﻦ ﺇﺩﺧﺎﻝmicroSD ﻻ ﺗﺪﻓﻊ ﺑﻄﺎﻗﺔ ﺍﻟﺒﻄﺎﻗﺔ ﻓﻲ ﺍﻟﻔﺘﺤﺔ، ﻓﺮﺑﻤﺎ ﻛﻨﺖ ﺗﺤﺎﻭﻝ ﺇﺩﺧﺎﻟﻬﺎ ﻓﻲ ﺍﻻﺗﺠﺎﻩ .ﺍﻟﺨﻄﺄ...
- Page 19 ﺍﻟﺒﺪﺍﻳﺔ ﺍﻟﺒﻄﺎﻗﺔ ﻣﺼﻤﻤﺔ ﻟﻴﺘﻢ ﺗﺮﻛﻴﺒﻬﺎ ﺑﺴﻬﻮﻟﺔ ﻓﻲ ﺍﻟﻨﻈﺎﻡ ﻓﻲ ﺍﺗﺠﺎﻩ ،"٤. ﺑﻤﺠﺮﺩ ﺇﺩﺧﺎﻟﻬﺎ، ﺍﺩﻓﻊ ﺑﻄﺎﻗﺔ ﺍﻟﺬﺍﻛﺮﺓ ﺣﺘﻰ ﺗﺴﻤﻊ ﺻﻮﺕ " ﺗﻜﺔ ◄ .ﻭﺍﺣﺪ ﻓﻘﻂ . ﺗﻢ ﺗﺮﻛﻴﺒﻬﺎ ﺑﻄﺮﻳﻘﺔ ﺻﺤﻴﺤﺔmicroSD ﺗﻔﻴﺪ ﺑﺄﻥ ﺑﻄﺎﻗﺔ .ﻻ ﺗﺜﻦ ﺍﻟﺒﻄﺎﻗﺔ ﺃﻭ ﺗﺪﺧﻠﻬﺎ ﻋﻨﻮﺓ ﻓﻲ ﺍﻟﻔﺘﺤﺔ ◄...
- Page 20 ( )ﻣﻦ ٤ ﺇﻟﻰ ٨ ﺃﺭﻗﺎﻡPIN ﺭﻗﻢ ﺍﻟﺘﻌﺮﻳﻒ ﺍﻟﺸﺨﺼﻲ ﺗﺸﻐﻴﻞ ﺍﻟﻬﺎﺗﻒ USIM )ﺭﻗﻢ ﺍﻟﺘﻌﺮﻳﻒ ﺍﻟﺸﺨﺼﻲ( ﺑﻄﺎﻗﺘﻚPIN ﻳﺤﻤﻲ ﺭﻣﺰ . ﻟﺪﻳﻚ ﻓﻲ ﺍﻟﻬﺎﺗﻒ ﻭﺃﻥ ﺍﻟﺒﻄﺎﺭﻳﺔ ﻣﺸﺤﻮﻧﺔUSIM ﺗﺄﻛﺪ ﺃﻥ ﺑﻄﺎﻗﺔ PIN ﻣﻦ ﺍﻻﺳﺘﻌﻤﺎﻝ ﻏﻴﺮ ﺍﻟﻤﺮﺧﺺ. ﻋﺎﺩﺓ ﻣﺎ ﻳﺘﻢ ﺗﺰﻭﻳﺪ ﺭﻣﺰ ﺣﺘﻰ ﻳﺘﻢ ﺍﻟﺘﺸﻐﻴﻞ. ﺃﺩﺧﻞ ﺍﺿﻐﻂ...
- Page 21 ﺍﻟﺒﺪﺍﻳﺔ ( )ﻣﻦ ٤ ﺇﻟﻰ ٨ ﺃﺭﻗﺎﻡPUK2 ﺭﻣﺰ ﻫﻴﻜﻞ ﺍﻟﺸﺎﺷﺔ ﻣﺜﺒﺘﺔ، ﻳﻈﻬﺮ ﺭﺳﻢ ﻣﺘﺤﺮﻙ ﻳﻄﻠﺐUSIM ﺇﺫﺍ ﻟﻢ ﺗﻜﻦ ﻫﻨﺎﻙ ﺑﻄﺎﻗﺔ USIM ﺍﻟﻤﺮﻓﻖ ﻣﻊ ﺑﻌﺾ ﺑﻄﺎﻗﺎﺕPUK2 ﻳﺠﺐ ﺇﺩﺧﺎﻝ ﺭﻣﺰ ﺍﻟﻤﺜﺒﺘﺔUSIM . ﺇﺫﺍ ﻛﺎﻧﺖ ﺑﻄﺎﻗﺔUSIM ﻣﻨﻚ ﺇﺩﺧﺎﻝ ﺑﻄﺎﻗﺔ ﺍﻟﻤﺤﻈﻮﺭ. ﺇﺫﺍ ﻓﻘﺪﺕ ﺍﻟﺮﻣﺰ ﻋﻠﻴﻚPIN2 ﻹﻟﻐﺎء ﻗﻔﻞ ﺭﻣﺰ ﺩﺍﺧﻞ...
- Page 22 ﺷﺮﻳﻂ ﺭﻣﻮﺯ ﺍﻟﻤﺆﺷﺮ ﻳﻮﺿﺢ ﺍﻟﻌﻤﻠﻴﺎﺕ ﺍﻟﺠﺎﺭﻳﺔ ﻭﻳﺬﻛﺮﻙ ﺑﻘﻮﺓ ﺍﻹﺷﺎﺭﺓ ﻭﻃﺎﻗﺔ ﺍﻟﺒﻄﺎﺭﻳﺔ. ﻭﻳﻈﻬﺮ ﺫﻟﻚ .ﺧﻼﻝ ﻛﻞ ﺍﻷﻧﺸﻄﺔ ﺷﺮﻳﻂ ﻗﺎﺋﻤﺔ ﺍﻻﺧﺘﺼﺎﺭ :ﻓﻲ ﻭﺿﻊ ﺍﻟﺴﻜﻮﻥ، ﻳﻤﻜﻨﻚ ﺍﻟﺪﺧﻮﻝ ﺇﻟﻰ ﺍﻟﻘﻮﺍﺋﻢ ﺍﻟﺘﺎﻟﻴﺔ ﺩﻓﺘﺮ ﺍﻟﻌﻨﺎﻭﻳﻦ: ﺟﻬﺎﺕ ﺍﻻﺗﺼﺎﻝ، ﺟﻬﺔ ﺍﺗﺼﺎﻝ ﺟﺪﻳﺪﺓ ،ﺍﻟﻤﻜﺎﻟﻤﺎﺕ: ﺳﺠﻞ ﺍﻟﻤﻜﺎﻟﻤﺎﺕ، ﺍﻟﻤﻜﺎﻟﻤﺎﺕ ﺍﻟﻔﺎﺋﺘﺔ، ﺍﻟﻤﻜﺎﻟﻤﺎﺕ ﺍﻟﻤﺴﺘﻠﻤﺔ ﺍﻟﻤﻜﺎﻟﻤﺎﺕ...
- Page 23 ﺍﻟﺒﺪﺍﻳﺔ ﻭﻇﺎﺋﻒ ﺍﻟﻤﻔﺎﺗﻴﺢ .ﻓﻴﻤﺎ ﻳﻠﻲ ﻭﺻﻒ ﻟﻮﻇﺎﺋﻒ ﺍﻟﻤﻔﺎﺗﻴﺢ ﻓﻲ ﺣﺎﻟﺔ ﺷﺎﺷﺔ ﺍﻟﺴﻜﻮﻥ ﻣﻨﻈﺮ ﻣﻦ ﺍﻟﺠﺎﻧﺐ ﺍﻷﻳﻤﻦ ﻣﻔﺘﺎﺡ ﺍﻻﺧﺘﻴﺎﺭ ﺍﻷﻳﺴﺮ .ﻟﻔﺘﺢ ﻗﺎﺋﻤﺔ ﺍﻟﺮﺳﺎﺋﻞ .ﻳﺘﺼﻞ ﺑﺎﻟﻤﻮﺳﻴﻘﻰ ﻣﻔﺘﺎﺡ ﺍﻟﻤﺴﺢ ) ﻣﻔﺘﺎﺡ ﺍﺗﺠﺎﻩ ﺿﻐﻄﺔ ﻗﺼﻴﺮﺓ: ﻟﺤﺬﻑ ﺣﺮﻑ ﻭﺍﺣﺪ .ﻳﻘﻮﻡ ﺑﺎﺧﺘﻴﺎﺭ ﺷﺮﻳﻂ ﻗﺎﺋﻤﺔ ﺍﻻﺧﺘﺼﺎﺭ ﺿﻐﻄﺔ ﻃﻮﻳﻠﺔ: ﻟﺤﺬﻑ ﻛﻞ ﺍﻟﺤﺮﻭﻑ (ﻣﻔﺘﺎﺡ...
- Page 24 ﺷﺎﺷﺔ ﻗﻔﻞ ﺍﻟﻬﺎﺗﻒ ﺷﺎﺷﺔ ﺍﻟﺘﺮﻗﻴﻢ ﻋﻨﺪ ﺍﺧﺘﻴﺎﺭ ﻭﻇﻴﻔﺔ ﻗﻔﻞ ﺍﻟﻬﺎﺗﻒ، ﻳﻤﻜﻨﻚ ﻓﻘﻂ ﻓﻲ ﻫﺬﻩ ﺍﻟﺸﺎﺷﺔ ﺇﺟﺮﺍء .ﺗﻈﻬﺮ ﺷﺎﺷﺔ ﺍﻟﺘﺮﻗﻴﻢ ﻋﻨﺪ ﺿﻐﻂ ﻣﻔﺘﺎﺡ ﺭﻗﻢ ﺷﺎﺷﺔ ﺍﻟﺴﻜﻮﻥ ﻣﻜﺎﻟﻤﺔ ﻃﻮﺍﺭﺉ ﻭﺗﺤﺮﻳﺮ ﺍﻟﻘﻔﻞ ﻭﺇﻳﻘﺎﻑ ﺗﺸﻐﻴﻞ ﺍﻟﻬﺎﺗﻒ. ﻭﻛﻤﺎ ﻫﻮ ﻫﻴﻜﻞ ﺍﻟﺸﺎﺷﺔ ﺍﻟﺤﺎﻝ ﺩﺍﺋ ﻤ ً ﺎ، ﻳﻤﻜﻨﻚ ﺇﻳﻘﺎﻑ ﺗﺸﻐﻴﻞ ﺍﻟﻬﺎﺗﻒ ﻋﻦ ﻃﺮﻳﻖ ﺍﻟﻀﻐﻂ ﻣﻊ ﺗﺘﻜﻮﻥ...
- Page 25 ﺍﻟﺒﺪﺍﻳﺔ ﻭﻇﺎﺋﻒ ﺇﻟﻐﺎء ﺍﻟﻘﻔﻞ )ﻣﻮﺍﻓﻖ(، ﺗﻈﻬﺮ ﻟﻚ ﺭﺳﺎﻟﺔOK ﺇﺫﺍ ﻗﻤﺖ ﺑﺎﻟﻀﻐﻂ ﻋﻠﻰ ﻣﻔﺘﺎﺡ ﺗﻄﻠﺐ ﻣﻨﻚ ﺇﺩﺧﺎﻝ ﺭﻣﺰ ﺍﻟﺤﻤﺎﻳﺔ ﻹﻟﻐﺎء ﻗﻔﻞ ﺍﻟﻬﺎﺗﻒ. ﺗﺘﻢ ﺗﻬﻴﺌﺔ ﺭﻣﺰ ﺍﻷﻣﺎﻥ ﻋﻦ ﻃﺮﻳﻖ ﺍﺧﺘﻴﺎﺭ ﺍﻹﻋﺪﺍﺩﺍﺕ ← ﺍﻟﺤﻤﺎﻳﺔ ← ﺗﻐﻴﻴﺮ ﺍﻟﺮﻣﻮﺯ. ﻓﻲ ﺣﺎﻟﺔ ﺇﺩﺧﺎﻝ ﺭﻣﺰ ﺣﻤﺎﻳﺔ ﺧﻄﺄ، ﺳﻮﻑ ﻳﺒﻘﻰ ﺍﻟﻬﺎﺗﻒ ،ﻓﻲ...
- Page 26 ﺍﻟﻮﻇﺎﺋﻒ ﺍﻟﻌﺎﻣﺔ ﺇﺟﺮﺍء ﺍﻟﻤﻜﺎﻟﻤﺎﺕ ﻭﺍﻟﺮﺩ ﻋﻠﻴﻬﺎ ﺳﻮﻑ ﻳﺘﻢ ﺇﺧﺒﺎﺭﻙ ﺑﺄﻧﻚ ﺳﺘﺤﺘﺎﺝ ﺇﻟﻰ ﻏﻠﻖ ﺍﻟﺘﻄﺒﻴﻘﺎﺕ ﺍﻷﺧﺮﻯ ◄ .ﻹﺟﺮﺍء ﻣﻜﺎﻟﻤﺔ ﺍﻟﻔﻴﺪﻳﻮ ﺇﺟﺮﺍء ﻣﻜﺎﻟﻤﺎﺕ ﺍﻟﻔﻴﺪﻳﻮ ﻭﺍﻟﺮﺩ ﻋﻠﻴﻬﺎ ﻣﻼﺣﻈﺔ ﻳﻤﻜﻦ ﺃﻥ ﺗﺴﺘﻐﺮﻕ ﻣﻜﺎﻟﻤﺔ ﺍﻟﻔﻴﺪﻳﻮ ﺑﻌﺾ ﺍﻟﻮﻗﺖ ﻟﻼﺗﺼﺎﻝ. ﻟﺬﻟﻚ ﻳﻤﻜﻨﻚ ﺇﺟﺮﺍء ﻣﻜﺎﻟﻤﺔ ﻓﻴﺪﻳﻮ ﻓﻲ ﺍﻟﻤﻨﻄﻘﺔ ﺍﻟﺘﻲ ﺗﻐﻄﻴﻬﺎ ﺧﺪﻣﺔ ﺍﻟﺠﻴﻞ ◄...
- Page 27 ﺍﻟﻮﻇﺎﺋﻒ ﺍﻟﻌﺎﻣﺔ ﺿﺒﻂ ﻣﺴﺘﻮﻯ ﺍﻟﺼﻮﺕ ﺇﺟﺮﺍء ﻣﻜﺎﻟﻤﺔ ﺻﻮﺗﻴﺔ/ ﻓﻴﺪﻳﻮ ﻣﻦ ﺟﻬﺎﺕ ﺍﻻﺗﺼﺎﻝ ﺇﺫﺍ ﺃﺭﺩﺕ ﺿﺒﻂ ﻣﺴﺘﻮﻯ ﺻﻮﺕ ﺍﻟﺴﻤﺎﻋﺔ، ﺃﺛﻨﺎء ﺍﻟﻤﻜﺎﻟﻤﺔ، ﻗﻢ ﻣﻦ ﺍﻟﺴﻬﻞ ﺍﻻﺗﺼﺎﻝ ﺑﺄﻱ ﺷﺨﺺ ﻗﻤﺖ ﺑﺘﺨﺰﻳﻦ ﺭﻗﻤﻪ ﻓﻲ ﺟﻬﺎﺕ ﺑﺎﺳﺘﺨﺪﺍﻡ ﺍﻟﻤﻔﺎﺗﻴﺢ ﺍﻟﺠﺎﻧﺒﻴﺔ ﻟﻠﻬﺎﺗﻒ. ﻓﻲ ﻭﺿﻊ ﺍﻟﺴﻜﻮﻥ ﻣﻊ ﻓﺘﺢ .ﺍﻻﺗﺼﺎﻝ...
- Page 28 ٢. ﻳﺘﻢ ﺇﻧﻬﺎء ﺍﻟﻤﻜﺎﻟﻤﺔ ﻋﻦ ﻃﺮﻳﻖ ﻏﻠﻖ ﺍﻟﻬﺎﺗﻒ ﺃﻭ ﺑﺎﻟﻀﻐﻂ ﻋﻠﻰ T9 ﻭﺳﻴﻠﺔ ﺍﻟﻤﻔﺘﺎﺡ ﻳﺘﻴﺢ ﻟﻚ ﻫﺬﺍ ﺍﻟﻮﺿﻊ ﺇﺩﺧﺎﻝ ﺍﻟﻜﻠﻤﺎﺕ ﺑﻮﺍﺳﻄﺔ ﺍﻟﻀﻐﻂ ﻋﻠﻰ ﺍﻟﻤﻔﺘﺎﺡ ﻣﻼﺣﻈﺔ ﺿﻐﻄﺔ ﻭﺍﺣﺪﺓ ﻓﻘﻂ ﻟﻜﻞ ﺣﺮﻑ ﺗﺮﻳﺪ ﺇﺩﺧﺎﻟﻪ. ﻛﻞ ﻣﻔﺘﺎﺡ ﻣﻦ ﻣﻔﺎﺗﻴﺢ ﻟﻮﺣﺔ ﻣﻔﺎﺗﻴﺢ ﺍﻟﻬﺎﺗﻒ ﻣﺰﻭﺩ ﺑﺄﻛﺜﺮ ﻣﻦ ﺣﺮﻑ ﻭﺍﺣﺪ. ﻭﻳﻘﻮﻡ ﺍﻟﻮﺿﻊ ﻳﻤﻜﻦ...
- Page 29 ﺍﻟﻮﻇﺎﺋﻒ ﺍﻟﻌﺎﻣﺔ ﺗﻐﻴﻴﺮ ﻭﺿﻊ ﺇﺩﺧﺎﻝ ﺍﻟﻨﺺ ،ﺇﺫﺍ ﻛﺎﻧﺖ ﺍﻟﻜﻠﻤﺔ ﺑﻌﺪ ﻛﺘﺎﺑﺘﻬﺎ ﺑﺎﻟﻜﺎﻣﻞ ﻣﺎ ﺯﺍﻟﺖ ﻏﻴﺮ ﺻﺤﻴﺤﺔ ◄ ﻣﺮﺓ ﻭﺍﺣﺪﺓ ﺃﻭ ﺃﻛﺜﺮ ﻟﻠﺘﻨﻘﻞ ﻋﺒﺮ ﺍﺿﻐﻂ ﻋﻠﻰ ﺍﻟﻤﻔﺘﺎﺡ ١. ﻋﻨﺪﻣﺎ ﺗﻜﻮﻥ ﻓﻲ ﺣﻘﻞ ﻳﺴﻤﺢ ﻟﻚ ﺑﺈﺩﺧﺎﻝ ﺣﺮﻭﻑ، ﺳﻮﻑ ﺗﻼﺣﻆ .ﺍﻟﺨﻴﺎﺭﺍﺕ ﺍﻷﺧﺮﻯ ﻟﻠﻜﻠﻤﺔ .ﻣﺆﺷﺮ...
- Page 30 (ﺍﺳﺘﺨﺪﺍﻡ ﻭﺿﻊ 321 )ﻭﺿﻊ ﺍﻷﺭﻗﺎﻡ ﻣﺮﺓ ﻭﺍﺣﺪﺓ ٢. ﻹﺩﺧﺎﻝ ﻣﺴﺎﻓﺔ ﻓﺎﺻﻠﺔ، ﺍﺿﻐﻂ ﻋﻠﻰ ﺍﻟﻤﻔﺘﺎﺡ ﻓﻘﻂ. ﻟﺤﺬﻑ ﺃﻱ ﺣﺮﻑ ﻣﻦ ﺍﻟﺤﺮﻭﻑ، ﺍﺿﻐﻂ ﻋﻠﻰ ﺍﻟﻤﻔﺘﺎﺡ ﻳﻤﻜﻨﻚ ﻭﺿﻊ ﺍﻷﺭﻗﺎﻡ ﻣﻦ ﺍﻟﻘﻴﺎﻡ ﺑﺈﺩﺧﺎﻝ ﺍﻷﺭﻗﺎﻡ ﻓﻲ ﻧﺺ ﺍﻟﺮﺳﺎﻟﺔ ﻟﻤﺤﻮ ﻣﺤﺘﻮﻳﺎﺕ ﺷﺎﺷﺔ ﺍﻟﻬﺎﺗﻒ ﺍﺳﺘﻤﺮ ﻓﻲ ﺍﻟﻀﻐﻂ ﻋﻠﻰ ﻣﻔﺘﺎﺡ )ﺭﻗﻢ...
- Page 31 ﺍﻟﻘﺎﺋﻤﺔ ﺍﻟﺮﺋﻴﺴﻴﺔ ( )ﻣﻮﺍﻓﻖOK ﻓﻲ ﺷﺎﺷﺔ ﺍﻟﺴﻜﻮﻥ. ﺗﺤﺮﻙ ﺇﻟﻰ ﺍﻟﻌﻨﺼﺮ ﺍﻟﻤﻄﻠﻮﺏ ﺛﻢ ﺍﺿﻐﻂ ﺍﻟﻤﻔﺘﺎﺡ ﻳﻤﻜﻨﻚ ﺑﺪء ﺗﺸﻐﻴﻞ ﺍﻟﻘﺎﺋﻤﺔ ﺑﺎﻟﻀﻐﻂ ﻋﻠﻰ ﺍﻟﻤﻔﺘﺎﺡ .ﻟﻠﺬﻫﺎﺏ ﺇﻟﻰ ﺍﻟﻘﺎﺋﻤﺔ ﺍﻟﻔﺮﻋﻴﺔ ﻳﻤﻜﻦ ﺍﻟﺪﺧﻮﻝ ﺃﻳﻀ ً ﺎ ﻣﺒﺎﺷﺮ ﺓ ً ﻣﻦ ﺍﻟﻘﺎﺋﻤﺔ ﺍﻟﺮﺋﻴﺴﻴﺔ ﺇﻟﻰ ﺍﻟﻘﺎﺋﻤﺔ ﺍﻟﻔﺮﻋﻴﺔ ﺑﺎﻟﻀﻐﻂ ﻋﻠﻰ ﻣﻔﺘﺎﺡ ﺍﻟﺮﻗﻢ ﺍﻟﻤﻨﺎﻇﺮ ﻛﻤﺎ ﻳﻠﻲ. ﺗﺤﺘﻮﻱ ﺍﻟﻘﺎﺋﻤﺔ ﺍﻟﺮﺋﻴﺴﻴﺔ .ﻋﻠﻰ...
- Page 32 ٨. ﺃﻟﻌﺎﺏ ﻭﺗﻨﺰﻳﻼﺕ ٦. ﺍﻟﻤﺘﺼﻔﺢ ٤. ﺍﻟﻮﺳﺎﺋﻂ ٨-١ ﺃﻟﻌﺎﺏ ﻭﺗﻄﺒﻴﻘﺎﺕ ٦-١ ﺍﻟﺼﻔﺤﺔ ﺍﻟﺮﺋﻴﺴﻴﺔ ٤-١ ﻛﺎﻣﻴﺮﺍ ﺍﻟﻔﻴﺪﻳﻮ ٨-٢ ﺃﻟﻌﺎﺏ ﺇﺿﺎﻓﻴﺔ ٦-٢ ﺍﻟﻌﻼﻣﺎﺕ ٤-٢ ﺍﻟﺘﻘﺎﻁ ﺻﻮﺭﺓ ٨-٣ ﺗﻨﺰﻳﻼﺕ ٦-٣ ﺍﻟﺼﻔﺤﺎﺕ ﺍﻟﻤﺤﻔﻮﻇﺔ ٤-٣ ﻣﺴﺠ ّ ﻞ ﺍﻟﺼﻮﺕ ٦-٤ ﺍﻟﺬﻫﺎﺏ ﺍﻟﻰ ﻋﻨﻮﺍﻥ ﺍﻟﻤﻮﻗﻊ ٩. ﺍﻟﻤﺰﻳﺪ ٥.
- Page 33 ٢ ٠-٧ ﻣﺨﺼﺺ ٣ ٠-٨ ﻣﺨﺼﺺ ﻣﻴﺰﺓ ﺍﻟﻤﻬﺎﻡ ﺍﻟﻤﺘﻌﺪﺩﺓ ﻣﻴﺰﺓ ﺍﻟﻤﻬﺎﻡ ﺍﻟﻤﺘﻌﺪﺩﺓ. ﻳﻤﻜﻨﻚ ﺍﺳﺘﺨﺪﺍﻡ ﺗﻄﺒﻴﻘﺎﺕ ﻣﺘﻌﺪﺩﺓ ﻓﻲ ﻧﻔﺲ ﺍﻟﻮﻗﺖ. ﺃﺛﻨﺎء ﺗﺸﻐﻴﻞ ﺗﻄﺒﻴﻖ، ﻳﻤﻜﻨﻚ ﺍﻟﻮﺻﻮﻝ ﺇﻟﻰ ﺗﻄﺒﻴﻖ ﺁﺧﺮKU730 ﻳﺪﻋﻢ ﺑﺎﻟﻀﻐﻂ ﻟﻔﺘﺮﺓ ﻃﻮﻳﻠﺔ ﻋﻠﻰ ﻭﺣﺪﺩ ﺍﻟﻤﺰﻳﺪ ﻭﺍﻟﺤﺎﺳﺒﺔ. ﺍﺭﺟﻊ ﺇﻟﻰ ﻋﻠﻰ ﺳﺒﻴﻞ ﺍﻟﻤﺜﺎﻝ، ﺇﺫﺍ ﺭﻏﺒﺖ ﻓﻲ ﺍﺳﺘﺨﺪﺍﻡ ﺍﻟﺤﺎﺳﺒﺔ ﺃﺛﻨﺎء ﻛﺘﺎﺑﺔ ﺭﺳﺎﻟﺔ، ﺍﺿﻐﻂ ﻣﻊ ﺍﻻﺳﺘﻤﺮﺍﺭ ﻋﻠﻰ...
- Page 34 ﺍﻟﻤﻜﺎﻟﻤﺎﺕ ﺳﺠﻞ ﺍﻟﻤﻜﺎﻟﻤﺎﺕ ﻣﻜﺎﻟﻤﺎﺕ ﺍﻟﻔﻴﺪﻳﻮ ٢-١ ﺍﻟﻘﺎﺋﻤﺔ ١-١ ﺍﻟﻘﺎﺋﻤﺔ ﺗﺴﺘﻄﻴﻊ ﻋﺮﺽ ﺳﺠﻼﺕ ﺍﻟﻤﻜﺎﻟﻤﺎﺕ ﻛﻠﻬﺎ ﻭﺍﻟﻤﻄﻠﻮﺑﺔ ﻭﺍﻟﻤﺴﺘﻠﻤﺔ ﻳﻤﻜﻨﻚ ﺿﺒﻂ ﻋﺮﺽ ﺍﻟﺸﺎﺷﺔ ﺑﻴﻨﻤﺎ ﺗﻘﻮﻡ ﺑﺈﺟﺮﺍء ﺃﻭ ﺍﺳﺘﻼﻡ .ﻭﺍﻟﻔﺎﺋﺘﺔ. ﺗﻘﺪﻡ ﻛﻞ ﻗﺎﺋﻤﺔ ﺳﺠﻞ ﻣﻜﺎﻟﻤﺔ ﺍﻟﻮﻇﺎﺋﻒ ﺍﻟﺘﺎﻟﻴﺔ .ﻣﻜﺎﻟﻤﺔ ﻓﻴﺪﻳﻮ ﻳﻤﻜﻨﻚ ﺇﺟﺮﺍء ﻣﻜﺎﻟﻤﺔ ﺻﻮﺗﻴﺔ ﺃﻭ ﻓﻴﺪﻳﻮ ﻟﻠﺮﻗﻢ ﺍﻟﻤﻮﺟﻮﺩ ﻓﻲ ﺳﺠﻞ .ﺣﺠﻢ...
- Page 35 ﺍﻟﻤﻜﺎﻟﻤﺎﺕ ﺁﺧﺮ ﻣﻜﺎﻟﻤﺔ ﻣﻜﺎﻟﻤﺎﺕ ﻭﺍﺭﺩﺓ (١-٣-١ )ﺍﻟﻘﺎﺋﻤﺔ (٢-٢-١ )ﺍﻟﻘﺎﺋﻤﺔ .ﻳﻌﺮﺽ ﻣﺪﺓ ﺁﺧﺮ ﻣﻜﺎﻟﻤﺔ ﺑﺎﻟﻮﺣﺪﺍﺕ ﺍﻟﺰﻣﻨﻴﺔ ﺳﺎﻋﺔ/ ﺩﻗﻴﻘﺔ/ ﺛﺎﻧﻴﺔ ﺗﺴﻤﺢ ﻟﻚ ﺑﻌﺮﺽ ﺳﺠﻼﺕ ﺍﻟﻤﻜﺎﻟﻤﺎﺕ ﺍﻟﻤﺴﺘﻠﻤﺔ ﻭﺇﺟﺮﺍء ﻣﻜﺎﻟﻤﺔ .ﻭﺇﺭﺳﺎﻝ ﺭﺳﺎﻟﺔ ﻭﺣﻔﻆ ﺍﻟﺮﻗﻢ ﻓﻲ ﺟﻬﺎﺕ ﺍﻻﺗﺼﺎﻝ ﻣﻜﺎﻟﻤﺎﺕ ﻭﺍﺭﺩﺓ (٢-٣-١ )ﺍﻟﻘﺎﺋﻤﺔ ﻣﻜﺎﻟﻤﺎﺕ ﺻﺎﺩﺭﺓ (٣-٢-١ )ﺍﻟﻘﺎﺋﻤﺔ .ﻳﻌﺮﺽ...
- Page 36 ٢. ﻋﻨﺪ ﺗﺤﺪﻳﺪ ﺇﻟﻰ ﻣﺮﻛﺰ ﺍﻟﺒﺮﻳﺪ ﺍﻟﺼﻮﺗﻲ، ﻳﺘﻢ ﺗﻨﺸﻴﻂ ﺭﻗﻢ ﻣﺮﻛﺰ ٤. ﻓﻲ ﺗﻬﻴﺌﺔ ﺿﺒﻂ ﺍﻟﺤﺪ، ﺍﺧﺘﺮ ﺗﺸﻐﻴﻞ ﻟﺘﻬﻴﺌﺔ ﺣﺪ ﺍﻟﺘﻜﻠﻔﺔ. ﻋﻨﺪ ﺗﻬﻴﺌﺔ ﺍﻟﺒﺮﻳﺪ ﺍﻟﺼﻮﺗﻲ ﻋﻠﻰ ﺃﻧﻪ ﺭﻗﻢ ﺍﻟﺘﺤﻮﻳﻞ. ﻟﺘﺴﺠﻴﻞ ﺭﻗﻢ ﺧﺪﻣﺔ ﺣﺪ ﺍﻟﺘﻜﻠﻔﺔ، ﻟﻦ ﻳ ُﺴﻤﺢ ﻟﻚ ﺑﺈﺟﺮﺍء ﺃﻱ ﻣﻜﺎﻟﻤﺔ ﻋﻨﺪ ﻭﺻﻮﻝ ﺗﻜﻠﻔﺔ ←...
- Page 37 ﺍﻟﻤﻜﺎﻟﻤﺎﺕ ٢. ﻋﻨﺪ ﺗﺤﺪﻳﺪ ﺇﻟﻰ ﺭﻗﻢ ﺁﺧﺮ – ﻳﻈﻬﺮ ﺇﻃﺎﺭ ﺣﻮﺍﺭ ﻳﺘﻴﺢ ﻟﻚ ﺇﺩﺧﺎﻝ ٥. ﺑﻌﺪ ﺗﻨﺸﻴﻂ ﻗﺎﺋﻤﺔ ﻛﻞ ﺍﻟﻤﻜﺎﻟﻤﺎﺕ ﺍﻟﺼﻮﺗﻴﺔ، ﻳﺆﺩﻱ ﺗﺤﺪﻳﺪ ﻗﺎﺋﻤﺔ ﺭﻗﻢ ﺍﻟﻬﺎﺗﻒ ﺍﻟﺬﻱ ﺗﺮﻳﺪ ﺍﻟﺘﺤﻮﻳﻞ ﺇﻟﻴﻪ. ﺃﺩﺧﻞ ﺭﻗﻢ ﺍﻟﻬﺎﺗﻒ ﺍﻟﺬﻱ ﺧﻴﺎﺭﺍﺕ ﻓﻲ ﺃﺳﻔﻞ ﺍﻟﻘﻮﺍﺋﻢ ﺇﻟﻰ ﻋﺮﺽ ﻗﻮﺍﺋﻢ ﺗﻨﺸﻴﻂ ﻭﺇﻟﻐﺎء .(...
- Page 38 ﻋﻨﺪ ﻋﺪﻡ ﺍﻟﺮﺩ ﺍﺳﺘﻼﻡ ﺍﻟﻤﻌﻠﻮﻣﺎﺕ ﻣﻦ ﺍﻟﺸﺒﻜﺔ. ﻭﻳﺆﺩﻱ ﺗﺤﺪﻳﺪ ﺍﻟﺤﺎﻟﺔ ﻣﻦ ﻗﺎﺋﻤﺔ ،ﺍﻻﺧﺘﻴﺎﺭ ﺍﻟﻴﻤﻨﻰ ﺇﻟﻰ ﻧﻔﺲ ﺍﻟﻨﺘﻴﺠﺔ. ﻋﻨﺪ ﺗﺤﺪﻳﺪ ﻗﺎﺋﻤﺔ ﺇﻟﻐﺎء ﺗﻨﺸﻴﻂ ١. ﻋﻨﺪ ﺗﺤﺪﻳﺪ ﻗﺎﺋﻤﺔ ﺇﻳﻘﺎﻑ – ﺗﺆﺩﻱ ﻧﻔﺲ ﻋﻤﻞ ﻗﺎﺋﻤﺔ ﻛﻞ ﺍﻟﻤﻜﺎﻟﻤﺎﺕ .ﻳﺘﻢ ﺣﺬﻑ ﺃﺭﻗﺎﻡ ﺍﻟﺘﺤﻮﻳﻞ ﺍﻟﻤﺴﺠﻠﺔ ﻓﻲ ﺍﻟﺸﺒﻜﺔ ﺑﻌﺪ ﺗﺄﻛﻴﺪ ﺍﻟﻤﺴﺘﺨﺪﻡ .ﺍﻟﺼﻮﺗﻴﺔ...
- Page 39 ﺍﻟﻤﻜﺎﻟﻤﺎﺕ ﺣﻈﺮ ﺍﻟﻤﻜﺎﻟﻤﺎﺕ ﺍﻟﻤﻜﺎﻟﻤﺎﺕ ﺍﻟﺼﻮﺗﻴﺔ ٦-١ ﺍﻟﻘﺎﺋﻤﺔ ﻣﻜﺎﻟﻤﺎﺕ ﺍﻟﻔﻴﺪﻳﻮ .ﺗﺘﻮﻓﺮ ﻗﻮﺍﺋﻢ ﺣﻈﺮ ﺍﻟﻤﻜﺎﻟﻤﺎﺕ ﻟﻠﻤﻜﺎﻟﻤﺎﺕ ﺍﻟﺼﻮﺗﻴﺔ ﻭﻣﻜﺎﻟﻤﺎﺕ ﺍﻟﻔﻴﺪﻳﻮ ﻛﻞ ﺍﻟﺼﺎﺩﺭﺓ ﺗﺪﻋﻢUSIM ﻟﻜﻦ ﻳﺘﻢ ﺗﺤﺪﻳﺪ ﺍﻟﻘﻮﺍﺋﻢ ﺍﻟﻤﺘﺎﺣﺔ ﺑﻮﺍﺳﻄﺔ ﺑﻄﺎﻗﺔ .CPHS ﻣﻮﺍﺻﻔﺎﺕ ١. ﻋﻨﺪ ﺗﺤﺪﻳﺪ ﺍﻟﻤﻔﺘﺎﺡ ﻣﻮﺍﻓﻖ ﻳﺘﻢ ﺍﺳﺘﻼﻡ ﻛﻠﻤﺔ ﻣﺮﻭﺭ ﺍﻟﺤﻈﺮ ﻣﻦ ﺍﻟﻤﺴﺘﺨﺪﻡ...
- Page 40 ﺍﻟﻤﻜﺎﻟﻤﺎﺕ ﺍﻟﻮﺍﺭﺩﺓ ﺃﺛﻨﺎء ﺍﻟﺘﺠﻮﺍﻝ ﺍﻟﻌﻤﻠﻴﺔ ﻋﻨﺪ ﺇﺟﺎﺑﺔ ﺍﻟﺸﺒﻜﺔ. ﺗﺘﻴﺢ ﻗﺎﺋﻤﺔ ﻛﻠﻤﺔ ﻣﺮﻭﺭ ﺍﻟﺤﻈﺮ .ﻟﻠﻤﺴﺘﺨﺪﻣﻴﻦ ﺗﻐﻴﻴﺮ ﻛﻠﻤﺔ ﻣﺮﻭﺭ ﺍﻟﺤﻈﺮ ﺍﻟﺤﺎﻟﻴﺔ )ﻣﻮﺍﻓﻖ( ﺗﻌﻤﻞ ﻛﻤﺎ ﺍﻟﺤﺎﻝ ﻣﻊ ﻗﺎﺋﻤﺔOK ١. ﻋﻨﺪ ﺗﺤﺪﻳﺪ ﺍﻟﺰﺭ .ﺍﻟﻤﻜﺎﻟﻤﺎﺕ ﺍﻟﺼﺎﺩﺭﺓ ﺍﻟﺼﺎﺩﺭﺓ ﺍﻟﺪﻭﻟﻴﺔ ٢. ﻋﻨﺪ ﺗﺤﺪﻳﺪ ﻗﺎﺋﻤﺔ ﺧﻴﺎﺭﺍﺕ ﻳﺘﻢ ﺗﻨﺸﻴﻂ ﻗﺎﺋﻤﺔ ﺍﻟﻤﻜﺎﻟﻤﺎﺕ ﺍﻟﻮﺍﺭﺩﺓ ...
- Page 41 ﺍﻟﻤﻜﺎﻟﻤﺎﺕ ﺍﻧﺘﻈﺎﺭ ﺍﻟﻤﻜﺎﻟﻤﺎﺕ .٢. ﺍﺿﺒﻂ ﺧﻴﺎﺭ ﺭﻓﺾ ﺍﻟﻤﻜﺎﻟﻤﺎﺕ ﺍﻟﻤﻄﻠﻮﺏ ﻓﻲ ﻗﺎﺋﻤﺔ ﺭﻓﺾ ٨-١ ﺍﻟﻘﺎﺋﻤﺔ .ﺭﻓﺾ ﻛﻞ ﺍﻟﻤﻜﺎﻟﻤﺎﺕ: ﻟﺮﻓﺾ ﻛﺎﻓﺔ ﺍﻟﻤﻜﺎﻟﻤﺎﺕ ◄ ﺗﻨﺸﻴﻂ: ﻟﺘﻨﺸﻴﻂ ﺧﺪﻣﺔ ﺍﻻﻧﺘﻈﺎﺭ. ﻳﺆﺩﻱ ﺗﺤﺪﻳﺪ ﻫﺬﺍ ﺍﻟﺨﻴﺎﺭ ﺇﻟﻰ ◄ ﻋﺮﺽ ﺭﺳﺎﻟﺔ ﺍﻟﻄﻠﺐ ﻭﺍﻟﺮﺳﻢ ﺍﻟﻤﺘﺤﺮﻙ. ﻭﻋﻨﺪ ﺇﺟﺎﺑﺔ ﺍﻟﺸﺒﻜﺔ ﺟﻬﺎﺕ ﺍﺗﺼﺎﻝ: ﻟﺮﻓﺾ ﺍﻟﻤﻜﺎﻟﻤﺎﺕ ﺍﻟﻮﺍﺭﺩﺓ ﻣﻦ ﺭﻗﻢ ﻣﺤﻔﻮﻅ ◄...
- Page 42 ﻭﺿﻊ ﺍﻟﺮﺩ (٤-٩-١ )ﺍﻟﻘﺎﺋﻤﺔ ﻳﺘﻴﺢ ﺿﺒﻂ ﻃﺮﻳﻘﺔ ﺍﻟﺮﺩ. ﻭﻳﻤﻜﻦ ﺍﻻﺧﺘﻴﺎﺭ ﻣﺎ ﺑﻴﻦ ﺍﻟﻀﻐﻂ ﻋﻠﻰ .ﻣﻔﺘﺎﺡ ﺍﻹﺭﺳﺎﻝ ﻭﻓﺘﺢ ﺍﻟﻐﻄﺎء ﻭﺍﻟﻀﻐﻂ ﻋﻠﻰ ﺃﻱ ﻣﻔﺘﺎﺡ ﺗﺬﻛﻴﺮ ﻛﻞ ﺩﻗﻴﻘﺔ (٥-٩-١ )ﺍﻟﻘﺎﺋﻤﺔ ﻳﺤﺪﺩ ﺇﺻﺪﺍﺭ ﻧﻐﻤﺔ ﻭﺍﺣﺪﺓ ﻛﻞ ﻣﺮﺓ ﻋﻨﺪ ﻣﺮﻭﺭ ﺩﻗﻴﻘﺔ ﻭﺍﺣﺪﺓ ﺃﺛﻨﺎء .ﺍﻟﺘﺤﺪﺙ ﻓﻲ ﺍﻟﻬﺎﺗﻒ ﻣﻦ ﻋﺪﻣﻪ ﻭﺿﻊ...
- Page 43 ﺩﻓﺘﺮ ﺍﻟﻌﻨﺎﻭﻳﻦ ﺍﻟﺮﺋﻴﺴﻴﺔ ﻭﻧﻐﻤﺔ ﺍﻟﺮﻧﻴﻦ ﻭﺍﻟﺮﻣﺰ ﺃﻭ ﺍﻟﺼﻮﺭﺓ )ﺍﻟﻔﻮﺗﻮﻏﺮﺍﻓﻴﺔ( ﻓﻲ ﺗﻮﺟﺪ ﻭﻇﻴﻔﺔ ﺩﻓﺘﺮ ﺍﻟﻌﻨﺎﻭﻳﻦ ﺍﻟﺨﺎﺻﺔ ﺑﺘﺴﺠﻴﻞ ﻋﻨﺎﻭﻳﻦ ﺟﻬﺎﺕ ﻣﻌﻠﻮﻣﺎﺕ ﻋﻨﻮﺍﻥ ﺟﻬﺔ ﺍﻻﺗﺼﺎﻝ. ﻳﺘﺎﺡ ﺃﻳﻀ ً ﺎ ﺇﺩﺧﺎﻝ ﻋﻨﺎﻭﻳﻦ ﺟﻬﺎﺕ ﺍﻻﺗﺼﺎﻝ ﻭﺇﺩﺍﺭﺗﻬﺎ. ﺑﺎﺳﺘﺨﺪﺍﻡ ﻗﺎﺋﻤﺔ ﺇﺩﺍﺭﺓ ﺟﻬﺎﺕ ﺍﻻﺗﺼﺎﻝ، ﻳﻤﻜﻦ .ﺍﻻﺗﺼﺎﻝ ﻭﺍﻟﺘﺤﻜﻢ ﻓﻴﻬﺎ ﺣﺴﺐ ﺩﺭﺟﺔ ﺍﺳﺘﺨﺪﺍﻡ ﺍﻟﺬﺍﻛﺮﺓ ﺗﺴﺠﻴﻞ...
- Page 44 ﺇﻇﻬﺎﺭ ﺍﻟﺼﻮﺭﺓ / ﺍﻟﺮﻣﺰ ﺃﺭﻗﺎﻡ ﺍﻻﺗﺼﺎﻝ ﺑﺎﻟﺨﺪﻣﺔ (٢-٧-٢ )ﺍﻟﻘﺎﺋﻤﺔ .ﻳﺤﺪﺩ ﺇﻇﻬﺎﺭ ﺍﻟﺼﻮﺭﺓ / ﺍﻟﺮﻣﺰ ﻣﻦ ﻋﺪﻣﻪ (USIM )ﺣﺴﺐ ﺑﻄﺎﻗﺔ ٥-٢ ﺍﻟﻘﺎﺋﻤﺔ ( ﺍﻟﻤﺨﺼﺼﺔSDN) ﻳﻤﻜﻦ ﻋﺮﺽ ﻗﺎﺋﻤﺔ ﺑﺄﺭﻗﺎﻡ ﺍﻻﺗﺼﺎﻝ ﺑﺎﻟﺨﺪﻣﺔ ﻧﺴﺦ ﺍﻟﻜﻞ (٣-٧-٢ )ﺍﻟﻘﺎﺋﻤﺔ .( ﺗﺪﻋﻢ ﺫﻟﻚUSIM ﻣﻦ ﻗﺒﻞ ﻣ ُ ﻮﻓﺮ ﺍﻟﺨﺪﻣﺔ )ﺇﺫﺍ ﻛﺎﻧﺖ ﺑﻄﺎﻗﺔ ﻳﻤﻜﻦ...
- Page 45 ﺍﻹﻋﺪﺍﺩﺍﺕ ﺿﺒﻂ ﺍﻟﺘﺎﺭﻳﺦ ﺍﻟﺘﺎﺭﻳﺦ ﻭﺍﻟﻮﻗﺖ (٢-١-٣ )ﺍﻟﻘﺎﺋﻤﺔ ١-٣ ﺍﻟﻘﺎﺋﻤﺔ ١. ﺣﺪﺩ ﻋﻨﺼﺮ "ﺍﻟﺘﺎﺭﻳﺦ" ﻣﻦ ﻗﺎﺋﻤﺔ ﺍﻟﺘﺎﺭﻳﺦ ﻭﺍﻟﻮﻗﺖ ﻭﺍﺿﻐﻂ ﻋﻠﻰ ﺍﻟﺮﻏﻢ ﻣﻦ ﺃﻧﻪ ﺗﺘﻢ ﺗﻬﻴﺌﺔ ﺍﻟﻮﻗﺖ ﺍﻟﺤﺎﻟﻲ ﺁﻟ ﻴ ًﺎ ﻋﻨﺪ ﺗﺴﺠﻴﻞ .[ﻋﻠﻰ ]ﻣﻮﺍﻓﻖ ﺍﻟﻬﺎﺗﻒ ﻋﻠﻰ ﺍﻟﺸﺒﻜﺔ، ﻳﺴﺘﻄﻴﻊ ﺍﻟﻤﺴﺘﺨﺪﻣﻮﻥ ﺗﻬﻴﺌﺔ ﺍﻟﻮﻗﺖ ﻭﺍﻟﺘﺎﺭﻳﺦ ﻣﺒﺎﺷﺮ...
- Page 46 ﻗﺎﺋﻤﺔ ﺍﻟﻤﻔﻀﻠﺔ ﺍﻟﺸﺒﻜﺔ (٣-٢-٣ )ﺍﻟﻘﺎﺋﻤﺔ ٢-٣ ﺍﻟﻘﺎﺋﻤﺔ ﺇﺫﺍ ﻛﺎﻧﺖ ﺍﻟﺸﺒﻜﺔ ﺗﻘﻮﻡ ﺑﺈﺟﺮﺍء ﺍﻟﺒﺤﺚ ﺁﻟ ﻴ ًﺎ، ﻳﻤﻜﻨﻚ ﺇﺿﺎﻓﺔ ﺷﺒﻜﺔ ﺗﺤﺪﻳﺪ ﺍﻟﺸﺒﻜﺔ .ﻣ ُ ﻔﻀﻠﺔ ﻟﻼﺗﺼﺎﻝ ﺑﻬﺎ. ﻛﻤﺎ ﺗﺘﻮﻓﺮ ﺍﻟﺨﻴﺎﺭﺍﺕ ﺍﻵﺗﻴﺔ (١-٢-٣ )ﺍﻟﻘﺎﺋﻤﺔ .ﺍﺧﺘﺮ ﻣﺎ ﺑﻴﻦ ﺁﻟﻲ ﻭﻳﺪﻭﻱ ﺇﺿﺎﻓﺔ ﺟﺪﻳﺪﺓ: ﻳﻤﻜﻨﻚ ﺇﺿﺎﻓﺔ ﺷﺒﻜﺔ ﺟﺪﻳﺪﺓ ﺑﺎﺳﺘﺨﺪﺍﻡ ﺍﻟﺨﻴﺎﺭﺍﺕ ◄...
- Page 47 ﺍﻹﻋﺪﺍﺩﺍﺕ PIN ﻃﻠﺐ ﺭﻣﺰ .ﻳﻤﻜﻦ ﺗﻌﺪﻳﻞ ﻋﻨﺎﺻﺮ ﺍﻟﺘﻬﻴﺌﺔ ﺍﻟﺘﺎﻟﻴﺔ ﺑﺘﺤﺪﻳﺪ ﻣﻔﺘﺎﺡ ﺍﻻﺧﺘﻴﺎﺭ ﺍﻷﻳﻤﻦ (١-٤-٣ )ﺍﻟﻘﺎﺋﻤﺔ ﻋﻨﺪ ﺿﺒﻂ ﻫﺬﺍ ﺍﻟﺨﻴﺎﺭ ﻋﻠﻰ ﺗﺸﻐﻴﻞ، ﺗﺘﻢ ﻣﻄﺎﻟﺒﺘﻚ ﺑﺈﺩﺧﺎﻝ ﺭﻣﺰ .ﺍﺳﻢ ﻭﺿﻊ ﻧﻘﻄﺔ ﺍﻻﺗﺼﺎﻝ ﻋﻨﻮﺍﻥ ﺍﻻﺗﺼﺎﻝ . ﻛﻞ ﻣﺮﺓ ﻋﻨﺪ ﺗﺸﻐﻴﻞ ﺍﻟﻬﺎﺗﻒPIN .ﺍﺧﺘﺮ ﺍﻟﺤﺎﻣﻞ ﻣﻦ ﺍﻟﻘﺎﺋﻤﺔ ﺍﻟﺤﺎﻣﻞ...
- Page 48 .[ ﺍﻟﺠﺪﻳﺪ ﻭﺍﺿﻐﻂ ﻋﻠﻰ ]ﻣﻮﺍﻓﻖPIN ٣. ﺃﺩﺧﻞ ﺭﻣﺰ .ﻋﻨﺪ ﺗﺸﻐﻴﻞ ﺍﻟﻬﺎﺗﻒ: ﻳﻘﻔﻞ ﺍﻟﻬﺎﺗﻒ ﻛﻠﻤﺎ ﺗﻢ ﺗﺸﻐﻴﻠﻪ .[ ﺍﻟﺠﺪﻳﺪ ﻣﺮ ﺓ ً ﺃﺧﺮﻯ ﻭﺍﺿﻐﻂ ﻋﻠﻰ ]ﻣﻮﺍﻓﻖPIN ٤. ﺃﺩﺧﻞ ﺭﻣﺰ USIM : ﻳﻘﻔﻞ ﺍﻟﻬﺎﺗﻒ ﻋﻨﺪ ﺗﻐﻴﻴﺮ ﺑﻄﺎﻗﺔUSIM ﻋﻨﺪ ﺗﻐﻴﻴﺮ .ﺍﻟﺨﺎﺻﺔ ﺑﻪ ،٣ ﻣﺨﺘﻠﻔ ً ﺎ ﻋﻦ ﺫﻟﻚ ﺍﻟﻮﺍﺭﺩ ﻓﻲ ﺍﻟﺨﻄﻮﺓPIN - ﺇﺫﺍ ﻛﺎﻥ ﺭﻣﺰ .٣...
- Page 49 ﺍﻹﻋﺪﺍﺩﺍﺕ ﺣﺎﻟﺔ ﺍﻟﺬﺍﻛﺮﺓ PIN2 ﺭﻣﺰ ٦-٣ ﺍﻟﻘﺎﺋﻤﺔ ﻫﻮ ﺍﺧﺘﺼﺎﺭ ﻟﻜﻠﻤﺔ "ﺭﻗﻢ ﺍﻟﺘﻌﺮﻳﻒ ﺍﻟﺸﺨﺼﻲ ٢" ﻭﻫﻮPIN2 ﺍﻟﺬﺍﻛﺮﺓ ﺍﻟﻌﺎﻣﺔ ﻳ ُﺴﺘﺨﺪﻡ ﻟﻤﻨﻊ ﺍﻻﺳﺘﺨﺪﺍﻡ ﻏﻴﺮ ﺍﻟ ﻤ ُ ﺼﺮﺡ ﺑﻪ ﻟﻠﻬﺎﺗﻒ ﻛﻤﺎ ﺍﻟﺤﺎﻝ ﻣﻊ (١-٦-٣ )ﺍﻟﻘﺎﺋﻤﺔ ﻣﻤﺎﺛﻼ ً ﻟﺬﻟﻚ ﺍﻟ ﻤ ُ ﺘﺒﻊPIN2 . ﻳﻌﺪ ﺇﺟﺮﺍء ﺗﻐﻴﻴﺮ ﺭﻣﺰPIN ﺭﻣﺰ ﺗﻌﺮﺽ...
- Page 50 ﺇﻋﺪﺍﺩﺍﺕ ﺍﻟﺘﺪﻓﻖ ﺗﻬﻴﺌﺔ ﺍﻟﺬﺍﻛﺮﺓ ﺍﻟﺨﺎﺭﺟﻴﺔ (٥-٦-٣ )ﺍﻟﻘﺎﺋﻤﺔ ٩-٣ ﺍﻟﻘﺎﺋﻤﺔ .ﺣﺪﺩ ﻫﺬﻩ ﺍﻟﻮﻇﻴﻔﺔ ﻟﺘﻬﻴﺌﺔ ﺍﻟﺬﺍﻛﺮﺓ ﺍﻟﺨﺎﺭﺟﻴﺔ ،ﺇﺫﺍ ﺃﺭﺩﺕ ﺿﺒﻂ ﺇﻋﺪﺍﺩ ﺷﺒﻜﺔ ﻣﺨﺘﻠﻒ ﻟﺘﺸﻐﻴﻞ ﻣﺤﺘﻮﻯ ﻣﺘﺪﻓﻖ .ﻳﺘﺎﺡ ﻟﻚ ﺿﺒﻂ ﺇﻋﺪﺍﺩﺍﺕ ﺷﺒﻜﺔ ﻣﺨﺘﻠﻔﺔ ﻣﻌﻠﻮﻣﺎﺕ ﺣﻮﻝ ﺍﻟﻬﺎﺗﻒ ٧-٣ ﺍﻟﻘﺎﺋﻤﺔ ﻭﺍﺳﻢ ﺍﻟﻄﺮﺍﺯUSIM ﺗﻮﺿﺢ ﻫﺬﻩ ﺍﻟﻮﻇﻴﻔﺔ ﺭﻗﻢ ﻫﺎﺗﻒ ﺑﻄﺎﻗﺔ .ﻭﺇﺻﺪﺍﺭ...
- Page 51 ﺍﻟﻮﺳﺎﺋﻂ ﻛﺎﻣﻴﺮﺍ ﺍﻟﻔﻴﺪﻳﻮ MMS ﺍﻟﻤﺪﺓ: ﺣﺪﺩ ﻭﻗﺖ ﺍﻟﺘﺴﺠﻴﻞ ﺍﻟﻤﻄﻠﻮﺏ ﻣﻦ ﺑﻴﻦ ﺣﺠﻢ ◄ ١-٤ ﺍﻟﻘﺎﺋﻤﺔ )ﺣﻮﺍﻟﻲ ٥٢ ﺛﺎﻧﻴﺔ( ﻭ٠٣ ﺛﺎﻧﻴﺔ ﻭﺩﻗﻴﻘﺔ ﻭﺍﺣﺪﺓ ﻭﺩﻗﻴﻘﺘﺎﻥ ﻳﺘﻴﺢ ﻫﺬﺍ ﺍﻟﺘﻄﺒﻴﻖ ﺗﺴﺠﻴﻞ ﻣﻘﺎﻃﻊ ﺍﻟﻔﻴﺪﻳﻮ. ﻭﻳﻤﻜﻦ ﺗﺸﻐﻴﻞ ﻣﻠﻒ ﻓﻴﺪﻳﻮ .ﻭ٥ ﺩﻗﺎﺋﻖ ﻭ٠٦ ﺩﻗﻴﻘﺔ ،ﻣﺤﻔﻮﻅ ﻭﻣﺸﺎﻫﺪﺗﻪ ﻓﻲ ﻫﺬﻩ ﺍﻟﻘﺎﺋﻤﺔ. ﺑﻌﺪ ﺗﺴﺠﻴﻞ ﻣﻘﺎﻃﻊ ﺍﻟﻔﻴﺪﻳﻮ .ﺍﻟﺬﺍﻛﺮﺓ: ﺣﺪﺩ...
- Page 52 ﺍﻟﺠﻮﺩﺓ: ﻳﻤﻜﻨﻚ ﺗﺤﺪﻳﺪ ﺟﻮﺩﺓ ﺍﻟﺼﻮﺭ ﺍﻟﻤﻄﻠﻮﺑﺔ ﻣﻦ ﺑﻴﻦ ٤. ﻟﻌﺮﺽ ﻣﻘﺎﻃﻊ ﺍﻟﻔﻴﺪﻳﻮ ﺍﻟﻤﻮﺟﻮﺩﺓ، ﺍﺿﻐﻂ ﻋﻠﻰ ﻣﻔﺘﺎﺡ ﺍﻻﺧﺘﻴﺎﺭ ◄ .ﻣﻤﺘﺎﺯﺓ ﺃﻭ ﺟﻴﺪﺓ ﺃﻭ ﻋﺎﺩﻳﺔ ﺍﻷﻳﻤﻦ ]ﺍﻟﻤﺸﻐﻞ[. ﻳﺘﻢ ﻓﺘﺢ ﻣﺠﻠﺪ ﻣﻘﺎﻃﻊ ﺍﻟﻔﻴﺪﻳﻮ ﺍﻟﺬﻱ ﻳﻌﺮﺽ ﻣﻘﺎﻃﻊ ﺍﻟﻔﻴﺪﻳﻮ ﺍﻟﻤﻮﺟﻮﺩﺓ ﻋﻠﻰ ﻫﻴﺌﺔ ﺻﻮﺭ ﻣﺼﻐﺮﺓ. ﺍﻧﺘﻘﻞ ﻟﻘﻄﺎﺕ...
- Page 53 ﺍﻟﻮﺳﺎﺋﻂ .ﺍﻟﺬﺍﻛﺮﺓ: ﺣﺪﺩ ﺍﻟﺬﺍﻛﺮﺓ ﺍﻟﻤﻄﻠﻮﺑﺔ ﻣﻦ ﺑﻴﻦ ﻫﺎﺗﻒ ﻭﺧﺎﺭﺟﻴﺔ ◄ ﻣﻼﺣﻈﺔ ﺻﻮﺭﺓ ﻣﻌﻜﻮﺳﺔ: ﻳﻤﻜﻨﻚ ﺗﻨﺸﻴﻂ ﺗﺄﺛﻴﺮ ﺍﻟﺼﻮﺭﺓ ﺍﻟﻤﻌﻜﻮﺳﺔ ◄ ﻳﻤﻜﻨﻚ ﺍﻟﺘﺒﺪﻳﻞ ﺑﻴﻦ ﻛﺎﻣﻴﺮﺍ ﺍﻟﻔﻴﺪﻳﻮ ﻭﺍﻟﻜﺎﻣﻴﺮﺍ ﺑﺴﻬﻮﻟﺔ ﺑﻮﺍﺳﻄﺔ ◄ ."ﺑﺘﺤﺪﻳﺪ " ﺗﺸﻐﻴﻞ .ﻣﻔﺘﺎﺡ ﺍﻟﺘﻨﻘﻞ ﺍﻷﻳﺴﺮ/ ﺍﻷﻳﻤﻦ ﻓﻲ ﻭﺿﻊ ﺍﻟﻤﻌﺎﻳﻨﺔ ﺗﺒﺪﻳﻞ ﺍﻟﻜﺎﻣﻴﺮﺍ: ﻳﻤﻜﻨﻚ ﺿﺒﻂ ﺍﻟﻜﺎﻣﻴﺮﺍ ﻟﻠﺘﺒﺪﻳﻞ ﺑﻴﻦ ﺍﻟﻜﺎﻣﻴﺮﺍ ◄...
- Page 54 ﺳﻤﺔ ﺻﻮﺕ: ﻳﻤﻜﻨﻚ ﺿﺒﻄﻬﺎ ﻛﻨﻐﻤﺔ ﺭﻧﻴﻦ ﺻﻮﺗﻴﺔ ﺃﻭ ﻧﻐﻤﺔ ٢. ﻳﺆﺩﻱ ﺍﻟﻀﻐﻂ ﻋﻠﻰ ﻣﻔﺘﺎﺡ ]ﻣﻮﺍﻓﻖ[ ﺇﻟﻰ ﺑﺪء ﺍﻟﺘﺴﺠﻴﻞ. ﺑﻌﺪ ◄ .ﺭﻧﻴﻦ ﻓﻴﺪﻳﻮ ﺃﻭ ﻧﻐﻤﺔ ﺭﺳﺎﻟﺔ ﺃﻭ ﺻﻮﺕ ﺍﻟﺘﺸﻐﻴﻞ/ ﺇﻳﻘﺎﻑ ﺍﻟﺘﺸﻐﻴﻞ . ﻹﻟﻐﺎءLCD ﺑﺪء ﺍﻟﺘﺴﺠﻴﻞ، ﻳﻈﻬﺮ ﻭﻗﺖ ﺍﻟﺘﺴﺠﻴﻞ ﻋﻠﻰ ﺷﺎﺷﺔ .ﺍﻟﺘﺴﺠﻴﻞ، ﺍﺿﻐﻂ ﻋﻠﻰ ﻣﻔﺘﺎﺡ ﺍﻻﺧﺘﻴﺎﺭ ﺍﻷﻳﻤﻦ .ﻣﺘﻌﻠﻘﺎﺗﻲ: ﻳﻌﺮﺽ...
- Page 55 ﺍﻟﺮﺳﺎﺋﻞ ﺭﺳﺎﻟﺔ ﺟﺪﻳﺪﺓ .٧. ﺃﺩﺧﻞ ﺭﺳﺎﻟﺘﻚ ﻓﻲ ﺣﻘﻞ ﺍﻟﺮﺳﺎﻟﺔ ١-٥ ﺍﻟﻘﺎﺋﻤﺔ .٨. ﺍﺿﻐﻂ ﻋﻠﻰ ﻣﻔﺘﺎﺡ ﺍﻻﺧﺘﻴﺎﺭ ﺍﻷﻳﻤﻦ ]ﺇﺭﺳﺎﻝ[ ﻹﺭﺳﺎﻝ ﺍﻟﺮﺳﺎﻟﺔ ﺍﻟﺮﺳﺎﺋﻞ ﺍﻟﻨﺼﻴﺔ ﻭﺳﻴﺘﻢ ﺣﻔﻆ ﺍﻟﺮﺳﺎﻟﺔ ﻓﻲ ﺍﻟﻌﻨﺎﺻﺮ ﺍﻟ ﻤ ُ ﺮﺳﻠﺔ ﺁﻟ ﻴ ًﺎ. ﻓﻲ ﺣﺎﻟﺔ ﻋﺪﻡ (١-١-٥ )ﻗﺎﺋﻤﺔ ﺇﺭﺳﺎﻝ ﺍﻟﺮﺳﺎﻟﺔ، ﻓﺈﻧﻬﺎ ﺳﺘﻈﻞ ﻓﻲ ﺍﻟﺼﺎﺩﺭ ﻣﻊ ﺗﻮﺿﻴﺢ ﺣﺎﻟﺔ ﻳﻤﻜﻨﻚ...
- Page 56 #. ﻧﺴﺨﺔ/ ﺍﻟﻌﻨﻮﺍﻥ: ﺣﺪﺩ ﻫﺬﻩ ﺍﻟﻮﻇﻴﻔﺔ ﻹﺩﺭﺍﺝ ﻧﺴﺨﺔ ﻛﺮﺑﻮﻧﻴﺔ .٤. ﺭﻣﺰ ﺗﻌﺒﻴﺮﻱ: ﻹﺿﺎﻓﺔ ﺭﻣﺰ ﺗﻌﺒﻴﺮﻱ .ﺃﻭ ﻋﻨﻮﺍﻥ ٥. ﺟﻬﺎﺕ ﺍﻻﺗﺼﺎﻝ: ﺗﺘﺎﺡ ﺇﺿﺎﻓﺔ ﺍﺳﻢ ﻭ/ ﺃﻭ ﺭﻗﻢ ﻣﺤﻔﻮﻅ ﻓﻲ ﺩﻓﺘﺮ ﺍﻟﻌﻨﺎﻭﻳﻦ. ﺑﻌﺪ ﺗﺤﺪﻳﺪ ﺃﺣﺪ ﺍﻟﻌﻨﺎﺻﺮ ﻣﻦ ﺍﻻﺳﻢ ﻭﺍﻟﺮﻗﻢ ﻭﺍﻻﺳﻢ ﻣﻼﺣﻈﺔ )ﻣﻮﺍﻓﻖ(. ﻳﺘﻢ ﻓﺘﺢ ﺩﻓﺘﺮOK ﻭﺍﻟﺮﻗﻢ، ﺍﺿﻐﻂ ﻋﻠﻰ ﻣﻔﺘﺎﺡ ،ﻓﻲ...
- Page 57 ﺍﻟﺮﺳﺎﺋﻞ (٦. ﺻﻮﺭﺓ: ﻳﻤﻜﻨﻚ ﺇﺩﺭﺍﺝ ﺻﻮﺭﺓ. )ﺻﻮﺭﺓ ﻭﺍﺣﺪﺓ ﻟﻜﻞ ﺷﺮﻳﺤﺔ ٤. ﺃﺩﺧﻞ ﺃﺭﻗﺎﻡ ﺍﻟﻬﺎﺗﻒ ﻓﻲ ﺣﻘﻠﻲ "ﺇﻟﻰ" ﻭ"ﻧﺴﺨﺔ". ﺣﺪﺩ ( )ﻣﻮﺍﻓﻖOK ﺧﻴﺎﺭﺍﺕ ← ﺟﻬﺎﺕ ﺍﻻﺗﺼﺎﻝ ﺃﻭ ﺍﺿﻐﻂ ﻋﻠﻰ ٧. ﻓﻴﺪﻳﻮ: ﻳﻤﻜﻨﻚ ﺇﺩﺭﺍﺝ ﻣﻘﻄﻊ ﻓﻴﺪﻳﻮ. )ﻣﻘﻄﻊ ﻓﻴﺪﻳﻮ ﻭﺍﺣﺪ ﻟﻜﻞ ﻓﻲ ﺣﻘﻞ "ﺇﻟﻰ" ﺃﻭ "ﻧﺴﺨﺔ" ﻟﺘﺤﺪﻳﺪ ﺭﻗﻢ ﺍﻟﻬﺎﺗﻒ ﻣﻦ ﺟﻬﺎﺕ (ﺷﺮﻳﺤﺔ...
- Page 58 < > ﻗﻮﺍﺋﻢ ﺍﻟﺨﻴﺎﺭﺍﺕ ٨. ﺻﻮﺕ: ﻳﻤﻜﻨﻚ ﺇﺩﺭﺍﺝ ﻣﻠﻒ ﺻﻮﺗﻲ. )ﻣﻠﻒ ﺻﻮﺗﻲ ﻭﺍﺣﺪ (ﻟﻜﻞ ﺷﺮﻳﺤﺔ .ﺇﺩﺭﺍﺝ: ﻳﻤﻜﻨﻚ ﺇﺩﺭﺍﺝ ﺍﻟﻌﻨﺎﺻﺮ ﺍﻟﺘﺎﻟﻴﺔ ◄ ٩. ﺻﻮﺭﺓ ﺟﺪﻳﺪﺓ: ﺗ ُ ﻔﺘﺢ ﻭﺣﺪﺓ ﺍﻟﻜﺎﻣﻴﺮﺍ ﻭﻳﺘﺎﺡ ﻟﻚ ﺍﻟﺘﻘﺎﻁ .١. ﺷﺮﻳﺤﺔ ﺟﺪﻳﺪﺓ: ﺣﺪﺩ ﻫﺬﺍ ﺍﻟﺨﻴﺎﺭ ﻹﺿﺎﻓﺔ ﺷﺮﻳﺤﺔ ﺟﺪﻳﺪﺓ ﺻﻮﺭﺓ.
- Page 59 ﺍﻟﺮﺳﺎﺋﻞ ﻋﺮﺽ ﺍﻟﺮﺳﺎﺋﻞ ﺍﻟﻮﺳﺎﺋﻄﻴﺔ ﺇﺯﺍﻟﺔ: ﺣﺪﺩ ﻫﺬﻩ ﺍﻟﻘﺎﺋﻤﺔ ﻹﺯﺍﻟﺔ ﺍﻟﺸﺮﻳﺤﺔ ﺍﻟﺤﺎﻟﻴﺔ ﺃﻭ ﻋﻨﺼﺮ ◄ .ﻣﺮﻓﻖ ﺑﻬﺎ ﻟﻤﻌﺎﻳﻨﺔ ﺍﻟﺮﺳﺎﺋﻞ ﺍﻟﻮﺳﺎﺋﻄﻴﺔ ﺍﻧﺘﻘﺎﻝ ﺇﻟﻰ ﺍﻟﺸﺮﻳﺤﺔ: ﺣﺪﺩ ﻫﺬﻩ ﺍﻟﻘﺎﺋﻤﺔ ﻟﻼﻧﺘﻘﺎﻝ ﺇﻟﻰ ﺍﻟﺸﺮﻳﺤﺔ ◄ ١. ﺣﺪﺩ ﻣﻌﺎﻳﻨﺔ ﻣﻦ ﻗﺎﺋﻤﺔ ﺧﻴﺎﺭﺍﺕ ﻟﻤﻌﺎﻳﻨﺔ ﺍﻟﺮﺳﺎﻟﺔ ﺍﻟﻮﺳﺎﺋﻄﻴﺔ .ﺍﻟﺴﺎﺑﻘﺔ ﺃﻭ ﺍﻟﺘﺎﻟﻴﺔ .ﺍﻟﺘﻲ...
- Page 60 .ﺗﻮﺟﻴﻪ: ﻟﺘﻮﺟﻴﻪ ﺍﻟﺮﺳﺎﻟﺔ ﺍﻟﻤﺤﺪﺩﺓ ﻛﺘﻢ ﺍﻟﺼﻮﺕ )ﺃﻭ ﺇﻟﻐﺎء ﻛﺘﻢ ﺍﻟﺼﻮﺕ(: ﺗﺘﻴﺢ ﻫﺬﻩ ﺍﻟﻘﺎﺋﻤﺔ ﺗﺤﺪﻳﺪ ◄ ◄ ﺇﻣﻜﺎﻧﻴﺔ ﻛﺘﻢ ﺍﻟﺼﻮﺕ ﻋﻨﺪ ﺍﺣﺘﻮﺍء ﺍﻟﺮﺳﺎﻟﺔ ﻋﻠﻰ ﻣﻠﻒ ﺻﻮﺕ .ﺍﺗﺼﺎﻝ: ﻳﺘﻢ ﺍﻻﺗﺼﺎﻝ ﺑ ﻤ ُ ﺮﺳﻞ ﺍﻟﺮﺳﺎﻟﺔ ◄ .ﺃﻭ ﻓﻴﺪﻳﻮ .ﺣﻔﻆ ﻋﻨﻮﺍﻥ: ﻳﺤﻔﻆ ﺭﻗﻢ ﺍﻟ ﻤ ُ ﺮﺳﻞ ﻓﻲ ﺩﻓﺘﺮ ﺍﻟﻌﻨﺎﻭﻳﻦ ◄...
- Page 61 ﺍﻟﺮﺳﺎﺋﻞ [] ﻗﺎﺋﻤﺘﺎ ﺍﻟﺼﺎﺩﺭ/ ﺷﺎﺷﺔ ﺍﻟﻌﺮﺽ ﺍﻟﺘﻔﺼﻴﻠﻲ .ﺗﻮﺟﻴﻪ: ﻟﺘﻮﺟﻴﻪ ﺍﻟﺮﺳﺎﻟﺔ ﺍﻟﻤﺤﺪﺩﺓ ◄ .ﺇﻋﺎﺩﺓ ﺇﺭﺳﺎﻝ: ﻹﻋﺎﺩﺓ ﺇﺭﺳﺎﻝ ﺍﻟﺮﺳﺎﻟﺔ .ﺍﺗﺼﺎﻝ: ﻳﺘﻢ ﺍﻻﺗﺼﺎﻝ ﺑ ﻤ ُ ﺮﺳﻞ ﺍﻟﺮﺳﺎﻟﺔ ◄ ◄ .ﺗﻌﺪﻳﻞ: ﻟﺘﻌﺪﻳﻞ ﺍﻟﺮﺳﺎﻟﺔ ﺍﻟﻤﺤﺪﺩﺓ .ﺣﻔﻆ ﻋﻨﻮﺍﻥ: ﻳﺤﻔﻆ ﺭﻗﻢ ﺍﻟ ﻤ ُ ﺮﺳﻞ ﻓﻲ ﺩﻓﺘﺮ ﺍﻟﻌﻨﺎﻭﻳﻦ ◄...
- Page 62 []ﺻﻨﺪﻭﻕ ﺍﻟﺼﺎﺩﺭ/ ﺗﺸﻐﻴﻞ ﻗﻮﺍﺋﻢ ﺍﻟﺸﺎﺷﺔ .ﺣﺬﻑ: ﻟﺤﺬﻑ ﺍﻟﺮﺳﺎﻟﺔ ﺍﻟﻤﺤﺪﺩﺓ ◄ .ﻧﻘﻞ ﺇﻟﻰ ﺍﻟﺸﺮﻳﺤﺔ: ﻟﻠﻨﻘﻞ ﺇﻟﻰ ﺍﻟﺸﺮﻳﺤﺔ ﺍﻟﻤﺤﺪﺩﺓ .ﺇﻋﺎﺩﺓ ﺇﺭﺳﺎﻝ: ﻹﻋﺎﺩﺓ ﺇﺭﺳﺎﻝ ﺍﻟﺮﺳﺎﻟﺔ ◄ ◄ ﻋﺮﺽ ﺍﻟﺘﻔﺎﺻﻴﻞ: ﻟﻌﺮﺽ ﺷﺎﺷﺔ ﺍﻟﻌﺮﺽ ﺍﻟﻤﻔﺼﻠﺔ. ﺗﻌﺮﺽ .ﺗﻌﺪﻳﻞ: ﻟﺘﻌﺪﻳﻞ ﺍﻟﺮﺳﺎﻟﺔ ﺍﻟﻤﺤﺪﺩﺓ ◄ ◄ .ﻟﻚ ﻣﻌﻠﻮﻣﺎﺕ ﻣﻔﺼﻠﺔ ﻋﻦ ﺍﻟﺮﺳﺎﺋﻞ ﺗﺸﻐﻴﻞ/ ﺇﻳﻘﺎﻑ...
- Page 63 ﺍﻟﺮﺳﺎﺋﻞ (ﻋﺮﺽ ﻋﻨﺎﺻﺮ: ﻳﻌﺮﺽ ﺍﻟﺸﺎﺷﺔ )ﺷﺎﺷﺔ ﻋﺮﺽ ﺍﻟﻌﻨﺼﺮ (ﻋﺮﺽ ﺍﻟﻌﻨﺎﺻﺮ: ﻳﻌﺮﺽ ﺍﻟﺸﺎﺷﺔ )ﺷﺎﺷﺔ ﻋﺮﺽ ﺍﻟﻌﻨﺼﺮ ◄ ◄ ﺍﻟﺘﻲ ﺗﺴﺘﻄﻴﻊ ﻓﻴﻬﺎ ﻋﺮﺽ ﻣﻠﻔﺎﺕ ﺍﻟﻔﻴﺪﻳﻮ ﻭﺍﻟﺼﻮﺭﺓ ﻭﺍﻟﺼﻮﺕ ﺍﻟﺘﻲ ﺗﺴﺘﻄﻴﻊ ﻓﻴﻬﺎ ﻋﺮﺽ ﻣﻠﻔﺎﺕ ﺍﻟﻔﻴﺪﻳﻮ ﻭﺍﻟﺼﻮﺭﺓ ﻭﺍﻟﺼﻮﺕ ﺍﻟﻤﻀﻤﻨﺔ ﻓﻲ ﺍﻟﺮﺳﺎﻟﺔ. ﻳﻤﻜﻨﻚ ﺃﻳﻀ ً ﺎ ﺣﻔﻆ ﻫﺬﻩ ﺍﻟﻤﻠﻔﺎﺕ ﺑﺄﺳﻤﺎء .ﺍﻟﻤﻀﻤﻨﺔ...
- Page 64 ﺑﺮﻳﺪ ﺇﻟﻜﺘﺮﻭﻧﻲ ٧. ﻹﺩﺧﺎﻝ ﺑﻴﺎﻧﺎﺕ ﻓﻲ ﺣﻘﻮﻝ ﺍﻟﻤﺴﺘﻠﻢ )ﺇﻟﻰ( ﻭﻋﻨﻮﺍﻥ ﺍﻟﻤﺮﺟﻊ (٤-١-٥ )ﺍﻟﻘﺎﺋﻤﺔ )ﻧﺴﺨﺔ ﻛﺮﺑﻮﻧﻴﺔ( ﻭﻋﻨﻮﺍﻥ ﺍﻟﻤﺮﺟﻊ ﺍﻟﻤﺨﻔﻲ )ﻧﺴﺨﺔ ﻛﺮﺑﻮﻧﻴﺔ ﺇﻧﺸﺎء ﺑﺮﻳﺪ ﺇﻟﻜﺘﺮﻭﻧﻲ ﻣﺨﻔﻴﺔ(، ﻳﻤﻜﻨﻚ ﺍﻟﺒﺤﺚ ﻓﻲ ﺟﻬﺎﺕ ﺍﻻﺗﺼﺎﻝ ﺑﺎﺳﺘﺨﺪﺍﻡ ﻣﻔﺘﺎﺡ ﺟﻬﺎﺕ ﺍﻻﺗﺼﺎﻝ ﻭﺍﺳﺘﺨﺪﻡ ﺍﻟﻮﻇﺎﺋﻒ ﺍﻟﺘﺎﻟﻴﺔ ﺑﺎﺳﺘﺨﺪﺍﻡ ﺍﻟﻤﻔﺘﺎﺡ .ﻳﻤﻜﻨﻚ ﺇﻧﺸﺎء ﺑﺮﻳﺪ ﺇﻟﻜﺘﺮﻭﻧﻲ ﺟﺪﻳﺪ .[]ﺧﻴﺎﺭﺍﺕ...
- Page 65 ﺍﻟﺮﺳﺎﺋﻞ .ﺇﺯﺍﻟﺔ: ﻹﺯﺍﻟﺔ ﺍﻟﻤﻠﻒ ﺍﻟﻤﺮﻓﻖ ﺣﻔﻆ ﺇﻟﻰ ﺍﻟﻤﺴﻮﺩﺍﺕ: ﺣﺪﺩ ﻫﺬﻩ ﺍﻟﻘﺎﺋﻤﺔ ﻟﺤﻔﻆ ﺍﻟﺮﺳﺎﻟﺔ ﻓﻲ ◄ ◄ .ﺻﻨﺪﻭﻕ ﺍﻟﻤﺴﻮﺩﺍﺕ .ﺇﻟﻐﺎء: ﻟﻠﺨﺮﻭﺝ ﻣﻦ ﻣﺆﻟﻒ ﺭﺳﺎﺋﻞ ﺍﻟﺒﺮﻳﺪ ﺍﻹﻟﻜﺘﺮﻭﻧﻲ ◄ .ﻋﺮﺽ ﻋﻨﺼﺮ: ﻟﻌﺮﺽ ﺍﻟﻤﻠﻒ ﺍﻟﻤﺮﻓﻖ ◄ ٠١. ﻋﻨﺪ ﺍﻻﻧﺘﻬﺎء ﻣﻦ ﻛﺘﺎﺑﺔ ﺑﺮﻳﺪ ﺇﻟﻜﺘﺮﻭﻧﻲ، ﺍﺿﻐﻂ ﻋﻠﻰ ﺍﻟﻤﻔﺘﺎﺡ ."ﺇﺭﺳﺎﻝ"...
- Page 66 .ﺭﺩ ﻋﻠﻰ ﺍﻟﻜﻞ: ﻹﻧﺸﺎء ﺭﺩ ﻋﻠﻰ ﻛﻞ ﺍﻟﻤﺴﺘﻠﻤﻴﻦ .ﻋﺮﺽ: ﻳﻤﻜﻨﻚ ﻋﺮﺽ ﺍﻟﺮﺳﺎﻟﺔ ﺍﻟﺤﺎﻟﻴﺔ ◄ ◄ ﺗﻮﺟﻴﻪ: ﻟﺘﻮﺟﻴﻪ ﺭﺳﺎﻟﺔ ﺍﻟﺒﺮﻳﺪ ﺍﻹﻟﻜﺘﺮﻭﻧﻲ ﺍﻟﻤﺤﺪﺩﺓ ﺇﻟﻰ .ﺭﺳﺎﻟﺔ ﺟﺪﻳﺪﺓ: ﻳﻤﻜﻨﻚ ﻛﺘﺎﺑﺔ ﺭﺳﺎﻟﺔ ﺟﺪﻳﺪﺓ ◄ ◄ .ﻋﻨﻮﺍﻥ ﺑﺮﻳﺪ ﺇﻟﻜﺘﺮﻭﻧﻲ ﺁﺧﺮ ﺗﺤﺪﻳﺪ/ ﺇﻟﻐﺎء ﺗﺤﺪﻳﺪ: ﻳﻤﻜﻨﻚ ﺗﺤﺪﻳﺪ ﺭﺳﺎﻟﺔ ﻭﺍﺣﺪﺓ ﺃﻭ ﺃﻛﺜﺮ ◄...
- Page 67 ﺍﻟﺮﺳﺎﺋﻞ ٤. ﺍﺿﻐﻂ ﻋﻠﻰ ﺍﻟﻤﻔﺘﺎﺡ ﺍﺳﺘﻌﺎﺩﺓ ﻻﺳﺘﻌﺎﺩﺓ ﺭﺳﺎﻟﺔ ﺑﺮﻳﺪ ﺇﻟﻜﺘﺮﻭﻧﻲ .ﺭﺩ: ﻹﻧﺸﺎء ﺭﺩ ﻋﻠﻰ ﺭﺳﺎﻟﺔ ﺍﻟﺒﺮﻳﺪ ﺍﻹﻟﻜﺘﺮﻭﻧﻲ ﺍﻟﻤﺤﺪﺩﺓ ◄ .ﻣﺤﺬﻭﻓﺔ .ﺭﺩ ﻋﻠﻰ ﺍﻟﻜﻞ: ﻹﻧﺸﺎء ﺭﺩ ﻋﻠﻰ ﻛﻞ ﺍﻟﻤﺴﺘﻠﻤﻴﻦ ◄ .٥. ﺑﺎﺳﺘﺨﺪﺍﻡ ﺍﻟﻤﻔﺘﺎﺡ ﺧﻴﺎﺭ، ﻳﻤﻜﻨﻚ ﺗﺤﺪﻳﺪ ﺍﻟﻮﻇﺎﺋﻒ ﺍﻟﺘﺎﻟﻴﺔ ﺗﻮﺟﻴﻪ: ﻟﺘﻮﺟﻴﻪ ﺭﺳﺎﻟﺔ ﺍﻟﺒﺮﻳﺪ ﺍﻹﻟﻜﺘﺮﻭﻧﻲ ﺍﻟﻤﺤﺪﺩﺓ ﺇﻟﻰ ◄...
- Page 68 .ﻋﺮﺽ ﺍﻟﺤﺎﻟﺔ: ﻟﻌﺮﺽ ﺳﺒﺐ ﻓﺸﻞ ﺍﻹﺭﺳﺎﻝ .ﺣﺬﻑ: ﻟﺤﺬﻑ ﺍﻟﺮﺳﺎﻟﺔ ﺍﻟﺤﺎﻟﻴﺔ ◄ ◄ ﺗﺤﺪﻳﺪ/ ﺇﻟﻐﺎء ﺗﺤﺪﻳﺪ: ﻳﻤﻜﻨﻚ ﺗﺤﺪﻳﺪ ﺭﺳﺎﻟﺔ ﻭﺍﺣﺪﺓ ﺃﻭ ﺃﻛﺜﺮ ◄ ﺻﻨﺪﻭﻕ ﺍﻟﺼﺎﺩﺭ .ﻟﻠﺤﺬﻑ ﺍﻟﻤﺘﻌﺪﺩ ٥-٥ ﺍﻟﻘﺎﺋﻤﺔ .ﻣﺮﺷﺢ: ﻳﻌﺮﺽ ﺍﻟﺮﺳﺎﺋﻞ ﺣﺴﺐ ﺍﻷﻧﻮﺍﻉ ﺍﻟﻤﻄﻠﻮﺑﺔ ﺻﻨﺪﻭﻕ ﺍﻟﺼﺎﺩﺭ ﻋﺒﺎﺭﺓ ﻋﻦ ﻣﺨﺰﻥ ﻣﺆﻗﺖ ﻟﻠﺮﺳﺎﺋﻞ ﺍﻟﻤﻨﺘﻈﺮﺓ ﻟﻴﺘﻢ ◄...
- Page 69 ﺍﻟﺮﺳﺎﺋﻞ ﺍﻻﻋﺪﺍﺩﺍﺕ .ﺣﻔﻆ ﻋﻨﻮﺍﻥ: ﻟﺤﻔﻆ ﺭﻗﻢ ﺍﻟﻤﺴﺘﻠﻢ ﻓﻲ ﺩﻓﺘﺮ ﺍﻟﻌﻨﺎﻭﻳﻦ ◄ ٩-٥ ﺍﻟﻘﺎﺋﻤﺔ ﺗﺤﺪﻳﺪ/ ﺇﻟﻐﺎء ﺗﺤﺪﻳﺪ: ﻳﻤﻜﻨﻚ ﺗﺤﺪﻳﺪ ﺭﺳﺎﻟﺔ ﻭﺍﺣﺪﺓ ﺃﻭ ﺃﻛﺜﺮ ◄ ﺭﺳﺎﻟﺔ ﻧﺼﻴﺔ .ﻟﻠﺤﺬﻑ ﺍﻟﻤﺘﻌﺪﺩ (١-٩-٥ )ﺍﻟﻘﺎﺋﻤﺔ .ﻣﺮﺷﺢ: ﻳﻌﺮﺽ ﺍﻟﺮﺳﺎﺋﻞ ﺣﺴﺐ ﺍﻷﻧﻮﺍﻉ ﺍﻟﻤﻄﻠﻮﺑﺔ ﻣﺮﻛﺰ ﺍﻟﺮﺳﺎﺋﻞ ◄ .• ﺃﺩﺧﻞ ﻋﻨﻮﺍﻥ ﻣﺮﻛﺰ ﺍﻟﺮﺳﺎﺋﻞ ﺍﻟﻨﺼﻴﺔ .ﺣﺬﻑ: ﻟﺤﺬﻑ...
- Page 70 ٥. ﻓﺘﺮﺓ ﺍﻟﺼﻼﺣﻴﺔ: ﻳﺴﻤﺢ ﺑﺘﻬﻴﺌﺔ ﻣﺪﺓ ﺍﻟﺼﻼﺣﻴﺔ ﻟﺮﺳﺎﻟﺔ ﻋﻨﺪ ﻃﻠﺐ ﺗﻘﺮﻳﺮ: ﻳﺤﺪﺩ ﻃﻠﺐ ﺭﺳﺎﻟﺔ ﺑﺮﻳﺪ ﻟﺘﺄﻛﻴﺪ ﺗﺴﻠﻴﻢ ﺭﺳﺎﻟﺔ ◄ ﺇﺭﺳﺎﻝ ﺭﺳﺎﻟﺔ ﻭﺳﺎﺋﻂ. ﺳﻴﺘﻢ ﺣﻔﻆ ﺍﻟﺮﺳﺎﻟﺔ ﻓﻲ ﺧﺎﺩﻡ ﺍﻟﺮﺳﺎﺋﻞ .ﺍﻟﻮﺳﺎﺋﻂ ﺍﻟﻤﺘﻌﺪﺩﺓ ﻣﻦ ﻋﺪﻣﻪ .ﺍﻟﻮﺳﺎﺋﻄﻴﺔ ﻓﻘﻂ ﻟﻠﻔﺘﺮﺓ ﺍﻟﺘﻲ ﺗﻢ ﺗﻬﻴﺌﺘﻬﺎ ﺍﻟﺴﻤﺎﺡ ﺑﺘﻘﺮﻳﺮ: ﻳﺤﺪﺩ ﺍﻟﺴﻤﺎﺡ ﺑﺈﺭﺳﺎﻝ ﺭﺳﺎﻟﺔ ﺑﺮﻳﺪ ﻟﺘﺄﻛﻴﺪ ◄...
- Page 71 ﺍﻟﺮﺳﺎﺋﻞ ١. ﺍﻟﺴﻤﺎﺡ ﺑﺒﺮﻳﺪ ﺇﻟﻜﺘﺮﻭﻧﻲ ﻟﻠﺮﺩ: ﻳﺤﺪﺩ ﺍﻟﺴﻤﺎﺡ ﺑﺈﺭﺳﺎﻝ ﺭﺳﺎﻟﺔ ﺍﻟﺘﻌﺪﻳﻞ ﺑﺎﻟﻀﻐﻂ ﻋﻠﻰ ﺍﻟﻤﻔﺘﺎﺡ ﺗﻌﺪﻳﻞ. ﺗﻈﻬﺮ ﺷﺎﺷﺔ ﺍﻟﺘﻌﺪﻳﻞ .ﺃﻳﻀ ً ﺎ ﻋﻨﺪ ﺇﻧﺸﺎء ﻭﺿﻊ ﺟﺪﻳﺪ ﻓﻲ ﺍﻟﺨﻴﺎﺭﺍﺕ. ﻓﻴﻤﺎ ﻳﻠﻲ ﻣﻌﺎﻧﻲ ﺍﻟﻌﻨﺎﺻﺮ ﺑﺮﻳﺪ ﺇﻟﻜﺘﺮﻭﻧﻲ ﻟﺘﺄﻛﻴﺪ ﺍﻟﻘﺮﺍءﺓ ﻟﻄﻠﺐ ﺭﺳﺎﻟﺔ ﺑﺮﻳﺪ ﺇﻟﻜﺘﺮﻭﻧﻲ .ﻟﺘﺄﻛﻴﺪ ﺍﻟﻘﺮﺍءﺓ ﻣﻦ ﻋﺪﻣﻪ .ﻋﻨﻮﺍﻥ: ﺍﺳﻢ...
- Page 72 ٦. ﺣﺮﻙ ﺍﻟﻤﺆﺷﺮ ﺇﻟﻰ ﺣﻘﻞ ﻋﻨﻮﺍﻥ ﺍﻟﺒﺮﻳﺪ ﺍﻹﻟﻜﺘﺮﻭﻧﻲ ﻭﻗﻢ ﺑﺘﻬﻴﺌﺔ ٥. ﺣﺴﺎﺑﺎﺕ ﺍﻟﺒﺮﻳﺪ ﺍﻹﻟﻜﺘﺮﻭﻧﻲ .ﻋﻨﻮﺍﻥ ﺍﻟﺒﺮﻳﺪ ﺍﻹﻟﻜﺘﺮﻭﻧﻲ ﻟﻠﺒﺮﻳﺪ ﺍﻟﺼﺎﺩﺭ ١. ﻳﻤﻜﻨﻚ ﺇﻧﺸﺎء ﻭﺗﻬﻴﺌﺔ ﺣﺴﺎﺏ ﺑﺮﻳﺪ ﺇﻟﻜﺘﺮﻭﻧﻲ، ﻭﻳﺸﺘﻤﻞ ﺫﻟﻚ "٧. ﺣﺮﻙ ﺍﻟﻤﺆﺷﺮ ﺇﻟﻰ ﺣﻘﻞ ﻋﻨﻮﺍﻥ ﺍﻟﺒﺮﻳﺪ ﺍﻹﻟﻜﺘﺮﻭﻧﻲ ﻟـ "ﺭﺩ .ﻋﻠﻰ ﺧﺎﺩﻡ ﺍﻟﺒﺮﻳﺪ ﺍﻹﻟﻜﺘﺮﻭﻧﻲ ﻭﻣﻌﺮﻑ ﺍﻟﻤﺴﺘﺨﺪﻡ ﻭﻗﻢ...
- Page 73 ﺍﻟﺮﺳﺎﺋﻞ ﻭﺣﺪﺩ ﻣﺎ ﺇﺫﺍSMTP ٨١. ﺣﺮﻙ ﺍﻟﻤﺆﺷﺮ ﺇﻟﻰ ﺣﻘﻞ ﻣﺼﺎﺩﻗﺔ ٣١. ﺣﺮﻙ ﺍﻟﻤﺆﺷﺮ ﺇﻟﻰ ﻧﻮﻉ ﺻﻨﺪﻭﻕ ﺍﻟﺒﺮﻳﺪ ﻭﺣﺪﺩ ﻧﻮﻉ ﻭﺍﺭﺩ ﺍﻟﺒﺮﻳﺪ ﻛﺎﻥ ﺧﺎﺩﻡ ﺍﻟﺒﺮﻳﺪ ﺍﻟﺼﺎﺩﺭ ﻳﺘﻄﻠﺐ ﻣﺼﺎﺩﻗﺔ ﻣﻦ ﻋﺪﻣﻪ. ﻳﻤﻜﻨﻚ .IMAP4 ﻭPOP3 ﺍﻹﻟﻜﺘﺮﻭﻧﻲ. ﻳﻤﻜﻨﻚ ﺍﻟﺘﺤﺪﻳﺪ ﻣﻦ ﺑﻴﻦ ﺗﺤﺪﻳﺪ ﺗﺸﻐﻴﻞ ﺃﻭ ﺇﻳﻘﺎﻑ ﺑﺎﺳﺘﺨﺪﺍﻡ ﻣﻔﺘﺎﺡ ﺍﻟﻘﺎﺋﻤﺔ. ﻋﻨﺪ ﺿﺒﻂ ٤١.
- Page 74 ﺑﺮﻳﺪ ﺍﻟﻔﻴﺪﻳﻮ (٤-٩-٥ )ﺍﻟﻘﺎﺋﻤﺔ .ﻳﻤﻜﻨﻚ ﺇﺿﺎﻓﺔ ﺃﻭ ﺗﻌﺪﻳﻞ ﻣﺮﻛﺰ ﺑﺮﻳﺪ ﺍﻟﻔﻴﺪﻳﻮ ﺍﻟﺒﺮﻳﺪ ﺍﻟﺼﻮﺗﻲ (٥-٩-٥ )ﺍﻟﻘﺎﺋﻤﺔ .ﻳﻤﻜﻨﻚ ﺇﺿﺎﻓﺔ ﺃﻭ ﺗﻌﺪﻳﻞ ﻣﺮﻛﺰ ﺑﺮﻳﺪ ﺍﻟﻔﻴﺪﻳﻮ ﺭﺳﺎﺋﻞ ﺍﻟﺨﺪﻣﺔ (٦-٩-٥ )ﺍﻟﻘﺎﺋﻤﺔ .ﻳﻤﻜﻨﻚ ﺗﻬﻴﺌﺔ ﺧﻴﺎﺭ ﺍﺳﺘﻼﻡ ﺭﺳﺎﻟﺔ ﺍﻟﺨﺪﻣﺔ .ﻏﻴﺮ ﻣﺴﻤﻮﺡ: ﻟﻦ ﻳﺴﺘﻘﺒﻞ ﺍﻟﻬﺎﺗﻒ ﺃﻱ ﺭﺳﺎﺋﻞ ﺧﺪﻣﺔ ◄...
- Page 75 ﺍﻟﻤﺘﺼﻔﺢ ﺍﻟﺼﻔﺤﺎﺕ ﺍﻟﻤﺤﻔﻮﻇﺔ ﺍﻟﺼﻔﺤﺔ ﺍﻟﺮﺋﻴﺴﻴﺔ ٣ ﺍﻟﻘﺎﺋﻤﺔ ٦ ־ ١-٦ ﺍﻟﻘﺎﺋﻤﺔ ﻳﺴﺘﻄﻴﻊ ﺍﻟﻬﺎﺗﻒ ﺣﻔﻆ ﺍﻟﺼﻔﺤﺔ ﺍﻟﺘﻲ ﺗﻮﺟﺪ ﻋﻠﻰ ﺍﻟﺸﺎﺷﺔ ﻛﻤﻠﻒ ﺩﻭﻥ ﻳﻤﻜﻨﻚ ﺑﺪء ﻣﺴﺘﻌﺮﺽ ﺍﻟﻮﻳﺐ ﻭﺍﻟﻮﺻﻮﻝ ﺇﻟﻰ ﺍﻟﺼﻔﺤﺔ ﺍﻟﺮﺋﻴﺴﻴﺔ ﻟﺨﺪﻣﺔ .ﺍﻻﺗﺼﺎﻝ ﺑﺎﻹﻧﺘﺮﻧﺖ. ﻳﻤﻜﻦ ﺣﻔﻆ ٠٢ ﺻﻔﺤﺔ ﻛﺤﺪ ﺃﻗﺼﻰ .ﺍﻟﻮﻳﺐ ﺍﻟﺘﻲ ﻳﻘﺪﻣﻬﺎ ﻣﺰﻭﺩ ﺍﻟﺨﺪﻣﺔ ﻳﻤﻜﻨﻚ...
- Page 76 ﺍﻟﺸﻬﺎﺩﺍﺕ Unicode(UTF-16 LE) ﻭUnicode(UTF-16 BE)ﻭ .Unicode(UTF-8) ﻭUnicode(UTF-16 Auto)ﻭ /ﺇﺫﺍ ﻛﺎﻧﺖ ﺍﻟﺠﻠﺴﺔ ﻣﺨﺰﻧﺔ، ﻓﻴﻤﻜﻦ ﺍﻟﻌﺜﻮﺭ ﻋﻠﻰ ﺍﻟﺸﻬﺎﺩﺍﺕ ﺍﻷﺳﺎﺳﻴﺔ ﻫﻨﺎ. ﻳﻤﻜﻦ ﻋﺮﺽWTLS /TLS ﺷﻬﺎﺩﺍﺕ ﻣﺮﺟﻊ ﻣﺼﺪﻕ ﻟـ ﺍﻟﺘﺤﻜﻢ ﻓﻲ ﺍﻟﺘﻤﺮﻳﺮ (٣ )ﺍﻟﻘﺎﺋﻤﺔ ٦ ־ ٦ ־ .ﺍﻟﺸﻬﺎﺩﺍﺕ ﻣﻦ ﺍﻟﻘﺎﺋﻤﺔ .ﻳﺴﻤﺢ ﺑﻀﺒﻂ ﺳﺮﻋﺔ ﺍﻟﺘﻤﺮﻳﺮ ﻋﻦ ﻃﺮﻳﻖ ﺗﺤﺪﻳﺪ ﻋﺪﺩ ﺍﻟﺨﻄﻮﻁ ﻟﻠﺘﻤﺮﻳﺮ ﻣﺴﺢ...
- Page 77 ﺍﻟﻤﺴﺘﻌﺮﺽ ﻣﻠﻔﺎﺕ ﺗﻌﺮﻳﻒ ﺍﻻﺭﺗﺒﺎﻁ (٦ )ﺍﻟﻘﺎﺋﻤﺔ ٦ ־ ٦ ־ ﺗﻤﻜﻴﻦ ﻣﻠﻔﺎﺕ ﺗﻌﺮﻳﻒ ﺍﻻﺭﺗﺒﺎﻁ ﻳﺴﻤﺢ ﺑﺘﺨﺰﻳﻦ ﻣﻠﻔﺎﺕ ﺗﻌﺮﻳﻒ ﺍﻻﺭﺗﺒﺎﻁ ﺍﻟﻤﺮﺳﻠﺔ ﻣﻦ ﺍﻟﺨﺎﺩﻡ. ﺑﻴﻨﻤﺎ ﻳﻤﻨﻊ ﺗﻌﻄﻴﻞ ﻫﺬﻩ ﺍﻟﻮﻇﻴﻔﺔ ﻣﻠﻔﺎﺕ ﺗﻌﺮﻳﻒ .ﺍﻻﺭﺗﺒﺎﻁ ﻣﻦ ﺍﻟﺘﺨﺰﻳﻦ ﻓﻲ ﺍﻟﻬﺎﺗﻒ ﻣﺴﺢ ﺍﻟﺬﺍﻛﺮﺓ ﺍﻟﻤﺆﻗﺘﺔ (٧ )ﺍﻟﻘﺎﺋﻤﺔ ٦ ־ ٦ ־ .ﻟﺤﺬﻑ...
- Page 78 ﺃﻟﺒﻮﻡ ﺍﻟﻮﺳﺎﺋﻂ ﺍﻟﺼﻮﺭ .- ﺇﻋﺎﺩﺓ ﺍﻟﺘﺴﻤﻴﺔ: ﻳﻤﻜﻨﻚ ﻣﻦ ﺇﻋﺎﺩﺓ ﺗﺴﻤﻴﺔ ﺍﻟﺼﻮﺭﺓ ١-٧ ﺍﻟﻘﺎﺋﻤﺔ .- ﻣﻌﻠﻮﻣﺎﺕ ﺍﻟﻤﻠﻒ: ﻳﻌﺮﺽ ﻣﻌﻠﻮﻣﺎﺕ ﻣﻠﻒ ﺍﻟﺼﻮﺭﺓ ﺍﻟﻤﺤﺪﺩ ﻳﺸﺘﻤﻞ ﺫﻟﻚ ﻋﻠﻰ ﺭﺍﺑﻂ ﺩﺍﺧﻠﻲ ﻟﺘﻨﺰﻳﻞ ﺍﻟﺼﻮﺭ ﻣﻦ ﺍﻹﻧﺘﺮﻧﺖ ﻭﻣﺠﻠﺪﺍﺕ .ﺍﻟﺼﻮﺭ ﺍﻻﻓﺘﺮﺍﺿﻴﺔ ﻭﺻﻮﺭﻱ ﺗﺤﺪﻳﺪ/ﺇﻟﻐﺎء ﺗﺤﺪﻳﺪ: ﺑﺎﺳﺘﺨﺪﺍﻡ ﻭﻇﻴﻔﺔ ﺍﻟﺘﺤﺪﻳﺪ، ﻳﻤﻜﻨﻚ ﺇﺭﺳﺎﻝ ﻣﻠﻔﺎﺕ ◄...
- Page 79 ﺃﻟﺒﻮﻡ ﻭﺳﺎﺋﻂ .ﺗﻌﺪﻳﻞ ﻋﻨﺼﺮ: ﻻﺳﺘﺨﺪﺍﻡ ﻭﻇﺎﺋﻒ ﻗﺺ ﻭﻋﻴﻮﺏ ﺍﻟﺼﻮﺭﺓ ﺣﺎﻟﺔ ﺍﻟﺬﺍﻛﺮﺓ: ﻳﻤﻜﻨﻚ ﻋﺮﺽ ﺣﺎﻟﺔ ﺍﻟﺬﺍﻛﺮﺓ )ﺍﻟﻬﺎﺗﻒ ﺃﻭ ﺑﻄﺎﻗﺔ ◄ ◄ .(ﺍﻟﺬﺍﻛﺮﺓ ﺍﻟﺨﺎﺭﺟﻴﺔ .ﺗﺄﺛﻴﺮ: ﻟﺘﻄﺒﻴﻖ ﺍﻟﺘﺄﺛﻴﺮ ﺍﻟﻤﻄﻠﻮﺏ ﺇﻟﻰ ﺍﻟﺼﻮﺭﺓ ◄ .ﺍﺿﻐﻂ ﻋﻠﻰ ﻣﻔﺘﺎﺡ ﺍﻻﺧﺘﻴﺎﺭ ﺍﻷﻳﻤﻦ ﻟﺘﻨﻔﻴﺬ ﻭﻇﻴﻔﺔ ]ﺇﺭﺳﺎﻝ[ ﻋﻠﻰ ﺍﻟﻔﻮﺭ .(ﻣﻌﻜﻮﺳﺔ: ﻟﻘﻠﺒﻬﺎ ﻛﺼﻮﺭﺓ ﻣﻌﻜﻮﺳﺔ )ﻳﻤﻴﻦ <> ﻳﺴﺎﺭ ◄...
- Page 80 ﺣﺪﺩ ]ﺇﺭﺳﺎﻝ[ ﻹﺭﻓﺎﻕ ﻣﻘﻄﻊ ﺍﻟﻔﻴﺪﻳﻮ ﺍﻟﻤﻄﻠﻮﺏ ﺇﻟﻰ ﺭﺳﺎﻟﺔ ﻭﺳﺎﺋﻂ ﺃﻭ .- ﺣﺬﻑ: ﻟﺤﺬﻑ ﺍﻟﻔﻴﺪﻳﻮ ﺍﻟﻤﺤﺪﺩ .ﺭﺳﺎﻟﺔ ﻣﺠﻤﻮﻋﺔ ﺃﻭ ﺑﻠﻮﺗﻮﺙ .- ﺣﺬﻑ ﺍﻟﻜﻞ: ﻟﺤﺬﻑ ﻛﻞ ﻣﻘﺎﻃﻊ ﺍﻟﻔﻴﺪﻳﻮ ﻋﻨﺪ ﺗﺤﺪﻳﺪ ﺍﻟﺨﻴﺎﺭ ١. ﺗﺸﻐﻴﻞ، ﺳﻴﺘﻢ ﺗﺸﻐﻴﻞ ﻣﻘﻄﻊ ﺍﻟﻔﻴﺪﻳﻮ ﺑﺎﺳﺘﺨﺪﺍﻡ .- ﺇﻋﺎﺩﺓ ﺍﻟﺘﺴﻤﻴﺔ: ﻳﻤﻜﻨﻚ ﻣﻦ ﺇﻋﺎﺩﺓ ﺗﺴﻤﻴﺔ ﺍﻟﻔﻴﺪﻳﻮ OK ﻣﺸﻐﻞ...
- Page 81 ﺃﻟﺒﻮﻡ ﻭﺳﺎﺋﻂ .ﺗﺸﻐﻴﻞ: ﻟﺘﺸﻐﻴﻞ ﺍﻟﺼﻮﺕ ﺍﻟﺘﻘﺎﻁ: ﻳﻤﻜﻨﻚ ﺣﻔﻆ ﺍﻟﻤﻮﺟﻮﺩ ﻋﻠﻰ ﺷﺎﺷﺔ ﺍﻟﺘﻮﻗﻒ ﺍﻟﻤﺆﻗﺖ ﻓﻲ ﻣﻠﻒ ◄ ◄ .(ﺻﻮﺭﺓ )ﻳﺘﻢ ﺍﻟﺘﻨﺸﻴﻂ ﻓﻲ ﻭﺿﻊ ﺍﻟﺘﻮﻗﻒ ﺍﻟﻤﺆﻗﺖ ﻓﻘﻂ .ﻣﺠﻠﺪ ﺟﺪﻳﺪ: ﻳﻤﻜﻨﻚ ﺇﻧﺸﺎء ﻣﺠﻠﺪ ﺟﺪﻳﺪ ◄ ،٠ ﻛﺘﻢ/ﺇﻟﻐﺎء ﻛﺘﻢ: ﺇﺫﺍ ﺗﻢ ﺿﺒﻂ ﻣﺴﺘﻮﻯ ﺍﻟﺼﻮﺕ ﻋﻠﻰ ﺃﻋﻠﻰ ﻣﻦ ◄...
- Page 82 ٩. ﻧﻘﻞ ﺇﻟﻰ ﻣﻠﻒ ﺍﻧﺘﻘﻞ ﺇﻟﻰ ﺍﻟﻘﺎﺋﻤﺔ ﺍﻟﻤﻄﻠﻮﺑﺔ ﺑﺎﺳﺘﺨﺪﺍﻡ ﺍﻟﻤﻔﺎﺗﻴﺢ ﻷﻋﻠﻰ ﻭﻷﺳﻔﻞ ﻭﺍﺿﻐﻂ .( )ﻣﻮﺍﻓﻖOK ﻋﻠﻰ ﺍﻟﻤﻔﺘﺎﺡ .ﺍﻟﻤﻠﻒ ﺍﻟﺴﺎﺑﻖ: ﻟﺘﺸﻐﻴﻞ ﻣﻠﻒ ﺍﻟﺼﻮﺕ ﺍﻟﺴﺎﺑﻖ ◄ .١. ﺗﺸﻐﻴﻞ/ﺇﻳﻘﺎﻑ ﻣﺆﻗﺖ: ﻳﻤﻜﻨﻚ ﺗﺸﻐﻴﻞ ﻣﻠﻒ ﺃﻭ ﺇﻳﻘﺎﻓﻪ ﻣﺆﻗﺘ ً ﺎ .ﺍﻟﻤﻠﻒ ﺍﻟﺘﺎﻟﻲ: ﻟﺘﺸﻐﻴﻞ ﻣﻠﻒ ﺍﻟﻔﻴﺪﻳﻮ ﺍﻟﺘﺎﻟﻲ ◄...
- Page 83 ﺃﻟﺒﻮﻡ ﻭﺳﺎﺋﻂ ٦. ﺇﺫﺍ ﻛﺎﻥ ﺍﻷﻣﺮ ﻣﺮﺗﺒﻂ، ﻓﻘﻢ ﺑﺈﻧﺸﺎء ﺻﻮﺭ ﻣﺨﺘﻠﻔﺔ ﻛﻤﻠﻒ ﻣﺘﺤﺮﻙ ﺑﺎﻟﺮﻏﻢ ﻣﻦ ﺇﻣﻜﺎﻧﻴﺔ ﺣﻔﻆ ﻛﺎﻓﺔ ﺃﻧﻮﺍﻉ ﺍﻟﻤﻠﻔﺎﺕ ﻫﻨﺎ، ﻳﻤﻜﻨﻚ ﻓﻘﻂ ﻧﺴﺦ ﺃﻭ .GIF ﺑﺘﻨﺴﻴﻖ ﻧﻘﻞ ﺍﻟﻤﻠﻔﺎﺕ ﺍﻟﺘﻲ ﺗﺘﻢ ﺇﺩﺍﺭﺗﻬﺎ ﻣﻦ ﻗﺒﻞ ﺍﻟﻮﺳﺎﺋﻂ ﺍﻟﺨﺎﺻﺔ ﺑﻲ. ﻟﻀﺒﻂ ﻣﻠﻒ ﻛﺨﻠﻔﻴﺔ ﺃﻭ ﻧﻐﻤﺔ ﺭﻧﻴﻦ، ﻳﺠﺐ ﻧﺴﺦ ﺃﻭ ﻧﻘﻞ ﺍﻟﻤﻠﻒ ﻓﻲ ﺍﻟﻤﺠﻠﺪ .٧.
- Page 84 .ﺗﺸﻐﻴﻞ: ﻟﺘﺸﻐﻴﻞ ﻣﻠﻒ ﺍﻟﻔﻴﺪﻳﻮ/ﺍﻟﺼﻮﺕ ﺍﻟﻤﺤﺪﺩ ﻏﻴﺮ ﻣﺪﻋﻮﻣﺔ. ﻟﻀﺒﻂ ﺻﻮﺭﺓ ﻛﺨﻠﻔﻴﺔ ﻳﺠﺐ ﻧﺴﺦ ﺍﻟﺼﻮﺭﺓ ﺃﻭ ﻧﻘﻠﻬﺎ ﺇﻟﻰ ◄ .ﺍﻟﻬﺎﺗﻒ .ﺇﺿﺎﻓﺔ ﺟﺪﻳﺪ: ﻳﻤﻜﻨﻚ ﺇﺿﺎﻓﺔ ﻣﻠﻒ ﺟﺪﻳﺪ ﻣﻦ ﻗﺎﺋﻤﺔ ﺍﻟﻔﻴﺪﻳﻮ/ﺍﻟﺼﻮﺕ ◄ ﺗﺮﺗﻴﺐ ﺣﺴﺐ: ﻳﻤﻜﻨﻚ ﺗﺮﺗﻴﺐ ﺍﻟﻤﻠﻔﺎﺕ ﺣﺴﺐ ﺍﻻﺳﻢ ﻭﺍﻟﺘﺎﺭﻳﺦ ﻭﻧﻮﻉ ﻣﻘﺎﻃﻊ ﺍﻟﻔﻴﺪﻳﻮ ◄ (٢...
- Page 85 ﺃﻟﻌﺎﺏ ﻭﺗﻨﺰﻳﻼﺕ ﻟﺬﻟﻚ ﻳﻤﻜﻨﻚ ﺗﻨﺰﻳﻞ ﺃﻟﻌﺎﺏJava ﻳﺪﻋﻢ ﻫﺬﺍ ﺍﻟﻬﺎﺗﻒ ﺗﻄﺒﻴﻘﺎﺕ .ﻭﻣﻤﺎﺭﺳﺘﻬﺎ ﻓﻲ ﺍﻟﻬﺎﺗﻒ ﻣﻼﺣﻈﺔ ،ﺑﺮﺟﺎء ﻣﻼﺣﻈﺔ ﺃﻥ ﺗﻨﺰﻳﻞ ﺑﻌﺾ ﺍﻟﻤﻮﺍﺩ )ﺃﻟﻌﺎﺏ، ﻧﻐﻤﺎﺕ ﺭﻧﻴﻦ ◄ .ﺧﻠﻔﻴﺎﺕ ﻭﻏﻴﺮ ﺫﻟﻚ( ﻳﺘﻄﻠﺐ ﻋﺎﺩﺓ ﻣﺼﺎﺭﻳﻒ ﺇﺿﺎﻓﻴﺔ ﺃﻟﻌﺎﺏ ﻭﺗﻄﺒﻴﻘﺎﺕ ١-٨ ﺍﻟﻘﺎﺋﻤﺔ ،ﺗ ُ ﺴﺘﺨﺪﻡ ﻫﺬﻩ ﺍﻟﺬﺍﻛﺮﺓ ﻟﺘﺤﺪﻳﺪ ﻣﻮﻗﻊ ﺍﻟﺘﻄﺒﻴﻘﺎﺕ ﺍﻟﺘﻲ ﻳﺘﻢ ﺗﻨﺰﻳﻠﻬﺎ ﻭﺗﺸﻐﻴﻠﻬﺎ .ﻋﻠﻰ...
- Page 86 ﺍﻟﻤﺰﻳﺪ ﺳﺎﻋﺔ ﺍﻟﻤﻨﺒﻪ ،٥. ﺗﺤﺪﻳﺪ ﺍﻟﺠﺮﺱ: ﺣﺪﺩ ﺍﻟﺠﺮﺱ ﺍﻟﺬﻱ ﺳﻴﺮﻥ ﻓﻲ ﻭﻗﺖ ﺍﻟﻤﻨﺒﻪ ١-٩ ﺍﻟﻘﺎﺋﻤﺔ ﺑﺎﺳﺘﺨﺪﺍﻡ ﻣﻔﺎﺗﻴﺢ ﺍﻻﺗﺠﺎﻫﺎﺕ ﻟﻠﻴﻤﻴﻦ ﻭﻟﻠﻴﺴﺎﺭ ﺃﻭ ﺑﺎﻟﻀﻐﻂ ﻋﻠﻰ ﻣﻔﺘﺎﺡ " ﻋﻠﻰ ﺷﺮﻳﻂ " ،ﺇﺫﺍ ﻗﻤﺖ ﺑﻀﺒﻂ ﺳﺎﻋﺔ ﺍﻟﻤﻨﺒﻪ، ﻓﺴﻴﻈﻬﺮ .ﺍﻟﻮﺳﻂ ﺍﻟﻤﺆﺷﺮ. ﻳﺼﺪﺭ ﺍﻟﻤﻨﺒﻪ ﺍﻟﻤﺤﺪﺩ ﺃﺻﻮﺍﺗ ً ﺎ ﻓﻲ ﺍﻟﻮﻗﺖ ﺍﻟﻤﺠﺪﻭﻝ. ﺍﺿﻐﻂ .٦.
- Page 87 ﺍﻟﻤﺰﻳﺪ - ﺭﺅﻳﺔ ﻫﺎﺗﻔﻲ: ﺍﺿﺒﻂ ]ﺣﺎﻟﺔ ﺭﺅﻳﺔ ﻫﺎﺗﻔﻲ[ ﻋﻠﻰ ]ﺇﻇﻬﺎﺭ ﻟﻠﻜﻞ[ ﺑﺤﻴﺚ ﻣﻼﺣﻈﺔ ﺗﺴﺘﻄﻴﻊ ﺍﻷﺟﻬﺰﺓ ﺍﻷﺧﺮﻯ ﺍﻛﺘﺸﺎﻑ ﺍﻟﻬﺎﺗﻒ ﻋﻨﺪ ﻗﻴﺎﻣﻬﺎ ﺑﺎﻟﺒﺤﺚ ﻋﻦ ﻧﻮﺻﻲ ﺑﺄﻥ ﻳﻜﻮﻥ ﺍﻟﻬﺎﺗﻒ ﻭﺟﻬﺎﺯ ﺍﻟﺒﻠﻮﺗﻮﺙ ﺍﻟﻤﺘﺼﻞ ﺑﻪ ﻓﻲ ◄ ﺃﺟﻬﺰﺓ ﺗﺸﺘﻤﻞ ﻋﻠﻰ ﺗﻘﻨﻴﺔ ﺑﻠﻮﺗﻮﺙ. ﺇﺫﺍ ﺣﺪﺩﺕ ]ﻣﺨﻔﻲ[، ﻓﻠﻦ ﺗﺘﻤﻜﻦ ﻧﻄﺎﻕ...
- Page 88 ﺧﻴﺎﺭﺍﺕ .ﺑﻠﻮﺗﻮﺙ، ﻓﺴﻴﺘﻢ ﺳﺆﺍﻟﻚ ﻋﻤﺎ ﺇﺫﺍ ﻛﻨﺖ ﺗﺮﻏﺐ ﻓﻲ ﺍﻟﺒﺤﺚ ﻣﺮﺓ ﺃﺧﺮﻯ ﺇﺟﺮﺍء ﺍﻻﻗﺘﺮﺍﻥ ١. ﺇﺿﺎﻓﺔ ﺟﺪﻳﺪ: ﺑﺎﺳﺘﺨﺪﺍﻡ ﻫﺬﻩ ﺍﻟﻘﺎﺋﻤﺔ، ﻳﻤﻜﻨﻚ ﺇﻗﺮﺍﻥ ﺟﻬﺎﺯ ﺑﻠﻮﺗﻮﺙ ◄ .ﺟﺪﻳﺪ ﺑﺎﻟﻬﺎﺗﻒ - ﺿﻐﻂ ﻋﻠﻰ ﺍﻟﻤﻔﺘﺎﺡ ﺭﺑﻂ. ﺳﺘﻈﻬﺮ ﻧﺎﻓﺬﺓ ﻋﻠﻰ ﺍﻟﺸﺎﺷﺔ ﺗﻄﻠﺐ .ﺇﺩﺧﺎﻝ ﻛﻠﻤﺔ ﺍﻟﻤﺮﻭﺭ ٢.
- Page 89 ﺍﻟﻤﺰﻳﺪ <> ﺍﺳﺘﻼﻡ ﺍﻟﺒﻴﺎﻧﺎﺕ ﻋﺒﺮ ﺑﻠﻮﺗﻮﺙ < > ﻧﻘﻞ ﺍﻟﺒﻴﺎﻧﺎﺕ ﻋﺒﺮ ﺑﻠﻮﺗﻮﺙ ١. ﻟﻨﻘﻞ ﺍﻟﺒﻴﺎﻧﺎﺕ ﻣﻦ ﺍﻟﻬﺎﺗﻒ ﺇﻟﻰ ﺟﻬﺎﺯ ﺑﻠﻮﺗﻮﺙ ﺁﺧﺮ، ﻗﻢ ﺃﻭﻻ ً ﺑﺘﺤﺪﻳﺪ ← ﺍﻟﻘﺎﺋﻤﺔ ← ٩. ﺍﻟﻤﺰﻳﺪ ← ٢. ﺍﻟﺘﻮﺻﻴﻞ ،ﺍﻟﺘﻄﺒﻴﻖ ﺍﻟﺬﻱ ﺳﻴﺘﻢ ﺣﻔﻆ ﺍﻟﺒﻴﺎﻧﺎﺕ ﺍﻟﻤﻄﻠﻮﺑﺔ ﻓﻴﻪ. ﻋﻠﻰ ﺳﺒﻴﻞ ﺍﻟﻤﺜﺎﻝ ١.
- Page 90 ٣. ﻻﺳﺘﺨﺪﺍﻡ ﺍﻟﻬﺎﺗﻒ، ﺣﺪﺩ ﺍﻟﻬﺎﺗﻒ ﻣﻦ ﺍﻷﺟﻬﺰﺓ ﺍﻟﻤﺴﺠﻠﺔ، ﻭﺍﺿﻐﻂ ﻣﺰﺍﻣﻨﺔ ﺍﻟﺨﺎﺩﻡ (٢ )ﺍﻟﻘﺎﺋﻤﺔ ٩ ־ ٢ ־ .ﻋﻠﻰ ﺍﻟﻤﻔﺘﺎﺡ ﺧﻴﺎﺭ ﺛﻢ ﺣﺪﺩ ٣. ﺗﻮﺻﻴﻞ ﺇﺫﺍ ﻛﺎﻧﺖ ﺷﺒﻜﺔ ﺍﻟﻤﺸﻐﻞ ﺗﺪﻋﻢ ﺧﺪﻣﺔ ﺍﻟﻤﺰﺍﻣﻨﺔ، ﺗﻘﻮﻡ ﻫﺬﻩ ﻭﻇﻴﻔﺔ ٤. ﻟﻠﺘﺤﻘﻖ ﻣﻦ ﺗﻮﺻﻴﻞ ﺍﻟﻬﺎﺗﻒ ﺍﻟﻤﺤﺪﺩ ﺑﻨﺠﺎﺡ، ﺍﺿﻐﻂ ﻋﻠﻰ ﺍﻟﻤﻔﺘﺎﺡ ﺍﻟﺨﺪﻣﺔ...
- Page 91 ﺍﻟﻤﺰﻳﺪ - ﺍﻟﻨﺴﺨﺔ ﺍﻻﺣﺘﻴﺎﻃﻴﺔ ﻭﺭﻗﻢWAP ﺍﻟﺨﺎﺹ ﺑﺎﻟﻮﻛﻴﻞ: ﺃﺩﺧﻞ ﻋﻨﻮﺍﻥ ﻋﺒﺎﺭﺓIP ﻋﻨﻮﺍﻥ ◄ .ﺍﻟﻤﻨﻔﺬ. ﺍﺳﻢ ﺍﻟﻤﺴﺘﺨﺪﻡ: ﺃﺩﺧﻞ ﻣﻌﺮﻑ ﺍﻟﻤﺴﺘﺨﺪﻡ ﻟﺨﺎﺩﻡ ﺍﻟﻤﺰﺍﻣﻨﺔ .ﻳﻘﻮﻡ ﺍﻟﻬﺎﺗﻒ ﺑﺈﺭﺳﺎﻝ ﻛﺎﻓﺔ ﺍﻟﺒﻴﺎﻧﺎﺕ ﻣﻦ ﻗﺎﻋﺪﺓ ﺍﻟﺒﻴﺎﻧﺎﺕ ﺇﻟﻰ ﺍﻟﺨﺎﺩﻡ ﻭﻣﻦ ﺍﻟﻤﺘﻮﻗﻊ ﺃﻥ ﻳﻘﻮﻡ ﺍﻟﺨﺎﺩﻡ ﺑﺎﺳﺘﺒﺪﺍﻝ ﻛﺎﻓﺔ ﺍﻟﺒﻴﺎﻧﺎﺕ ﻓﻲ ﻗﺎﻋﺪﺓ .ﻛﻠﻤﺔ...
- Page 92 ﺍﻟﺤﺎﺳﺒﺔ . ﻋﻨﺪ ﺍﻛﺘﻤﺎﻝ ﺍﻟﻌﻤﻠﻴﺔAC ﺟﺪﻳﺪ، ﺣﺘﻰ ﻟﻮ ﻟﻢ ﺗﻀﻐﻂ ﻋﻠﻰ ﺍﻟﻤﻔﺘﺎﺡ ٣ ﺍﻟﻘﺎﺋﻤﺔ ٩ ־ ﺍﻟﺤﺴﺎﺑﻴﺔ ﻭﻋﺮﺽ ﺍﻟﻨﺘﻴﺠﺔ ﻋﻠﻰ ﺍﻟﺸﺎﺷﺔ، ﻳﺆﺩﻱ ﺍﻟﻀﻐﻂ ﻋﻠﻰ ﺭﻣﺰ ﺇﻟﻰ ﻟﺪﻳﻚ ﺣﺎﺳﺒﺔ ﺗﻘﻮﻡ ﺑﺄﺭﺑﻊ ﻋﻤﻠﻴﺎﺕ ﺣﺴﺎﺑﻴﺔ ﻫﻲ ﺍﻟﺠﻤﻊ ﻭﺍﻟﻄﺮﺡ ﻭﺍﻟﻀﺮﺏ .ﺣﻔﻆ ﺍﻟﻨﺘﻴﺠﺔ ﻓﻲ ﺍﻟﺮﻣﻮﺯ ﻭﻣﺘﺎﺑﻌﺔ ﺍﻟﻌﻤﻠﻴﺔ ﺍﻟﺤﺴﺎﺑﻴﺔ .ﻭﺍﻟﻘﺴﻤﺔ...
- Page 93 ﺍﻟﻤﺰﻳﺪ ﺍﻟﻄﻮﻝ ﺍﻟﻌﻤﻠﺔ (٣ )ﺍﻟﻘﺎﺋﻤﺔ ٩ ־ ٥ ־ (١ )ﺍﻟﻘﺎﺋﻤﺔ ٩ ־ ٥ ־ .١. ﺣﺪﺩ ﻗﺎﺋﻤﺔ ﺍﻟﻄﻮﻝ .١. ﺣﺪﺩ ﻗﺎﺋﻤﺔ ﺍﻟﻌﻤﻠﺔ .[٢. ﺣﺪﺩ ﺍﻟﻮﺣﺪﺓ ﺍﻟﻤﻄﻠﻮﺑﺔ ﻟﻠﺘﺤﻮﻳﻞ ﺑﺎﺳﺘﺨﺪﺍﻡ ]ﺍﻟﻮﺣﺪﺓ .[٢. ﻳﺴﺘﻄﻴﻊ ﺍﻟﻤﺴﺘﺨﺪﻣﻮﻥ ﺿﺒﻂ ﺳﻌﺮ ﺻﺮﻑ ﺍﻟﻌﻤﻠﺔ ﺑﺎﺳﺘﺨﺪﺍﻡ ]ﺍﻟﺴﻌﺮ .٣. ﺃﺩﺧﻞ ﺍﻟﻮﺣﺪﺓ ﺍﻟﻘﻴﺎﺳﻴﺔ ﻭﺍﻋﺮﺽ ﺍﻟﻘﻴﻤﺔ ﺍﻟﻤﺤﻮﻟﺔ ٣.
- Page 94 .٣. ﺃﺩﺧﻞ ﺍﻟﻮﺣﺪﺓ ﺍﻟﻘﻴﺎﺳﻴﺔ ﻭﺍﻋﺮﺽ ﺍﻟﻘﻴﻤﺔ ﺍﻟﻤﺤﻮﻟﺔ ٤. ﺍﺿﻐﻂ ﻋﻠﻰ ] ﺇﻋﺎﺩﺓ ﺍﻟﻀﺒﻂ[ ﻟﻤﺴﺢ ﺣﻘﻞ ﺍﻹﺩﺧﺎﻝ ﺍﻟﺤﺎﻟﻲ ﻭﺿﻊ .ﺍﻟﻤﺆﺷﺮ ﻓﻲ ﺣﻘﻞ ﺍﻹﺩﺧﺎﻝ ﺍﻟﺤﺠﻢ (٦ )ﺍﻟﻘﺎﺋﻤﺔ ٩ ־ ٥ ־ .١. ﺣﺪﺩ ﻗﺎﺋﻤﺔ ﺍﻟﻜﻤﻴﺔ .[٢. ﺣﺪﺩ ﺍﻟﻮﺣﺪﺓ ﺍﻟﻤﻄﻠﻮﺑﺔ ﻟﻠﺘﺤﻮﻳﻞ ﺑﺎﺳﺘﺨﺪﺍﻡ ] ﺍﻟﻮﺣﺪﺓ .٣.
- Page 95 ﺷﺎﺷﺔ ﺍﻟﻌﺮﺽ ﺗﺸﻐﻴﻞ ﺗﺴﻤﺢ ﻫﺬﻩ ﺍﻟﻘﺎﺋﻤﺔ ﺑﺘﺨﺼﻴﺺ ﺧﻴﺎﺭﺍﺕ ﺍﻟﻌﺮﺽ ﺍﻟﺨﺎﺻﺔ ﺑﺎﻟﺸﺎﺷﺔ (٣ )ﺍﻟﻘﺎﺋﻤﺔ * ־ ١ ־ .ﻭﺍﻟﻮﺍﺟﻬﺔ ﺍﻟﺮﺳﻮﻣﻴﺔ ﺍﻟﻜﺎﻣﻠﺔ ﻟﻠﻘﺎﺋﻤﺔ .ﻳﻤﻜﻨﻚ ﺗﺤﺪﻳﺪ ﺍﻟﺼﻮﺭﺓ ﻟﻠﻌﺮﺽ ﺃﺛﻨﺎء ﺗﺸﻐﻴﻞ ﺍﻟﻬﺎﺗﻒ ﺳﻤﺔ ﺍﻟﺸﺎﺷﺔ ﺇﻳﻘﺎﻑ ﺍﻟﺘﺸﻐﻴﻞ (٤ )ﺍﻟﻘﺎﺋﻤﺔ * ־ ١ ־ ١-* ﺍﻟﻘﺎﺋﻤﺔ .ﻳﻤﻜﻨﻚ...
- Page 96 ﺍﻟﻤﻜﺎﻟﻤﺎﺕ ﺍﻟﺼﺎﺩﺭﺓ (٢ )ﺍﻟﻘﺎﺋﻤﺔ * ־ ٢ ־ .ﻳﻤﻜﻨﻚ ﺿﺒﻂ ﺻﻮﺭﺓ ﻟﻠﻌﺮﺽ ﺃﺛﻨﺎء ﺍﻻﺗﺼﺎﻝ ﺑﺮﻗﻢ ﺍﻹﺿﺎءﺓ ﺍﻟﺨﻠﻔﻴﺔ ٣-* ﻗﺎﺋﻤﺔ ﻳﻤﻜﻨﻚ ﺿﺒﻂ ﻣﺪﺓ ﺍﻹﺿﺎءﺓ ﺍﻟﺨﻔﻠﻴﺔ ﻓﻲ ﺍﻟﺸﺎﺷﺔ ﺍﻟﺮﺋﻴﺴﻴﺔ ﻭﺍﻟﺸﺎﺷﺔ .ﺍﻷﻣﺎﻣﻴﺔ ﻭﻟﻮﺣﺔ ﺍﻟﻤﻔﺎﺗﻴﺢ ﺍﻟﺨﻂ ٤ ﺍﻟﻘﺎﺋﻤﺔ * ־ ﻳﻤﻜﻨﻚ ﺿﺒﻂ ﻧﻤﻂ ﺍﻟﺨﻂ ﻭﺣﺠﻢ ﺧﻂ ﺍﻻﺗﺼﺎﻝ ﻭﻟﻮﻥ ﺧﻂ ﺍﻻﺗﺼﺎﻝ .ﺑﺎﺳﺘﺨﺪﺍﻡ...
- Page 97 ﺍﻻﻭﺿﺎﻉ ﺗﻨﺒﻴﻪ ﺣﺴﺐ: ﻳﻤﻜﻨﻚ ﺗﺨﺼﻴﺺ ﻧﻮﻉ ﺍﻹﺷﺎﺭﺓ ﺍﻟﺘﻲ ﻳﺼﺪﺭﻫﺎ ﻫﺎﺗﻒ ﺗﺴﻤﺢ ﻗﺎﺋﻤﺔ ﺍﻷﻭﺿﺎﻉ ﺑﺘﺨﺼﻴﺺ ﻭﺿﺒﻂ ﻧﻐﻤﺎﺕ ﺍﻻﺗﺼﺎﻝ ﻭﻧﻐﻤﺎﺕ ◄ ،ﺍﻟﻔﻴﺪﻳﻮ، ﻭﺍﻻﺧﺘﻴﺎﺭ ﺑﻴﻦ ﺭﻧﻴﻦ ﻭﺍﻫﺘﺰﺍﺯ ﻭﺻﺎﻣﺖ، ﺭﻧﻴﻦ ﻭﺍﻫﺘﺰﺍﺯ .ﺍﻟﺮﺳﺎﺋﻞ ﻭﻧﻐﻤﺎﺕ ﺃﺣﺪﺍﺙ ﻫﺎﺗﻒ ﺍﻟﻔﻴﺪﻳﻮ .ﻭﺭﻧﻴﻦ ﺑﻌﺪ ﺍﻫﺘﺰﺍﺯ، ﺃﻗﺼﻰ ﺭﻧﻴﻦ ﻭﺍﻫﺘﺰﺍﺯ ﻳﺘﻢ ﺿﺒﻂ ﺍﻟﻮﺿﻊ ﻋﺎﻡ ﻭﺍﻟﻮﺿﻊ ﻋﺎﻝ ٍ ﻣﻦ ﻗﺒﻞ ﺍﻟﺠﻬﺔ ﺍﻟﻤﺼﻨﻌﺔ ﻭﻟﻜﻦ ﻧﻐﻤﺔ...
- Page 98 ﻣﺴﺘﻮﻯ ﺻﻮﺕ ﻧﻐﻤﺔ ﺍﻟﻤﻔﺎﺗﻴﺢ: ﻳﻤﻜﻨﻚ ﺿﺒﻂ ﻣﺴﺘﻮﻯ ﺻﻮﺕ ﺍﻟﺘﺄﺛﻴﺮ ◄ .ﺍﻟﺬﻱ ﺗﻢ ﺍﺧﺘﻴﺎﺭﻩ، ﻭﺍﻻﺧﺘﻴﺎﺭ ﻣﻦ ﺑﻴﻦ ٧ ﻣﺴﺘﻮﻳﺎﺕ ﻣﺘﺎﺣﺔ ﻧﻐﻤﺔ ﺍﻟﻐﻄﺎء: ﻳﻤﻜﻨﻚ ﺗﺤﺪﻳﺪ ﺃﺣﺪ ﺍﻟﻤﻠﻔﺎﺕ ﺍﻟﻤﺘﺎﺣﺔ ﻟﻴﺘﻢ ﺗﺸﻐﻴﻠﻪ ◄ .ﺑﺎﺳﺘﺨﺪﺍﻡ ﻫﺎﺗﻒ ﺍﻟﻔﻴﺪﻳﻮ ﻋﻨﺪ ﻓﺘﺢ ﺍﻟﻐﻄﺎء ﻧﻐﻤﺔ ﺍﻟﺘﺄﻛﻴﺪ: ﻳﻤﻜﻨﻚ ﺿﺒﻂ ﻧﻐﻤﺔ ﺍﻟﺘﺄﻛﻴﺪ ﻟﻴﺘﻢ ﺗﺸﻐﻴﻠﻬﺎ ﺑﺎﺳﺘﺨﺪﺍﻡ ◄...
- Page 99 ﺍﻟﺘﻘﻮﻳﻢ ﺍﻟﺘﻘﻮﻳﻢ ﻭﺗﻬﻴﺌﺔ ﺇﻋﺪﺍﺩ ﺍﻟﺘﻜﺮﺍﺭ ﻭﺗﻬﻴﺌﺔ ﺇﻋﺪﺍﺩ ﺍﻟﻤﻨﺒﻪ. ﻳﻤﻜﻨﻚ ﺇﺭﺳﺎﻝ ﺍﻟﺠﺪﻭﻝ ﺇﻟﻰ ١ ﺍﻟﻘﺎﺋﻤﺔ # ־ )ﺭﺳﺎﻟﺔ ﻧﺼﻴﺔ( ﺃﻭSMS ﻫﺎﺗﻒ ﺁﺧﺮ ﺃﻭ ﻣﻮﻗﻊ ﺇﻧﺘﺮﻧﺖ ﺧﻼﻝ ﺭﺳﺎﻟﺔ ﺑﺤﺚ ﻭﺍﺳﺘﻌﻼﻡ ﺍﻟﺠﺪﻭﻝ .ﺭﺳﺎﻟﺔ ﻭﺳﺎﺋﻂ ﺃﻭ ﺭﺳﺎﻟﺔ ﻣﺠﻤﻮﻋﺔ ﺃﻭ ﺑﺮﻳﺪ ﺇﻟﻜﺘﺮﻭﻧﻲ ﺃﻭ ﺑﻠﻮﺗﻮﺙ ١.
- Page 100 ﺇﺧﻄﺎﺭ ﺍﻟﺠﺪﻭﻝ ﺧﻴﺎﺭﺍﺕ ﺍﻟﺘﻨﺒﻴﻪ ﺍﻟﻘﺎﺑﻠﺔ ﻟﻠﺘﻬﻴﺌﺔ .ﺇﺫﺍ ﻗﺎﻡ ﺍﻟﻤﺴﺘﺨﺪﻡ ﺑﺘﻬﻴﺌﺔ ﺇﻋﺪﺍﺩ ﺍﻟﻤﻨﺒﻪ، ﻓﺴﻴﺼﺪﺭ ﺍﻟﻤﻨﺒﻪ ﺍﻟﻤﺤﺪﺩ ﺻﻮﺗ ً ﺎ ﺍﻟﺮﻣﺰ ﻏﻴﺮ ﻣﻮﺟﻮﺩ ﻻ ﻳﻮﺟﺪ ﻣﻨﺒﻪ ﺇﺫﺍ ﻛﺎﻥ ﻭﻗﺖ ﺍﻹﺧﻄﺎﺭ ﻗﺒﻞ ﻭﻗﺖ ﺑﺪء ﺍﻟﺠﺪﻭﻝ، ﻓﻴﻤﻜﻨﻚ ﺇﻋﺪﺍﺩ ﺍﻟﺘﻨﺒﻴﻪ ﻭﻗﺖ ﺍﻟﺘﺸﻐﻴﻞ .ﻣﺮﺓ ﺃﺧﺮﻯ ﻗﺒﻞ ٥١ ﺩﻗﻴﻘﺔ ﺍﻟﻤﻬﺎﻡ...
- Page 101 ﺍﻟﺘﻘﻮﻳﻢ ﺗﻌﺪﻳﻞ ﻣﺬﻛﺮﺓ ﻭﺣﺬﻓﻬﺎ ﺿﺒﻂ ﺣﺎﻟﺔ ﺍﻟﻤﻬﻤﺔ ﺿﻊ ﺍﻟﻤﺆﺷﺮ ﻋﻠﻰ ﺍﻟﻤﺬﻛﺮﺓ ﺍﻟﻤﻄﻠﻮﺑﺔ ﻭﺍﺿﻐﻂ ﻋﻠﻰ ﺍﻟﻤﻔﺘﺎﺡ ﻟﻌﺮﺽ ﻛﻞ ﻳﺘﻢ ﻋﺮﺽ ﺍﻟﻤﻬﺎﻡ ﺍﻟﻤﻨﺘﻬﻴﺔ ﻭﻋﻠﻴﻬﺎ ﻋﻼﻣﺔ ﺧﻄﺄ ﺃﺳﻔﻞ ﺍﻟﻤﻬﺎﻡ ﻏﻴﺮ ﻣﺤﺘﻮﻳﺎﺕ ﺍﻟﻤﺬﻛﺮﺓ. ﺗﻌﺮﺽ ﻫﺬﻩ ﺍﻟﻮﻇﻴﻔﺔ ﻛﻞ ﻣﺤﺘﻮﻳﺎﺕ ﺍﻟﻤﺬﻛﺮﺓ. ﻳﻤﻜﻨﻚ ﺍﻟﻤﻨﺘﻬﻴﺔ ﻓﻲ ﻗﺎﺋﻤﺔ ﺍﻟﻤﻬﺎﻡ. ﻳﻤﻜﻨﻚ ﺿﺒﻂ ﺍﻟﻤﻬﺎﻡ ﺍﻟﻤﻨﺘﻬﻴﺔ ﺇﻟﻰ ﻣﻬﺎﻡ ﺗﻌﺪﻳﻞ...
- Page 102 ﻣﺴﺢ ﺍﻟﻜﻞ .[٢. ﺃﺩﺧﻞ ﻧﺼ ً ﺎ ﻓﻲ ﺣﻘﻞ ]ﻣﻼﺣﻈﺎﺕ[ ﻭﺍﺿﻐﻂ ﻋﻠﻰ ]ﺗﻢ (٣ )ﺍﻟﻘﺎﺋﻤﺔ # ־ ٧ ־ ٣. ﻟﻌﺮﺽ ﺍﻟﻤﺤﺘﻮﻳﺎﺕ ﺍﻟﻤﻔﺼﻠﺔ ﻟﻤﻬﻤﺔ، ﺿﻊ ﺍﻟﻤﺆﺷﺮ ﻋﻠﻰ ﺍﻟﻌﻨﺼﺮ .ﻳﺴﻤﺢ ﺑﺤﺬﻑ ﻛﻞ ﺍﻟﻌﻨﺎﺻﺮ ﺍﻟﻤﺤﻔﻮﻇﺔ، ﻳﻨﺒﻐﻲ ﺇﺩﺧﺎﻝ ﺭﻣﺰ ﺍﻟﺤﻤﺎﻳﺔ OK ﺍﻟﻤﻄﻠﻮﺏ ﻓﻲ ﻗﺎﺋﻤﺔ ﻋﺪﺍﺩ ﺍﻟﺘﺎﺭﻳﺦ ﺛﻢ ﺍﺿﻐﻂ ﻋﻠﻰ ﺍﻟﻤﻔﺘﺎﺡ )ﻣﻮﺍﻓﻖ(.
- Page 103 ﺍﺳﺘﻜﺸﺎﻑ ﺍﻷﺧﻄﺎء ﻭﺇﺻﻼﺣﻬﺎ ﺍﻟﺮﺟﺎء ﺍﻟﺘﺤﻘﻖ ﻟﻤﻌﺮﻓﺔ ﻣﺎ ﺇﺫﺍ ﻛﺎﻧﺖ ﺃﻳﺔ ﻣﺸﻜﻠﺔ ﺗﻮﺍﺟﻬﻬﺎ ﻓﻲ ﻫﺎﺗﻔﻚ ﻣﻮﺻﻮﻓﺔ ﻫﻨﺎ ﻗﺒﻞ ﺃﺧﺬ ﺍﻟﻬﺎﺗﻒ ﻟﻠﺼﻴﺎﻧﺔ ﺃﻭ .ﺍﻻﺗﺼﺎﻝ ﺑﻤﻬﻨﺪﺱ ﺻﻴﺎﻧﺔ ﺱ ﺱ .ﺍﻻﺗﺼﺎﻝ ﺭﺩﻱء ﺃﻭ ﻏﻴﺮ ﻣﺴﻤﻮﻉ ﻓﻲ ﻣﻨﺎﻃﻖ ﻣﻌﻴﻨﺔ ﻛﻴﻒ ﻳﻤﻜﻨﻨﻲ ﻋﺮﺽ ﻗﺎﺋﻤﺔ ﺍﻟﻤﻜﺎﻟﻤﺎﺕ ﺍﻟﺼﺎﺩﺭﺓ ﻭﺍﻟﻮﺍﺭﺩﺓ ﻭﺍﻟﻤﻜﺎﻟﻤﺎﺕ...
- Page 104 ﺱ ﺱ .ﻳﺼﺒﺢ ﻭﻗﺖ ﺍﺳﺘﺨﺪﺍﻡ ﺍﻟﺒﻄﺎﺭﻳﺔ ﺃﻗﺼﺮ ﻳﺘﻢ ﺳﻤﺎﻉ ﺻﺪﻯ ﺻﻮﺕ ﺃﺛﻨﺎء ﺍﻻﺗﺼﺎﻝ ﺑﺎﺳﺘﺨﺪﺍﻡ ﺍﻟﻬﻮﺍﺗﻒ ﻓﻲ .ﺑﻌﺾ ﺍﻟﻤﻨﺎﻃﻖ ﺝ ﺇﺫﺍ ﻛﺎﻥ ﻭﻗﺖ ﺍﺳﺘﺨﺪﺍﻡ ﺍﻟﺒﻄﺎﺭﻳﺔ ﻗﺼﻴﺮ، ﻓﻘﺪ ﻳﻜﻮﻥ ﺫﻟﻚ ﺑﺴﺒﺐ ﺑﻴﺌﺔ ﺝ .ﺍﻟﻤﺴﺘﺨﺪﻡ ﺃﻭ ﺇﺟﺮﺍء ﻋﺪﺩ ﻛﺒﻴﺮ ﻣﻦ ﺍﻟﻤﻜﺎﻟﻤﺎﺕ ﺃﻭ ﺿﻌﻒ ﺍﻹﺷﺎﺭﺓ ﻳﺴﻤﻰ...
- Page 105 .ﻗﺪ ﺗﺨﺘﻠﻒ ﺍﻟﺒﺮﺍﻣﺞ ﺍﻟﻤﻌﺮﻭﺿﺔ ﺃﻋﻼﻩ ﺣﺴﺐ ﺇﺻﺪﺍﺭ ﺍﻟﻘﺮﺹ ﺍﻟﻤﻀﻐﻮﻁ ﻭﺍﻟﺴﻮﻕ .ﺗﺘﻴﺢ ﺍﻟﺘﺤﺪﺙ ﻓﻲ ﺍﻟﻮﺿﻊ ﺍﻟﻼﻳﺪﻭﻱ ﻣﻼﺣﻈﺔ .ﻳﺘﻀﻤﻦ ﺳﻤﺎﻋﺔ ﺍﻷﺫﻥ ﻭﻣﻴﻜﺮﻭﻓﻮﻥ 0ﺍﻷﺻﻠﻴﺔ. ﻗﺪ ﻳﺆﺩﻱ ﻋﺪﻡ ﺍﻟﻘﻴﺎﻡ ﺑﺬﻟﻚ ﺇﻟﻰ ﺇﺑﻄﺎﻝ ﺻﻼﺣﻴﺔLG ﺍﺳﺘﺨﺪﻡ ﺩﺍﺋﻤﺎ ً ﻣﻠﺤﻘﺎﺕ ◄ .ﺍﻟﻀﻤﺎﻥ ﻗﺪ ﺗﺨﺘﻠﻒ ﺍﻟﻤﻠﺤﻘﺎﺕ ﻓﻲ ﺍﻟﻤﻨﺎﻃﻖ ﺍﻟﻤﺨﺘﻠﻔﺔ: ﻟﺬﺍ ﻳﺮﺟﻰ ﻣﺮﺍﺟﻌﺔ ﺷﺮﻛﺔ ﺍﻟﺨﺪﻣﺔ ﺍﻹﻗﻠﻴﻤﻴﺔ...
- Page 106 MEMO...
- Page 107 MEMO...
- Page 108 MEMO...
- Page 109 MEMO...
- Page 110 T h i s d o c u m e n t i s t h e u s e r g u i d e f o r t h e LG KU 730 3 G V i d...
-
Page 111: Table Of Contents
Table of Contents Guidelines for safe and General functions Address book Contacts efficient use New contact Speed dials Main menu Parts of the phone Groups Service dial numbers Calls Getting started Own number Video calls Settings Call history Call duration Call costs Call divert Call barring... - Page 112 Settings Media Messaging Date & time Video camera New message Network Camera Inbox Access points Voice recorder Mailbox Security Drafts Language Outbox Memory status Sent items Handset info. Templates Reset settings Emoticon Streaming settings Settings...
- Page 113 Table of Contents Browser Media album Games & Downloads Home Images My games & apps Bookmarks Videos More games Saved pages Sounds Downloads Go to URL Applications Security Others More Settings Bluetooth Alarm clock External memory Connectivity Play lists Calculator World time Unit converter...
- Page 114 Display Profiles Calendar Screen theme Normal Calendar Front screen theme Silent To do Backlight Vibrate only Memo Font Outdoor Secret memo Handset scheme Headset Date finder Download more Customised 1 Date counter Customised 2 Settings Customised 3 Troubleshooting Accessories...
-
Page 115: Guidelines For Safe And Efficient Use
Rate (SAR) information countries/regions that have adopted the SAR limit recommended by the Institute of Electrical and This mobile phone model KU730 has been designed Electronics Engineers (IEEE) is 1.6 W/kg averaged to comply with applicable safety requirements for over one (1) gram of tissue (for example USA, exposure to radio waves. - Page 116 The unit should be kept away from heat sources Use accessories, such as earphones and headsets, such as radiators or cookers. with caution. Ensure that cables are tucked away safely and do not touch the antenna unnecessarily. Never place your phone in a microwave oven as it will cause the battery to explode.
- Page 117 Guidelines for safe and efficient use Give full attention to driving. Blasting area Use a hands-free kit, if available. Do not use the phone where blasting is in progress. Pull off the road and park before making or Observe restrictions, and follow any regulations or answering a call if driving conditions so require.
- Page 118 Unlike other battery systems, there is no memory effect that could compromise the battery's performance. Use only LG batteries and chargers. LG chargers are designed to maximize the battery life. Do not disassemble or short-circuit the battery...
-
Page 119: Parts Of The Phone
Parts of the phone Front view Rear view Antenna External Holes for a carrying strap camera lens Battery release latch Front screen USIM card socket Battery terminals Charger connector/ Battery Cable connector Note Never touch the antenna during a call or when using a Bluetooth connection. - Page 120 Right side view Left side view Audio/Video player hot keys : Next track/ Fast forward Volume keys : Previous track/ Rewind Camera hot key : (Long press) Opens/Closes the play lists. Stops the play during the playback. (Short press) Plays/Pauses the music/video.
- Page 121 Parts of the phone Open view Internal camera lens Speaker OK key + 4-way navigation key Main screen Right soft key Activates the prompts displayed on screen in the right soft box. Left soft key Activates the prompts displayed on Clear key/Handsfree key screen in the left soft box.
-
Page 122: Getting Started
Getting started Installing the USIM card and battery 1. Install the USIM card. Your USIM card contains your phone number, service details and contacts and must be inserted into your handset. If your USIM card is removed then your handset becomes unusable (except emergency calls) until a To remove the USIM card valid USIM is inserted. - Page 123 Getting started 2. Install the battery. 3. To remove the battery Insert the battery aligning the gold contacts on Turn the power off. (If power is left on, there is a chance you could lose the stored telephone the battery with the battery terminals (gold numbers and messages.) Press the battery release contacts) in the battery compartment.
- Page 124 Charging the battery 2. Connect the other end of the travel adapter to the mains socket. Use only the charger included in the To connect the travel adapter to the phone, you box. must first install the battery. 1. With the arrow facing you as shown in the diagram push the plug on the battery adapter into the socket on the center of the phone until it clicks into place.
- Page 125 Getting started Disconnecting the charger Note Ensure the battery is fully charged before using Disconnect the travel adapter from the phone by the phone. pressing its side buttons as shown in the diagram. Do not remove your battery or the USIM card while charging.
- Page 126 How to use a microSD* memory 3. Insert the memory card in the slot. The gold contacts must be kept on the back of the card microSD. Don’t push the microSD too much. If it cannot enter easily in the slot, you may be trying to insert it in the wrong way or there could be a foreign object in the slot.
- Page 127 Getting started 4. Once inserted, push the memory card until you The card is designed to fit easily into the system hear a “click”, meaning that the microSD has been one way only. correctly blocked. Do not bend the card or force it into the slot. Do not insert any other kind of memory cards different from microSD.
- Page 128 Turning your handset on PIN code (4 to 8 digits) The PIN (Personal Identification Number) code Ensure that your USIM card is in your handset and protects your USIM card against unauthorized use. the battery is charged. Press and hold the The PIN code is usually supplied with the USIM card.
- Page 129 Getting started PUK2 code (4 to 8 digits) Screen structure If there is no USIM card installed, an animation telling The PUK2 code, supplied with some USIM cards, is you to insert a USIM card appears. If the USIM card required to unlock a blocked PIN2 code.
- Page 130 Icon indicator bar Shows what operations are taking place and reminds you of battery and signal strength. This appears through all activities. Short-cut menu bar In idle mode, you can access the following menus. Address book: Contacts, New contact Calls: Call history, Missed calls, Received calls, Dialled callls Messages: Write message, Inbox, Mailbox Calendar: Today, No appointments, New appontment Camera: Take a picture, Media album, Background...
- Page 131 Getting started Key functions The functions of the keys in the idle screen status are described below. Right soft key Left soft key Connects to Music. Opens the Messaging menu. Clear key Direction key ( ) Selects the short-cut menu bar. Short: Deletes a character Long: Deletes all characters Video call key (Call register: in idle mode)
- Page 132 Numbering screen Handset lock screen The numbering screen appears when a number key is When the Handset Lock function is selected, you can pressed in the idle screen. only make an emergency call, release the lock, and turn off the phone in this screen. As always, you can Screen structure turn the phone off by pressing and holding the End The numbering screen consists of status indicators,...
- Page 133 Getting started Unlock function If you press the OK key, a popup screen appears asking you to input the Security code to unlock the phone. The Security code is configured by selecting Settings > Security > Change codes. If you key in an incorrect Security code, the phone will remain in Handset Lock status.
-
Page 134: General Functions
General functions Making and answering calls Note The video call may take some time to connect. Making and answering a video call Please be patient. The connection time will also depend on how quickly the other party answers You can make a video call in 3G covered service area. the call. - Page 135 General functions Making a voice/video call from Answering a call Contacts When you receive a call, the phone rings and the flashing phone icon appears on the screen. If the It is easy to call anyone whose number you have caller can be identified, the caller’s phone number (or stored in your Contacts.
- Page 136 Signal strength ABC mode If you are inside a building, being near a window may This mode lets you enter letters by pressing the give you better reception. You can see the strength key labeled with the required letter once, twice, of your signal by the signal indicator see the strength three times or more until the letter is displayed.
- Page 137 General functions added, the word changes to reflect the most likely 3. Complete each word with a space by pressing the candidate from the dictionary. key. 1. When you are in the T9 predictive text input To delete letters, press the key.
- Page 138 Using the 123 (Number) mode Characters in the order display The 123 Mode enables you to enter numbers in a Lower case Upper case text message (a telephone number, for example). .,?!’”1- ()@/ :_ .,?!’”1- ()@/ :_ Press the keys corresponding to the required digits a b c 2 à...
-
Page 139: 2.4 Groups
Main menu You can launch a menu by pressing the key in the idle screen. Move to a desired item and press the OK key to go into the sub menu. From main menu you can also go into a submenu by directly pressing the corresponding numeric key as follows. The main menu consists of the following top menus and sub menus. - Page 140 4. Media 6. Browser 8. Games & Downloads 4.1 Video camera 6.1 Home 8.1 My games & apps 4.2 Camera 6.2 Bookmarks 8.2 More games 4.3 Voice recorder 6.3 Saved pages 8.3 Downloads 6.4 Go to URL 5. Messaging 9. More 6.5 Security 5.1 New message 6.6 Settings...
- Page 141 0.8 Customised 3 Multi tasking feature KU730 supports multi-tasking feature. You can use multiple applications at the same time. During an application, you can access another application by long press of For instance, if you need to use the calculator while writing a message, press and hold down and select More and Calculator.
- Page 142 Calls Video calls Call history Menu 1.1 Menu 1.2 You can set the screen display when making / You can view missed, received, dialled and entire call receiving a video call. records. Each call record menu provides the following functions. My picture size: Select my picture size to be displayed.
- Page 143 Calls Received calls Last call (Menu 1.2.2) (Menu 1.3.1) Allows you to view received call records, make a call, Shows the latest call time in units of hour/minute send a message, and save the number in the /second. Contacts. Received calls (Menu 1.3.2) Dialled calls (Menu 1.2.3)
- Page 144 4. In the Set limit configuration, select On to 2. When the To voicemail centre is selected, it configure the cost limit. When cost limit is activates a Voicemail centre number as a diverted configured, and call cost reaches the limit, making number.
- Page 145 Calls 5. After activating All voice calls menu, selecting the network answers, the result of the operation is Options menu at the bottom of the menus displayed. displays the Activate, Deactivate, Deactivate all, 2. When To other number is selected – A dialogue View status and clear list menus.
- Page 146 menu, Requesting.. message and animation appear. If no answer Then the network settings are displayed when the 1. When the off menu is selected – It operates the information is received from the network. Selecting same as All voice calls menu. Status in the right soft menu gives the same result.
- Page 147 Calls Call barring Voice calls Menu 1.6 Video calls Call barring menus for Voice and Video calls are provided. All outgoing However, available menus are determined by the 1. When OK button is selected – Receives Barring USIM supporting CPHS. password from user, and activates barring service on the network.
-
Page 148: Fixed Dial Numbers
answers. Barring password menu enables users to Incoming calls when roaming change current barring password. 1. When OK button is selected – It operates the Outgoing international same to Outgoing calls menu. 2. When Options menu is selected – It activates and 1. - Page 149 Calls Call waiting 2. Set the desired call reject option in the Reject list Menu 1.8 menu. Activate: Activates waiting service. Selecting this Reject all calls: Rejects all calls. item, displays requesting message and animation. When the network answers, the result of the Contacts: Rejects the calls from the number operation is displayed.
- Page 150 Answer mode (Menu 1.9.4) Allows you to set the answering method. You can choose between pressing the send key, opening the flip, and pressing any key. Minute reminder (Menu 1.9.5) Determines whether to sound a 1 minute tone every 1 minute when you are on the phone. BT answer mode (Menu 1.9.6) Hands-free: You can answer a call using the...
-
Page 151: Address Book
Address book This is an address book function to record and (photograph) in the contact address information. You manage contact addresses. Using the Contacts can input and manage contact addresses depending management menu, you can register new contact on the memory usage. addresses, or can search for desired addresses by name, phone number, or groups. -
Page 152: Service Dial Numbers
Service dial numbers Show image/avatar (Menu 2.7.2) (USIM dependent) Menu 2.5 Determine whether to show the image/avatar or not. You can view the list of Service Dialling Numbers Copy all (SDN) assigned by your service provider (Menu 2.7.3) (if supported by the USIM card). Such numbers You can copy contact address information from the include the emergency, directory enquiries and voice phone memory to the USIM or from USIM to the... - Page 153 Settings Date & time Date (Menu 3.1.2) Menu 3.1 1. Select ‘Date’ item from the Date & Time list, and Although the current time is automatically configured then press [OK]. when the phone is registered to the network, users can configure time and date directly using this menu. 2.
- Page 154 Network Preferred list (Menu 3.2.3) Menu 3.2 If the network is searching automatically, you can add Select network (Menu 3.2.1) a preferable network to be connected to. And the following options are available. Select between Automatic and Manual. Add new: You can add a new network using the Automatic: Automatically searches for the network followings.
-
Page 155: Security
Settings You can edit the following configuration items by PIN code request (Menu 3.4.1) selecting the right soft key. When this is set to On, you are requested to enter your PIN each time you switch the phone on. Connection title Access Point profile name. - Page 156 When switching one: Locks the handset whenever 3. Input the new PIN code, and press [OK]. the handset is switched on. 4. Input the new PIN code once again, and press If USIM changed: Locks the handset when the [OK]. phone's USIM card has been changed.
-
Page 157: Language
Settings PIN2 code Memory status Menu 3.6 PIN2 is the abbreviation of Personal Identification Common memory Number 2, and is used to restrict the use of (Menu 3.6.1) unauthenticated users like PIN. The PIN2 code This function shows the status of the user memory of change procedure is the same as the one for the PIN the mobile phone. -
Page 158: Handset Info
Format external memory Streaming settings (Menu 3.6.5) Menu 3.9 Select this to format the external memory. If you want to set different network setting to play streaming content, you can set different network Handset info. settings. Menu 3.7 This functions shows the USIM card telephone number, model name and software version of the mobile phone. -
Page 159: Settings 44 Media
Media Video camera Duration: Select the desired recording time Menu 4.1 from MMS size(around 25 seconds), 30 This application enables you to record a video clip. seconds, 1 minute, 2 minutes, 5 minutes, and You can play and watch a saved video file in this 60 minutes. -
Page 160: Network 45 Camera
4. To view existing videos, press the right soft key Quality: You can select the desired quality of [Player]. The Videos is launched and displays photo from super fine, fine or normal. existing videos as thumbnails. Move to a desired Multishot: You can take 3/6/9 photos video to view, and press the OK key [Play]. -
Page 161: Access Points Voice Recorder
Media Memory: Select the desired memory between Note Handset and External. You can easily switch the video camera and camera using the left/right navigation keys in Mirror: You can activate the mirror effect by preview mode. selecting "On". Switch camera: You can switch the camera to Voice recorder activate between Internal one and External one. - Page 162 2. Pressing the OK key starts recording. When a Sound theme: You can set it as a voice recording is started, the recording time is ringtune, video ringtune, message tone, or displayed on the LCD. To cancel the recording, switch on/off sound. press the right soft key.
-
Page 163: Messaging
Messaging New message 7. Enter your message in the Message field. Menu 5.1 8. Press the right soft key [Send] to send the Text message message. And it will be saved in the Sent items (Menu 5.1.1) automatically. If the message has not been sent, it You can write and edit a single text message up to will stay in the Outbox with fail status. - Page 164 4. Emoticon: To add an emoticon. #. Cc/Title: Select this to insert Cc or title. 5. Contacts: You can add name or/and number Note stored in the address book. After selecting one In Text Message, from Name, Number and Name & Number, if you insert a new slide, an image, a sound, a press the OK key.
- Page 165 Messaging 4. Enter phone numbers in the To and Cc fields. 6. Image: You can insert an image. (One image Select Options > Contacts or press OK in the TO per slide) or CC fields to select a phone number from the 7.
- Page 166 < Option Menus > 8. Sound: You can insert a sound file. (One sound per slide) Insert: You can insert the followings. 9. New image: Camera module opens and you can 1. New slide: Select this to add a new slide. take a photo.
- Page 167 Messaging Remove: Select this menu to remove the current Viewing picture messages slide or an object included in the current slide. To preview picture message Move to Slide: Select this menu to move to the 1. Select Preview from the Options Menu to preview previous or the next slide.
- Page 168 Mute(or Unmute): This menu allows you to Forward: Forwards the selected message. determine whether to mute the sound when there Call: Call back to the originator. is an audio or a video file included in the message. Save address: Saves the sender’s number to the Move to Slide: Move to the selected Slide.
- Page 169 Messaging Forward: Forwards the selected message. [Outbox / Detailed View Screen Menus] Call: Call back to the originator. Resend: Resends the message. Save address: Saves the sender’s number to the Edit: Edits the selected message. address book. Play/Pause: Plays the message or pauses message New message: Displays the Edit screen in which playback.
- Page 170 [Outbox / Play Screen Menus] Delete: Deletes the selected message. Move to slide: Move to the selected Slide. Resend: Resends the message. Edit: Edits the selected message. View detail: Displays the Detailed View screen. Itshows you detailed information of messages. Play/Pause: Plays the message or pauses message playback.
- Page 171 Messaging View objects: Displays the screen (Object View View objects: Displays the screen (Object View Screen) in which you can view the audio, image, Screen) in which you can view the audio, image, and video files included in the message. You can and video files included in the message.
- Page 172 E-mail 7. To enter data in the recipient (To), reference (Menu 5.1.4) address (CC) and hidden reference address (BCC) Create e-mail fields, you can search the Contacts by using the Contacts key and use the following functions by You can create a new e-mail (Electronic mail). using the [Option] key.
-
Page 173: Inbox
Messaging Save to drafts: Select this menu to save the Remove: Remove the attached file. message in the draftbox. Cancel: Exit the e-mail composer. View object: Show the attached file. 10. When you have finished writing an e-mail, press Remove: Remove the attached file. the Send key to send the e-mail. -
Page 174: Mailbox
View: You can view current message. Reply all: Creates a reply to all the recipients. New message: You can write a new message. Forward: Forwards the selected e-mail message to another e-mail address. Mark/Unmark: You can select one or more messages for multiple deletion. -
Page 175: Drafts
Messaging Reply: Creates a reply to the selected e-mail 4. Press the Restore key to restore a deleted e-mail. message. 5. Using the Option key, you can select the following Reply all: Creates a reply to all the recipients. functions. Forward: Forwards the selected e-mail message Restore: Restores a deleted e-mail. -
Page 176: Outbox
Delete: Deletes the current message. View status: Shows the reason for transmission failure. Outbox Mark/Unmark: You can select one or more Menu 5.5 messages for multiple deletion. Outbox is a temporary storage place for messages waiting to be sent. Filter: Displays messages by desired message types. -
Page 177: Templates
Messaging Save address: Saves the recipient's number to the Settings Menu 5.9 address book. Text message Mark/Unmark: You can select one or more (Menu 5.9.1) messages for multiple deletion. Message centre Filter: Displays messages by desired message • Input the address of Text message centre. types. - Page 178 Request report: Determines whether to request 5. Validity period: Allows you to configure the term a delivery confirmation mail for a Multimedia of validity for a message when transmitting a message. picture message. The message would be saved in the picture message server only for the configured Allow report: Determines whether to allow term.
- Page 179 Messaging the contents of the profile in the edit mode by 1. Allow reply email: Determines whether to allow pressing the Edit key. The edit screen also appears sending a read confirmation mail for a read when creating a new profile under Options. The confirmation mail request.
- Page 180 5. Email accounts 6. Move the cursor to the E-mail address field and configure the e-mail address for outgoing mail. 1. You can create or configure an e-mail account including the e-mail server and user ID. 7. Move the cursor to the Reply e-mail address field and configure the e-mail address to reply to your 2.
- Page 181 Messaging 13. Move the cursor to the Mailbox type and select 18. Move the cursor to the SMTP authentication field the email inbox type. You can select one between and decide whether the outgoing mail server POP3 and IMAP4. requires authentication. You can select On or Off using the List key.
- Page 182 Video mail (Menu 5.9.4) You can add or modify the video mail centre. Voice mail (Menu 5.9.5) You can add or modify voice mail centre. Service message (Menu 5.9.6) You can configure service message receipt option. Never: Your phone will not receive any service message.
- Page 183 Browser Home Saved pages Menu 6.1 Menu 6.3 You can launch the web browser and access the The phone can save the page on display as an off- homepage of the web service provided by service line file. Up to 20 pages can be saved. provider.
- Page 184 Certificates Automatic, English(ASCII), English(ISO), English(LATIN), Unicode(UCS2 BE), If stored, a list of root/ca certificates required for Unicode(UCS2 LE), Unicode(UCS2 Auto), WTLS/TLS can be found here. Certificates can be Unicode(UTF-16 BE), Unicode(UTF-16 LE), viewed from the list. Unicode(UTF-16 Auto), Unicode(UTF-8). Session clear Scrolling control (Menu 6.6.3) Secure (WTLS/ TLS) session data can be cleared...
- Page 185 Browser Cache (Menu 6.6.5) Enabling Cache allows you to store accessed pages to your phone. Once a page has been stored in cache it will greatly enhance the page loading speed on subsequent browsing of the same page. Cookies (Menu 6.6.6) Enabling Cookies allows you to store cookies sent from the server.
- Page 186 Media album Images - Rename: You can rename the image. Menu 7.1 - File info.: Shows information of the selected This consists of an embedded link for downloading image file. images through the Internet, Default images, and My Images folders. Mark/Unmark: Using the Mark function, you can send, delete, move and copy multiple files.
- Page 187 Media album Memory status: You can view the memory status Edit object: To use the Image Defect & Clipping (handset or external memory card). functions. Effect: To apply the desired effect to the image. Press the right soft key to execute [Send] function immediately.
- Page 188 - Delete: Deletes the selected video. Select [Send] to attach the selected video to a picture message, group message, Email, or Bluetooth. - Delete all: Deletes all the videos. When option 1. Play is selected, the video clip will be - Rename: You can rename the video.
- Page 189 Media album Capture: You can save what is on the paused Play: Plays the sound. screen in an image file (activating only in the Pause New folder: You can create a new folder. mode). Files Mute/Unmute: If the Volume is set to more than 0, the Mute mode goes active and if the Volume is - File info.: Shows information of the selected set to 0, the Unmute mode goes active.
- Page 190 Move to the desired menu using the up and down 9. Move to file key and press the OK key. Previous file: Plays the previous sound file. 1. Play/Pause: You can play, or pause playing a file. Next file: Plays the next video file. 2.
-
Page 191: External Memory
Media album Although all types of files can be saved here, you can 6. If relevant, create with different pictures an only copy or move files managed by My Media. To animated GIF file. set a file as your wallpaper or ringtone, you must 7. - Page 192 To set a picture as your wallpaper, you must copy or Play: Plays the selected audio/video file. move the picture to the phone. Add new: You can add a new file from the audio/video list. Videos (Menu 7.7.2) Sort by: You can sort the files by name, date or file type.
-
Page 193: Games & Downloads
Games & Downloads This phone supports Java so that you can download games, and play them on your handset. Note Please note that downloading a stuff(game, ringtone, wallpaper, etc.) usually requires additional charge. My games & apps Menu 8.1 This menu is used to locate and run downloaded applications, e.g. -
Page 194: Alarm Clock
More Alarm clock 5. Select bell: Select the bell to ring at the alarm Menu 9.1 time, using the left add right direction keys or If you set the alarm, " " appears on the Indicator from the pressing the centre key. bar. - Page 195 More - My handset’s visibility: Set [My handset’s visibility Note status] to [Shown to all] so that other devices can We recommend that your phone and the detect your phone when they are searching for a Bluetooth device you are communicating with be Bluetooth device.
- Page 196 Options found, you will be asked if you want to search again. 1. Add new: Using this menu, you can pair a new Pairing procedure Bluetooth device with your phone. 2. Assign short name: Using this menu, you can - Press the Bond key. A window will appear on rename a paired phone as required.
- Page 197 More <Transmitting data using Bluetooth> <Receiving data using Bluetooth> Menu > 9. More > 2. Connectivity > 1. To transmit data from your phone to another 1. Bluetooth > 1. Paired devices Bluetooth device, first select the application where the target data is saved. For example, to send data 1.
- Page 198 3. To use the headset, select the headset from the Server synchronisation (Menu 9.2.2) registered devices, press the Option key and then If Sync service is supported by your network select 3.Connect. operator, this service function synchronizes the data 4. To check that the selected headset has been in a phone and the data on a server such as connected successfully, press the Option key.
- Page 199 More Proxy IP address: Enter the WAP gateway - Backup address and port number. ] User name: Enter The phone sends all the data from a database your user ID for synchronization server. to the server. The server is expected to replace Password: Input your password.
-
Page 200: Calculator
Calculator World time Menu 9.3 Menu 9.4 You have a calculator that provides 4 calculations of The World time function provides time information of addition, subtraction, multiplication and division as major cities worldwide. well as scientific functions. 1. Select world time. 1. - Page 201 More 3. Input currency rates for up to 5 currencies 4. Press [Reset] to clear the current input field and equivalent to GBP and then press [Done]. Then locate the cursor in the input field. you can convert one currency to another. Weight (Menu 9.5.4) 4.
- Page 202 Volume (Menu 9.5.6) 1. Select Volume menu. 2. Select desired unit to convert using [Unit]. 3. Input standard unit and view converted value. 4. Press [Reset] to clear the current input field and locate the cursor in the input field. Velocity (Menu 9.5.7) 1.
- Page 203 Display This menu allows you to personalise the display Switch on (Menu *.1.3) options of the screens and of the menus' entire You can select the image to be displayed while the graphic interface. phone is being switched on. Screen theme Switch off Menu *.1 (Menu *.1.4)
- Page 204 Outgoing call (Menu *.2.2) You can select the image to be displayed while dialling a number. Backlight Menu *.3 You can set the backlight duration on the Main screen, Front screen and Keypad each. Font Menu *.4 You can set the font style, dialing font size, and dialing font color using the left/right navigation keys.
- Page 205 Profiles The profiles menu allows you to personalise and set Alert by: You can personalize the type of signal call tones, message tones, and videophone event made by the Videophone, choosing between Ring, tones. Vibration, Silent, Ring & Vibration, Ring after vibration and Max Ring &...
- Page 206 Key tone Volume: You can set the volume of the chosen effect, choosing from 7 available levels. Flip tone: You can select one of the available files, to be played by the videophone when flipped open. Confirmation tone: You can set the confirmation tone to be played by the videophone to confirm actions.
- Page 207 Calendar Calendar schedule to another phone or an Internet site Menu #.1 through SMS(Text message) or Picture message or Schedule inquiry and search Group message or E-mail or Bluetooth. 1. Reference by Months 3. Detailed reference You can refer to your schedule by months. The You can refer to a detailed schedule, that is the cursor is on the current date, and the registered whole contents of the schedule configured by user.
- Page 208 Schedule notification Configurable alarm options No alarm Icon does not exist. If the user has configured the alarm setting, the specified alarm sound will ring. If the notification time On time is before the schedule start time, you can set up the 15 mins before alarm again.
- Page 209 Calendar Set job status Edit and delete memo The jobs set as finished are displayed as cross-out Locate the cursor on your desired memo, and press below the unfinished jobs in the To do list. You can the key to view all the contents of the memo. This set Finished jobs to Not finished by selecting function shows all the memo contents.
- Page 210 Date counter Memory info. (Menu #.7.2) Menu #.6 Allows you to view each memory status of the 1. Press [Add] and input desired date in the date Calendar menu. field. 2. Input text in [Notes] field and press [Done]. Clear all (Menu #.7.3) 3.
- Page 211 Troubleshooting Please check to see if any problem which you may have with your phone is described here before taking it for service or calling a service engineer. How do I view the list of outgoing calls, incoming Connection is poor or is not audible in certain calls and missed calls? areas.
- Page 212 An echo can be heard during connection with a Usage time of battery becomes shorter. certain telephone in a certain area. If the battery time is short, it may be due to the user environment, or large volume of calls, or weak It is called ‘Echo Phenomenon’...
- Page 213 Allows hands-free operation. Includes earpiece and Note microphone. Always use genuine LG accessories. Failure to do this may invalidate your warranty. Accessories may be different in different regions; please check with our regional service company or agent for further enquiries.
- Page 215 MEMO...
- Page 216 MEMO...
- Page 217 MEMO...
Need help?
Do you have a question about the KU730 and is the answer not in the manual?
Questions and answers