
Related Manuals for COMFORTPOOL CP-80021


Summary of Contents for COMFORTPOOL CP-80021
- Page 1 SOLAR PANEL Installatie- & gebruikershandleiding SOLAR PANEL Installation & Operation Manual...
-
Page 2: Table Of Contents
Om zoveel mogelijk van de warmte die gegenereerd wordt door het solar panel te behouden raden wij aan om ‘s nachts, of wanneer u het zwembad niet gebruikt, uw zwembad af te dekken met een Comfortpool Solar Cover. -
Page 3: Veiligheidsvoorschriften
Veiligheidsvoorschriften Lees de handleiding zorgvuldig door vóór de montage en het gebruik van het solar panel, en volg alle instructies op. Bewaar deze handleiding voor toekomstig gebruik. Waarschuwing! Installeer het Solar Panel zodanig dat het niet mogelijk is voor kinderen om via het paneel in het zwembad te klimmen. -
Page 4: Algemene Informatie
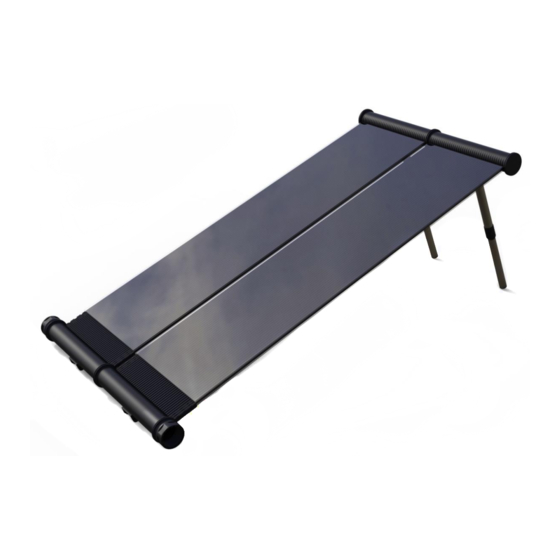
1. Algemene informatie Hoe werkt het Solar Panel? Het Solar Panel is een zwembad-zonneverwarmingsapparaat dat op het zwembadfiltratiesysteem wordt aangesloten. Het solar paneel verwarmt het zwembadwater door zonlicht te absorberen. Raadpleeg de onderstaande afbeelding voor de stroomrichting van het zwembadwater tijdens het gebruik. Het water stroomt uit het zwembad, komt de filterpomp binnen en stroomt van daaruit naar het paneel waar het rond stroomt. -
Page 5: Waar Plaats Ik Het Solar Panel
Waar plaats ik het Solar Panel? 1. Het zonnepaneel moet op een harde, vlakke ondergrond worden geïnstalleerd. 2. Kies een plaats waar per dag zo lang mogelijk de volle zon op schijnt. 3. Stel de aluminium voetjes af om het oppervlak van het paneel naar de zon te kantelen. 4. -
Page 6: Plaatsing Op Het Dak Of Andere Verhoging
Plaatsing op het dak of andere verhoging Het solar panel is bedoeld voor plaatsing op de grond, naast uw zwembad en filterpomp. Montage op een andere plek, zoals een dak of een andere verhoging, is in principe mogelijk maar wel geheel op eigen risico. Mogelijke onderdelen die u nodig heeft voor dit soort installaties worden niet meegeleverd met het solar panel. -
Page 7: Onderdelen
2. Onderdelen Omschrijving Aantal Solar paneel Connector Ø 38 mm zwembadslang Aluminium poot Ø 38 mm rvs slangklem Teflon tape Lekkage reparatiekit... -
Page 8: Installatie
3. Installatie We raden aan om teflon tape rondom het schroefdraad aan de uiteinden van koppelstukken en slangadapters te wikkelen. 1. Haal het solar panel en de accessoires uit de verpakking. 2. Omwikkel de connector met teflontape en schroef deze in de waterinlaat en -uitlaat Connector 3. - Page 9 4. Plaats het paneel in de juiste positie en pas de lengte van de aluminium poten aan. Opmerking: Houd het uiteinde van de kleine aluminium buis met uw hand vast, draai deze linksom, trek vervolgens de aluminium buis op de juiste lengte, draai met de klok mee en vergrendel de aluminium buis. 5.
- Page 10 7. Sluit het ene uiteinde van de bijpassende slang aan op de wateruitlaat van het solar panel en sluit het andere uiteinde aan op de retourwaterinlaat van het zwembad, zet de roestvrijstalen slangklem erop en draai deze vast. Retourinlaat zwembad Wateruitlaat 8.
-
Page 11: Aansluiting Op Een Intex Zwembad
Aansluiting op een Intex zwembad Wanneer u een Intex zwembad heeft dient u tevens een Zwembadverwarming Aansluitset aan te schaffen. Deze aansluitset gebruikt u om het solar panel passend aan te sluiten op uw zwembadsysteem. Sluit met behulp van een Intex adapter en een rvs-slangklem de meegeleverde slang aan op de Intex filterpomp, en sluit deze slang vervolgens volgens de normale instructies aan op het solar paneel. -
Page 12: Instructies Voor De Driewegkraan
Instructies voor de driewegkraan De hendel op de driewegkraan kan de waterstroom aanpassen. № 4 is voor de waterinstroom, № 1 is verbonden met het solar panel. Bij een filterpomp van 0,25 – 0,75 pk kunt u het beste de hendel in de № 2 positie plaatsen. Bij een filterpomp van meer dan 0,75 pk kunt u het beste de hendel in de №... -
Page 13: Winterklaar Maken
4. Winterklaar maken Laat uw solar panel volledig leeglopen om deze winterklaar te maken. Vorstschade valt niet onder de garantie. U moet, net als bij uw andere zwembadapparatuur, al het water uit het solar panel en alle bijbehorende aansluitingen laten lopen. Wij adviseren om het solar panel en alle bijbehorende onderdelen op een warme, droge plek op te bergen. -
Page 14: Garantie
2 jaar vanaf de aankoopdatum. Deze garantie beperkt zich tot de eerste koper en is niet overdraagbaar. De aansprakelijkheid van Comfortpool zal nooit de reparatie of vervanging van defecte onderdelen te boven gaan, en zal geen kosten omvatten voor arbeid om een defect onderdeel te verwijderen en opnieuw te installeren, noch het transport van en naar de fabriek of leverancier, noch enig ander materiaal dat nodig is voor het uitvoeren van een eventuele reparatie. - Page 15 5. TROUBLESHOOTING ..........................26 6. WARRANTY............................... 27 Thank you for purchasing a Comfortpool Solar Panel. The solar panel has been engineered and manufactured according to our highest standards for dependability, durability, ease of operation and safety. Follow the instructions in this manual and the solar panel will heat your pool for many years to come.
-
Page 16: Safety Warnings
Safety warnings Please read this manual carefully before installing and using the solar panel, and follow all instructions. Keep this manual for future use. Warning! Position the solar panel so that it does not provide an access for children into the swimming pool. -
Page 17: General Information
1. General information How it works: The solar heating panel is a pool solar heating device to be connected to the pool filtration system. The solar heating panel heats the pool water by absorbing sunlight. Please refer to the below image for the water flow direction while in use. -
Page 18: Where Do I Place The Solar Panel
Where do I place the solar panel? 1. The solar heating panel should be installed on a hard, level ground. 2. It is recommended that the installation site receive at least 6 hours of direct sunlight per day. 3. Adjust the aluminium feet to tilt the surface of the product toward the sun. 4. -
Page 19: Installation On The Roof Or Other Structure
Installation on the roof or other structure The solar panel is intended for installation on the ground, next to your pool and filter pump. Installation on a roof or any other structure is possible, but completely at your own risk. Possible parts that you may need for this kind of installation are not included with the solar panel. -
Page 20: Parts
2. Parts Description Solar panel Connector 1½” flexible hose Aluminium foot 1½” stainless steel clamp Teflon tape Leak repair kit... -
Page 21: Installation
3. Installation We advise you to wrap Teflon tape on the ends of all threaded headers and pipe adapters. 1. Remove the solar heating panel and its accessories from the box. 2. Wrap the joint of the connector with the Teflon tape and screw it into the water inlet and outlet. Connector 3. - Page 22 4. Place the solar heating plate in the proper position and adjust the length of the aluminium leg. Note: Hold the end of the small aluminium tube with your hand, turn it counter clockwise, then pull the aluminium tube out to the appropriate length, turn clockwise, and lock the aluminium tube. 5.
- Page 23 7. Connect one end of the matching hose to the water outlet of the solar heating plate and connect the other end to the return end of the pool, respectively, and put on the stainless steel clamp and tighten. Inlet tot the pool Water outlet 8.
-
Page 24: Connecting The Panel To An Intex Pool
Connecting the panel to an Intex pool If you have an Intex pool you will need the Solar Heating Connection Kit (not included). This connection kit can be used to connect the solar panel with your Intex pool system. With the help of the Intex adaptor and stainless-steel clamp from the Solar Heating Connection Kit, attach the provided hose onto the pool filter, then onto the solar panel (following the regular instructions). -
Page 25: Manual For Three-Way Valve
Manual for three-way valve The handle on the three-way valve could adjust the water flow, the No.4 is for the water inlet and No.1 is connected with solar heater. If the using 0.25HP to 0.75HP pump, the handle is better sitting on No.2 position If the using more than 0.75HP pump, the handle is better sitting on No.5 position If the pump is less than 0.25HP, the handle is better sitting on No.3 position... -
Page 26: Winterization
4. Winterization The solar panel must be drained for winterization. Freeze damage is not covered under warranty. You must drain the solar panel just like you drain the rest of your pool equipment. It is always best to store your solar heater inside a warm, dry place for winter storage. 5. -
Page 27: Warranty
This warranty is limited to the first retail purchaser and is not transferable. The liability of Comfortpool shall not exceed the repair or replacement of defective parts and does not include any costs for labor to remove and reinstall a defective part, transportation to or from the factory or supplier, and any other materials required to execute a possible repair.
Need help?
Do you have a question about the CP-80021 and is the answer not in the manual?
Questions and answers