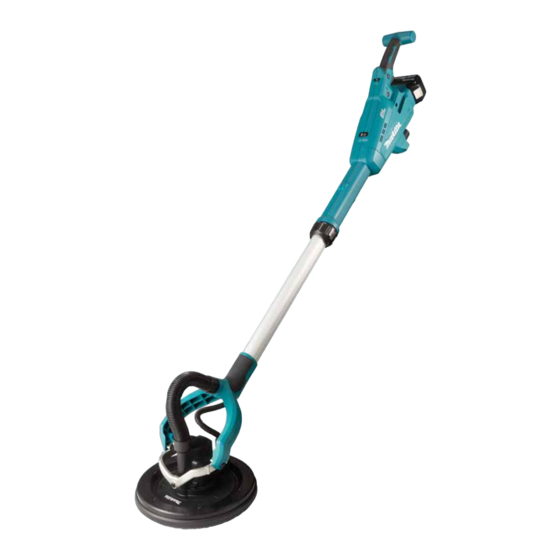
Makita DSL801 Instruction Manual
Cordless drywall sander
Hide thumbs
Also See for DSL801:
- Instruction manual (129 pages) ,
- Repair manual (36 pages) ,
- Instruction manual (92 pages)
Table of Contents
Advertisement
Quick Links
Advertisement
Table of Contents

Related Manuals for Makita DSL801


Summary of Contents for Makita DSL801
- Page 1 INSTRUCTION MANUAL Cordless Drywall Sander DSL801 Read before use.
-
Page 2: Specifications
SPECIFICATIONS Model: DSL801 Paper size 225 mm Pad diameter 210 mm No load speed 1,000 - 1,800 min Dimensions (L x W x H) 1,120 mm - 1,540 mm x 278 mm x 273 mm Rated voltage D.C. 18 V Net weight 4.6 - 5.8 kg... -
Page 3: Ec Declaration Of Conformity
Electrical safety Vibration Power tool plugs must match the outlet. Never modify the plug in any way. Do not use any The vibration total value (tri-axial vector sum) deter- adapter plugs with earthed (grounded) power mined according to EN62841-2-4: tools. Unmodified plugs and matching outlets will Work mode: disc sanding reduce risk of electric shock. - Page 4 Do not let familiarity gained from frequent use Keep handles and grasping surfaces dry, clean of tools allow you to become complacent and and free from oil and grease. Slippery handles and ignore tool safety principles. A careless action can grasping surfaces do not allow for safe handling and cause severe injury within a fraction of a second.
- Page 5 Do not use accessories which are not specifi- Kickback and Related Warnings cally designed and recommended by the tool Kickback is a sudden reaction to a pinched or snagged rotat- manufacturer. Just because the accessory can ing pad or any other accessory. Pinching or snagging causes be attached to your power tool, it does not assure rapid stalling of the rotating accessory which in turn causes safe operation. the uncontrolled power tool to be forced in the direction oppo- site of the accessory’s rotation at the point of the binding. The rated speed of the accessory must be at For example, if a pad is snagged or pinched by the workpiece, least equal to the maximum speed marked on the edge of the pad that is entering into the pinch point can dig...
- Page 6 It may result in loss of your eyesight. CAUTION: Only use genuine Makita batteries. Do not short the battery cartridge: Use of non-genuine Makita batteries, or batteries that Do not touch the terminals with any con- have been altered, may result in the battery bursting ductive material. causing fires, personal injury and damage. It will...
-
Page 7: Functional Description
25. When storing the wireless unit, keep it in the forcibly. If the cartridge does not slide in easily, it is supplied case or a static-free container. not being inserted correctly. 26. Do not insert any devices other than Makita wireless unit into the slot on the tool. 27. Do not use the tool with the lid of the slot dam- aged. Water, dust, and dirt come into the slot may cause malfunction. -
Page 8: Overheat Protection
Overheat protection Indicating the remaining battery capacity When the tool or battery is overheated, the tool stops Only for battery cartridges with the indicator automatically and the lamp lights up. In this case, let the tool and battery cool before turning the tool on again. Overdischarge protection When the battery capacity is not enough, the tool stops automatically. In this case, remove the battery from the tool and charge the battery. Switch action CAUTION: Before installing the battery car- tridge into the tool, always check to see that the switch trigger actuates properly and returns to the "OFF"... -
Page 9: Electronic Function
For continuous operation, depress the lock button while Electronic function pulling the switch trigger, and then release the switch trigger. To stop the tool, pull the switch trigger fully, then The tools equipped with electronic function are easy to release it. operate because of the following features. Speed adjusting dial Constant speed control Possible to get fine finish, because the rotating speed is kept constant even under the loaded condition. Soft start feature Soft start because of suppressed starting shock. - Page 10 Hex wrench storage Optional accessory When you wish to perform operation cleanly, connect a Makita vacuum cleaner to your tool. Connect a hose of the vacuum cleaner to the dust nozzle using the front cuff 24. ► 1 . Hex wrench When not in use, store the hex wrench as shown in the figure to keep it from being lost.
-
Page 11: Operation
Installing or removing the extension OPERATION handle CAUTION: Only use Makita genuine pads for Optional accessory sanding (optional accessories). To install the extension handle, attach the extension CAUTION: Make sure the work material is handle to the tool and secure it with the knob firmly. Be secured and stable. Falling object may cause sure to insert the end of the tool into the holder of the personal injury. - Page 12 Wear the belt for the extension handle as shown in Put the end of the extension handle into the holder the figure. to support the tool. ► 1 . End of extension handle 2. Holder Operate the tool in the same way as the tool without the extension handle. ► 1 . Belt Attach the holder to the belt.
- Page 13 Open the lid on the tool as shown in the figure. WIRELESS ACTIVATION FUNCTION Optional accessory What you can do with the wireless activation function The wireless activation function enables clean and com- fortable operation. By connecting a supported vacuum cleaner to the tool, you can run the vacuum cleaner automatically along with the switch operation of the tool. ► 1 . Lid Insert the wireless unit to the slot and then close the lid. When inserting the wireless unit, align the projections with the recessed portions on the slot.
- Page 14 Tool registration for the vacuum cleaner NOTE: A Makita vacuum cleaner supporting the wireless activation function is required for the tool registration. NOTE: Finish installing the wireless unit to the tool before starting the tool registration.
- Page 15 Connect the hose of the vacuum cleaner with the NOTE: The wireless activation lamp on the tool will tool. stop blinking in blue when there is no operation for 2 hours. In this case, set the stand-by switch on the vacuum cleaner to "AUTO" and push the wireless activation button on the tool again. NOTE: The vacuum cleaner starts/stops with a delay.
- Page 16 Description of the wireless activation lamp status ► 1 . Wireless activation lamp The wireless activation lamp shows the status of the wireless activation function. Refer to the table below for the meaning of the lamp status. Status Wireless activation lamp Description Color Duration...
- Page 17 If the cancellation is performed successfully, the wire- Cancelling tool registration for the less activation lamps will light up in red for 2 seconds vacuum cleaner and start blinking in blue. NOTE: The wireless activation lamps finish blinking in Perform the following procedure when cancelling the red after 20 seconds elapsed. Press the wireless acti- tool registration for the vacuum cleaner.
- Page 18 Troubleshooting for wireless activation function Before asking for repairs, conduct your own inspection first. If you find a problem that is not explained in the manual, do not attempt to dismantle the tool. Instead, ask Makita Authorized Service Centers, always using Makita replace- ment parts for repairs. State of abnormality Probable cause (malfunction) Remedy The wireless activation lamp does The wireless unit is not installed into the tool. Install the wireless unit correctly. not light/blink. The wireless unit is improperly installed into the tool. The terminal of the wireless unit and/or Gently wipe off dust and dirt on the terminal of the the slot is dirty.
-
Page 19: Maintenance
CAUTION: before attempting to perform inspection or These accessories or attachments maintenance. are recommended for use with your Makita tool specified in this manual. The use of any other NOTICE: Never use gasoline, benzine, thinner, accessories or attachments might present a risk of alcohol or the like. - Page 20 Makita Europe N.V. Jan-Baptist Vinkstraat 2, 3070 Kortenberg, Belgium Makita Corporation 3-11-8, Sumiyoshi-cho, Anjo, Aichi 446-8502 Japan 885880-229 www.makita.com 20210127...
Need help?
Do you have a question about the DSL801 and is the answer not in the manual?
Questions and answers
where do you replace filters