Advertisement
Available languages
Available languages
Wireless Stereo
Headphone System
Operating Instructions
Mode d'emploi
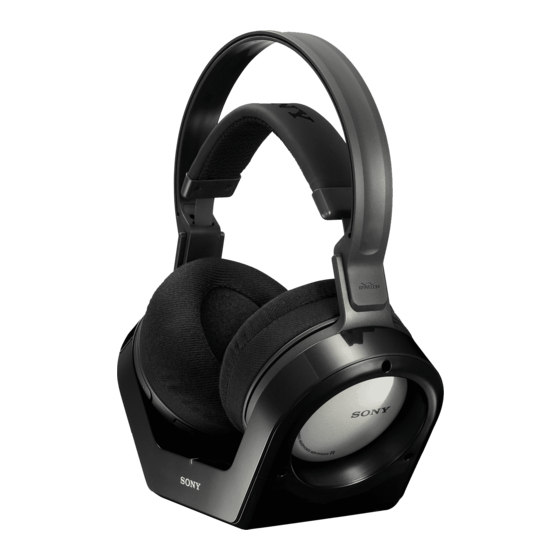
MDR-RF925RK
MDR-RF970RK
© 2007 Sony Corporation
Printed in China
For the customers in the USA and Canada
English
RECYCLING NICKEL METAL HYDRIDE
BATTERIES
Nickel Metal Hydride
batteries are recyclable.
WARNING
You can help preserve our
environment by returning
To reduce the risk of fire or electric shock,
your used rechargeable
do not expose this apparatus to rain or
batteries to the collection
moisture.
and recycling location
nearest you.
To reduce the risk of fire or electric shock, do not place
For more information regarding recycling of
objects filled with liquids, such as vases, on the
rechargeable batteries, call toll free 1-800-822-8837,
apparatus.
or visit http://www.rbrc.org/
To avoid electrical shock, do not open the cabinet.
Refer servicing to qualified personnel only.
Caution:
Connect AC power adaptor to an easily accessible AC
outlet. Should you notice an abnormality in AC power
Do not handle damaged or leaking Nickel Metal
adaptor, disconnect it from the AC outlet
Hydride batteries.
immediately.
Do not install the appliance in a confined space, such
as a bookcase or built-in cabinet.
Do not expose the battery to excessive heat such as
Welcome!
direct sunlight, fire or the like.
Thank you for purchasing the Sony MDR-RF925RK/
Information
RF970RK Wireless Stereo Headphone System. Before
You are cautioned that any changes or modifications
operating the unit, please read this manual thoroughly
not expressly approved in this manual could void
and retain it for future reference.
your authority to operate this equipment.
Some features are:
• Wireless transmission lets you enjoy TV or music
If you have any questions about this product, you
without the restriction of a cord
may call:
• High fidelity sound reproduction
Sony Customer Information Services Center
1-800-222-7669 or http://www.sony.com/
• Enhanced clarity of sound with minimal
transmission noise by use of noise reduction
technology (MDR-RF970RK only)
Declaration of Conformity
• Easy connection to TV and Audio system equipment
Trade Name:
SONY
• Up to 150 feet reception range
Model No.:
MDR-RF925R
• Hassle-free recharging by simply placing
MDR-RF970R
headphones on the transmitter base station;
(Headphones Unit)
headphones charge via electromagnetic induction
Responsible Party:
Sony Electronics Inc.
• Convenient volume adjustment on the headphones
• Comfortable fit with adjustable headband and
Address:
16530 Via Esprillo,
San Diego, CA 92127 USA
complete coverage of the ear
Telephone No.:
858-942-2230
• Headphones automatically turn on when placed
over the head and turn off when removed, saving
This device complies with Part 15 of the FCC
battery power
Rules. Operation is subject to the following two
conditions: (1) this device may not cause harmful
interference, and (2) this device must accept any
Notes on receiving
interference received, including interference that
performance
may cause undesired operation.
This system utilizes very high frequency signals in the
Note
900 MHz band so the receiving performance may
This equipment has been tested and found to comply
deteriorate due to the surroundings. The following
with the limits for a Class B digital device, pursuant to
examples illustrate conditions that may reduce the
Part 15 of the FCC Rules. These limits are designed to
reception range or cause interference.
provide reasonable protection against harmful
• Inside a building with walls containing steel beams.
interference in a residential installation. This
• An area with many steel file cabinets, etc.
equipment generates, uses and can radiate radio
• An area with many electrical appliances capable of
frequency energy and, if not installed and used in
generating electromagnetic fields.
accordance with the instructions, may cause harmful
• The transmitter is placed on a metal instrument.
interference to radio communications.
• An area facing a roadway.
However, there is no guarantee that interference will
• Noise or interfering signals exist in the surroundings
not occur in a particular installation. If this equipment
due to radio transceivers in trucks, etc.
does cause harmful interference to radio or television
• Noise or interfering signals exist in the surroundings
reception, which can be determined by turning the
owing to wireless communication systems installed
equipment off and on, the user is encouraged to try to
along roadways.
correct the interference by one or more of the
following measures:
– Reorient or relocate the receiving antenna.
– Increase the separation between the equipment
and receiver.
– Connect the equipment into an outlet on a circuit
different from that to which the receiver is
connected.
– Consult the dealer or an experienced radio/ TV
technician for help.
For the customers in Canada
Operation is subject to the following two conditions:
(1) this device may not cause interference, and (2) this
device must accept any interference, including
interference that may cause undesired operation of the
device.
3-100-340-11(2)
5
N Getting started
Unpacking
Check that you have the following items:
• The headphones (1)
• The transmitter (1)
• AC power adaptor (1)
About the charging method of the system
This system employs a contactless charge method that
• Connecting cord (1) (phono plugs y stereo
requires no terminals by the electromagnetic induction.
miniplug), 1 m
Notes
• Do not leave any metallic objects (coin, clip, etc.)
near the transmitter's charging point. The
transmitter and the metal might become hot and it is
dangerous.
• Unimatch plug adaptor (1) (stereo mini jack y
stereo phone plug) (MDR-RF970RK only)
• Rechargeable nickel-metal hydride battery
• Do not leave any objects susceptible to magnetism
BP-HP550-11 (1)
(cash cards, floppy disks with magnetic coding, etc.)
near the system. Exposure to the transmitter's
electromagnetic field may render them unusable.
Charging the supplied
rechargeable battery
The supplied rechargeable nickel-metal hydride battery
is not charged from the first time you use it. Be sure to
charge it before use.
To charge the headphones, place them on the transmitter.
1
Press the PUSH button of the left housing to
• Do not place a radio near the system. A noise may be
open the battery compartment lid.
heard from the radio. In such a case, change the
The battery compartment lid comes off.
angle of the radio or move away from the system so
L
that a noise is not heard.
When the transmitter's POWER/CHARGE
indicator does not light up red
Check if the right and left headphones are rested on
the transmitter correctly. Remove the headphones and
replace them on the transmitter again so that the
PUSH
POWER/CHARGE indicator lights in red.
button
To recharge the headphone battery after use
2
Insert the supplied rechargeable nickel-
Place the headphones on the transmitter after use.
metal hydride battery into the battery
Since the built-in timer recognizes when charging is
complete, there is no need to remove the headphones
compartment matching the 3 terminal on
from the transmitter after charging.
the battery to the 3 mark in the
compartment.
Notes
Do not use rechargeable battery other than the
• The transmitter automatically stops sending RF
supplied one.
• This system is designed to charge only the supplied
• If dry batteries are installed, they cannot be charged.
• Do not attempt to use the supplied BP-HP550-11
• Charge in an environmental temperature of
3
Close the battery compartment lid.
Charging and usage hours
1Insert the tab into the hole at the upper left.
2Close the lid until it clicks.
Approx. charging
hours*
L
1 hour
1
16 hours*
*
1
*
2
*
3
2
Using the headphones with dry batteries
(sold separately)
4
Connect the supplied AC power adaptor to
Commercially available (size AAA) dry batteries can also
the transmitter.
be used to power the headphones. Install the batteries in
the same manner as described in steps 1 through 3 of
"Charging the supplied rechargeable battery."
When dry batteries are installed, the battery charge
function will not be activated.
1 2
3
R
A
L INPUT
B
CHANNEL
DC IN 12V
Battery life
Transmitter
To DC IN
(Using Sony alkaline batteries LR03/AM-4 (N))
12V jack
To an AC
Model
outlet
MDR-RF925RK
MDR-RF970RK
AC power adaptor
(supplied)
*
1
*
2
Notes on Batteries
Rest the headphones on the transmitter so
• Do not charge a dry battery.
that the transmitter's POWER/CHARGE
• Do not carry a dry battery together with coins or
indicator lights in red.
other metallic objects. It can generate heat if the
Please place the headphones on the transmitter so
positive and negative terminals of the battery
that the triangle arrow would be matched. If the
accidentally come into contact with metallic objects.
headphones are not properly placed, it will not be
• If you are not going to use the unit for a long time,
charged.
remove the batteries to avoid damage from battery
Charging will take about 16 hours, after which the
leakage or corrosion.
POWER/CHARGE indicator will go off.
Checking the remaining battery power
Headphones
Pull up the self-adjusting band and check the POWER
indicator located on the right housing. The battery is
L
R
still serviceable when the indicator lights in red.
Charge the rechargeable battery or install new dry
batteries if the POWER indicator light dims, flashes, or
the sound becomes distorted or noisy.
Note
The rechargeable nickel-metal hydride battery should
be replaced with new one when they last only half the
expected time after a proper recharging. The
rechargeable battery type BP-HP550-11 is not
commercially available. You can order the battery
Transmitter
from the store where you purchased this system, or at
POWER/CHARGE
indicator
your nearest Sony dealer.
Setting up the transmitter
1
Connect the transmitter to audio/video
equipment.
Select one of the hookups below depending on the
jack type:
A To connect to a headphones jack
Transmitter
Charging point
1 2
3
R
A
L
INPUT
CHANNEL
DC IN 12V
Right
Left channel
L
R
channel (red)
(white)
Headphones
Connecting cord
(supplied)
Rechargeable
battery
Lines of magnetic
force
Transmitter
Unimatch plug
adaptor
(MDR-RF970RK:
supplied)
To headphones
jack (Stereo
phone jack)
B To connect to LINE OUT or REC OUT
Transmitter
signals while charging the battery.
1 2
3
R
A
L
INPUT
CHANNEL
DC IN 12V
rechargeable battery type BP-HP550-11 for safety.
Note that other types of rechargeable batteries
cannot be charged with this system.
rechargeable battery for other components. They are
for use with this system only.
Connecting cord
(supplied)
between 0 °C and 40 °C (between 32 °F and 104 °F).
Right
Approx. usage time*
1
channel (red)
1
MDR-RF925RK MDR-RF970RK
60 minutes*
3
40 minutes*
3
To LINE OUT or
2
18 hours*
3
14 hours*
3
REC OUT jacks
at 1 kHz, 1 mW+1 mW output
hours required to fully charge an empty battery
Stereo system,
Time stated above may vary, depending on the
VCR, etc.
temperature or conditions of use.
* "WALKMAN" and "WALKMAN" logo are
registered trademarks of Sony Corporation.
2
Connect the supplied AC power adaptor to
the transmitter.
1 2
3
R
A
L INPUT
B
CHANNEL
DC IN 12V
Approx. hours*
1
To DC IN
28 hours*
2
12V jack
To an AC
22 hours*
2
outlet
at 1 kHz, 1 mW+1 mW output
Time stated above may vary, depending on the
AC power adaptor
temperature or conditions of use.
(supplied)
Notes
Sending RF signals from the transmitter
• Use only the supplied AC power adaptor. Do not
The transmitter starts sending RF signals automatically when
use any other AC power adaptor.
it detects an audio signal from the connected equipment.
If it does not detect an audio signal for more than about 10
minutes, the transmitter will stop sending RF signals, and the
POWER/CHARGE indicator will turn off.
When the transmitter receives an audio signal again, it starts
Polarity of the plug
sending the RF signals, and the POWER/CHARGE
• When the transmitter is placed on or near a TV, it
indicator will light up green again.
may pick up a noise. In such a case, place the
If the audio signal is very weak, the transmitter does not
transmitter away from the TV.
send RF signals. If the transmitter is connected to a
• If the connected equipment has the AVLS
headphone jack, make sure the volume of the equipment
(Automatic Volume Limiter System) function, be
connected is set to 5 - 6 or higher.
sure to turn the function off when using the
You may not hear the beginning of the sound from the
transmitter. Otherwise, you will have to turn up the
headphones until the transmitter starts sending the RF
volume of the headphones, and that may cause
signals after detecting an audio signal.
noise.
The headphones automatically turn off
when they are taken off
N Operating the system
– Auto power on/off function
Do not pull up the self-adjusting band when not in
Listening to a program
use, as this will consume the battery power.
Before listening
To reduce the risk of hearing damage, first lower the
volume.
1
Turn on the audio/video equipment
connected to the transmitter.
If the transmitter is connected to the headphone
jack, set the volume control of the audio source
equipment as high as possible but not so high that
the audio signal becomes distorted.
Notes
2
• If hiss is heard, move closer to the transmitter.
Remove the headphones from the
• You may hear some noise when you disconnect the
transmitter.
AC power adaptor from the transmitter before turn
The transmitter's POWER/CHARGE indicator
off the headphones.
lights up green.
Noise Reduction process (MDR-RF970RK
To INPUT A
only)
jacks
The transmitter unit compresses the audio signal and
converts it to RF signal. The headphones unit converts
the received RF signal to an audio signal and
Headphones
decompresses it.
This process reduces noise picked up during
transmission.
B
Transmitter unit
input signal
Transmitter
1 The transmitter unit compresses the audio signals
dynamic range, then converts it to RF signal.
2 Noise may occur due to long distance
3
Select the radio frequency with the
transmission, etc.
CHANNEL selector switch.
3 The headphones unit converts the RF signal to an
audio signal.
4 Noise may occur during conversion.
5 Decompression of the audio signals dynamic range
reduces the noise level and improves the S/N
(signal-to-noise) ratio.
1 2
3
CHANNEL
To headphones
The effective areas of
jack (Stereo
4
Put on the headphones.
mini jack)
the transmitter
When you put on the headphones, the
WALKMAN*,
headphone's power turns on automatically.
TV, etc.
The POWER indicator on the right housing glows
The optimum distance is up to approximately 150 feet
red.
without the system picking up some interference.
Be sure to put the right housing R on your right
However, the distance may vary depending on the
ear and the left housing L on your left ear.
surroundings and environment. If the system picks up
Wear the headphones vertically on your head so
some noise within the above mentioned distance,
that auto power on function is properly activated.
reduce the distance between the transmitter unit and
the headphones, or select another channel.
Notes
• When you use the headphones inside the effective
To INPUT B
areas of the transmitter, the transmitter can be
jack
placed in any direction from the listener.
• Even within the signal reception area, there are some
spots (dead spots) where the RF signal cannot be
received. This characteristics is inherent to RF
signals, and does not indicate malfunction. By
B
slightly moving the transmitter, location of the dead
5
Set the channel to that of the transmitter
spot can be changed.
with the selector (or button) on the right
housing of the headphones.
Replacing the ear pads
A MDR-RF925RK
The ear pads are replaceable. If the ear pads become
Select the channel to that of the transmitter with
the TUNING selector on the right housing of the
dirty or worn out, replace them as illustrated below.
headphones.
The ear pad is not commercially available. You can
When tuning has completed, turn up the volume
order replacements from the store where you
to a moderate level with the VOLUME control on
purchased this system, or at your nearest Sony dealer.
the right housing.
1
Remove the old ear pad by pulling it out of
Left channel
(white)
R
the groove on the housing.
VOLUME control
TUNING
selector
1
2 3
VOLUME
B MDR-RF970RK
Press the TUNING button briefly for automatic
tuning of the headphones. If you do not receive a
clear audio signal, press it again.
When tuning has completed, turn up the volume
2
Place the new ear pad on the driver unit.
to a moderate level with the VOLUME control on
Hang the edge of the ear pad on one side of the
the right housing.
driver unit's groove edge, then turn the edge of
ear pad around the driver unit as illustrated
R
below.
VOLUME control
TUNING
When the ear pad is securely inserted into the
button
groove, adjust the ear pad to the vertical position.
VOLUME
TUNING
Transmitter
N Additional information
Precautions
• If the transmitter is not to be used for a long period of
time, disconnect the AC power adaptor from the AC
outlet by holding the plug. Do not pull on the cord.
• Do not leave the wireless stereo headphone system
in a location subject to direct sunlight, heat or
moisture.
Notes on headphones
To reduce the risk of hearing damage
Avoid using headphones at high volume. Hearing
experts advise against continuous, loud and extended
play. If you experience a ringing in your ears, reduce
the volume or discontinue use.
Caring for others
Keep the volume at a moderate level. This will allow
you to hear outside sounds and to be considerate to
the people around you.
Self-
If you have any questions or problems concerning the
adjusting
system that are not covered in this manual, please
band
consult your nearest Sony dealer.
Be sure to bring the headphones and the transmitter to
the Sony dealer when requiring repair work.
Troubleshooting
No sound/Muffled sound
, Check the connection of the audio/video
equipment or the AC power adaptor.
, Check that the audio/video equipment is
turned on.
, Turn up the volume on the connected audio/
video equipment, if the transmitter is
connected to the headphones jack.
, Change the radio frequency with the
CHANNEL selector switch on the transmitter,
then set to the same radio frequency with the
TUNING selector (or TUNING button) on the
right housing of the headphones.
Headphones unit
, The muting function is activated.
RF transmission
output signal
• Use the headphones near the transmitter.
, The headphones' POWER indicator light turns
2 3 4
noise level (low)
off, dims, flashes, or sound becomes distorted
1
compression
decompression
5
or noisy.
• Charge the rechargeable battery if it is weak,
or replace alkaline batteries with new ones. If
the POWER indicator is still off after charging
the battery, take the headphones to a Sony
dealer.
Distortion
, If the transmitter is connected to the
headphones jack, turn down the volume on the
connected audio/video equipment.
, Change the radio frequency with the
CHANNEL selector switch on the transmitter,
then set to the same radio frequency with the
TUNING selector (or TUNING button) on the
right housing of the headphones.
, The headphones' POWER indicator light turns
off, dims, flashes, or sound becomes distorted
or noisy.
• Charge the rechargeable battery if it is weak,
or replace alkaline batteries with new ones. If
the POWER indicator is still off after charging
the battery, take the headphones to a Sony
dealer.
Loud background noise
, Move closer to the transmitter. As you move
away from the transmitter, more noise is likely
to be heard.
, If the transmitter is connected to the
headphones jack, turn up the volume of the
connected audio/video equipment.
, Change the radio frequency with the
CHANNEL selector switch on the transmitter,
then set to the same radio frequency with the
TUNING selector (or TUNING button) on the
right housing of the headphones.
, The headphones' POWER indicator light turns
off, dims, flashes, or sound becomes distorted
or noisy.
• Charge the rechargeable battery if it is weak,
or replace alkaline batteries with new ones. If
the POWER indicator is still off after charging
the battery, take the headphones to a Sony
dealer.
Specifications
General
Carrier frequency
915.5 MHz, 916.0 MHz, 916.5 MHz
Channel
Ch1, Ch2, Ch3
Modulation
FM stereo
Frequency response
MDR-RF925R: 20 – 20,000 Hz
MDR-RF970R: 10 – 22,000 Hz
Transmitter TMR-RF925R, RF970R
Power source DC 12 V: supplied AC power adaptor
Audio input
Phono jacks, stereo mini jack
Approx. 216 × 105 × 96 mm
Dimensions
(8
/
× 4
/
× 3
/
in) (w/h/d)
5
1
7
8
4
8
Mass
Approx. 220 g (7.77 oz)
Headphones MDR-RF925R, RF970R
Power source Supplied rechargeable nickel-metal
hydride battery BP-HP550-11 or
commercially available (size AAA) dry
batteries
Mass
Approx. 300 g (10.59 oz) incl. Battery
Design and specifications are subject to change
without notice.
Advertisement

Related Manuals for Sony MDR-RF925R


Summary of Contents for Sony MDR-RF925R
- Page 1 When tuning has completed, turn up the volume order replacements from the store where you to a moderate level with the VOLUME control on purchased this system, or at your nearest Sony dealer. the right housing. Remove the old ear pad by pulling it out of...
-
Page 2: Dépannage/Spécifications
Commande prise secteur Touche dans le magasin où vous avez acheté cet appareil ou VOLUME TUNING chez votre revendeur agréé Sony le plus proche. Adaptateur secteur VOLUME (fourni) TUNING Retirez l’oreillette usagée en la sortant de la rainure du boîtier.
Need help?
Do you have a question about the MDR-RF925R and is the answer not in the manual?
Questions and answers