Table of Contents
Advertisement
Available languages
Available languages
Quick Links
Advertisement
Table of Contents

Subscribe to Our Youtube Channel
Related Manuals for Disney DKS7100-P


Summary of Contents for Disney DKS7100-P
-
Page 2: Quick Reference
QUICK REFERENCE Lights when the power is on Lights when a CD+G disc is playing Lights/blinks to indicate Repeat mode Blinks to indicate Program mode Rotate to select CD/CD+G or to turn the power off Rotate to adjust the volume Rotate to adjust the Echo when using a CD+G disc Rotate to adjust the AVC when using a CD+G disc Slide to the ON position to... - Page 3 QUICK REFERENCE (CONTINUED) PLAYING COMPACT DISCS 1. Rotate the Function switch to the CD/CD+G position to turn the unit on; the POWER indicator will light. 2. Press the OPEN/CLOSE button to open the CD compartment door. Place a CD on the center spindle, with the printed label side facing up.
- Page 4 Dear Customer, Please read this manual thoroughly before operating the unit to become more familiar with it and obtain the performance that will bring you continued enjoyment for many years. Keep these instructions handy for future reference. PLEASE KEEP ALL PACKAGING MATERIAL FOR AT LEAST 90 DAYS IN CASE YOU NEED TO RETURN THIS PRODUCT TO YOUR PLACE OF PURCHASE OR MEMOREX.
- Page 5 Dear Customer: Selecting fine audio equipment such as the unit you’ve just purchased is only the start of your musical enjoyment. Now it’s time to consider how you can maximize the fun and excitement your equipment offers. This manufacturer and the Electronic Industries Association’s Consumer Electronics Group want you to get the most out of your equipment by playing it at a safe level.
-
Page 6: Safety Instructions
Before using the unit, be sure to read all operating instructions carefully. Please note that these are general precautions and may not pertain to your unit. For example, this unit may not have the capability to be connected to an outdoor antenna. READ INSTRUCTIONS All the safety and operating instructions should be read before the product is operated. -
Page 7: Location Of Controls
FRONT POWER Indicator CD Display REPEAT Indicator Function (POWER OFF, CD/CD+G) Switch Microphone 1 Monitor ECHO Control Mic 1 Holder Mic 1 ON/OFF Switch 10. MIC VOLUME Control 11. Left Speaker (Side of Unit) 12. Mic 1 Jack 13. CD Compartment 14. - Page 8 LOCATION OF CONTROLS REAR Carrying Handle V-HOLD Control CONTRAST Control BRIGHTNESS Control MONITOR Switch (ON/OFF) AC Jack VIDEO OUT Jack AUDIO OUT Right Jack AUDIO OUT Left Jack...
-
Page 9: Power Source
A/V jacks, we suggest that you use those jacks to connect your portable Karaoke system. After connecting the Video Out jack on this Karaoke system to the Video In jack on your TV with the included video cable, you have the following three choices: 1. - Page 10 Karaoke system to a single mono channel for connection to your mono TV. 3. You can connect the Audio Out jacks from this portable Karaoke system to the Aux In or Audio In jacks of your home stereo system to hear the sound through your home stereo speakers. Follow the instructions for your home stereo system to select the device connected to the external jacks as the audio source.
-
Page 11: Operation
CONNECTING THE MICROPHONES This unit has two microphone jacks which will allow you to sing along with your favorite songs. Before connecting, make sure the MIC VOLUME control is set to minimum. ECHO CONTROL Rotate the ECHO control clock- wise to increase the echo or counterclockwise to decrease the echo. - Page 12 OPERATION (CONTINUED) PLAYING COMPACT DISCS NORMAL PLAYBACK (For karaoke, please refer to page 16.) Rotate the Function switch to the CD/CD+G position to turn the unit on; the POWER indicator will light. The CD player will read the table of contents on the disc and the total number of tracks on the disc will appear in the display.
-
Page 13: To Begin Playback From A Specific Track
OPERATION (CONTINUED) CD PAUSE CONTROL During CD playback, if you wish to pause the disc momentarily, press the PLAY/PAUSE ( button. Playback stops but the disc continues to spin. TO BEGIN PLAYBACK FROM A SPECIFIC TRACK After you insert the disc into the CD player and the total number of tracks appear on the display, you may press either the SKIP/SEARCH o 1 or n 2... -
Page 14: Repeat Playback
OPERATION (CONTINUED) REPEAT PLAYBACK To repeat a single track, press the REPEAT button ‚ once; the REPEAT indicator will blink. Press the SKIP/SEARCH o 2 or n 3 button to select the specific track that you wish to repeat. When the desired track number blinks in the display, press the PLAY/PAUSE (®p) button …... - Page 15 OPERATION (CONTINUED) Press the SKIP/SEARCH o 1 or n 2 button to select the first track that you wish to program. When the desired track number appears display, press PROGRAM button „ again. To clear programmed playback, while in the Stop mode, press the PROGRAM button followed by the STOP (I) button or open the CD door.
-
Page 16: Intro Playback
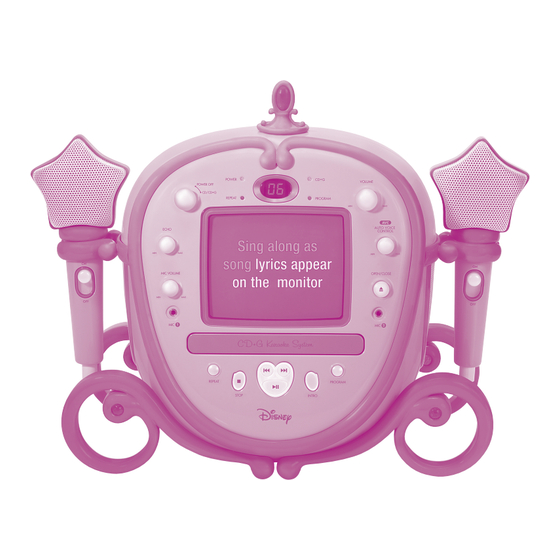
OPERATION (CONTINUED) INTRO PLAYBACK Follow the instructions below to playback the first 10 seconds of each track: During playback, press the INTRO button; the unit will then play the first 10 seconds of each track and then stop. If you hear a song you want to hear in its entirety, press the INTRO button again. - Page 17 OPERATION (CONTINUED) PLAYING A CD+G (COMPACT DISC + GRAPHICS) KARAOKE DISC You can listen to a CD+G karaoke disc. CD+G discs combine the recorded music with an additional video track that displays the song lyrics on this monitor and/or an external TV, if connected. As the song plays, the words to be sung are highlighted on most CD+Gs.
- Page 18 OPERATION (CONTINUED) INFORMATION ABOUT CD+G KARAOKE DISCS: CD+G Karaoke discs are designed specifically for playback in special CD players that include a CD+G decoder, such as this unit. These discs contain the lyrics to each song and the lyrics will appear on your TV screen, line by line, as the disc is playing.
-
Page 19: Care And Maintenance
CARE AND MAINTENANCE Caring for Compact Discs • Treat the compact disc carefully. Handle the compact disc only by its edges. Never allow your fingers to come in contact with the shiny, unprinted side of the compact disc. • Do not attach adhesive tape, stickers, etc. to the compact disc label. •... -
Page 20: Troubleshooting Guide
TROUBLESHOOTING GUIDE Should this unit exhibit a problem, check the following before seeking service: Symptom Possible Cause Compact Disc Player CD Player will not play. CD is not installed or installed upside-down. CD skips while playing. Disc is dirty or scratched. General No sound. -
Page 21: Specifications
SPECIFICATIONS GENERAL: Power Source ...120V, 60Hz AC Speaker ...Impedance 8 Ohms Dimensions ...13.6 (W) x 12.5 (H) x 9.6 (D) Inches Output Power...1.5 W/Channel CD SECTION: Disc Diameter ...4.72” (120mm) ...3.15” (80mm) Single CD Optical Source...Semiconductor Laser D/A Conversion ...1-bit Wavelength. -
Page 22: Référence Rapide
S'allume/clignote pour signaler le mode de répétition Faite pivoter pour sélectionner CD/CD+G ou pour éteindre l'appareil Faite pivoter pour ajuster le contrôle Echo lorsque vous utilisez un disque CD+G Glissez jusqu'en position ON pour allumer le microphone Faites pivoter pour régler le volume du microphone Insérez le microphone 1 dans cette prise Appuyez une fois pour faire répéter la lecture d'une piste, appuyez deux fois pour faire répéter la lecture de toutes les pistes... - Page 23 RÉFÉRENCE RAPIDE (SUITE) LECTURE DES DISQUES COMPACTS 1. Faites pivoter le commutateur de fonction "Function" jusqu'en position CD/CD+G pour mettre l'appareil en marche ; l'indicateur POWER s'allumera. 2. Appuyez sur le bouton OPEN/CLOSE (ouverture/fermeture) pour ouvrir la porte du compartiment à CD. Placez un CD sur l'axe central, en plaçant la face imprimée vers le haut.
- Page 24 Cher client, Cher client, Veuillez lire attentivement ce manuel avant de faire fonctionner l'appareil afin de vous familiariser avec lui et de pouvoir obtenir la performance qui fera vos délices pendant de nombreuses années. Conservez ces instructions pour référence future. CONSERVEZ TOUT LE MATÉRIEL D'EMBALLAGE PENDANT AU MOINS 90 JOURS AU CAS OÙ...
- Page 25 Cher client, Le choix de l'appareil audio de qualité que vous venez d'acheter ne constitue que le début de votre expérience musicale. Le temps est maintenant venu de maximiser le plaisir que vous procure votre appareil. Le fabricant et le Consumer Electronics Group de l’Electronic Industries Association veulent que vous obteniez le maximum de votre appareil en le faisant fonctionner à...
-
Page 26: Consignes De Sécurité
CONSIGNES DE SÉCURITÉ Avant d’utiliser l’appareil, assurez-vous de lire attentivement toutes les instructions d’utilisation. Prenez note qu’il s’agit de précautions d’ordre général, qui peuvent ne pas s’appliquer à votre appareil. Par exemple, il est possible que cet appareil ne puisse être branché à une antenne extérieure. LISEZ LES INSTRUCTIONS Veuillez lire attentivement toutes les instructions sur la sécurité... -
Page 27: Emplacement Des Contrôles
EMPLACEMENT DES CONTRÔLES AVANT Indicateur POWER (alimentation) Afficheur CD Indicateur REPEAT (répéter) Commutateur de fonction (POWER OFF, CD/CD+G) Microphone 1 Moniteur Contrôle ECHO (écho) Support du microphone 1 Interrupteur Mic 1 ON/OFF (micro 1 marche/arrêt) 10. Contrôle MIC VOLUME (volume du micro) 11. - Page 28 EMPLACEMENT DES CONTRÔLES ARRIÈRE Poignée de transport Contrôle V-HOLD (réglage vertical) Contrôle CONTRAST (contraste) Contrôle BRIGHTNESS (luminosité) Interrupteur MONITOR (ON/OFF) (marche/arrêt du moniteur) Prise c.a. Prise VIDEO OUT (sortie vidéo) Prise AUDIO OUT (sortie audio) de droite Prise AUDIO OUT (sortie audio) de gauche...
- Page 29 C.A. Déroulez le cordon d’alimentation c.a. et étendez-le à sa pleine longueur. Insérez-le dans une prise de courant ordinaire de 120 V 60 Hz commodément située. NOTE: Veuillez noter que cet appareil est muni d’une fiche c.a. polarisé dont l’une des broches est plus large que l’autre. Il s’agit d’une mesure de sécurité...
- Page 30 compris. Dans ce cas, les paroles du disque CD+G apparaîtront à l’écran de votre télé et le son du disque se fera entendre à partir des haut-parleurs de votre téléviseur. Remarque : Si vous possédez un téléviseur mono avec une seule prise audio In, vous devrez peut-être vous procurer un adaptateur en "Y"...
- Page 31 BRANCHEMENT D’UN OU DE MICROPHONE(S) Cet appareil est doté de deux prises de microphone qui vous permettent de chanter en accompagnement sur l’air de vos chansons préférées. Avant de brancher un microphone, assurez-vous que les commandes de volume sont réglées au plus bas niveau. COMMANDE D’ÉCHO Tournez la commande d’écho (ECHO) dans le sens horaire pour...
- Page 32 LECTURE DES DISQUES COMPACTS LECTURE NORMALE (POUR LE KARAOKÉ, CONSULTEZ LA PAGE 36.) Faites pivoter le commutateur de fonction "Function" jusqu'en position CD/CD+G pour mettre l'appareil en marche ; l'indicateur POWER s'allumera Le lecteur CD fera la lecture de la table des matières présente sur le disque et le nombre total de pistes apparaîtra à...
- Page 33 COMMANDE DE PAUSE DU CD Si vous voulez arrêter la lecture disque temporairement, appuyez sur la touche de lecture et de pause (PLAY/PAUSE)(®p). La lecture s’arrête, bien que le disque continue à tourner. POUR COMMENCER LA LECTURE À PARTIR D'UNE PISTE SPÉCIFIQUE Après avoir inséré...
-
Page 34: Répétition De La Lecture
RÉPÉTITION DE LA LECTURE Pour répéter une seule piste, appuyez sur la touche REPEAT 1 une fois; le message REPEAT clignotera à l’afficheur. Appuyez sur les touches de saut et de recherche ) 2 ou ( (SKIP/SEARCH) ( pour sélectionner une piste particulière à... - Page 35 Appuyez bouton ) 1 ou ( SKIP/SEARCH ( pour choisir la première piste à programmer. Lorsque la piste désirée apparaît à l’écran, appuyez de nouveau sur le bouton PROGRAM 3. Pour effacer la lecture programmée, lorsque vous êtes en mode Stop, appuyez sur le bouton PROGRAM, puis sur le bouton STOP (X) pour ouvrir la porte du compartiment à...
- Page 36 LECTURE INTRO Suivez les consignes ci-dessous pour faire jouer les premières 10 secondes de chaque piste : Pendant la lecture, appuyez sur le bouton INTRO ; l'appareil fera jouer les 10 premières secondes de chaque piste et s'arrêtera ensuite. FONCTIONNEMENT (SUITE) Si vous entendez une pièce que vous désirez...
- Page 37 FAIRE JOUER UN DISQUE KARAOKÉ CD+G (DISQUE COMPACT + GRAPHIQUES) Vous pouvez mettre en lecture un disque de karaoké CD+G. Les disques CD+G combinent la musique enregistrée avec une piste vidéo additionnelle qui affiche les paroles de la chanson sur ce moniteur et/ou sur un téléviseur externe, s'il est branché. À...
- Page 38 INFORMATION AU SUJET DES DISQUES CD + G KARAOKÉ Les disques CD + G karaoké ont été conçu spécifiquement pour être lus dans des lecteurs CD particuliers qui comportent un décodeur CD + Graphique, comme celui intégré dans cet appareil. Ces disques contiennent les paroles des chansons qui apparaîtront à...
-
Page 39: Soins Et Entretien
Entretien des disques compacts • Manipulez le disque avec soin. Tenez-le uniquement par le bord. Ne posez jamais les doigts sur la surface brillante, non imprimée du disque. • Ne fixez pas de ruban adhésif, d’autocollants ou d’autres matériaux semblables sur la face imprimée du disque. -
Page 40: Guide De Dépannage
Si vous avez un problème avec cet appareil, vérifiez le tableau ci-dessous avant de contacter le service : Symptôme Cause possible Lecteur de disque compact Le lecteur CD ne fonctionne pas. Il n’y a pas de CD dans le lecteur l’extérieur. -
Page 41: Données Techniques
DONNÉES TECHNIQUES GÉNÉRALITÉS : Alimentation ...Secteur 120 V c.a., 60 Hz Haut-parleur...Impédance de 8 ohms Dimensions...13.6 (W) x 12.5 (H) x 9.6 (D)” Puissance de sortie ...1.5 W/CH SECTION CD : Diamètre de disque...120 mm (4,72 po) ...80 mm (3,15 po) Disque unique Source optique ...Semi-conducteur laser Longueur d’onde ...780 nm Les données techniques sont modifiables sans préavis. -
Page 42: Referencia Rápida
Se ilumina cuando la unidad está encendida Se ilumina/parpadea para indicar que está en modo de Repetir Girar para seleccionar CD/CD+G o apagar la unidad Girar para ajustar el Eco cuando usa un disco CD+G Deslizar a la posición de ON para encender el micrófono Girar para ajustar el volumen del micrófono Introducir el Micrófono 1 en este enchufe... - Page 43 REFERENCIA RÁPIDA (CONTINÚA) REPRODUCIR DISCOS COMPACTOS 1. Gire el interruptor Función a la posición de CD/CD+G para encender la unidad; el indicador de ENERGÍA se iluminará. 2. Oprima el botón de ABRIR/CERRAR para abrir la tapa del compartimiento del CD. Coloque un CD en el centro del eje, con el lado de la etiqueta hacia arriba.
- Page 44 Estimado Cliente: Sírvase leer este manual detenidamente antes de operar la unidad para familiarizarse más con la misma y obtener el desempeño que le permitirá disfrutarla por muchos años. Mantenga estas instrucciones a la mano para futura referencia. SÍRVASE GUARDAR EL EMPAQUE DE CARTÓN AL MENOS POR 90 DÍAS POR SI ACASO NECESITARA REGRESAR EL PRODUCTO A SU DISTRIBUIDOR O A MEMOREX.
- Page 45 Estimado cliente: El haber seleccionado un equipo de tan alta tecnología, como el que usted acaba de comprar, es sólo el comienzo de su entretenimiento musical. Ahora es tiempo de tomar en consideración como optimizar el entretenimiento que su equipo le ofrece. Este fabricante y la Asociación de Industrias Electrónicas del Grupo de Consumidores Electrónicos desean que usted obtenga el mejor resultado de su equipo usándolo en un nivel seguro, tal como el escuchar el sonido claro y sonoro, sin distorsión - sobre todo sin que afecte su sentido auditivo.
-
Page 46: Medidas De Seguridad
MEDIDAS DE SEGURIDAD Antes de usar este aparato asegúrese de leer bien todos los puntos de este manual de operaciones. Una vez leído guárdelo a la mano para usarlo como referencia en el futuro. Tenga especial cuidado al seguir las advertencias indicadas en la unidad, así... -
Page 47: Ubicación De Los Controles
UBICACIÓN DE LOS CONTROLES FRENTE Indicador de ENERGÍA Pantalla del CD Indicador de REPETIR Interruptor de Función (APAGADO, CD/CD+G) Micrófono 1 Monitor Control de ECO Soporte de Micrófono 1 Interruptor de Encendido/Apagado del Micrófono 10. Control de VOLUMEN DEL MICRÓFONO 11. - Page 48 UBICACIÓN DE LOS CONTROLES ATRÁS Control de V-HOLD Control de CONTRASTE Control de BRILLO Interruptor de MONITOR (Encendido/Apagado) Enchufe AC Enchufe de SALIDA A VIDEO Enchufe Derecho de SALIDA A AUDIO Enchufe Izquierdo de SALIDA A AUDIO...
-
Page 49: Fuente De Energía
Use el cable AC polarizado incluido con la unidad para operar con energía AC. Inserte el cable AC en cualquier toma de corriente casera de 120V 60Hz. NOTA: La clavija AC incluida con la unidad está polarizada para ayudar a minimizar la posibilidad de un choque eléctrico. Si la clavija AC no cabe en un tomacorriente AC no polarizado, no lime ni corte la cuchilla ancha. - Page 50 CONEXIONES OPCIONALES (CONTINÚA) Nota: Si usted tiene un televisor mono con un único enchufe de Entrada a audio, es posible que tenga que comprar un adaptador "Y" (estéreo a mono) en su tienda local para accesorios electrónicos para poder combinar los canales de estéreo izquierdo y derecho de este sistema de Karaoke portátil a un solo canal mono para conectarse a su televisor mono.
-
Page 51: Operación
CONECTAR LOS MICRÓFONOS Esta unidad tiene dos enchufes para micrófonos que le permiten cantar sus canciones favoritas. Antes de conectar, cerciórese de que el volumen del micrófono esté al mínimo. CONTROL DE ECO Gire el control de ECO a la derecha para aumentar el eco o la izquierda para disminuir el eco. - Page 52 REPRODUCIR DISCOS COMPACTOS REPRODUCCIÓN NORMAL (Para el karaoke, por favor consulte la página 56.) Gire el interruptor de Función a la posición de CD/CD+G para encender la unidad; el indicador de ENERGÍA se iluminará. El reproductor de CD leerá el índice y en la pantalla aparecerá...
- Page 53 CONTROL DE PAUSA PARA CD Durante la reproducción del CD, si usted desea poner en pausa el disco momentáneamente, oprima el botón de TOCAR/PAUSA ( ). Se detiene la reproducción pero el disco continúa girando. INICIAR LA REPRODUCCIÓN DE UNA PISTA ESPECÍFICA Después de introducir el disco en el reproductor de CD y que aparezca el número total de pistas en la pantalla,...
-
Page 54: Reproducción Programada
REPRODUCCIÓN REPETIDA Para repetir una sola pista, oprima el botón de Repetir 1 una vez; el indicador de REPETIR parpadeará. Oprima el botón de Brincar/Buscar ) 2 o ( ) 3 tpara escoger una pista específica que usted desee repetir. Cuando aparezca el número deseado de pista en la pantalla, oprima el botón de Tocar/Pausa (®... - Page 55 Oprima botón ) 1 o ( BRINCAR/BUSCAR ( ) 2 para escoger la primera pista que desee programar. Cuando aparezca el número de pista deseado en la pantalla, oprima de nuevo el botón de PROGRAMA 3. Para borrar la reproducción programada, mientras está en modo de Paro, oprima el botón de PROGRAMA seguido del botón de Paro (n) o bien abra la puerta del CD.
- Page 56 REPRODUCCIÓN DE INTRO Siga las instrucciones a continuación para reproducir los primeros 10 segundos de cada pista: Durante la reproducción, oprima el botón de INTRO; entonces la unidad tocará los primeros 10 segundos de cada pista y luego se detendrá. OPERACIÓN (CONTINÚA) Si usted oye una canción que desee escuchar en su totalidad,...
- Page 57 REPRODUCIR UN DISCO CD+G (DISCO COMPACTO + GRÁFICOS) DE KARAOKE Usted puede oír un disco karaoke CD+G. Los discos CD+G combinan la música grabada con una pista adicional para video que muestra las letras de las canciones en esta monitor y/o televisor externo, si hay uno conectado.
- Page 58 INFORMACIÓN ACERCA DE LOS DISCOS CD+G KARAOKE: Los discos CD+G Karaoke están diseñados específicamente para que se reproduzcan en reproductores de CD especiales que incluyen un decodificador de CD+G, tal como esta unidad. Estos discos contienen las letras de cada canción y las letras aparecerán en la pantalla de su televisor, línea por línea, mientras el disco se reproduce.
-
Page 59: Cuidado Y Mantenimiento
Cuidado a los discos compactos • Trate el disco compacto con cuidado. Agarre el disco compacto sólo por sus orillas. Nunca permita que sus dedos toquen el lado brilloso y sin etiqueta del disco compacto. • No pegue cinta adhesiva, calcomanías, etc. sobre la etiqueta del disco compacto. •... -
Page 60: Guía De Diagnóstico
En caso de tener algún problema con la unidad, verifique lo siguiente antes de buscar servicio: Síntoma Posible causa Reproductor de disco compacto Reproductor de CD no CD no instalado o instalado al revés. toca. CD brinca mientras toca. Disco sucio o rayado. General Sin sonido. -
Page 61: Especificaciones
ESPECIFICACIONES GENERAL: Fuente de energía ...120V, 60Hz AC Bocina ...Impedancia 8 Ohms Dimensiones ...13.6 (W) x 12.5 (H) x 9.6 (D) pulgadas Energía de salida...1.5W/CH SECCIÓN DE CD: Diámetro de disco...4.72” (120mm) ...3.15” (80mm) CD sencillo Fuente óptica ...Láser semiconductor Longitud de onda ...780nm Las especificaciones están sujetas a cambios sin previo aviso.. - Page 62 Veuillez conserver tout matériel d’emballage pendant au moins 90 jours au cas où vous devriez renvoyer votre produit à votre revendeur ou directement à Memorex. Pour les pieces et les accessoires, contactez Fox International at au 1-800-321-6993 Distribué par Memcorp inc . Weston, FL, Disney Elements © Disney 2004.
Need help?
Do you have a question about the DKS7100-P and is the answer not in the manual?
Questions and answers