Advertisement
Available languages
Available languages
Quick Links
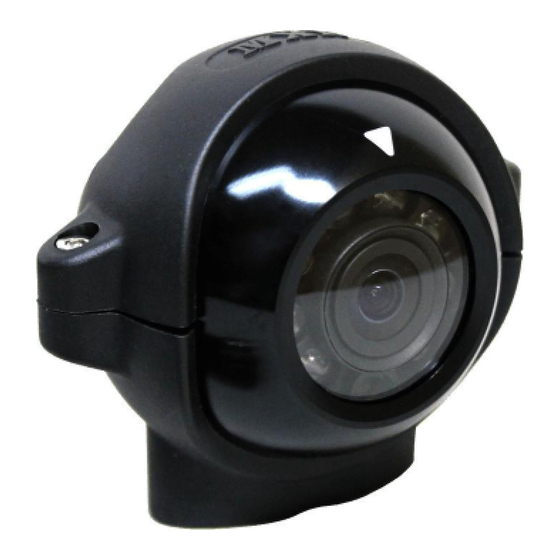
MXN22C
130 Degree Wide View, Autoheated, Color Camera
◈ MXN22C Camera
◈ Features
▪ Compact Ball Camera
▪ High resolution CMOS camera (1.23 Mega pixels)
▪ 1/3.2" Color CMOS high resolution image sensor
▪ IP69K Waterproof Rating
▪ Built-in Infra Red LEDs
▪ IR LED ON/OFF function (via loop wire)
▪ Diagonal 130˚ viewing angle
▪ Normal/Mirror Image adjustable
▪ Built-in Microphone (for one-way audio)
▪ Multi purpose (Frontview, Sideview, Rearview, Surveillance, etc)
▪ Built-in Automatic Heater (below +10˚C)
▪ Anti-corrosive 3-fold coating
▪ Temp. -40˚C ~ +80˚C
▪ Vibration resistant (10G)
▪ ECE R10.05 approved (EMC)
Optional versions of model MXN22C:
MXN22C-078 78˚(D) x 62.0˚(H) x 45.0˚(V)
MXN22C-040 40˚(D) x 30.9˚(H) x 23.2˚(V)
MXN22C-020 20˚(D) x 17.0˚(H) x 12.8˚(V)
▪ Front View
Day/Night sensor
◈ Installation
▪ Camera Assembly
M3 bolt
M6 bolt
M3 nut
Rubber O-ring
Ø 6mm Drilling holes
Rubber washer
Installation surface
Metal washer
M6 nut
1. Fix the supplied camera bracket to the vehicle.
2. Fix the bracket with camera according to drawing.
3. Adjust the viewing angle of the camera and fasten the screws firmly.
▪ Securing cable connection
1. Match the arrow marks and
press the connectors together.
Note!
The warranty will not be valid if the problem is related to moist / corrosion in the connector.
E
10R-05-6368
9
▪ Cable grommet
Drill a suitable hole (approx. Ø 19mm) and insert the
cable grommet.
Just before final fixation, please apply a proper sealant
(for prevention) between the hole and the grommet and
also between the cable and the grommet.
2. Screw the camera connector
up clockwise.
3. Tighten cable connection firmly
in order to prevent water ingress.
◈ Contents
Camera x 1
◈ Technical Specifications
Picture elements : PAL, 1.23 Mega pixels (1280 x 960)
Minimum illumination : 0 Lux (IR LEDs on)
Power consumption : DC 12V, 350mA (heater on)
Operating temperature : -40ºC to +80ºC
Supplied Accessories :
▪ Rear View
IR LEDs
▪ Wiring to Monitor
Run the cable from the camera to the
monitor.
▪ IR LED ON/OFF function
IR LED function can be ON or OFF via the GREEN loop wire:
* Green loop wire un-cut : IR LED function => ON / Standby
* Green loop wire cut
▪ Caution !!
1. Before making the connection, disconnect the ground terminal from the battery
to avoid short circuits.
2. The plugs should be fully inserted into the connectors or jacks.
A loose connection may cause malfunctioning of the unit.
3. A damaged cable may affect the operation of the camera and may even cause
a malfunction of the camera or monitor: Avoid a damaged cable!
4. Protect the cable by using a guide tube, pipe or run the cable inside the vehicle
as much as possible. Caution! Run the cable in natural shapes in order to
prevent cable breaks.
5. Preferably use an acid free grease in between the waterproof screw type
connectors and tighten them firmly eachother.
* Design And Specifications Are Subject To Change Without Notice.
Instruction Manual
Camera Bracket x 1
Screw kit x 1
Image Sensor : 1/3.2" Color SONY CMOS (Exmor)
Resolution : 750 TV lines
S/N ratio : Minimum 45dB (at AGC off)
Power range : DC 9 ~ 48V
DC 12V, 110mA (heater off)
Viewing angle : 130˚(Diagonal) x 102˚(Horizontal) x 76˚(Vertical)
Dimensions : Ø 52mm, 72(W) x 52(D) x 63(H) incl. bracket
Approx. 215g
Weight :
Camera Bracket
Stainless M6 x 25mm bolt + M6 nut
Stainless M3 x 12mm bolt + M3 nut
Stainless M4 x 16mm tapping screw
Rubber washer + stainless metal washer (2 + 2)
Rubber O-Ring
Allen wrench 3mm
Camera pin configuration
Heater function
(9~12V DC)
Extension cable
(Not supplied)
: IR LED function => permanent OFF
Manual x 1
(1)
(2 + 2)
(2 + 2)
(2)
(2)
(1)
Built-in Microphone
Normal/Mirror Image
switch
Audio out
Video out
Power (9~48V DC)
GROUND
Advertisement

Related Manuals for MXN MXN22C

Summary of Contents for MXN MXN22C
- Page 1 (2 + 2) Stainless M4 x 16mm tapping screw Optional versions of model MXN22C: Rubber washer + stainless metal washer (2 + 2) MXN22C-078 78˚(D) x 62.0˚(H) x 45.0˚(V) Rubber O-Ring 10R-05-6368 MXN22C-040 40˚(D) x 30.9˚(H) x 23.2˚(V) Allen wrench 3mm MXN22C-020 20˚(D) x 17.0˚(H) x 12.8˚(V)
- Page 2 M3 x 12mm bout + M3 moer, RVS (2 + 2) Optionele varianten van model MXN22C: M4 x 16mm parker, RVS MXN22C-078 78˚(D) x 62.0˚(H) x 45.0˚(V) Rubber ring + metalen ring, RVS (2 + 2) MXN22C-040 40˚(D) x 30.9˚(H) x 23.2˚(V)
Need help?
Do you have a question about the MXN22C and is the answer not in the manual?
Questions and answers