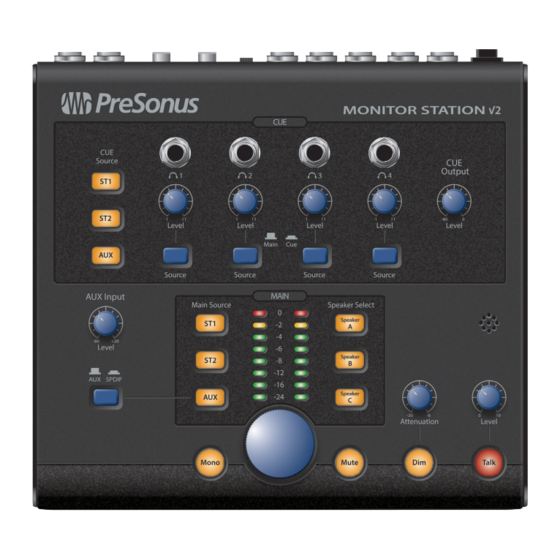
PRESONUS Monitor Station V2 Quick Start Manual
Hide thumbs
Also See for Monitor Station V2:
- Owner's manual (28 pages) ,
- Owner's manual (29 pages) ,
- Owner's manual (37 pages)
Summary of Contents for PRESONUS Monitor Station V2
- Page 1 Monitor Station V2 Quick Start Guide Please review your Monitor Station V26 User Manual available at www.PreSonus.com for more information on proper operation and installation. English Español Deutsch Français 中文 ® www.presonus.com...
-
Page 3: Getting Started
PreSonus supports only the power supply shipped with your Monitor Station V2. If the power supply doesn’t meet your local requirements, or if you wish to purchase an additional power supply, please contact your local dealer or distributor. - Page 4 3. Connect the included power supply to the appropriate wall socket and then to the Monitor Station V2’s rear-panel power input. 4. Turn on the Monitor Station V2’s power by pressing the “|” symbol at the top of the Power switch.
- Page 5 Aux inputs and digital S/PDIF inputs as described in Section 4.1.3. 1.1.3 Calibrating the Monitor Station V2’s LED Meter By default, the Monitor Station V2’s LED meters are calibrated so that the red 0 VU LED illuminates when the selected source signals reach +10 dBu. This can be changed so that 0 VU references +4, +10, or +18 dBu.
- Page 6 1. Zero the Monitor Station V2’s front-panel Main Output Level knob, the Cue Output knob, and the individual headphone Level knobs by turning them fully counterclockwise.
- Page 7 2. Connect your primary monitoring system (such as a pair of powered nearfield reference monitors) to the Monitor Station V2’s A L/R Speaker outputs. 3. If you have a second set of monitors, connect them to the Monitor Station V2’s B L/R Speaker outputs.
- Page 8 This speaker-calibration method sets up your primary speakers so that the Monitor Station V2’s 0 VU meter level produces a certain acoustic level. In the following steps, we’ll use 80 dB SPL as our target; this is a sensible level for a small-to-medium-sized environment.
- Page 9 SPL meter 4. On the Monitor Station V2, press the ST1 Main Source and Speaker A Speaker Select buttons so they light. Make sure no other sources or speakers are turned on. 5. In your DAW, or on your noise generator, pan the pink noise all the way to the left, since we’ll start by calibrating the left speaker.
- Page 10 Getting Started Monitor Station V2 Quick Start Guide Owner’s Manual Calibrating Additional Speaker Systems Repeat the steps above for your other monitoring systems, making sure to zero each system’s Speaker Output trim in step 2 and pressing the appropriate speaker-system button in step 4.
- Page 11 1. Turn the input and output levels of the external device to be connected all the way down. 2. Connect the inputs of the external device to the Monitor Station V2’s Main L/R Line Outputs. 3. Calibrate the device’s audio levels according to its user manual or visit its manufacturer’s Web site for information...
- Page 12 Owner’s Manual Basic Hookup Diagram Here’s a typical Monitor Station V2 setup. In this example, the input sources are an audio interface, a CD player, a mobile phone, and a StudioLive AI-series mixer’s S/ PDIF digital output. Two monitoring systems for auditioning mixes are connected, along with a subwoofer.
- Page 13 PreSonus Audio Electronics, Inc. Capture, Impact, Mixverb Presence, RedLightDist, SampleOne, Studio One, and Tricomp are trademarks or registered trademarks of PreSonus Software Ltd. Mac and Mac OS are registered trademarks of Apple, Inc., in the U.S. and other countries. Windows is a registered trademark of Microsoft, Inc., in the U.S.
- Page 14 Monitor Station V2 Quick Start Guide 18011 Grand Bay Ct. • Baton Rouge, ® Louisiana 70809 USA• 1-225-216-7887 Part# 825-MS20036-B www.presonus.com...


Need help?
Do you have a question about the Monitor Station V2 and is the answer not in the manual?
Questions and answers