Table of Contents
Advertisement
Available languages
Available languages
Quick Links
Manual de Usuario y Garantía.
User's Manual and Warranty.
ATENCIÓN: Lea, entienda y siga las instrucciones de seguridad contenidas en este
manual, antes de operar esta herramienta.
WARNING: Read, understand and follow the safety rules in this manual, before operating this tool.
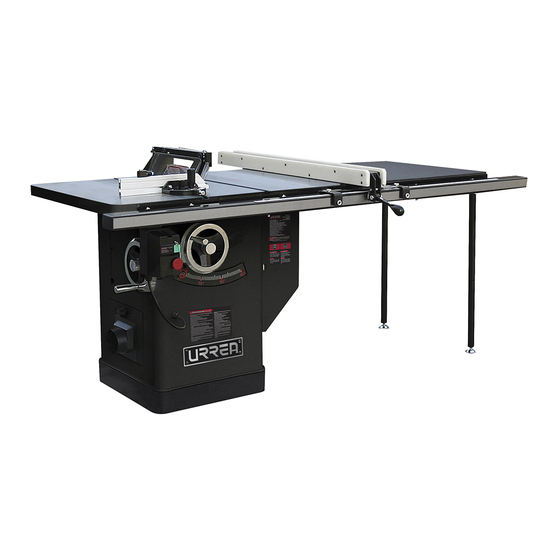
Sierra de Mesa Trifásica
3-Phase Table Saw
SM1113
Advertisement
Table of Contents

Related Manuals for Urrea SM1113


Summary of Contents for Urrea SM1113
- Page 1 Sierra de Mesa Trifásica 3-Phase Table Saw SM1113 Manual de Usuario y Garantía. User’s Manual and Warranty. ATENCIÓN: Lea, entienda y siga las instrucciones de seguridad contenidas en este manual, antes de operar esta herramienta. WARNING: Read, understand and follow the safety rules in this manual, before operating this tool.
-
Page 2: Table Of Contents
E S P A Ñ O L E N G L I S H CONTENIDO CONTENT Introducción Introduction Normas generales de seguridad General safety rules Seguridad eléctrica Electrical safety Seguridad personal Personal safety Uso y cuidado de la máquina Tool use and care Normas específicas de seguridad Specific safety rules Características... -
Page 3: Introducción
E S P A Ñ O L • Ma n ua l d e U s u a ri o INTRODUCCIÓN SEGURIDAD PERSONAL Esta SIERRA DE MESA tiene características que • Manténgase alerta, vea lo que está haciendo harán su trabajo más rápido y fácil. Seguridad, y use el sentido común cuando esté... -
Page 4: Uso Y Cuidado De La Máquina
• Desconecte el enchufe de la fuente de ener- contra la guía para cortes rectos o la guía de gía antes de hacer algún ajuste, cambiar ac- inglete. cesorios o guardar la máquina. Estas medidas 3. Utilice la varilla de empuje, para extraer preventivas reducen el riesgo de que la má- materiales angostos. - Page 5 E S P A Ñ O L • Ma n ua l d e U s u a ri o Corte biselado. Es la operación de hacer cual- Colocación de la cuchilla de la sierra. La distan- quier corte con la cuchilla colocada en otro cia en la que la punta de la cuchilla de la sierra grado que no sea 90°.
-
Page 6: Características
PRECAUCIÓN: No permita que la familiari- CARACTERÍSTICAS dad con el producto pueda provocar una poca FAMILIARICESE CON LA SIERRA DE MESA atención. Una fracción de segundo de descuido Antes de utilizar esta Sierra, familiarícese con es suficiente para cuasar daños severos. todas las características de operación y seguri- dad requeridas. - Page 7 E S P A Ñ O L • Ma n ua l d e U s u a ri o 5. Instalación del riel y la guía de corte (alas de extensión). figura muestra a) Instale el riel delan- Fig.5 la localización de la tero a la mesa y a las abrazadera de embar-...
- Page 8 f) Revise que la guía este paralela. 7. Instalación de la guía de Inglete. · Deslice la guía a lo largo del riel, si ésta se Deslice la guía de inglete dentro de la ranura T atora o arrastra en la mesa: entonces ajuste el en el lado izquierdo del disco.
- Page 9 E S P A Ñ O L • Ma n ua l d e U s u a ri o Fig.17 c) Tire del separa- dor hacia arriba para comprobar encuentra bloqueada la guarda del disco, Fig.18 Fig.14 cuando esté debida- mente instalado debe verse como la figura 14, Compruebe que el borde de la guía de corte y también debe girar libremente y así...
-
Page 10: Ajustes
4. AJUSTE DE TOPES A 45˚ y 90˚ INSTRUCCIONES DE OPERACIÓN El mecanismo de incli- Paradas de IMPORTANTE: ASEGÚRESE DE QUE LA SIE- los ángulos nación de la hoja de la RRA ESTE DESCONECTADA DE LA FUENTE DE sierra está equipada PODER. - Page 11 E S P A Ñ O L • Ma n ua l d e U s u a ri o 5. Cuchillas de Dado: Existen dos tipos de cuchi- mesa esté encendida, su mano puede entrar en llas de Dado: Dados de apilamiento y de tam- contacto con la cuchilla.
-
Page 12: Mantenimiento
bajar, firmemente contra la guía y la mesa. No ADVERTENCIA: ASEGÚRESE DE QUE LA SIERRA permita que sus dedos se acerquen a la cuchilla. ESTE DESCONECTADA DE LA FUENTE DE PO- No se estire sobre la cuchilla para quitar la pieza. DER ANTES DE REALIZAR CUALQUIER AJUSTE. -
Page 13: Solucionador De Problemas
E S P A Ñ O L • Ma n ua l d e U s u a ri o Asegúrese de usar aire comprimido no mayor a El material dobla la cuchilla al cortar. 50 PSI pues el aire comprimido de alta presión Cerca no alineada con cuchilla. -
Page 14: Especificaciones Técnicas
Partidor no alineado con cuchilla. Alinee el ESPECIFICACIONES TÉCNICAS partidor con la cuchilla. Dimensiones Pila de alimentación sin cerca de corte. Instale Largo / Ancho / Alto 82"x 41"x 40" y use la guía de corte. (208,2 cm x 104,1 cm x 101,6 cm) Partidos fuera de lugar. -
Page 15: Introduction
E N G L I S H • U s e r’s m a nu al PERSONAL SAFETY INTRODUCTION • Stay alert, watch what you are doing and use Your TABLE SAW has many features that will common sense when operating a power tools. make your job faster and easier. -
Page 16: Tool Use And Care
• Store the power tool out of reach of children 5. Never stand or have any part of your body in and other untrained persons. Tools are danger- line with the path of the saw blade. ous in untrained hands of users. 6. - Page 17 E N G L I S H • U s e r’s m a nu al Featherboard. An accessory device that can be contain chemicals known to the State of Cali- made or purchased to help guide or hold down fornia to cause cancer, birth defects or other a workpiece during cutting operations.
-
Page 18: Features
FEATURES WARNING: Do not allow familiarity with the table saw to cause a lack of alertness. A frac- BECOME FAMILIAR WITH THE TABLE SAW tion of second of carelessness is enough to Before attempting to use this table saw, be- cause sever injury. - Page 19 E N G L I S H • U s e r’s m a nu al 5. Install the rail & fence (extension table) a) Install the front rail Fig.5 This picture shows the onto the table and location for the brace extension wings with location.
- Page 20 · Slide the fence up, against the right hand edge WARNING: When replacing blades, check the of the miter slot , and lock it in place, examine thickness stamped onto the riving knife. You how the fence line up with the miter slot. must select a blade with akerf width larger NOTE: It’s permissible for the back of the fence than the thickness of the riving knife.
-
Page 21: Adjustments
E N G L I S H • U s e r’s m a nu al d) Place a straight 3. To set the fence perpendicular to the table, Alignment edge against the place a square on the table and against the zone blade side of the fence, loosen the top lock nuts (d) -
Page 22: Operation Instructions
1. Disconect saw from power source. 1. Rip Blade: Used for cut- 2. Remove the table insert. ting with the grain. 3. Loosen the upper and lower cap screws, Typically, 10” rip blades then adjust the 4 set screws in or out until the have between 18-40 teeth alignement is perfectly parallel. - Page 23 E N G L I S H • U s e r’s m a nu al there are two miter gauge slots in the table end of this manual. Use it to hold the work- top. Use the one that works best for the piece piece against the table and fence and push the being crosscut.
-
Page 24: Maintenance
CLEANING WARNING: Always use push sticks, feather- Keep the inside of the cabinet clear of saw boards, push paddles and other safety acces- dust and wood chips. With the table saw un- sories whenever possible to increase safety and plugged, vacuum out the inside of the cabinet control during operations which require the or blow out the inside with an air hose. -
Page 25: Technical Data
E N G L I S H • U s e r’s m a nu al Material binds blade when ripping. Splitter not in place. Install and use splitter Fence not aligned with blade. Check and ad- (with guard). just fence. Dull blade. -
Page 26: Notas
Notas / Notes... - Page 27 M a n u a l d e u s u a r i o / U s e r ’s m a n u a l Notas / Notes...
-
Page 28: Garantía
P Ó L I Z A D E G A R A N T Í A W A R R A N T P O L I C Y Urrea Herramientas Profesionales S.A. de C.V. Urrea Herramientas Profesionales S.A. de C.V.
Need help?
Do you have a question about the SM1113 and is the answer not in the manual?
Questions and answers