Table of Contents
Advertisement
Quick Links
MANUAL DE INSTRUCCIONES DE USO Y MANTENIMIENTO
MANUAL FOR USE AND MAINTENANCE
Modelos:
• I 100
• I 80
• I 70
CERTIFICACIÓN SEGÚN LA NORMA EN 13240 Y EN 13229
CERTIFICATION ACCORDING TO THE STANDARD EN 13240 Y EN 13229
CARBEL, S.L.
Cocinas
- C/Ciudad de Cartagena, 22 - Polígono Industrial fuente del Jarro
– www.carbel.net
46988 Paterna - VALENCIA -
carbel@carbel.net
V01 01 2021
Advertisement
Table of Contents

Related Manuals for CARBEL I 100


Summary of Contents for CARBEL I 100
- Page 1 MANUAL DE INSTRUCCIONES DE USO Y MANTENIMIENTO MANUAL FOR USE AND MAINTENANCE Modelos: • I 100 • I 80 • I 70 CERTIFICACIÓN SEGÚN LA NORMA EN 13240 Y EN 13229 CERTIFICATION ACCORDING TO THE STANDARD EN 13240 Y EN 13229 CARBEL, S.L.
- Page 2 ÍNDICE/ INDEX Español: 1. NOTA DEL FABRICANTE P. 3 2. INSTALACION P. 3 2.1 Consejos para la chimenea P. 3 2.2 Entrada de aire exterior P. 4 2.3 Consejos generales de instalación P. 5 3. FUNCIONAMIENTO P. 5 3.1 Combustión P.
-
Page 3: Table Of Contents
Modelo I 100 P. 29 Modelo I 80 P. 29 Modelo I 70 P. 30 Etiqueta Energética/ Energy Label I 100 P. 31 Etiqueta Energética/ Energy Label I 80 P. 32 Etiqueta Energética/ Energy Label I 70 P. 33 CLASIFICACIÓN AEFECC 7 ESTRELLAS... - Page 4 1. NOTA DEL FABRICANTE Agradecemos su confianza al elegir uno de nuestros modelos. Por favor lea atentamente este manual. Su intención es darle algunos consejos sobre la instalación, uso y mantenimiento. Si además necesita alguna aclaración, consulte a su distribuidor o directamente al fabricante. Nuestros modelos están diseñados para mejorar el rendimiento de cualquier chimenea convencional.
- Page 5 La instalación del tubo y sombrerete debe impedir rigurosamente que en días de lluvia entre agua al interior del aparato. El agua produce mayor deterioro en las estufas que las altas temperaturas de combustión para la que están preparadas. Cuando los tubos estén por el interior de la vivienda o de una chimenea de obra, es aconsejable montarlos el sentido que indica la 1ª...
- Page 6 Vd. En cualquier caso, la instalación deberá siempre ser realizada por un instalador autorizado. CARBEL se responsabiliza del suministro del aparato, en ningún caso de la instalación del mismo. 1- Tubo para salida de humos Ø 200 o Ø 150 (según modelo) 2- Entrada de airea la cámara de la chimenea, por convección natural.
- Page 7 Advertencia. - Toda instalación debe ser realizada por un instalador autorizado, perteneciente a una Empresa Instaladora Autorizada. Una instalación incorrecta, así como un mantenimiento inadecuado pueden acarrear graves incidentes. La terminación en obra debe ser tal que permita la dilatación de la estufa durante su funcionamiento, nunca se debe apoyar la obra encima, ni contra los laterales del aparato.
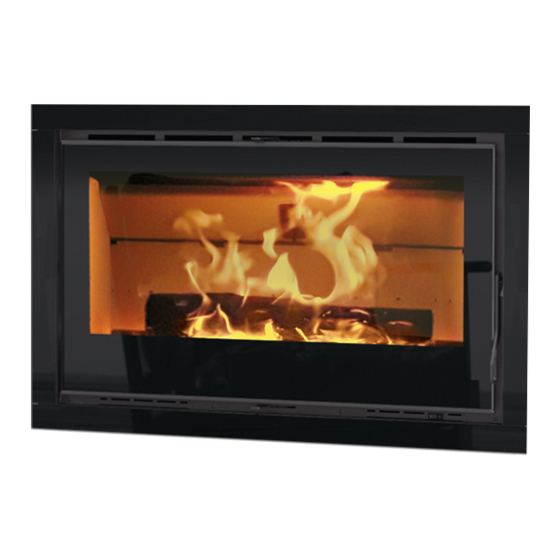
- Page 8 espera demasiado tiempo a realizar la recarga, la temperatura desciende demasiado y la nueva carga de leña no se enciende bien, esto perjudica la combustión y provoca que el cristal se ensucie. 2º La leña aumenta rápidamente de temperatura y empieza a descomponerse emitiendo gas que se inflama si la temperatura del hogar es la adecuada.
- Page 9 - Puede utilizar también troncos de madera comprimida como las briquetas. - Las maderas resinosas como el pino producen mucho humo y hollín afectando negativamente al mantenimiento del cristal limpio. - No utilice líquidos inflamables para encender, manténgalos siempre alejados de la estufa. - No utilice la estufa como un incinerador, nunca queme plásticos, residuos, basura o desperdicios.
- Page 10 Durante el funcionamiento no debe abrir la puerta, al realizar la recarga de leña abra la puerta lentamente para evitar absorber el humo del interior del hogar. Advertencia. - Durante la utilización de su insertable o estufa, las altas temperaturas generadas durante la combustión y su posterior enfriamiento provocan dilataciones y contracciones en el acero.
- Page 11 POSICION DE LA MANETA DE REGULACION DE AIRE PRIMARIO PARA POTENCIA NOMINAL (Abierta 10mm.) Abierta un 25% de su recorrido. - Entrada de aire secundario La regulación de aire secundario es la que le proporcionara una mejor combustión, más limpia y eficiente, sacando el máximo provecho a cada carga de leña.
- Page 12 3.7 Consejos para el funcionamiento y regulación ÓPTIMA de las entradas de aire: Una vez el aparato haya realizado un primer ciclo de combustión, y este lo suficientemente caliente, es aconsejable seguir estas indicaciones para obtener el máximo rendimiento de su producto. Reparta en la base del hogar las brasas procedentes de los ciclos de combustión previos.
- Page 13 - Los días con condiciones de tiro adversas (presión atmosférica muy baja, fuertes heladas), o cuando el conducto está muy frío, o en chimeneas con tiro deficiente, puede ayudar a iniciar el tiro antes del encendido, calentando el conducto: 1º Prepare la leña dentro de la estufa para realizar el encendido. 2º...
- Page 14 1. NOTE FROM THE MANUFACTURER Thank you for choosing one of our models. Please read this manual carefully. It has been written to give you tips on installation, use and maintenance. If you need any further clarification, please contact your dealer or the manufacturer directly.
- Page 15 When the pipes run through the inside of the home or a brick chimney, they should be mounted as shown in Figure 1 to prevent liquids produced by the condensation of the gases flowing through the joints and out of the pipes.
- Page 16 In any case, the installation should be done by an authorised installer. CARBEL will be responsible for the provided appliance, but in no case for the installation of the same. 1. Fumes exhaust pipe Ø 200 or 150, according to model.
- Page 17 The building work must be finished in such a way that the wood burner can expand during operation: the brickwork must never be supported on or against the sides of the appliance. Leave a minimum expansion joint of 0.5 cm on each side and at least 1 cm the top of the front. JUNTA DE DILATACION VISTA EN PLANTA MINIMO 1cm.
- Page 18 A full combustion cycle comprises the following: 1. A short period after reloading when the wood begins to heat up without flames. The time until the flame lights is an indication of the fireplace temperature. If you wait too long to reload firewood, the temperature falls too low and the new load of firewood does not light well.
- Page 19 You can also use compressed-wood logs, such as briquettes. Avoid softwoods, such as pine, because they produce a lot of smoke and soot that dirty the glass. Do not use flammable liquids to light the fire; always keep them away from the wood burner. Do not use the wood burner as an incinerator, never burn plastics, waste, garbage or rubbish.
- Page 20 When you reload with more wood, if there are not enough embers to light the new load of wood, repeat steps 3 and 4. When the wood burner is in operation, you must not open the door. When putting more wood on the fire, open the door slowly to prevent the smoke inside the fireplace from blowing out into the room.
- Page 21 3. 6 Adjusting air during operation - Primary air inlet During normal operation of the burner, once the appliance has warmed up, you must close the primary air inlet to achieve good combustion performance. If the quality of the firewood allows it, the primary air inlet must be fully closed or slightly open (no more than 1 cm).
- Page 22 Mod. I 80: one piece of wood between 40 and 55 centimeters in length and 1.25 to 1,8 kg weight. Mod. I 100: one piece of wood between 45 and 65 centimeters in length and1.6 to 2 kg weight. Adjust the primary air inlet to an opening of between 5 and 8 mm.
- Page 23 − On days with adverse draught conditions (very low atmospheric pressure, heavy frosts), or when the flue is very cold, or in chimneys with a poor draught, you can help the draught to start before lighting the fire by heating the flue: 1.
- Page 24 Para que la garantía tenga efecto es obligatorio remitir al fabricante copia de este certificado, así como una copia de factura emitida al cliente FIRMA Y SELLO DEL DISTRIBUIDOR COPIA PARA EL COMPRADOR Cocinas Carbel, S.L - C/Ciudad de Cartagena, 22 - Polígono Industrial fuente del Jarro 46988-Paterna- VALENCIA ------------------------------------------------------------------------------------------------------------------------------------------------------------ CERTIFICADO DE GARANTIA...
- Page 25 For the warranty to take effect, the manufacturer must be sent a copy of this certificate and a copy of the customer invoice. DEALER’S SIGNATURE AND STAMP COPY FOR THE MANUFACTURER Cocinas Carbel, S.L, C/ Ciudad de Cartagena, 22 - Polígono Industrial Fuente del Jarro 46988 (Paterna) VALENCIA...
-
Page 26: Anexo I
ANEXO I DESMONTAJE DE LOS DEFLECTORES DISMANTLING OF THE BAFFLES 1º. Extraiga la base del hogar. Take out the base of the device. 2º Extraiga uno de los laterales. A continuación, extraiga el deflector inferior. Take out one of the side panels and take out the baffle 3º. -
Page 27: Montaje De Las Patas
ANEXO II: Montaje de las patas Legs Assembly. 1. Atornille las guías a la cámara utilizando los agujeros ya previstos. Screw the guides to the chamber using the holes already provided. 2. Introducir las patas en las guías. Insert the legs into the guides. 1. -
Page 28: Anexo Iv
ANEXO III: Montaje de la embocadura de entrada de aire de combustión para conexión al exterior. Combustion Air Inlet Connection Assembly. Ajustar la embocadura centrándola en su posición y sujetarla por medio de los cuatro tornillos autoroscantes. Connect and fix the air entry connection using the four self-tapping screws. ANEXO IV: Sujección del aparato a la pared y suelo. - Page 29 Sujeción del aparato al suelo: Attachment of the device to the floor: Con el fin de garantizar el correcto anclaje del aparato al suelo, podrá utilizar las patas metálicas debidamente diseñadas para tal fin. La elección de la tornillería adecuada será competencia del instalador. In order to guarantee the correct anchoring of the device to the floor, you can use the metal legs properly designed for this purpose.
-
Page 30: Modelo I 100
ESQUEMA DE LA INSTALACION ELECTRICA Modelo: I70, I80, KRONOS 70, KRONOS 60, A70-2, A80-2 TENSIÓN DE TRABAJO: 230 V FRECUENCIA: 50 Hz 2 POSICIONES 2 POSICIONES POTENCIA INSTALADA: 28 W 0'22 A Max. BASE ENCHUFE CLAVIJAS 230 V 50 Hz WORKING VOLTAGE: 230 V 1000 Ohmios FREQUENCY:50 Hz... - Page 31 DATOS TÉCNICOS /TECHNICAL DETAILS I 100 Medidas sin marco / Without frame. (A) Entrada de aire exterior opcional / Optional Air Inlet. Modelo - Model: I 100 Clase energética - Energy Efficiency Class: Índice de eficiencia energética - Energy Efficiency Index (EEI):...
- Page 32 Modelo - Model: I 80 Clase energética - Energy Efficiency Class: Índice de eficiencia energética - Energy Efficiency Index (EEI): Rendimiento - Performance: 85,09 Potencia térmica nominal – Nominal Thermal Power: 9.48 Carga de Leña para pot. Nominal – Firewood load for Nominal Power: 1,8 Kg Intervalo de recarga para Pot.
Need help?
Do you have a question about the I 100 and is the answer not in the manual?
Questions and answers