Table of Contents
Advertisement
Quick Links
Advertisement
Table of Contents

Related Manuals for TRNDlabs SWIFT


Summary of Contents for TRNDlabs SWIFT
- Page 1 SWIFT USER GUIDE...
- Page 2 www.trndlabs.com...
- Page 3 Welcome to the world of TRNDlabs products! TRNDlabs products are design focused electronics, engineered to combine ultimate performance and aesthetics.
-
Page 4: Table Of Contents
Table of Contents Parts Identification Functions Drone Functions Controller Functions Setup Charging SWIFT Controller Battery Installation Mobile Phone Holder Preparation Pairing Take-Off & Land Piloting Flight Controls Setup App App Installation Photo & Video Taking a Photo Recording a Video... - Page 5 Tips & Tricks Sensitivity Control Advanced Flight: Performing 360º Flips Switching Modes Troubleshooting Direction Trim Rotation Trim Calibration Rotor Protector Installation Replacing Rotor Blades Safety Precautions Additional Safety Precautions Battery Safety Instructions FCC Compliance Information (USA only)
-
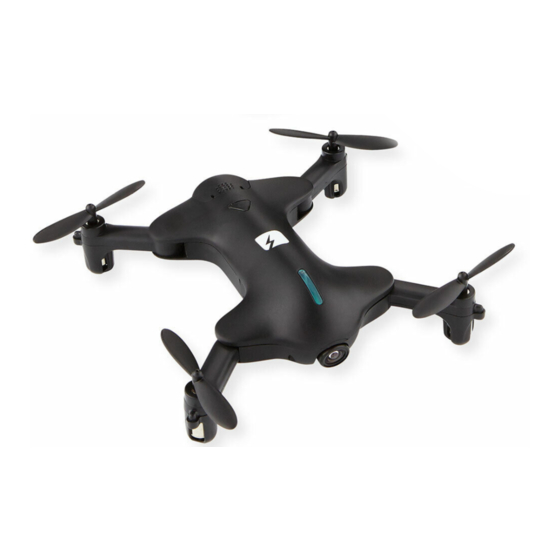
Page 6: Parts Identification
Parts Identification Charging Cable SWIFT Replacement Rotor Blades (4x) Rotor Protectors (4x) Controller... -
Page 7: Drone Functions
Functions Drone Functions Drone Body Rotor Protector Rotor Blade Power ON/OFF Camera Button Controller Functions Power Button Headless Mode Button Speed/Stunt Video/Photo Button Button Direction Forward/ Throttle/ Rotate Backward/ Sideways Sideways Trim Buttons Take-Off / Land Forward/Backward Button Trim Buttons Return Home Button... -
Page 8: Setup
Setup Charging SWIFT Slide the battery out of the drone by pulling it gently. Connect the Charging Cable to a USB port and the battery of the drone. A LED light on the connector of the Charging Cable will indicate it is charging. -
Page 9: Controller Battery Installation
Controller Battery Installation Open the Controller battery cover. Install 2x 1.5V AAA batteries. Slide the Controller battery cover back. Mobile Phone Holder Preparation Slide the Mobile Phone Holder from closed position to open position. You can now place a mobile phone. -
Page 10: Pairing
Pairing Place the drone on a flat and level surface. Press the Power Button for 2 seconds to switch the drone ON. Push the Power Button to turn on the Controller. The Green Indicator Light on the Controller starts flashing slowly. The Drone will automatically connect to the Controller. -
Page 11: Take-Off & Land 11 11 Piloting
Piloting Take-Off & Land Push the left stick to the lower left corner and the right stick to the lower right corner at the same time. The rotors start spinning. To take off the drone push the Take-Off/Landing Button. The drone will hover at approximately 1 meter. -
Page 12: Flight Controls
Flight Controls Direction Control To fly the drone forward or backward, push the Direction stick cautiously forward or backward. To fly the drone to the left or the right, push the Direction stick cautiously to the left or the right. - Page 13 Rotation Control To make the drone circle to the left or the right, push the Throttle/Rotate stick cautiously to the left or right.
-
Page 14: Setup App 14 14 App Installation
The App is suitable for mobile phones with iOS or Android. The App can be downloaded from the App Store or Google Play. Scan the QR code to download the App: TRNDlabs SWIFT For mobile phones with For mobile phones... -
Page 15: Taking A Photo 15 17 5 Photo & Video
Photo & Video Taking a Photo Press the Photo Button once to take a photo. Recording a Video Press the Video Button on the controller for 3 seconds to start recording. Press the button again for 3 seconds to stop recording. -
Page 16: Tips & Tricks
Tips & Tricks Sensitivity Control The drone has three sensitivity settings: Low, Medium and High. A higher sensitivity makes the drone faster and more responsive. Controller Sensitivity Control Press the Sensitivity/Stunt Button to change the sensitivity: When the Controller emits 1 tone = Low sensitivity mode. When the Controller emits 2 tones = Medium sensitivity mode. - Page 17 Advanced Flight: Performing 360° Flips Press and hold the Sensitivity/Stunt Button to enter stunt mode. The Controller will start to beep fast. Push the Direction stick forward, backward, right or left to perform flips. The drone carries out the flip in the respective direction. Do not attempt these stunts until you are able to fly confidently.
- Page 18 Left Side 360° Flip Press the Sensitivity/Stunt Button and push the Direction stick to the left. Right Side 360° Flip Press the Direction stick and push it to the right.
- Page 19 Forward 360° Flip Press the Direction stick and push it forward. Backward 360° Flip Press the Direction stick and push it backward.
- Page 20 Switching Modes The drone can be switched from Normal Mode to Headless Mode. Headless Mode does not require the pilot to differentiate the front (head) position of the drone, but simply use the Direction Stick for the drone to respond correctly to the given input relative to the position of the controller.
-
Page 21: Direction Trim
Troubleshooting Direction Trim When hovering, if the drone flies forward or backward without moving the Direction stick, proceed as follows: If the drone moves on its own forward, tap the Backward Trim arrow in steps. If the drone moves on its own backward, tap the Forward Trim arrow in steps. When hovering, if the drone flies to the left or right without moving the Direction stick, proceed as follows: If the drone moves on its own sideways to the left, tap the Right Trim arrow in... -
Page 22: Calibration
Calibration The drone needs to be calibrated if it flies unstable. Place the drone on a flat and level surface. Now, at the same time, push both the left and right joystick to the lower right corners and hold for 2 to 3 seconds. -
Page 23: Replacing Rotor Blades
Replacing Rotor Blades To replace a rotor blade, follow the steps below: Gently remove the Rotor Blade from the drone by pulling them straight upwards. Press the new rotor blade onto the motor axis. Each rotor blade is marked with a “F” or “R”. Be sure to note the marking and the tilt angle of the rotor blades. -
Page 24: Faq
Solution: Charge the battery inserted. as described in “Charging SWIFT” (page 8). Cause: The batteries do not have enough power. Problem: The drone only flies Solution: Insert new in a circle or flips over before batteries. -
Page 25: Safety Precautions
Safety Precautions Carefully follow the instructions below. Make sure you fly the drone safely, and you mind the warnings. The drone is not intended for use by children under fourteen years old, unless directly supervised by a competent adult at all times. Always ensure the safety of yourself, others and the drone. - Page 26 Do not fly near buildings. Do not fly over stations, railways or highways. Do not fly near trees, or crowds of people. Do not fly in rain, snow, fog, storm, wind or in unclear weather conditions at night. Do not approach or film people without their consent. Be mindful of privacy. Avoid ceiling fans, hanging light fixtures, heating or air conditioning.
- Page 27 Battery Safety Instructions • For the best performance, only use fresh 1.5V Alkaline “AAA” batteries in the controller. • Never operate the drone with low controller batteries • The drone automatically switches off if the rotors are unable to rotate. Switch the power to restart the drone.
- Page 28 WWW.TRNDLABS.COM The contents of this document are subject to change. Download the latest version from www.trndlabs.com. If you have any questions about this document, please contact TRNDlabs by sending a message to hello@trndlabs.com. © 2018 TRNDlabs. All rights reserved.
- Page 29 2786/1/EN...
Need help?
Do you have a question about the SWIFT and is the answer not in the manual?
Questions and answers