Table of Contents
Advertisement
Quick Links
Advertisement
Table of Contents

Related Manuals for TRNDlabs SKEYE


Summary of Contents for TRNDlabs SKEYE
- Page 1 SKEYE Mini Drone USER GUIDE...
-
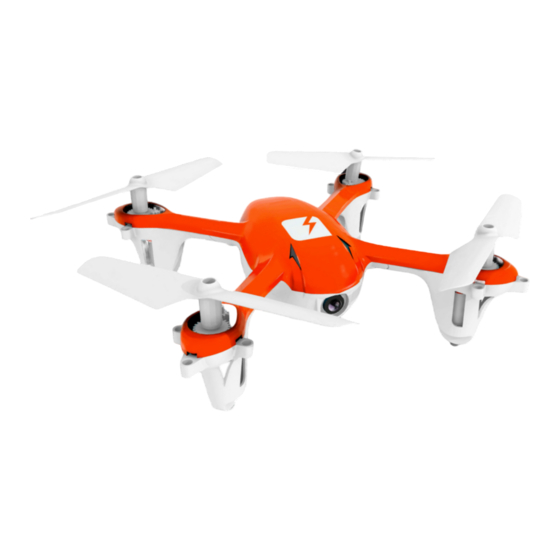
Page 2: Parts Identification
Parts Identification SKEYE Mini Drone Replacement Rotor Blades MicroSD card reader USB Charging Cable Controller MicroSD Card Rotor Protection Cage Rechargeable Battery... -
Page 3: Controller Functions
Controller Functions Power Switch ON/OFF Sensitivity Flip Direction Forward/Backward Throttle/Rotate Sideways Photo Forward Trimmer Rotation Sideways Trimmer Trimmer /Left Right Not In Use Not In Use Sideways Rotation Trimmer Left Video Backward Trimmer Getting Started Battery Installation Use a screwdriver to open the controller battery cover. Install 4x 1.5V AA batteries into the controller. -
Page 4: Flying Your Drone
Charging Disconnect the power cable. Connect the USB charging cable to a USB port. The LED on the USB charging cable lights red indicating that the battery is charging. When the battery is fully charged, the LED on the USB charging cable turns off. It takes about 60 minutes to recharge a discharged battery. -
Page 5: Flight Controls
Push the power switch of the The controller needs to be controller to the ON position. The calibrated after successful binding: controller will emit a tone to move the throttle/rotate stick to indicate that binding is complete. At the full up position and then push the same time, the LED lights on the the throttle/rotate stick to the full drone will start to flash slowly. -
Page 6: Direction Control
Direction Control To fly the drone forwards or backwards, push the direction stick cautiously to forwards or backwards. To fly the drone to the left or the right, push the direction stick cautiously to the left or the right. Rotation Control To make the drone circle to the left or the right, move the throttle/rotate stick cautiously to the left or the right. -
Page 7: Sensitivity Control
Sensitivity Control The drone has two sensitivity settings: beginner and advanced. Press the sensitivity button in order to change the sensitivity: When the controller emits 1 tone = beginner sensitivity mode. When the controller emits 2 tones = advanced sensitivity mode. A higher sensitivity makes the drone faster and more responsive. - Page 8 Left Side 360° Flip Press the flip button and push the direction stick to the left at the same time. Right Side 360° Flip Press the flip button and push the direction stick to the right at the same time. Forward 360°...
-
Page 9: Direction Trim
Backward 360° Flip Press the flip button and push the direction stick backward at the same time. Trimming The correct trim is a basic requirement for fault-free flying behavior of your drone. Direction Trim When hovering, if the drone flies forwards or backwards without you moving the direction stick, please proceed as follows: If the drone moves on its own forwards, press the backward trimmer in steps. - Page 10 When hovering, if the drone flies to the left or right without you moving the direction stick, please proceed as follows: If the drone moves on its own sideways to the left, press the right trimmer in steps. If the drone moves on its own sideways to the right, press the left trimmer in steps.
- Page 11 Calibration The drone needs to be calibrated if it flies unstable. Place the drone on a flat surface and calibrate throttle (See 4 under “Flying Your Drone”) Move the direction stick and the throttle/rotate stick into the lower right corner. Two LED lights on the drone will flash for 2-4 seconds and turn into a constant light meaning that the calibration is successful.
-
Page 12: Replacing Rotor Blades
Playing back videos/viewing photos Plug the microSD card into the microSD Card USB Reader and connect this to a computer. You will find the video files e.g. MOVI0000.avi on the SD card in the folder VIDEO. The videos are AVI files. You will find the photo files, e.g. PICT0000.jpg in the folder PHOTO. - Page 13 Problem: Controller does Problem: The drone does not work. not lift. Cause: The power switch is Cause: The rotor blades turned “OFF”. rotate too slowly. Solution: Turn the power Solution: Push the switch “ON”. throttle up. Cause: The batteries have Cause: The battery’s been wrongly inserted.
-
Page 14: Safety Precautions
Safety Precautions • Carefully follow the directions and warnings for this drone and any optional support equipment you may use. • Never operate your drone with low controller batteries. • The drone has rotating blades that move at high speed, posing danger of damage and injury. - Page 15 Caring For Your Drone • For best performance, only use fresh Alkaline “AA” batteries in the controller. • After each crash, inspect your drone for worn or damaged parts. • The drone automatically switches off if the rotors are unable to rotate. Switch the power to restart the drone.
Need help?
Do you have a question about the SKEYE and is the answer not in the manual?
Questions and answers