
Related Manuals for Harman AMX Precis PR Series


Summary of Contents for Harman AMX Precis PR Series
- Page 1 HARDWARE REFERENCE MANUAL VERSION: V1.0.0 Precis PR-Series Matrix Switcher Precis 4K60 HDMI Switcher...
-
Page 2: Important Safety Instructions
IMPORTANT SAFETY INSTRUCTIONS READ these instructions. KEEP these instructions. HEED all warnings. FOLLOW all instructions. DO NOT use this apparatus near water. CLEAN ONLY with dry cloth. DO NOT block any ventilation openings. Install in accordance with the manufacturer’s instructions. DO NOT install near any hear sources such as radiators, hear registers, stoves, or other apparatus (including amplifiers) that produce heat. - Page 3 electricity from an outside source (such as human hands) into an integrated circuit, often resulting in damage to the circuit. WARNING: To reduce the risk of fire or electrical shock, do not expose this apparatus to rain or moisture. WARNING: No naked flame sources - such as candles - should be placed on the product. WARNING: Equipment shall be connected to a MAINS socket outlet with a protective earthing connection.
- Page 4 servicing to qualified service personnel. Place the equipment near a main power supply outlet and make sure that you can easily access the power breaker switch. WARNING: This product is intended to be operated ONLY from the voltages listed on the back panel or the recommended, or included, power supply of the product.
- Page 5 This appliance is labeled in accordance with European Directive 2012/19/EU concerning waste of electrical and electronic equipment (WEEE). This label indicates that this product should not be disposed of with household waste. It should be deposited at an appropriate facility to enable recovery and recycling.
-
Page 6: Table Of Contents
Table of Contents IMPORTANT SAFETY INSTRUCTIONS ------------------------------------------------------------------------------------------------ 2 Overview ------------------------------------------------------------------------------------------------------------------------------------ 8 PR-0808 ------------------------------------------------------------------------------------------------------------------------------- 8 Features ------------------------------------------------------------------------------------------------------------------------ 8 Package Contents ------------------------------------------------------------------------------------------------------------ 8 Specifications ----------------------------------------------------------------------------------------------------------------- 9 PR-0602 ----------------------------------------------------------------------------------------------------------------------------- 12 Features ---------------------------------------------------------------------------------------------------------------------- 12 Package Contents ---------------------------------------------------------------------------------------------------------- 12 Specifications --------------------------------------------------------------------------------------------------------------- 13 PR-0404 ----------------------------------------------------------------------------------------------------------------------------- 16 Features ---------------------------------------------------------------------------------------------------------------------- 16 Package Contents ---------------------------------------------------------------------------------------------------------- 16 Specifications --------------------------------------------------------------------------------------------------------------- 17... - Page 7 Firmware Upgrade through USB --------------------------------------------------------------------------------------------- 46 Troubleshooting ------------------------------------------------------------------------------------------------------------------------- 47 Appendix: API Command List Instructions --------------------------------------------------------------------------------------- 48 System Commands -------------------------------------------------------------------------------------------------------------- 48 Network Commands ------------------------------------------------------------------------------------------------------------ 52 Security Commands ------------------------------------------------------------------------------------------------------------- 55 Configuration Commands-Input --------------------------------------------------------------------------------------------- 57 Configuration Commands-Output ------------------------------------------------------------------------------------------- 62 Switching Commands ----------------------------------------------------------------------------------------------------------- 68...
-
Page 8: Overview
Overview PR-0808 The AMX PR-0808 provides the ability to connect up to eight 4K UHD+ HDMI sources to up to eight 4K UHD+ HDMI displays and freely switch between them. This unit comes with full support for 18Gbps resolutions up to, and including 4K@60Hz (4:4:4, 8-bit) as well as support for Deep Color, HDR (High Dynamic Range), HD audio and other features defined by the HDMI 2.0 specification. -
Page 9: Specifications
Specifications Technical Input 8 x HDMI IN Input Resolution Supported VESA 640x480 @ 60, 72, 75 Hz 720 x 400 @ 70, 85 Hz 800 x 600 @ 56, 60, 72, 75, 85 Hz 848 x 480 @ 60 Hz 1024 x 768 @ 60, 70, 75, 85 Hz 1152 x 864 @ 75 Hz 1280 x 768 @ 60 Hz, 75 Hz... - Page 10 4096 x 2160p @ 24, 25, 29.97, 30, 50, 59.94, 60 Hz Input Audio Supported PCM 2-Channel, PCM Multi-Channel, Dolby Digital, Dolby Digital Plus, Dolby Atmos, Dolby True HD, DTS, DTS HD MA Output 8 x HDMI Out Technical Output Resolution Supported Same as the Input Output Signal Types Unbalanced stereo analog...
- Page 11 Transmission Distance Note: Straight-through Ethernet cable of T568B is recommended. General Range Supported Video HDMI Output 15m/49ft 1080P@60Hz 10m/33ft 4K@60Hz 4:2:0 5m/16ft 4K@60Hz 4:4:4...
-
Page 12: Features
PR-0602 The AMX PR-0602 provides the ability to connect up to six 4K UHD+ HDMI sources to up to two 4K UHD+ HDMI displays and freely switch between them. This unit comes with full support for 18Gbps resolutions up to, and including 4K@60Hz (4:4:4, 8-bit) as well as support for Deep Color, HDR (High Dynamic Range), HD audio and other features defined by the HDMI 2.0 specification. -
Page 13: Specifications
Specifications Technical Input 6 x HDMI IN Input Resolution Supported VESA 640x480 @ 60, 72, 75, 85 Hz 720 x 400 @ 70, 85 Hz 800 x 600 @ 56, 60, 72, 75, 85 Hz 848 x 480 @ 60 Hz 1024 x 768 @ 60, 70, 75, 85 Hz 1152 x 864 @ 75 Hz 1280 x 768 @ 60 Hz, 75 Hz... - Page 14 4096 x 2160p @ 24, 25, 29.97, 30, 50, 59.94, 60 Hz Input Audio Supported PCM 2-Channel, PCM Multi-Channel, Dolby Digital, Dolby Digital Plus, Dolby Atmos, Dolby True HD, DTS, DTS HD MA Output 2 x HDMI Out Technical Output Resolution Supported Same as the Input Output Signal Types Unbalanced stereo analog...
- Page 15 Transmission Distance Note: Straight-through Ethernet cable of T568B is recommended. General Range Supported Video HDMI Output 15m/49ft 1080P@60Hz 10m/33ft 4K@60Hz 4:2:0 5m/16ft 4K@60Hz 4:4:4...
-
Page 16: Features
PR-0404 The AMX PR-0404 provides the ability to connect up to four 4K UHD+ HDMI sources to up to four 4K UHD+ HDMI displays and freely switch between them. This unit comes with full support for 18Gbps resolutions up to, and including 4K@60Hz (4:4:4, 8-bit) as well as support for Deep Color, HDR (High Dynamic Range), HD audio and other features defined by the HDMI 2.0 specification. -
Page 17: Specifications
Specifications Technical Input 4 x HDMI IN Input Resolution Supported VESA 640x480 @ 60, 72, 75, 85 Hz 720 x 400 @ 70, 85 Hz 800 x 600 @ 56, 60, 72, 75, 85 Hz 848 x 480 @ 60 Hz 1024 x 768 @ 60, 70, 75, 85 Hz 1152 x 864 @ 75 Hz 1280 x 768 @ 60 Hz, 75 Hz... - Page 18 4096 x 2160p @ 24, 25, 29.97, 30, 50, 59.94, 60 Hz Input Audio Supported PCM 2-Channel, PCM Multi-Channel, Dolby Digital, Dolby Digital Plus, Dolby Atmos, Dolby True HD, DTS, DTS HD MA Output 4 x HDMI Out Technical Output Resolution Supported Same as the Input Output Signal Types Unbalanced stereo analog...
- Page 19 Transmission Distance Note: Straight-through Ethernet cable of T568B is recommended. General Range Supported Video HDMI Output 15m/49ft 1080P@60Hz 10m/33ft 4K@60Hz 4:2:0 5m/16ft 4K@60Hz 4:4:4...
-
Page 20: Features
PR-0402 The AMX PR-0402 provides the ability to connect four 4K UHD+ HDMI sources to two 4K UHD+ HDMI displays, and freely switch between them. This unit comes with full support for 18Gbps resolutions, including 4K@60Hz (4:4:4, 8-bit) as well as support for Deep Color 36bits, HDR (High Dynamic Range), HBR audio and other features defined by the HDMI 2.0 specification. -
Page 21: Specifications
Specifications Technical Input 4 x HDMI IN Input Resolution Supported VESA 640 x 480 @ 60, 72, 75, 85 Hz 720 x 400 @ 70, 85 Hz 800 x 600 @ 56, 60, 72, 75, 85 Hz 848 x 480 @ 60 Hz 1024 x 768 @ 60, 70, 75, 85 Hz 1152 x 864 @ 75 Hz 1280 x 768 @ 60 Hz, 75 Hz... - Page 22 4096 x 2160p @ 24, 25, 29.97, 30, 50, 59.94, 60 Hz Input Audio Supported PCM 2-Channel, PCM Multi-Channel, Dolby Digital, Dolby Digital Plus, Dolby Atmos, Dolby True HD, DTS, DTS HD MA Output 2 x HDMI Out Technical Output Resolution Supported Same as the Input Output Signal Types Unbalanced stereo analog...
- Page 23 Transmission Distance Note: Straight-through Ethernet cable of T568B is recommended. General Range Supported Video HDMI Output 15m/49ft 1080P@60Hz 10m/33ft 4K@60Hz 4:2:0 5m/16ft 4K@60Hz 4:4:4...
-
Page 24: Control Description
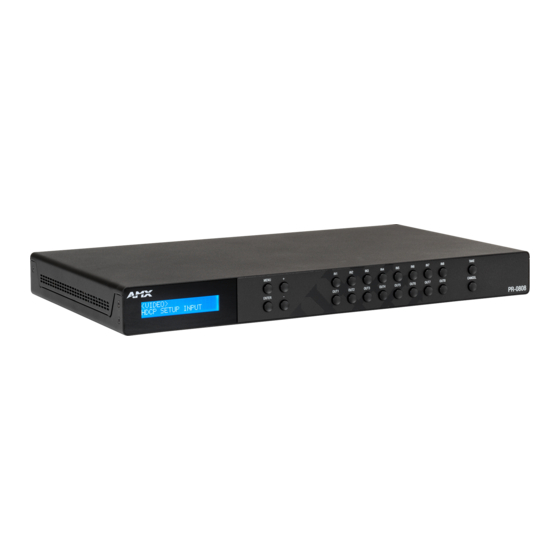
Control Description PR-0808 Front Panel Name Description Digital Indicator Indicates menu items and input/output selections. Menu Button Press to enter the main menu, or to back out from menu items. Enter button Press Enter to go into the main menu and menu items. Select buttons Press “+”... - Page 25 PR-0602 Front Panel Description Name Description Digital Indicator Indicates menu items and input/output selections. Menu Button Press to enter the main menu, or to back out from menu items. Enter button Press Enter to go into the main menu and menu items. Select buttons Press “+”...
- Page 26 PR-0404 Front Panel Description Name Description Digital Indicator Indicates menu items and input/output selections. Menu Button Press to enter the main menu, or to back out from menu items. Enter button Press Enter to go into the main menu and menu items. Select buttons Press “+”...
- Page 27 PR-0402 Front Panel Description Name Description Power Indicator Indicates the status of the unit. Auto Button Press for auto switching. Switching Buttons Selects the input and output channels. Rear Panel Description Name Description VIDEO INPUTS Connect to HDMI sources. VIDEO OUTPUTS Connect to HDMI display devices.
-
Page 28: Installation And Wiring
Installation and Wiring Brackets Installation for PR-0808/0602/0404 Warning: Before installation, ensure the device is disconnected from the power source. Steps to install the device in a suitable location: First remove the screws mounted on the side. Attach the installation bracket to the enclosure using the longer screws that were provided in the package separately. - Page 29 PR-0808 Connection Diagram...
- Page 30 PR-0602 Connection Diagram...
- Page 31 PR-0404 Connection Diagram...
- Page 32 PR-0402 Warning: Before wiring, disconnect the power from all devices. Connecting or disconnecting cables while powered, may cause damage to circuitry or possible injury. Connect and disconnect the cables with care. 1. Using high quality HDMI cable, firmly connect 4K or HD source devices (such as: Blu-Ray, computer, games console, satellite/ cable, music streaming device, CCTV etc.) to the HDMI input ports 1-4 of the processor.
- Page 33 PR-0402 Connection Diagram...
-
Page 34: Front Panel Control
Front Panel Control The PR-Series Matrixes are designed with ease of connection and control in mind. Basic switching of input sources to output displays can be achieved by pressing the front panel buttons with the front panel LCM (PR-0808/0602/0404) and LED (PR-0402) indicating the current input and output status of the matrix. -
Page 35: Pr-0808/Pr-0602/Pr-0404 Lcm Menu
PR-0808/PR-0602/PR-0404 LCM Menu LAYER 1 LAYER 2 LAYER 3 LAYER 4 LAYER 5 RECALL PRESET PRESET 1 ~ 8 VIDEO SETUP EDID SETUP IN 1 ~ 8 AUTO 4K60 3840x2160p,60Hz 4096x2160p,60Hz 1920x1080p,60Hz … MIRROR OUT 1 ~ 8 HDCP SETUP-INPUT IN 1 ~ 8 ENABLE/DISABLE HDCP SETUP-OUTPUT... -
Page 36: Rs232 Operation
RS232 Operation RS232 Control RS232 Phoenix Connector Pinout The following figure shows the RS232 Phoenix Connector pinout. Connect with the Phoenix Connectors provided. RS232 port is used to control the processor through RS232 serial communication. Advanced users may also choose to control the unit through RS232 serial communication. API commands for RS232 control are available in Appendix: API Command List Instructions. -
Page 37: Webgui Control
WebGUI Control Identify the IP address of the PR-0808/PR-0602/PR-0404 Press the MENU button to enter the main menu, and then use the UP and DOWN buttons to search for the “NETWORK STATUS” page. Press the ENTER button to enter the selected page. The current IP address of the device will be presented on the device’s front display. -
Page 38: Web Interface Introduction
Web Interface Introduction Network In the Network Column, users can set up the IPv4 and IPv6 environments with the following IP mode settings: DHCP: When enabled, the IP address of the PR-Series units will be assigned automatically by the connected DHCP ... -
Page 39: Security
Security In the Security Column, modification can be made for the Login Password. Web User Management: The Login Password default is admin. Click the “Change Password” button and the following window pops up for new password verification. Click the “Save” button to save the changes. Note: Passwords must be 4 to 16 characters in length (alphanumeric only). - Page 40 Certificate: Click on the “Browse” button and locate the Certificate file on your local PC then click “Open” to install the certificate in the unit. Password: Set the password used to encrypt the content stream. After entering the password press the ...
-
Page 41: Switcher
Switcher Switching The Switch manages the connection configurations of displays and sources. The input/output switch allows selection of output port (display) and input port (source) for specific combinations of displays and sources within the matrix. Click the white button, it will become blue, which represents that the input and output are routed. - Page 42 Preset Save: Save the selection states in the Switch submenu. Load: Load the preset which has been saved. Configuration Users can set the Input and Output names by clicking on the headings in the Switching tab, entering the appropriate name and then clicking “Accept”...
- Page 43 Set Scaling as “Auto” or “Manual”, and the resolutions of output sources from the drop-down menu.
-
Page 44: System
System In the System Column, users can set up following settings: RS-232 Settings: In the RS-232 Settings column, users can choose to turn “ON” or “OFF” the RS-232 stream and set the following configuration: Baud Rate: Set the baud rate. The available range is from 2400 to 115200 baud. ... - Page 45 Save Config: Save current settings as a setting file to be saved to a PC. Load Config: Click to load a setting file from PC to Matrix. Device Log: In the Device Log column, log files can be saved to a PC. ...
-
Page 46: Firmware Upgrade
Firmware Upgrade The PR-Series uses KIT files for firmware upgrade. Before Starting Download the latest firmware (KIT) file to your PC. (Place KIT files on a local drive for the fastest throughput.) Verify the following: Verify that an Ethernet/RJ-45 cable is connected from the PR-Series to the same network as the control ... -
Page 47: Troubleshooting
Troubleshooting Power: Ensure all devices are powered on (sources, transmitter, receiver and display). Indicator: Please make sure all LED indicators of the receiver is normal according to the user manual. Devices: Ensure picture can be shown normally when directly connecting a source to a display device. Cable: Plug in and out HDMI cable or try another HDMI cable. -
Page 48: Appendix: Api Command List Instructions
Appendix: API Command List Instructions System Commands Command Description Variables Example Command sent: ? Or help Display the >? commands listed in Response: the table ----------------- Help ------------------- ---System Commands--- ? Or help This list ping ping to specified IP address fwversion Request the firmware version of the device... - Page 49 number device firmware update status -100% Firmware update status: copying file from web finish device firmware update status -99% Firmware update status: Updating MCU device firmware update status -97% device firmware update status -94% device firmware update status -90% device firmware update status -70% Firmware update status: Updating APP device firmware update status -60% device firmware update status -19%...
- Page 50 --Notice:it will take some time, please keep device power on-- Start restore to factory firmware image…… Command sent: get sn Get device serial >get sn number Response: Serial Number:123456789 Command sent: set serial <on/off> Set serial port on or >set serial on Response: Serial port is on Command sent:...
- Page 51 all front panel key --Front panel key lock level Setting-- button, menu for Enter key lock level (All for all key button, Menu for only lock menu key only menu button, Off for no key button) ->menu button Key lock is set to menu >--Current key lock level state:menu Command sent: exit...
-
Page 52: Network Commands
Network Commands Command Description Variables Example Command sent: get friendly Get device's >get friendly hostname Response: --Current device friendly name:PR-0602-3456789 Command sent: set friendly Set device's >set friendly hostname Response: Please input friendly name: Old friendlyname: PR-0602-3456789 New friendlyname: PR-0602 Would you like to save this setting(Y/N)y Setting is ok , you should reboot that make it effective... - Page 53 Is this correct? Type Y or N and Enter ->y Settings written. Device must be rebooted to enable new settings. >--Current device friendly name:PR-0602 >--Current IP mode: static >--Current IP Address: 192.168.1.2 >--Current Subnet Mask: 255.255.255.0 >--Current Gateway IP: 192.168.1.1 Command sent: get dns Get device's DNS...
- Page 54 to auto, 100full or >set ethernet mode Response: 10 half Current ethernet mode : 10 half Enter new ethernet mode(Auto, 100 full or 10 half) - >Auto Would you like to set the ethernet mode (y/n):y New ethernet mode set, reboot the device for the change to take effect.
-
Page 55: Security Commands
Security Commands Command Description Variables Example Command sent: set telnet port Set the device’s IP >set telnet port port listened to for Response: Telnet connections Current telnet port number = 23 Enter new telnet port number(0 = disable telnet) ->23 NOTE: This Setting telnet port number to 0 command requires... - Page 56 you will need to reset it in WebGUI NOTE: This command is supported by SSH only, not supported by telnet Command sent: set ssh username Set the Username >set ssh username for a secure SSH Response: session Enter SSH new username ->123 Would you like to set this username (y/n) ->y NOTE: This (please set SSH password)
-
Page 57: Configuration Commands-Input
Configuration Commands-Input Command Description Variables Example Command sent: get vidin Get the name of the <input channel> = >get vidin portname:1 portname:<input specified input Response: channel> get input port 1 named as Input 1 Command sent: set vidin Set the name of the <input channel>... - Page 58 prefedid:<input resolution in the >get vidin prefedid:1 Response: channel> current edid used <resolution> = for the specified <H>x<V><i/p>,<Rat get preferred edid set to 3840x2160p,30 for input 1 input, no matter it is e><Specific Info> under which EDID mode Command sent: set vidin Set preferred edid <input channel>...
- Page 59 1280x720,50 1280x720,60 1280x720p,60 1280x720p,100 1280x720p,120 1280x768,59 1280x768,60 1280x768,74 1280x768,75 1280x768,85 1280x800,60 1280x960,60 1280x960,85 1280x1024,60 1280x1024,75 1280x1024,85 1360x764,60 1360x768,60 1440x900,60 1440x900,75 1440x900,85 1400x1050,60 1400x1050,75 1600x1200,60 1680x1050,60 1920x1080i,50 1920x1080i,60 1920x1080p,24 1920x1080p,25 1920x1080p,30 1920x1080p,50 1920x1080,60 1920x1080p,60 1920x1200,59 1920x1200,60 3840x2160p,24 3840x2160p,25 3840x2160p,30 4096x2160p,24 4096x2160p,25 4096x2160p,30...
- Page 60 3840x2160p,50 3840x2160,50 3840x2160p,60 3840x2160p,60CVR 4096x2160p,50 4096x2160p,60 Command sent: get vidin Get the current edid <input channel> = >get vidin ediddata:1 ediddata:<input data used for the Response: channel> specified input port >get vidin ediddata:1 get ediddata for input 1 is: 00 FF FF FF FF FF FF 00 05 B8 00 18 02 00 00 00 20 1E 01 03 80 00 00 78 0E EE 95 A3 54 4C 99 26 0F 50 54 FF FF 80 D1 00 B3 00 A9 40 81 00 81 C0 81 80 8B C0 95 00 02 3A 80 18 71 38 2D 40...
- Page 61 2C 20 00 2C 20 62 2C 20 79 2C 20 74 2C B0 11 B6 7E 01 00 00 00 54 54 01 00 00 00 00 00 C8 55 01 00 BC 11 B6 7E 34 32 39 34 39 36 37 32 39 35 00 00 01 00 00 00 6C 51 01 00 F3 D8 0F 60 31 11 B6 7E F3 D8 0F 60 8F 64 07 00 00 00 00 00 00 00 00 00 >set input 1 to custom edid mode...
-
Page 62: Configuration Commands-Output
Configuration Commands-Output Command Description Variables Example Command sent: get vidout Get the name of the <output channel> = >get vidout portname:1 portname:<output specified output Response: channel> port output 1 is named as meeting room 1 Command sent: <output channel> = set vidout Set the name of the >set vidout portname:1,Meeting Room 2... - Page 63 Response: set osd color to blue Command sent: get vidout osd pos Get osd position for >get vidout osd pos video output Response: get osd pos set to top left Command sent: set vidout osd Set osd position for <position>= >set vidout osd pos:tr pos:<position>...
- Page 64 set cec display auto off for output 2 Command sent: get vidout cec Get cec display auto <output channel>= >get vidout cec sleep timeout:2 sleep on/off delay time Response: timeout:<output for specified output get cec sleep timeout set to 2mins for output 2 channel>...
- Page 65 set video sleep off for output 1 Command sent: get vidout sleep Get vidout tmds <output channel>= >get vidout sleep delay:1 delay:<output sleep on/off delay Response: channel> time setting for get video sleep off delay time set to 1800 seconds for specified output output 1 Command sent:...
- Page 66 Setting: AUDOUT_MUTE = DISABLE AUDOUT_FORMAT - HDMI (HDMI audio plays, AUDIO OUT audio off) AUDOUT_FORMAT - ANALOG (HDMI audio off, AUDIO OUT audio plays) AUDOUT_FORMAT - ALL (HDMI audio plays, AUDIO OUT audio plays) Command sent: <output channel>= get audout Get audio output >get audout format:1 format:<output...
- Page 67 Analog Audio in ANALOG OUT port is ON NOTE: When HDMI embedded audio is not PCM audio (such as compressed Dolby/DTS audio), auto MUTE Analog line out, even ALL and ANALOG format is selected Command sent: get vidout Get edid data for <output channel>= >get vidout ediddata:1 ediddata:<output...
-
Page 68: Switching Commands
Switching Commands Command Description Variables Example Command sent: load preset:<preset Load the specified <preset mode>= >load preset:1 mode> preset mode for Response: switcher setting loaded preset 1 >set switch video from input 2 for output 1 Command sent: save preset:<preset Save current <preset mode>= >save preset:2... - Page 69 Command sent: get switch Get which video <channel>= >get switch VO2 VO<channel> input is switched to Possible responses: specified output 1~2 for PR-0402 ▪get switch video input 1 for output 2 and PR-0602 ▪get switch no video input for output 2 Output Channel, ▪get switch video input 1 for window 2 1~4 for PR-0404...
- Page 70 ▪invalid switch ALL channel © 2021 Harman. All rights reserved. SmartScale, NetLinx, Enova, AMX, AV FOR AN IT WORLD, and HARMAN, and their respective logos are registered trademarks of HARMAN. Any other company or brand name referenced may Last Revised: be trademarks/registered trademarks of their respective companies.
Need help?
Do you have a question about the AMX Precis PR Series and is the answer not in the manual?
Questions and answers