Table of Contents
Advertisement
Quick Links
Style Selections
is a registered trademark
®
of LF, LLC. All rights reserved.
Questions, problems, missing parts? Before returning to your retailer, call our
customer service department at 1-877-888-8225, 8 a.m. - 8 p.m., EST, Monday - Friday.
EB1686
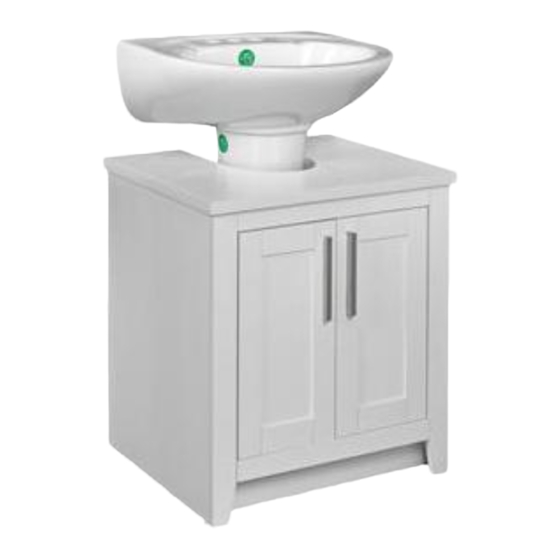
PEDESTAL SINK STORAGE CABINET
1
ITEM #0726714
MODEL # 22BV90034-NT01
Français p.18
Advertisement
Table of Contents

Related Manuals for Style selections 22BV90034-NT01


Summary of Contents for Style selections 22BV90034-NT01
- Page 1 ® of LF, LLC. All rights reserved. MODEL # 22BV90034-NT01 Français p.18 Questions, problems, missing parts? Before returning to your retailer, call our customer service department at 1-877-888-8225, 8 a.m. - 8 p.m., EST, Monday - Friday.
-
Page 2: Safety Information
SAFETY INFORMATION Please read and understand this entire manual before attempting to assemble, operate or install the product. WARNING: • Some steps are more easily handled with two adults. • Assembly and unpacking requires 2 adults. CAUTION: • Before installation, carefully use scissors or utility knife to cut and unwrap all parts. SAVE THESE INSTRUCTIONS... -
Page 3: Package Contents
PACKAGE CONTENTS PART DESCRIPTION QUANTITY Bottom Panel Bottom Apron Toe Kick Left Front Rail Right Front Rail Left Side Panel Top Panel Right Side Panel Top Apron Left Back Panel Right Back Panel Left Door Right Door... - Page 4 HARDWARE CONTENTS (not shown to size) Wood Dowel Cam Bolt Cam Lock Qty: 30 Qty: 30 Qty: 30 Handle Hinge Small Screw Qty: 2 Qty: 4 Qty: 8 Long Screw Handle Screw Touch-up Pen Qty: 4 Qty: 4 Qty: 1...
- Page 5 PREPARATION Before beginning assembly of product, carefully use scissors or utility knife to cut and unwrap all parts. Make sure all parts are present. Compare parts with package contents list and hardware contents list. If any part is missing or damaged, do not attempt to assemble the product. Estimated assembly time: 60 minutes.
- Page 6 2. Attach bottom apron (B) to bottom panel (A), securing with cam locks (CC). Hardware Used Cam Lock 3. Insert wood dowels (AA) and cam bolts (BB) into pre-drilled holes on bottom panel (A) as shown. Hardware Used Wood Dowel Cam Bolt...
- Page 7 4. Attach toe kick (C) to bottom panel (A), securing with cam locks (CC). Hardware Used Cam Lock 5. Insert wood dowels (AA) and cam bolts (BB) into pre-drilled holes on left front rail (D) and right front rail (E) as shown. Hardware Used Wood Dowel Cam Bolt...
- Page 8 6. Insert cam bolts (BB) into pre-drilled holes on left side panel (F) and right side panel (H) as shown. Hardware Used Cam Bolt x 12 7. Attach left side panel (F) to left front rail (D), securing with cam locks (CC). Repeat this step to attach right side panel (H) to right front rail (E).
- Page 9 8. Insert wood dowels (AA) into pre-drilled holes on right side panel (H) as shown. Hardware Used Wood Dowel 9. Attach bottom panel (A) to right side panel (H), securing with cam locks (CC). Hardware Used Cam Lock...
- Page 10 10. Attach right back panel (K) to right side panel (H), securing with cam locks (CC). Then, attach top apron (I) to right front rail (E) on right side panel (H). Hardware Used Cam Lock 11. Insert wood dowels (AA) into pre-drilled holes on bottom panel (A), bottom apron (B), top apron (I) and toe kick (C) as shown.
- Page 11 12. Attach left side panel (F) to the assembly as shown, securing with cam locks (CC). Hardware Used Cam Lock 13. Attach left back panel (J) to left side panel (F), securing with cam locks (CC). Hardware Used Cam Lock...
- Page 12 14. Secure the left back panel (J) and right back panel (K) using long screws (GG). Hardware Used Long Screw 15. Stand the assembled unit upright. Insert wood dowels (AA) into the pre-drilled holes as shown. Hardware Used Wood Dowel x 10...
- Page 13 16. On a flat surface, turn top panel (G) upside down. Insert cam bolts (BB) into the pre-drilled holes as shown. Hardware Used Cam Bolt 17. Attach top panel (G) to the assembly as shown, securing with cam locks (CC). Hardware Used Cam Lock...
- Page 14 18. On a flat surface, turn left door (L) and right door (M) upside down. Attach hinges (EE) as shown using small screws (FF). Hardware Used Hinge Small Screw 19. Attach handle (DD) to left door (L) and right door (M) using handle screws (HH) from inside the doors.
- Page 15 20. Attach left door (L) and right door (M) to the front rails of the assembly using the preassembled screws on the hinges (EE). To adjust the doors right or left, loosen/tighten the screws as in (a). To adjust the doors forward or backward, change keyhole slot position as in (b).
-
Page 16: Care And Maintenance
CARE AND MAINTENANCE • Dust the item regularly with a soft, non-lint producing cloth or household dusting product. • You can clean the item with a gentle, non-abrasive household cleaner. Make sure to dry the wood immediately with a soft cloth or towel. •... -
Page 17: Replacement Parts List
REPLACEMENT PARTS LIST For replacement parts, call our customer service department at 1-877-888-8225, 8 a.m. - 8 p.m., EST, Monday - Friday. PART DESCRIPTION PART # Floor Glide PH-GLDBRW001 Door Bumper PH-BMPBLK002 Printed in China...
Need help?
Do you have a question about the 22BV90034-NT01 and is the answer not in the manual?
Questions and answers