
Related Manuals for PVA PCP Series


Summary of Contents for PVA PCP Series
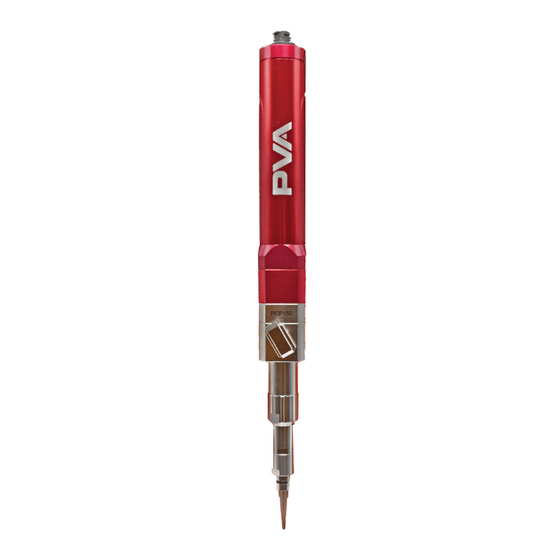
- Page 1 INNOVATION. PRECISION. EXCELLENCE. Progressive Cavity Pump PCP Series Operation Manual Revision A...
- Page 2 PCP Series Manual This document is based on information available at the time of its publication. While efforts have been made to ensure the contents of this manual are accurate, the information contained herein does not purport to cover all specific details or variations in hardware, or to provide for every possible contingency in connection with installation, operation, or maintenance.
-
Page 3: Table Of Contents
PCP Series Manual Table of Contents Introduction ............................5 PVA Contact Information ......................5 Document History ........................5 Safety ............................6 System Description ......................... 8 Theory of Operation ........................ 8 Description of Components ....................9 Personal Protective Equipment ..................... 9 Waste Disposal ........................... - Page 4 Dispense ........................... 37 Calibration ........................38 Parts Breakdown ..........................39 Spare Parts ............................40 Technical Specifications ......................41 Drawings ............................42 Troubleshooting ......................... 43 Table of Figures .......................... 44 PVA Warranty Policy ........................46 Page 4 of 46 Revision A September 2020...
-
Page 5: Introduction
Before you operate this valve, read the operation and setup manual. This will help you to become familiar with the product and ensure successful operation. If any questions or problems arise, contact PVA’s Technical Support department. PVA Contact Information Main Office... -
Page 6: Safety
PCP Series Manual Safety Certain warning symbols are affixed to the machine and correspond to notations in this manual. Before operating the system, identify these warning labels and read the notices described below. Not all labels may be used on any specific system. - Page 7 PCP Series Manual Do not smoke near the machine. Always have a fire extinguisher available for emergency use. Before performing any repairs or maintenance to the system, turn off power and lock out the power disconnect switch. Warning notices are used to emphasize that hazardous voltages, current, temperatures, or other conditions that could cause personal injury exist in this equipment or may be associated with its use.
-
Page 8: System Description
The PCP Series features five different rotor sizes allowing the end user to select their ideal flow rate. An optional carbide rotor allows processing of filled or abrasive chemistries while extending the life of the rotor. -
Page 9: Description Of Components
Waste Disposal Dispose of all used parts and materials in accordance with local laws and regulations. Necessary Tools PVA offers tools and cleaning accessories to maintain the PCP progressive cavity pumps. Part Number Description 12862... -
Page 10: Setup
PCP Series Manual Setup Before you operate the pump, know the pump components. Do the steps instructed below for safe and correct operation. WARNING: Never operate the pump dry. If the pump is operated dry or without pump conditioner, severe damage will occur. Always put pump conditioner on the rotor before the pump is assembled. -
Page 11: Operation
PCP Series Manual Operation WARNING: Never operate the pump dry. If the pump is operated dry or without pump conditioner, severe damage will occur. Always apply lubricant to the rotor before the pump is assembled. Operation Notes: • You must do the initial bleed for the pump to function correctly. -
Page 12: Fluid Pressure
The maximum outlet fluid pressure is 285 psi. Material Flow Rate Material flow rate can be adjusted in Auto Cycle or Manual mode through PVA Portal. Refer to the Portal instructions in your workcell manual. An alternative is to adjust the path speed in PathMaster instead of material flow rate. -
Page 13: Pump Shutdown Procedure
PCP Series Manual Pump Shutdown Procedure 1. Remove the needle from the manifold. 2. Purge material through the manifold. 3. Completely clean the manifold material outlet. 4. Install a night cap on the manifold material outlet. 5. Release the fluid supply pressure. Refer to the workcell manual if necessary. -
Page 14: Disassemble And Clean The Pump
PCP Series Manual Disassemble and Clean the Pump Remove the Pump from the Workcell 1. Remove the motor connection from the motor assembly of the pump. 2. Turn the luer lock dispense tip counterclockwise and pull to remove. 3. Discard the luer lock dispense tip. -
Page 15: Disassemble The Pump
PCP Series Manual Disassemble the Pump 1. Place the pump on a clean work surface. 2. Use a 2.5 mm hex key to remove the two M3 x 55 mm socket head cap screws from the rotor assembly. 3. Separate the motor from the rotor assembly. -
Page 16: Figure 5: Remove Luer Lock
PCP Series Manual 5. Twist to unscrew the luer lock and remove it from the stator sleeve. Figure 5: Remove Luer Lock 6. Twist to unscrew the union cap and remove it from the stator sleeve. Figure 6: Remove Union Cap... -
Page 17: Figure 7: Remove Stator Sleeve
PCP Series Manual 7. Remove stator sleeve. Figure 7: Remove Stator Sleeve 8. Install the stator tool onto the rotor assembly. Figure 8: Install Stator Tool Page 17 of 46 Revision A September 2020... -
Page 18: Figure 9: Remove Stator
PCP Series Manual 9. Hold the stator tool to stabilize and twist counterclockwise to remove the stator. Figure 9: Remove Stator 10. Twist to remove the bleed clip from the vent port. Figure 10: Remove Bleed Clip Page 18 of 46... -
Page 19: Figure 11: Remove O-Ring
PCP Series Manual 11. Remove the o-rings from the fluid block assembly. 12. Examine the o-rings for damage. Save it if it is not damaged. Replace it if it is damaged. Figure 11: Remove O-Ring 13. Use a 2.5 mm hex key to remove the two M3 x 35 mm socket head cap screws from the rotor assembly. -
Page 20: Figure 14: Remove O-Ring From Fluid Block
PCP Series Manual 15. Remove the o-ring from the fluid block. 16. Examine the o-ring for damage. Save it if it is not damaged. Replace it if it is damaged. Figure 14: Remove O-ring from Fluid Block 17. Remove the o-ring from the seal block. -
Page 21: Clean All Wetted Parts
PCP Series Manual 19. Separate the seal block from the rotor assembly. Figure 16: Remove Seal Block Clean All Wetted Parts • Wear gloves when you use solvents. • Cover the work surface so the solvent and material does not damage it. -
Page 22: Figure 18: Clean The Stator
PCP Series Manual 5. Make sure all material is removed from the inside and outside of the stator using a pipe cleaner. Figure 18: Clean the Stator 6. Make sure material is removed before assembling the pump. 7. Clean both the mix clip and manifold with solvent, cotton tipped applicators and lint free disposal wipes. -
Page 23: Assembly Instructions
PCP Series Manual Assembly Instructions Assemble the Pump 1. Install the seal block onto the rotor assembly. Figure 19: Install Seal Block on Rotor Assembly Note: When installed, the four small holes on the seal block should be facing away from the rotor assembly. -
Page 24: Figure 22: Install O-Ring On Seal Block
PCP Series Manual 3. Lubricate the AN016 O-ring with pump conditioner. 4. Install the AN016 O-ring onto the seal block. Figure 22: Install O-Ring on Seal Block 5. Install the fluid block onto the seal block/rotor assembly. Bleed Port Fluid Inlet... -
Page 25: Figure 24: Fluid Block Installed
PCP Series Manual Figure 24: Fluid Block Installed 6. Install the two M3 x 35 mm socket head cap screws onto the rotor assembly and fluid block. Tighten with a 2.5 mm hex key. Figure 25: Install Screws onto Rotor Assembly/Fluid Block 7. -
Page 26: Figure 27: Install O-Ring On Vent Port
PCP Series Manual 9. Lubricate the SS5 O-ring with pump conditioner. 10. Install the SS5 O-ring onto the vent port. Figure 27: Install O-Ring on Vent Port 11. Lubricate the SS5 O-rings with pump conditioner. 12. Install the SS5 O-rings on the bleed clip based on the picture below. -
Page 27: Figure 30: Install Stator Tool
PCP Series Manual 14. Apply pump conditioner to the rotor. 15. Install the stator tool onto the rotor assembly. Figure 30: Install Stator Tool 16. Face the tabs of the stator toward the fluid block assembly. Hold the stator tool to stabilize and twist on the stator. -
Page 28: Figure 32: Align Tabs With Locating Features
PCP Series Manual Note: Align the tabs with the locating features. Figure 32: Align Tabs with Locating Features Note: The rotor should be flush with the bottom of the stator. Figure 33: Rotor and Stator Page 28 of 46 Revision A... -
Page 29: Figure 34: Install Stator Sleeve
PCP Series Manual 17. Slide the stator sleeve over the stator. Figure 34: Install Stator Sleeve 18. Slide the union cap over the stator sleeve. Twist until it is secure. Figure 35: Install Union Cap Page 29 of 46 Revision A... -
Page 30: Figure 36: Install Blue Coupling
PCP Series Manual 19. Install the blue coupling onto the rotor assembly. Figure 36: Install Blue Coupling 20. Install the motor onto the rotor assembly. Figure 37: Install Motor Page 30 of 46 Revision A September 2020... -
Page 31: Figure 38: Install Screws
PCP Series Manual 21. Install the two M3 x 55 mm socket head cap screws. Tighten with 2.5 mm hex key. Figure 38: Install Screws 22. Install the luer lock onto the stator sleeve. Figure 39: Install Luer Lock Page 31 of 46... -
Page 32: Install The Pump On The Workcell
PCP Series Manual Figure 40: PCP Assembled Install the Pump on the Workcell 1. Install the bolt through the mount plate into the back of the fluid body. 2. Connect the material fitting to the fluid body. 3. Install the new luer lock dispense tip onto the stator sleeve. -
Page 33: Maintenance
PCP Series Manual Maintenance Interval Action Daily • Examine the material outlet for contamination and cured material. • Make sure the volume and flow rate of the material is correct. • Examine the motor cable and material supply hose for signs of wear, kinks, or twists. -
Page 34: Replace The Star Shaped Coupling
PCP Series Manual Replace the Star Shaped Coupling 1. Examine the star shaped coupling in the bearing block. If it is damaged, replace it. 2. Use a pick to remove the star shaped coupling. 3. Put the new star shaped coupling in the bearing block. -
Page 35: How To Use The Pcp With Portal
How to Use the PCP with Portal If your PDP is on a workcell with PVA Portal, you will use the screens that follow to operate it. Refer to the Portal manual for additional information on how to use the program. -
Page 36: Devices
PCP Series Manual Manual Mode Devices 1. Select Manual from the cycle stop screen. 2. Select the Devices tab. 3. Select the valve from the Select Valve drop down menu. 4. Select Purge Valve to purge material from the selected valve. -
Page 37: Dispense
PCP Series Manual Dispense 1. Select Manual from the cycle stop screen. 2. Select the PCP050 tab. 3. Select the Dispense tab. 4. Set the Dispense Rate in grams per minute. Select the value box and use the up and down arrows or use the keyboard to type the value. -
Page 38: Calibration
PCP Series Manual Calibration Select Manual from the cycle stop screen. Select the PCP050 tab. Select the Calibration tab. In the Shot Speed dropdown menu, select Low. Under Begin Shot, select Go. After the shot finishes, weigh the dispensed material and type it into the Lo Wgt. -
Page 39: Parts Breakdown
PCP Series Manual Parts Breakdown Figure 47: PCP Disassembled Item Part Number Description 12813 MOTOR ASSEMBLY, PCP050 12814 COUPLING, MOTOR, PCP050 12815 ROTOR ASSEMBLY, PCP050 12838 SEAL BLOCK ASSEMBLY, PCP050 12819 STATOR, FFKM, PCP050 12821 LUER, STANDARD ADAPTER, PCP050 12822... -
Page 40: Spare Parts
PCP Series Manual Spare Parts A spare parts kit is available to prevent machine downtime. Part Number: 612-10811-1 ITEM PART NUMBER DESCRIPTION 12830 O-RING, SS5, PCP050 12831 O-RING, AN016, PCP050 12836 O-RING, FKM, AS013, PDP050 12837 O-RING, FKM, P9, PDP050... -
Page 41: Technical Specifications
PCP Series Manual Technical Specifications Operating Temperature 10 - 40°C (50 - 104° F) Viscosity Range 1 - 500,000+ cps Max Inlet Fluid Pressure 85 psi Wetted Components Stainless Steel/FFKM Carbide/EPDM *Dimensions, Flow Rate, and Fluid Inlet will vary based on pump size. -
Page 42: Drawings
PCP Series Manual Drawings Figure 51: PCP Drawing Dimensions Page 42 of 46 Revision A September 2020... -
Page 43: Troubleshooting
PCP Series Manual Troubleshooting Troubleshooting Problem Possible Cause Corrective Action Motor not connected correctly Check motor connections Cured material in pump section Disassemble pump and clean Static mixer is blocked Replace the static mixer Stator is swollen or worn Replace stator... -
Page 44: Table Of Figures
PCP Series Manual Table of Figures Figure 1: Necessary Tools ........................9 Figure 2: Remove Pump from Workcell ....................14 Figure 3: Separate Motor from Rotor Assembly................15 Figure 4: Remove Coupling ........................15 Figure 5: Remove Luer Lock ......................... 16 Figure 6: Remove Union Cap ........................ - Page 45 PCP Series Manual Figure 41: Material Outlet ........................33 Figure 42: Replace Coupling ........................ 34 Figure 43: Setup Screen ........................35 Figure 44: Devices Screen ........................36 Figure 45: Dispense Screen ........................37 Figure 46: Calibration Screen ......................38 Figure 47: PCP Disassembled ......................39 Figure 48: Part Number List ........................
-
Page 46: Pva Warranty Policy
Unauthorized repair or modification of the enclosed product, and/or the use of spare parts not directly obtained from PVA (or from factory authorized dealers) will void all warranties.
Need help?
Do you have a question about the PCP Series and is the answer not in the manual?
Questions and answers