Advertisement
Quick Links
Advertisement

Related Manuals for MyFlyDream MFD

Summary of Contents for MyFlyDream MFD
- Page 1 MyFlyDream AutoPilot V1.0 www.MyFlyDream.com...
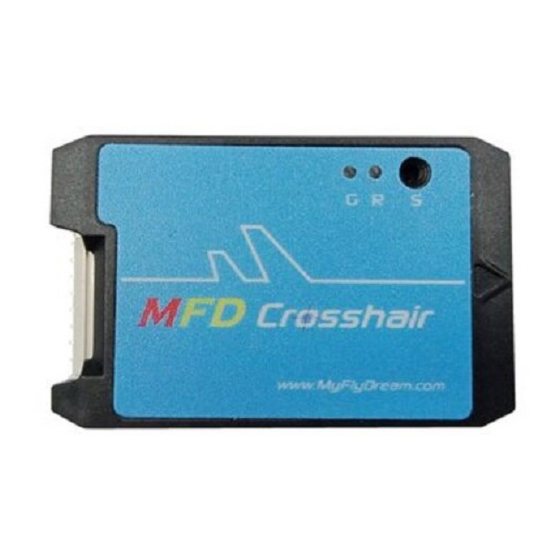
- Page 2 MFD has build-in 3-axis gyro, 3-axis Acceleration sensor ,3 axis digital compass and barometer. AP has two CPUs, one for the MFD attitude calculation, the other in charge for the OSD and fly logic control. Base on this advance hardware, AP can be used for plane stabilized, way point with altitude fly, and achieve autopilot and auto fly.
-
Page 3: Specification
4(RX in PPM mod,can have 4 more PWM output) Maximum rolling angular 2000 degree/S Flight mods Manual, stabilized, Circle, Waypoint, Return to launch 3. OSD 4. Connection MFD AP’s connections from A~J connection as the picture show above 编号 名称... - Page 4 Sensors To current sensor board (for current sensing and battery voltage sensing ) Extended port for air speed sensor (option) Connect to the device as the picture show below: put the MFD AP connection pins facing to you A) Power...
- Page 5 This port will supply the power to the MFD AP. The AP has it own voltage regulator, can be power from 7-20V, but the camera and the video transmitter will also share the power directly from this port. Most of the camera and video TX are 12V, so we recommend you to power the MFD AP with 3S lipo, and will make the connection more pretty and easy.
- Page 6 The bottoms are grounds they are internal connected also. Power to this port will not power up MFD AP, if the main power port is not connect to the power.
- Page 7 THR, and RUD. Use the jumper comes with the MFD AP, connected to CH5, and then PPM signal to CH6. 3 MFD AP will auto select the PPM order base on the jumper position。 C) CH1~CH4 Output D) This port used for servo connections, use for control your airplane.
- Page 8 ELE servo output THR ESC output RUD servo output E) GPS Connect the GPS to this port. 插针 用途 TX (default is no connection, the LS20033GPS come with the AP don need it) RX(To the GPS TX) Default GPS baud rate is 38400 3.3V power to the GPS Ground F) Data...
- Page 9 G) Camera Camera connecter (If you power AP with 12V, and camera is 12 V can connect to it directly, make sure your camera are in the same power range of the input power of the AP, they are internal connected) GND Ground PWR Power (voltage is same as the AP Power input A1 pin) VID (Camera video signal)
- Page 10 VID video output with the OSD information to the video TX. AUD Audio output for the ATT tracker. Connect to the Video TX audio channel If you video transmitter is difference from the AP power, you have to power the video TX separately. I) AUX This port is use for connect AUX (optional) can connect to ultrasonic sensor and other AUX.
-
Page 11: Installation
below. 插针 用途 RSSI (0~5V) VOLT power pack (0~27V) CURR power current (0~100A) PWR 5V GND Ground K) EXT This is I2C extension port for using airspeed and other device. 插针 用途 PWR 3.3 v 5. installation for better performance, please mount the AP around the CG point of the airplane. - Page 12 parallel to your airplane centerline,as the picture shows below. : because most of the setting can be done via the OSD menu, so if you don’t have you video transmitter hook up, you can connect a monitor to...
-
Page 13: Navigating The Menu
the G port of the AP to monitor the OSD display to set up the parameters Turn on your controller and make sure the CH5 and CH6 is on the low position. Around 1000us, if the connection is right, when power up you can see the G and R led on the AP flash two times. -
Page 14: First Time Power Up
First time power up Please follow the below procedures to setup the AP: 1) radio CH5 and CH6 on the low position, on the OSD display you should see the MAN(manual mode) on the left up corner of the screen. Move the elevator rudder and the aileron you should see the moving correspond to the stick. - Page 15 (airplane bank right ,aileron left is up, right is down) (nose up, elevator down)
- Page 16 (when the airplane spin left, rudder to the right. When spin right, rudder to the left.) if the servo movement is not expected, enter the OSD menu, go to PLANE SETTINGS, set the wrong movement channel to REV. for instance, when nose up, elevator also goes up. You have to change the ELE in the menu to the REV.
-
Page 17: Osd Layout
see the”QUIT” show on the OS, by using the aileron stick to the left to finish the calibration. In the COMMON CALIBRATIONthe parameters that are calibrated show as below: 1. Aileron elevator and rudder center point of your radio 2. AP installation error, show as degree off the roll and pitch 3. - Page 18 OSD display will slightly change base on the fly modes A. Fly time B. Fly modes。Has 6 modes including MAN/STB/WPT/CIR/RTH, about 6 fly mode detail please refer to (8. Test fly) C. heading。Heading to the north is 0 degree. East south and west are 90,180,270.When the airplane’s speed are greater than 20km/h.
- Page 19 F. Ground speed,unit: km/h。 G. altitude,unit: meter。Data comes from barometer. H. Home direction indicator (when in waypoint navigation mode, indicator will point to the current waypoint direction. When in CIR circle mode, indicator point to the circle point) when the indicator point to the 12 clock direction, it means the home position or way point position or circle point is in front of the airplane.
- Page 20 L. altitude 。 This number only shows when the AP is in CIR,WPT,RTL modes. Indicate that the AP is trying to reach the setting altitude. When this number change the number type will become larger than regular to cause your tension on this number.
- Page 21 T. Climbing rate。Fully mark of this bar is 4M/S. if the climbing rate greater than 4, it will show up the number on the side.。 U. Waypoint icon. Only shows in waypoint mode. Simulate the position base on the launch point(home position) , flashing point with number is the current heading waypoint.in WPT mode, the throttle is controlled by AP.
- Page 22 position input. The AP as bypass system. No level and stabilize Stabilizer, Stabilizer mode, the AP will control the MIDDLE airplane back to level position when you free the control stick. Throttle is control by user.。 WayPoint,waypoint mods, the AP will continue the waypoint one by one preset by user.
- Page 23 When you nose down the airplane, the elevator will go up, when you nose up the airplane, the elevator will go down. When you level the airplane, the Artificial horizon in the OSD will parallel to the real horizon line. After checking everything is right, use MAN mode to launch the airplane.
- Page 24 c) If your airplane can’t climb or turning and dissenting. It means the level fly position of your airplane is not calibrated right. Put your airplane to level fly position. And do the COMMON CALIBRATION in the OSD menu. 3) Next is the RTH. You have to set home when you flying the RTH modes.
- Page 25 b) If when airplane is Turing and heading to home. But the fly track is like snake walking, it means the CRUISE-P is too high go to the OSD menu AUTO-PILOT SETTINGS->CRUISE-P, bring down the number by 1 every times. c) If the airplane speed is too fast or too low, you can set the parameter to a desire value AUTO-PILOT SETTINGS->...
- Page 26 Recommended range are 5 ~45 degree.。 1.4 SAFE ALT, safe altitude use for RTH mode. Setting is in meter. When the airplane is in RTH mode, if the airplane’s altitude is under this value, the airplane will climbing to this number as soon as possible, if the airplane’s altitude is higher than this number, when your trigger RTH, the AP will consider the distance from home to do the altitude change.
- Page 27 1.9 ROLL-D Rolling Damping parameter, to control the roll oscillating. range 0~30,default 5。 1.10 PITCH-P Pitch P, the bigger the value the more sensitive to control, too high will cause pitch oscillating, default 11。Range : 0~30, 1.11 PITCH-D pitch Damping parameter, to control the pitch oscillating.
- Page 28 1.18 LAUNCH ANGLE, use to help hand launch airplane easy to launch. It will keep the elevator up for you when you hand launches your airplane. In degree。You only need to control the throttle, the AP will keep the airplane roll level and keep the elevator up a angle. So when you launch it, the airplane will keep an angle to climb up.
- Page 29 3. OSD SETTINGS 3.1 OSD LEFT-RIGHT 3.2 OSD UP-DOWN 3.3 VIDEO MODE 3.4 BLACK EDGE 3.5 DISPLAY L 3.6 DISPLAY R 4. SENSORS SETTINGS 4.1 CAL. GYRO+ACCL 4.2 CAL. MAG 4.3 CAL. VOLT 4.4 CAL. CURRENT 4.5 CAL. JOYSTICK 4.6 BATTERY TYPE 4.7 MERGE GPS TO IMU 4.8 GPS BAUDRATE 5.
- Page 30 7. COMMON CALIBRATION /////////////////TODO/////////////////// 升级固件 MyFlyDream will continue to improve the firmware to fix the bug and better preferment. please update the firmware when the newer firmware is available. Unless there is a big save change in the firmware, otherwise the update will not erase your setting.
- Page 31 as S) ,while you pressing the button plug the USB-TTL to your computer, and then release the button. 3. Open the upgrade software; select the right COM port according to your computer shows up. Other settings are default; click next, if you connect right.
- Page 32 change anything here. default target STM32_XL_density_768k, you have to manual select the chip from the drop down menu by clicking the arrow on the right. Then click next, will bring you to the next picture. 5.when you see the below picture come up, click the … mark on the right side of download to device.
- Page 33 button. Will bring you to the next picture. Wait for download finish, you will see 100% on the status bar. After you see that, unplug the cable from AP and do the calibrations mention before, to setup your AP.
Need help?
Do you have a question about the MFD and is the answer not in the manual?
Questions and answers