Table of Contents
Advertisement
Available languages
Available languages
Quick Links
MAG536
Het toestel-identificatieplaatje bevindt zich aan de binnenzijde van het toestel.
The appliance identification card is located inside the appliance.
Plak hier het toestel-identificatieplaatje.
Stick the appliance identification card here.
Houd, wanneer u contact opneemt met de serviceafdeling, het complete typenummer bij de hand.
When contacting the service department, have the complete type number to hand.
Handleiding
Manual
Adressen en telefoonnummers van de serviceorganisatie vindt u op de garantiekaart.
You will find the addresses and phone numbers of the service organisation on the guarantee card.
Advertisement
Chapters
Table of Contents

Related Manuals for Pelgrim MAG536


Summary of Contents for Pelgrim MAG536
- Page 1 MAG536 Het toestel-identificatieplaatje bevindt zich aan de binnenzijde van het toestel. The appliance identification card is located inside the appliance. Plak hier het toestel-identificatieplaatje. Stick the appliance identification card here. Houd, wanneer u contact opneemt met de serviceafdeling, het complete typenummer bij de hand.
- Page 2 MAG536 Handleiding 3 - 26 Manual 27 - 50 Gebruikte pictogrammen - Used icons Belangrijk om te weten - Important information...
-
Page 3: Table Of Contents
Inhoud Uw magnetron 1.1 Toestelbeschrijving 1.2 Inleiding Veiligheidsvoorschriften Waar u op moet letten 6 - 7 - 8 Vóór gebruik 3.1 Vóór het eerste gebruik 3.2 De klok instellen 3.3 Wat wel, wat niet Werking Hoe werkt de magnetron Bediening 5.1 Koken 12 - 13 - 14 - 15 - 16 5.2 Kinderslot... -
Page 4: Uw Magnetron
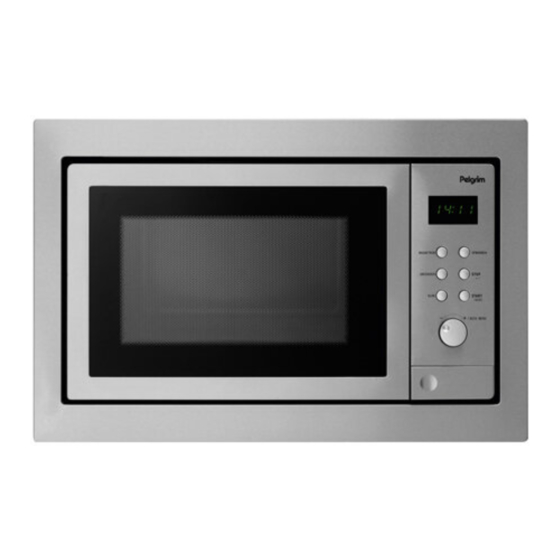
1 Uw magnetron 1.1 Toestelbeschrijving Deurvergrendeling Deur Ruit Glazen draaiplateau Geleidering Aandrijving Bedieningspaneel Display Magnetron 10. Opwarmen 11. Ontdooien 12. Stop 13. Klok 14. Start 15. Instelknop 16. Deurontgrendeling De magnetron mag niet gebruikt worden zonder geleidering en draaiplateau. Het draaiplateau moet met de uitsparing voor de aandrijving naar beneden geplaatst worden. -
Page 5: Inleiding
1 Uw magnetron 1.2 Inleiding Koken in uw nieuwe magnetron is veilig en comfortabel. U zet binnen een handomdraai de lekkerste gerechten op tafel. Het toestel is uiterst simpel te bedienen, mede dankzij de automatische kook- en ontdooiprogramma’s. In deze handleiding vindt u informatie over de installatie, veiligheid, bediening en het onderhoud van uw magnetron. -
Page 6: Veiligheidsvoorschriften
2 Veiligheidsvoorschriften Waar u op moet letten Houd rekening met onderstaande veiligheidsvoorschriften om brand, elektrische schokken, verwonding van personen en blootstelling aan microgolven te voorkomen. Houd het toestel schoon, dit verlengt de levensduur van uw magnetron en voorkomt gevaarlijke situaties. Deze magnetron is ontworpen voor huishoudelijk gebruik en is niet bedoeld voor professioneel gebruik of gebruik in de horeca. - Page 7 2 Veiligheidsvoorschriften • Waarschuwing! Sluit het apparaat alleen aan op wisselstroom, op een geaard stopcontact, met een netspanning overeenkomstig met de informatie aangegeven op het typeplaatje van het apparaat. • Waarschuwing! Maak het toestel spanningsloos voordat met reparatie of schoonmaken wordt gestart. Trek de stekker uit het stopcontact of draai de schakelaar in de meterkast op nul.
- Page 8 2 Veiligheidsvoorschriften • Let op! Het toestel is niet bedoeld voor gebruik door kleine kinderen, hulpbehoevenden en/of personen met gebrek aan kennis en ervaring, tenzij zij goede begeleiding krijgen of geïnstrueerd zijn in het veilig gebruiken van het toestel door een persoon die verantwoordelijk is voor hun veiligheid. •...
-
Page 9: Vóór Gebruik
3 Vóór gebruik 3.1 Vóór het eerste gebruik • Open de deur, verwijder al het verpakkingsmateriaal en controleer de magnetron op beschadigingen. Installeer de magnetron niet als deze beschadigd is, maar neem contact op met uw leverancier. • Verwijder de beschermfolie van de ommanteling. •... - Page 10 3 Vóór gebruik De magnetron is niet geschikt voor: • het inmaken van etenswaren; • het verhitten van frituurolie; • het koken van eieren in de schaal in verband met explosiegevaar (ook nadat de magnetron uitgeschakeld is). Niet alle materialen mogen in de magnetron. In onderstaande tabel wordt aangegeven welke materialen u wel en niet mag gebruiken.
-
Page 11: Werking
4 Werking Hoe werkt de magnetron Een magnetron is een kooktoestel dat door middel van microgolven voedsel verhit. Microgolven zijn elektromagnetische golven, net zoals radio- en tv-golven. Een radio zet deze golven om in geluid. In een magnetron worden de golven omgezet in warmte. De warmte ontstaat doordat de microgolven water- en vetmoleculen, die altijd in voedsel aanwezig zijn, snel laten bewegen. -
Page 12: Bediening
5 Bediening 5.1 Koken • Waarschuwing! Verhitting van vloeistoffen in de magnetron kan resulteren in kookpuntvertraging. Dit houdt in dat de vloeistof pas na verwijdering uit de magnetron heftig kan gaan koken met het risico dat u zich brandt. Het effect van kookpuntvertraging kunt u opheffen door een kunststof of glazen lepeltje in de vloeistof te zetten alvorens de vloeistof op te warmen in de magnetron. - Page 13 5 Bediening Snelstart Met één druk op de starttoets ‘START’ kunt u 30 seconden op maximaal vermogen koken. Door herhaaldelijk op de toets te drukken kunt u de kooktijd in stappen van 30 seconden verlengen. Ontdooien op gewicht Druk op toets ‘ONTDOOIEN’. In het display verschijnt ‘dEF1’.
- Page 14 5 Bediening Koken in fasen U kunt maximaal twee fasen in een kookprogramma instellen. Indien ontdooien een fase is in het kookprogramma, moet u deze als eerste invoeren. Voorbeeld U wilt 5 minuten voedsel ontdooien, daarna 7 minuten koken op 80% vermogen. Druk twee keer op toets ‘ONTDOOIEN’.
- Page 15 5 Bediening Automatisch koken Draai aan de instelknop om een automatisch programma te kiezen (A - 1 tot en met A - 8, zie de tabel hieronder). Druk op de starttoets ‘START’ om de instelling te bevestigen. Draai aan de instelknop om het gewicht in te stellen. In het display verschijnt het gewicht in gram en een ‘g’.
-
Page 16: Kinderslot
5 Bediening Programma Toepassingen Gewicht Display A - 7 Soep 200 ml 200 ml 400 ml 400 ml A - 8 550 g 550 g 1100 g 1100 g 5.2 Kinderslot U kunt uw magnetron ‘op slot’ zetten, waardoor het starten van de magnetron niet meer mogelijk is. - Page 17 5 Bediening • Voor een gelijkmatig resultaat kunt u het beste gerechten één- tot tweemaal roeren of keren. • Kies voor het opwarmen van reeds bereide gerechten altijd de hoogste magnetronstand. • Bij het koken hoeft u maar weinig water, zout en kruiden te gebruiken. Zout kunt u het beste na afloop toevoegen.
- Page 18 5 Bediening • Magnetrongolven dringen tot ongeveer 3 cm in het gerecht door. De kern van dikke gerechten wordt verhit doordat de warmte zich van het verwarmde deel (de buitenkant) naar binnen verspreidt. • Vlees en gevogelte dat langer dan een minuut of 15 in de magnetron gekookt wordt, bruint lichtjes.
- Page 19 5 Bediening 5.3.5 Koken van groente • Gebruik indien mogelijk verse groenten. Als groenten al wat slap zijn geworden doordat ze te lang gelegen hebben kunt u ze een tijdje in koud water leggen, zodat ze zich weer vol kunnen zuigen. •...
-
Page 20: Onderhoud
6 Onderhoud Houd uw toestel mooi • Reinig de binnen- en buitenzijde regelmatig; gebruik een sopje van afwasmiddel en maak de oven met een droge doek goed droog. Zorg dat de afdekking van de microgolfverdeler (rechterzijde van de ovenruimte) schoon is. Vervuiling van de afdekking kan leiden tot vonkvorming. -
Page 21: Storingen
7 Storingen Wat moet ik doen als... Als de kookresultaten niet naar wens zijn, er vonken overspringen in de magnetron, de magnetron niet start etc., probeer dan eerst zelf de oorzaak van de storing te vinden voordat u de servicedienst belt. Controleer: •... -
Page 22: Installatievoorschrift
8 Installatievoorschrift 8.1 Technische gegevens Op het gegevensplaatje aan de binnenzijde van het toestel worden de totale aansluit- waarde, de vereiste spanning en de frequentie aangegeven. 8.2 Productspecificaties Afmetingen toestel (bxdxh) 595 x 400 x 388 incl. frame Magnetron inhoud 25 liter Diameter draaiplateau 315 mm... -
Page 23: Inbouwmaten
8 Installatievoorschrift 8.5 Inbouwmaten 40-50 40-50 550-580 550-580 Opening Opening voor lucht- voor lucht- toevoer toevoer... -
Page 24: Inbouwen
8 Installatievoorschrift 8.6 Inbouwen Het apparaat wordt geleverd met gemonteerde korte stelvoetjes (lengte 15 mm). Om juist in de 380 mm hoge ruimte te passen, moeten deze vervangen worden door de vier bijgeleverde lange stelvoetjes. Haal de magnetron uit de verpakking, keer het om en vervang de korte stelvoetjes door de lange stelvoetjes in het bijgeleverde onderdelenzakje. -
Page 25: Bijlagen
9 Bijlagen Verpakking en toestel afvoeren Bij de vervaardiging van dit toestel is gebruik gemaakt van duurzame materialen. Dit toestel moet aan het eind van zijn levenscyclus op verantwoorde wijze worden afgevoerd. De overheid kan u hierover informatie verschaffen. De verpakking van het toestel is recyclebaar. Gebruikt kunnen zijn: •... - Page 27 Table of contents Your microwave oven 1.1 Appliance description 1.2 Introduction Safety instructions What you should pay attention to... 30 - 31 - 32 3.1 Before use 3.2 Setting the clock 3.3 Do’s and don’ts 33 - 34 Working How the microwave oven works Operation 5.1 Cooking 36 - 37 - 38 - 39 - 40...
-
Page 28: Your Microwave Oven
1 Your microwave oven 1.1 Appliance description Door lock Door Window Glass turntable Roller stay / Turntable support Turntable shaft Control panel Display Magnetron (Microwave) 10. Opwarmen (Reheat) 11. Ontdooien (Defrost) 12. Stop 13. Klok (Clock) 14. Start 15. Controlknop 16. -
Page 29: Introduction
1 Your microwave oven 1.2 Introduction Cooking with your new microwave oven is safe and relaxing. You can have the tastiest dishes on the table in no time at all. The appliance is extremely easy to use, partly thanks to the automatic cooking and defrosting programmes. You will find information about the installation, safety, operation and maintenance of your appliance in this instruction manual. -
Page 30: Safety Instructions
2 Safety instructions What you should pay attention to Be aware of the safety instructions listed below to reduce the risk of fire, electric shock, injury to persons and exposure to excessive microwave energy. Keep the appliance clean, this will extend the lifetime of your microwave oven and prevent hazardous situations. - Page 31 2 Safety instructions • Warning! Be sure to disconnect the microwave oven from the power supply before cleaning or repairing the appliance, preferably by removing the plug from the socket or turn the switch in the meter cupboard to zero. •...
- Page 32 2 Safety instructions • Caution! If smoke or fire is observed: º Switch off or unplug the appliance. º Keep the oven door closed in order to stifle any flames. º Remove the plug from the socket. • Caution! Do not use chemicals in this appliance. •...
-
Page 33: Before Use
3 Before use 3.1 Before you begin • Open the door and remove the packaging material. Do not install the microwave oven when it is damaged, but contact the manufacturer. • Remove the protection foil from the outside of the microwave oven. •... - Page 34 3 Before use The microwave oven is not suitable for: • preserving food; • heating oil for deep-fat frying; • boiling eggs in their shells, these are liable to explode (even after the microwave oven is switched off). Not all materials are suitable for use in the microwave oven. The table below shows which materials you can use and which you cannot.
-
Page 35: Working
4 Working How the microwave oven works A microwave oven is a cooking appliance that uses microwaves to heat food. Microwaves are electromagnetic waves, just like radio and television waves. A radio converts these waves into sound, whereas a microwave oven converts them into heat. The heat arises because the microwaves cause water and fat molecules, that are always present in food, to move quickly. -
Page 36: Operation
5 Operation 5.1 Cooking • Warning! Microwave heating of liquids (such as water) can result in delayed eruptive boiling. This means that liquid starts boiling without you seeing any movement. Once removed from the oven, the liquid can start to boil rapidly and spatter out of the cup with the risk of injury. - Page 37 5 Operation Quick start With just one press on the start button ‘START’ you can cook for 30 seconds on maximum power. By pressing the start button repeatedly you can increase the cooking time in steps of 30 seconds. Defrosting by weight Press button ‘ONTDOOIEN’.
- Page 38 5 Operation Multi-section cooking At most 2 sections can be set for cooking. In multi-section cooking, if one section is defrosting, the item that needs to be defrosted must be placed in the first section. Example You want to defrost food for 5 minutes, and after that 7 minutes of 80% microwave power to cook.
- Page 39 5 Operation Auto menu Turn the control knob to choose an automatic programme (A - 1 until A - 8, see table below). Press start button ‘START’ to confirm the setting. Turn the control knob to set the weight. The display shows the weight in grammes and a ‘g’. Press the start button ‘START’...
-
Page 40: Childproof Lock
5 Operation Programmes Function Weight Display A - 7 Soup 200ml 200ml 400ml 400ml A - 8 Porridge 550g 550g 1100g 1100g 5.2 Childproof lock You can ‘lock’ your microwave oven, so it is no longer possible to start it. Lock: Press button ‘STOP’... - Page 41 5 Operation • When reheating foods that have already been cooked before, always select the highest microwave power level. • When cooking in a microwave oven, only small quantities of water, salt and seasoning are necessary. Best add salt after cooking. This prevents moisture being drawn out of the food.
- Page 42 5 Operation • Meat and poultry that is cooked in the microwave for more than about 15 minutes becomes lightly browned. Any food cooked for a shorter time can be rubbed beforehand with a ‘browning’ sauce, such as Worcestershire sauce, soya bean oil or barbecue sauce.
- Page 43 5 Operation 5.3.5 Cooking vegetables • Use fresh vegetables if possible. If the vegetables have become limp because they have been kept for too long, you can refresh them by soaking them in cold water for a little while. • Use a large dish to cook vegetables, so the bottom of the dish is not covered by too thick a layer.
-
Page 44: Maintenance
6 Maintenance Keeping your appliance neat • Clean the inside and outside of the oven regularly using soapy water and dry it thoroughly with a dry cloth. Make sure that the microwave distributer cover (inside the oven on the right) is clean. A cover which is not clean may cause sparking. •... -
Page 45: Faults
7 Faults What to do if... If the microwave oven does not cook as well as it should do, if there is sparking inside it, or if it does not start, etc., first try to find the reason for the problem yourself before calling the service department. -
Page 46: Installation
8 Installation 8.1 Technical information On the label on the inside of this equipment, you will find the total wattage, the required voltage and the frequency. 8.2 Technical specifications External dimensions (wxdxh) 595 x 400 x 388 incl. frame Oven capacity 25 liter Turntable diameter 315 mm... -
Page 47: Installation Dimensions
8 Installation 8.5 Installation dimensions 40-50 40-50 550-580 550-580 Opening Opening for air voor lucht- supply toevoer... -
Page 48: Building In
8 Installation 8.6 Building in The appliance is assembled with short feet (hight 15 mm). To fit the 380 mm high cabinet, the short feet must be replaced by the 4 longer feet, which can be found inside the package. Unpack the appliance. -
Page 49: Appendix
9 Appendix Disposal of packaging and appliance In the manufacturing of this appliance durable materials were used. Make sure to dispose of this equipment responsibly at the end of its lifecycle. Ask the authorities for more information regarding this. The appliance packaging is recyclable. The following may have been used: •...
Need help?
Do you have a question about the MAG536 and is the answer not in the manual?
Questions and answers