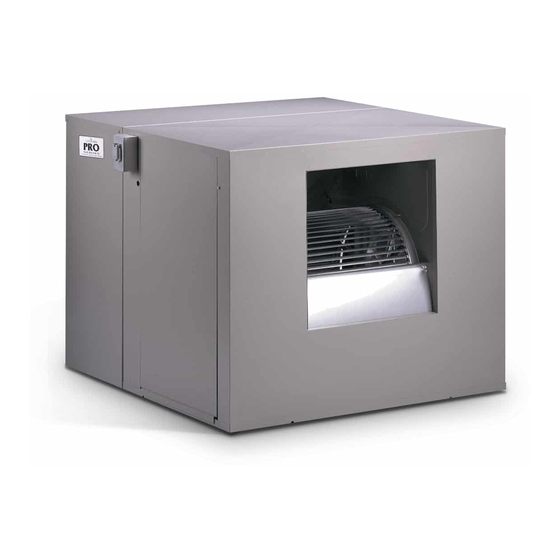
Table of Contents
Advertisement
Quick Links
OWNER'S GUIDE
USE AND CARE MANUAL
UL Classified Industrial /
Commercial Evaporative Air Cooler
INSTALLER: Please deliver this guide to owner.
Safety
Installation
Start-up
Congratulations: You have purchased a product of superior performance and design,
which will give the best service when properly installed, operated and maintained.
This guide was designed to provide you and your installer with information needed to mount,
operate, inspect, maintain, and troubleshoot your Industrial / Commercial evaporative air cooler.
The first section, Installation and Start-Up, is especially for the installer. The second section, Regular Maintenance, contains operational and maintenance
instructions for the owner and/or maintenance operations personnel, while Troubleshooting includes information on commonly encountered problems.
Read all instructions carefully before installation.
Use only the blower motor and circulating pump(s)
combinations marked on the Model Nameplate indicating
suitability for use in this model. Any other motors or pumps
cannot be substituted.
Installation work and electrical wiring must be done by
qualified person(s) in accordance with all applicable
codes and standards, including fire rated construction.
When cutting or drilling into a wall or ceiling, do not
damage electrical wiring or other concealed utilities (water
or gas lines, sewer lines, etc.).
Cooler motor, pump, cabinet and junction box must be
grounded in accordance with all local and national codes.
A ground wire must be used between the power supply
and the cooler.
Be sure that the cooler is connected to proper line voltage
stamped on the pump and blower (fan) motor specification
plate. NOTE: Improper voltage will void the pump and/or
motor warranties and may cause serious personal injury
or property damage.
Do not operate this blower (fan) motor with any solid-state
speed control device.
CONTENTS
Installation and Start-up
Introduction
Mounting requirements
Location and placement
Duct systems
Exhaust openings
Assemble unit & lift in place
Operation
Maintenance
Trouble Shooting
WARNING -
SHOCK, OR INJURY TO PERSONS, OBSERVE THE FOLLOWING.
Electrical requirements
2
Motor installation
2
Pump junction box location
2
Motor pulley adjustment
2
Belt adjustment
2
Overflow standpipe installation
2
Water line connections
TO REDUCE THE RISK OF FIRE, ELECTRIC
Always disconnect electrical power to unit before
working on or servicing cooler. More than one
disconnect switch will be required to de-energize the
equipment for servicing.
Do not remove any access panels while cooler is
running, this may cause the blower (fan) motor to
overload and damage the motor windings.
NOTE:
Do not locate unit near exhaust or vent pipes as odors or
fumes may be drawn into cooler.
Use of anode devices, chemical additives or treatments in
this cooler will void the warranty.
Your warranty does not cover shipping damage. Report all
shipping damage at once to dealer or carrier making the
delivery.
For future reference, record the model, serial numbers and
installation date of your evaporative cooler here:
Model #
Serial #
Install Date:
3
Pump installation
3
Bleed off installation
4
General inspections
4
Pre - start - up
4
Start-up Checklist
4
Cabinet Inspection
4
4
Maintenance
4
Cleaning
5
Draining and touch-up
5
Lubrication
5
Changing pad
5
Pump mounting diagrams
Troubleshooting
1-999-2469 REV A
5-6
6
6
6
7
8
Advertisement
Table of Contents

Summary of Contents for PHOENIX MANUFACTURING AEROCOOL ID500
- Page 1 OWNER’S GUIDE USE AND CARE MANUAL UL Classified Industrial / Commercial Evaporative Air Cooler INSTALLER: Please deliver this guide to owner. Safety Operation Installation Maintenance Start-up Trouble Shooting Congratulations: You have purchased a product of superior performance and design, which will give the best service when properly installed, operated and maintained. This guide was designed to provide you and your installer with information needed to mount, operate, inspect, maintain, and troubleshoot your Industrial / Commercial evaporative air cooler.
- Page 2 INTRODUCTION Duct System Read This Manual Completely Before Installing Your Industrial / Commercial Evaporative Cooler. Air can be delivered over a distance to individual rooms or areas by Your evaporative cooler is a well crafted unit built using decades of means of a duct system.
-
Page 3: Installation
INSTALLATION CAUTION: Overload Protection Disconnect all electrical power to the cooler before attempting to install, open, or service your cooler. All pumps and single-phase motors available from Phoenix More than one disconnect will be required to de-energize Manufacturing, Inc. for use in Industrial/Commercial coolers have the equipment for servicing. - Page 4 Belt Adjustment CAUTION : Disconnect all electrical power to the cooler Install Overflow Standpipe / Drain Line and insure that belt is not rotating before adjusting belt Install overflow drain bushing in bottom of cooler as follows: tension. Do not adjust belt tension by changing diameter of adjustable sheave.
-
Page 5: General Inspection
GENERAL INSPECTION Initial Start-up or Annual Inspection Maintenance Schedule Regular maintenance and periodic inspection is the key to long and CAUTION: Disconnect all electrical power to the cooler successful service from your Industrial / Commercial Cooler. The before attempting to install, open, or service your cooler. cooler should receive major servicing at least once a year, more often More than one disconnect will be required to de-energize if conditions require (dusty environment, constant use, poor water... -
Page 6: Replacement Parts
Adjust Belt Tension Each time you inspect your cooler, be sure to check belt tension on Blower Shaft Bearings motor/blower assembly. Check belt condition and replace it if frays or Blower shaft bearings are sealed and do not require oiling. cracks appear. - Page 7 Legend 1. Pump Cord Clips (approximate locations). 2. Pump junction box assembly (JBK115 or JBK230). Using “Locate J-box here” label as a guide, position and install in indicated location using holes in junction box flanges as guides to locate self-drilling screws. 3.
-
Page 8: Troubleshooting
Troubleshooting: The following guide is intended to help you diagnose and fix some of the most commonly encountered problems; by no means does this guide cover all of the possible problems you may encounter. If you cannot diagnose and correct the problem, or if it persists, contact qualified service personnel.


