Advertisement
Available languages
Available languages
Quick Links
CONTACT US FIRST
CONTACT US FIRST
sauder.com
sauder.com
sauder.com
BEFORE MAKING ANY RETURNS TO THE STORE.
BEFORE MAKING ANY RETURNS TO THE RETAILER.
sauder.com/service
Visit
Prefer the phone? Give us a ring at
Customer Service is available Monday-Friday - 9 a.m. to 5:30 p.m. EST (except holidays)
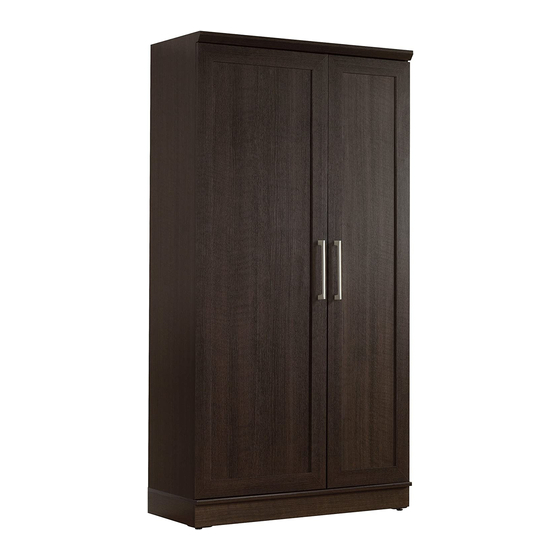
Storage Cabinet
Model 426932
Sauder.com
Share your journey!
to order replacement parts, view video assembly tips, or chat with a live rep.
1-800-445-1527
.
Treat yourshelf.
NOTE: THIS INSTRUCTION
BOOKLET CONTAINS IMPORTANT
SAFETY INFORMATION.
PLEASE READ AND KEEP FOR
FUTURE REFERENCE.
English pg 1-17
Français pg 18-20
Español pg 21-23
Lot # 542612
Purchased: __________________
03/17/20
Advertisement

Related Manuals for Sauder 426932


Summary of Contents for Sauder 426932
- Page 1 Customer Service is available Monday-Friday - 9 a.m. to 5:30 p.m. EST (except holidays) Treat yourshelf. Storage Cabinet NOTE: THIS INSTRUCTION BOOKLET CONTAINS IMPORTANT SAFETY INFORMATION. Model 426932 PLEASE READ AND KEEP FOR FUTURE REFERENCE. Sauder.com English pg 1-17 Français pg 18-20 Español pg 21-23...
- Page 2 Assembly Tools Required Part Identification No. 2 Phillips Screwdriver Tip Shown Actual Size Hardware Identification Assembly Steps 5-17 Hammer Not actual size Français 18-20 Español 21-23 Electric drill with 1/8" bit (ONLY in indicated step) Safety 24-26 Warranty Page 2 www.sauder.com/service 426932...
-
Page 3: Part Identification
While not all parts are labeled, some of the parts will have a label or an inked letter on the edge to help distinguish similar parts from each other. Use this part identification to help identify similar parts. LEFT END (1) RIGHT END (1) DOOR (2) BACK (1) FIXED SHELF (3) ADJUSTABLE SHELF (2) SKIRT (1) 426932 www.sauder.com/service Page 3... -
Page 4: Hardware Identification
NAIL - 40 PULL - 2 APPLIQUE CARD - 1 BUMPER CARD - 1 FURNITURE TIPPING RESTRAINT KIT - 1 1/2" FLAT HEAD SCREW - 32 1-9/16" FLAT HEAD SCREW - 12 15/16" PAN HEAD SCREW - 4 Page 4 www.sauder.com/service 426932... - Page 5 Step 1 Look for this icon. It means a video assembly tip is available at www.sauder.com/service/tips Find the numbered video or scan the QR code. å Assemble your unit on a carpeted floor or on the empty Caution carton to avoid scratching your unit or the floor.
- Page 6 BACK fastened. The unit may collapse. å Fasten the BACK (D) to your unit using the NAILS (5). The NAILS should be 4" apart and 1/4" in from the edges. NAIL (40 used in this step) 4" 1/4" Page 6 www.sauder.com/service 426932...
- Page 7 Step 3 å Carefully turn your unit onto its back edges. å Insert two WOOD DOWELS (1) into the ENDS (A and B). Some assembly (and snacks) required. 426932 www.sauder.com/service Page 7...
- Page 8 Step 4 å Fasten four METAL BRACKETS (2) to the SKIRT (G). Use eight 1/2" FLAT HEAD SCREWS (9) 1/2" FLAT HEAD SCREW (8 used in this step) Page 8 www.sauder.com/service 426932...
- Page 9 Step 5 å Fasten the SKIRT (G) to the ENDS (A and B). å NOTE: Be sure the WOOD DOWELS in the ENDS insert into the SKIRT. 426932 www.sauder.com/service Page 9...
- Page 10 Fasten the SKIRT (G) to the ENDS (A and B) and FIXED SHELF (E). Use eight 1/2" FLAT Now might be a HEAD SCREWS (9). good time to refresh your drink. 1/2" FLAT HEAD SCREW (8 used in this step) Page 10 www.sauder.com/service 426932...
- Page 11 Step 7 å Fasten the HINGES (3) to the DOORS (C). Use eight 1/2" FLAT HEAD SCREWS (9). 1/2" FLAT HEAD SCREW (8 used in this step) 426932 www.sauder.com/service Page 11...
- Page 12 NOTE:It is recommended you have someone help you with this step. å Fasten the DOORS (C) to the ENDS (A and B). Use eight 1/2" FLAT HEAD SCREWS (9). 1/2" FLAT HEAD SCREW (8 used in this step) Page 12 www.sauder.com/service 426932...
- Page 13 Step 9 å Fasten the PULLS (6) to the DOORS (C). Use four 15/16" PAN HEAD SCREWS (11). 15/16" PAN HEAD SCREW (4 used in this step) 426932 www.sauder.com/service Page 13...
- Page 14 Drill 1/8" hole into Use the short screw through a stud in your wall. the hole in the strap and into the top surface of the FIXED SHELF (E). Electric drill with 1/8" bit (ONLY in indicated step) Page 14 www.sauder.com/service 426932...
- Page 15 å To adjust the DOORS in or out (depth), loosen the mounting screw one turn and move the DOORS in or out, as needed. Tighten the mounting screw after making adjustments. 426932 www.sauder.com/service Page 15...
- Page 16 SCREW head. å Peel the BUMPERS from the BUMPER CARD (7) and stick them onto the FIXED SHELVES (E) shown where they come in contact with the DOORS (C). (12 used) (8 used) To cover SCREWS Page 16 www.sauder.com/service 426932...
- Page 17 NOTE: Please read the back pages of the instruction booklet for important safety information. å This completes assembly. Clean with a damp cloth. Wipe dry. And to celebrate, why not share your success story at sauder.com or 426932 www.sauder.com/service Page 17...
-
Page 18: Liste De Pièces
Modèle 426932 Meuble de rangement Utilisez les instructions d’ a ssemblage en français avec les NOUS CONTACTER EN PREMIER schémas étape par étape du manuel d’instruction en anglais. AVANT D'EFFECTUER TOUT RETOUR AU MAGASIN. Chaque étape en français correspond à la même étape en Nous faisons de notre mieux pour nous assurer que votre meuble anglais. - Page 19 (D). Si besoin est, enfoncer sur les coins opposés de l'unité pour s'assurer d'être « d'équerre ». Fixer l'ARRIÈRE (D) à l'élément à l'aide des CLOUS (5). Les CLOUS devraient être placés avec une séparation de 10 cm et 6 mm en retrait des chants. 426932 www.sauder.com/service Page 19...
- Page 20 PORTES (C). ÉTAPE 13 REMARQUE : Prière de lire les informations importantes sur la sécurité figurant sur les pages arrière du manuel d’instructions. Ceci complète l'assemblage. Nettoyer avec un tissu humide. Essuyer. Page 20 www.sauder.com/service 426932...
-
Page 21: Lista De Partes
EXTREMO IZQUIERDO ..........1 PASADOR DE MADERA .........2 su referencia futura. Si necesita ponerse en EXTREMO DERECHO ..........1 SOPORTE DE METAL ..........4 contacto con Sauder en PUERTA ................2 BISAGRA ................4 cuanto a esta unidad, DORSO .................1 ESPIGA DEL ESTANTE ...........8 refiérase al número de lote y al número de... - Page 22 "cuadrada." Fije el DORSO (D) a la unidad utilizando los CLAVOS (5). Debe colocar los CLAVOS a una distancia de 10 cm el uno del otro y a 6 mm dentro de los bordes. Page 22 www.sauder.com/service 426932...
- Page 23 PUERTAS (C). PASO 13 NOTA: Por favor, lea las páginas de atrás del folleto de instrucciones en cuanto a importante información de seguridad. Esto completa el ensamblaje. Limpiar con un trapo húmedo. Seque con un paño. 426932 www.sauder.com/service Page 23...
- Page 24 Moving furniture that is not designed to be moved or equipped with casters may result in injury or damage to furnishings or personal property. ALWAYS unload shelves and drawers, starting with the top surfaces, before moving. NEVER push or pull furniture on carpet. Have a friend help lift properly to move and/or reposition it. Page 24 www.sauder.com/service 426932...
- Page 25 TOUJOURS décharger les tablettes et les tiroirs, en commençant par les surface supérieures, avant de déplacer le meuble. NE JAMAIS pousser ou tirer un meuble sur de la moquette. Demander à une autre personne de le soulever correctement pour le déplacer et/ou le repositionner. 426932 www.sauder.com/service Page 25...
- Page 26 SIEMPRE descargue los estantes y cajones, empezando con las superficies superiores, antes de moverlo. NUNCA empuje ni tire de los muebles sobre una alfombra. Obtenga que un amigo le ayude a levantarlo correctamente para moverlo y/o reposicionarlo. Page 26 www.sauder.com/service 426932...
-
Page 27: Year Limited Warranty
à compter de la date d'achat la première fois et qui sont signalés à Sauder dans les limites de couverture de la contre tout défaut de matériaux ou de fabrication des composantes de mobilier Sauder. - Page 28 BEFORE MAKING ANY RETURNS TO THE RETAILER. So, how did it go? Dear Valued Customer: Thanks so much for choosing Sauder® furniture. I hope the Set a world record for speed? purchase and assembly process was a positive experience Feeling good about yourself? and you feel good about the furniture you just built.
Need help?
Do you have a question about the 426932 and is the answer not in the manual?
Questions and answers