
Related Manuals for Godrej EON VESTA DWF EON VES 13Z SI STSL


Summary of Contents for Godrej EON VESTA DWF EON VES 13Z SI STSL
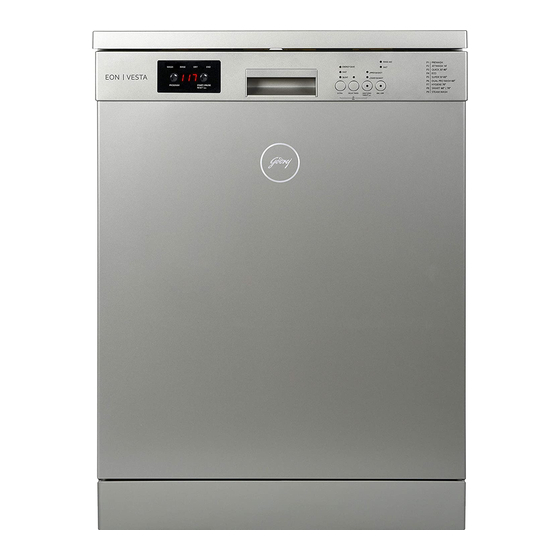
- Page 1 HOW TO GET THE BEST OUT OF YOUR GODREJ EON VESTA DISHWASHER Dishwasher USER MANUAL DWF EON VES 13Z SI STSL This image is for representation purpose only.
- Page 2 Congratulations! You are now the proud owner of a new Godrej Eon Vesta Dishwasher Machine. You can look forward to years of smooth, trouble-free usage from your dishwasher, as well as considerable savings in time, money and effort. Please read this manual carefully as it will tell you how to operate your machine optimally in order to get the best results.
-
Page 3: Table Of Contents
CONTENTS SAFETY INSTRUCTIONS 1.1 General Safety Warnings 1.2 Installation Warnings 1.3 During Use INSTALLATION 2.1 Machine Positioning 2.2 Water Connection 2.3 Water Inlet Hose 2.4 Drain Hose 2.5 Electrical Connection 2.6 Fitting the Machine Undercounter TECHNICAL SPECIFICATIONS 3.1 General Appearance 3.2 Technical Specifications BEFORE USING THE APPLIANCE 4.1 Preparing your Dishwasher for first use... -
Page 4: Safety Instructions
1. SAFETY INSTRUCTIONS 1.1 General Safety Warning • Read these instructions carefully before • This appliance can be used by children using your appliance and keep this aged from 8 years and above, and by manual for future reference. persons with reduced physical, sensory or mental capabilities or lack of experience Please check the packaging of your and knowledge if they have been given... - Page 5 Only put items in the machine which In the case of a malfunction, repair should are suitable for dishwashing, and take only be performed by Godrej authorised care not to overfill the baskets. service provider, otherwise the warranty Do not open the door while the will be void.
-
Page 6: Installation
2. INSTALLATION 2.1 Machine positioning WARNING: Connect the hose directly to When positioning the machine, place it in an the water inlet tap. The pressure supplied by the tap should be a minimum of 0.03 MPa area where dishes can be easily loaded and and a maximum of 1 MPa. -
Page 7: Drain Hose
Connecting the Water Supply Hose to the Connect water drain hose directly to water “Magic” Hose Joint drain hole or to the sink outlet spigot. This connection should be minimum 50 cm and 1. While pushing the sleeve on the female maximum 110 cm from floor plane. -
Page 8: Electrical Connection
2.5. Electrical connection WARNING: Your machine is set to operate at 220-240 V. The earthed plug of the machine must be connected to an earthed outlet supplied by suitable voltage and current. In the absence of earthing installation, an authorised electrician H1: min A H2: min B1 H3: min B2... -
Page 9: Technical Specifications
3. TECHNICAL SPECIFICATIONS 3.1 General appearance Detergent and rinse-aid dispenser Worktop 10. Cutlery basket Upper basket with racks 11. Salt dispenser Upper spray arm 12. Upper basket track latch Lower basket 13. Turbo Drying Unit: This system provides better drying performance for Lower spray arm your dishes. -
Page 10: Before Using The Appliance
4. BEFORE USING THE APPLIANCE 4.1 Preparing your Dishwasher for first • Check whether the electricity and supply water specifications match the values indicated in the installation instructions for the machine. • Remove all packaging materials inside the machine. • Set the water softener level. -
Page 11: Water Hardness Table
4.4 Water Hardness Table French British Level German dH Indicator L1 is seen on the display. 6-11 10-20 7-14 L1 is seen on the display. 12-17 21-30 15-21 L3 is seen on the display. 18-22 31-40 22-28 L4 is seen on the display. 23-31 41-55 29-39... -
Page 12: Rinse-Aid Usage
• Please use powder detergents in such programmes. • If you encounter problems when using combined detergents, please contact the detergent manufacturer. • When you stop using combined detergents, make sure that water hardness and rinse aid settings are set to correct level. -
Page 13: Loading Your Dishwasher
5. LOADING YOUR DISHWASHER • For best results, follow these loading guidelines. • We recommend that you place large items (pots, pans, lids, plates and bowls) which are heavily soiled in the lower basket. • The upper basket is designed for delicate and lighter dishware such as glasses, coffee and tea cups and saucers. -
Page 14: Alternative Basket Loads
5.2 Alternative basket loads Lower basket Unsuitable items for dishwashing • Cutlery and utensils made of wood. • Delicate decorative glasses, craft and antique utensils. These utensils are not dishwasher-proof. • Plastic parts not resistant to heat. • Copper and tin utensils. •... -
Page 15: Programme Table
6. PROGRAMME TABLE Dual Steam Hygiene Smart Jetwash Quick Super Programme Prewash ProWash (Reference) 60°C-70°C 30' 40°C 50' 65°C Wash 70°C 60°C Duration 109-179 (min) To rinse Fastest Standard For both High- Auto For heavily Description dishes programme lightly programme normally lightly temperature,... -
Page 16: The Control Panel
7. THE CONTROL PANEL turns on. This function increases drying efficiency and saves energy by operating at a lower temperature. NOTE: To reduce the duration of the washing, select Extra Fast option (8) by pressing Extra button (1) until its led turns on. -
Page 17: Changing A Programme
7.2. Cancelling a programme NOTE: When the rinse aid needs to be When you want to cancel and stop a wash refilled, the ‘Rinse Aid Indicator’ (9) will turn programme after another programme has on. This indicator will remain active until the already started: rinse aid has been refilled. - Page 18 NOTE: Do not open the door before the programme ends. NOTE: At the end of the washing programme, you can leave the door of your machine ajar to hasten the drying. NOTE: If the door of machine is opened or power is cut off during washing, the programme will continue when the door is closed or the power is restored.
-
Page 19: Cleaning And Maintenance
8. CLEANING AND MAINTENANCE Cleaning your Dishwasher is important to the metal filter (3).Rinse the filter with water until it is free of residue. Reassemble the maintain the machine's service life. filters. Replace the filter insert, and rotate it Oil and lime may build up in your clockwise (4). - Page 20 • Leave the door open slightly if the appliance will not be used for a while. This will prevent an unpleasant odour from developing. • Never clean the dishwasher using a steam cleaner. The manufacturer is not liable for any consequential damage. •...
-
Page 21: Troubleshooting
9. TROUBLESHOOTING FAULT POSSIBLE CAUSE TROUBLESHOOTING Your Dishwasher is not plugged in. Plug your Dishwasher in. Switch your Dishwasher on by pressing the Your Dishwasher is not switched on. On/Off button. Fuse blown. Check your indoor fuses. The programme does not start. - Page 22 FAULT POSSIBLE CAUSE TROUBLESHOOTING Use the correct amount of detergent, as Not enough detergent used. instructed in the programme table. Rinse aid dosage and/or water Increase rinse aid and/or water softener softener setting set too low. level. Whitish stains remain on dishes.
- Page 23 AUTOMATIC FAULT WARNINGS AND WHAT TO DO TROUBLE POSSIBLE FAULT WHAT TO DO CODE Make sure the water inlet tap is open and water is flowing Separate the inlet hose from the tap and clean the filter of Insufficient water the hose.
-
Page 24: Practical Information
10. PRACTICAL INFORMATION 1. When the machine isn’t in operation: • Disconnect the plug and close the tap. • Leave the door slightly open to prevent odour formation. 2. Select the dry option to remove water droplets. 3. Place dishes in the machine properly to achieve the best energy consumption, washing and drying performance. -
Page 25: Product Specifications
11. PRODUCT SPECIFICATIONS Brand GODREJ DWF EON VES 13Z SI STSL Model Capacity of dishwasher The energy efficiency class Annual energy consumption in kWh per year (AEc) ( 280 Cycle )* Energy consumption (Et) (kWh per cycle) 0.815 Off-mode power consumption (W) (Po) 0.50... -
Page 26: Branch Address/Service Connect
12. BRANCH ADDRESSES / SERVICE CONNECT Service Connect Branch Branch Addresses... - Page 27 The Godrej Eon Vesta Dishwasher comes with 1 year comprehensive warranty from the date of purchase, against defective material or workmanship. In case of any such defect, Godrej & Boyce Mfg. Co. Ltd. - Appliance Division undertakes to get the appliance repaired free of charge during warranty period, subject to terms and conditions below.
- Page 29 Protection of Environment: Protection of environment” is one of the core values of Godrej and we seek your co-operation to make sure that the product, packaging and plastic material is not disposed as unsorted municipal waste. This symbol is known as the “Crossed-out Wheellie Bin Symbol”. It means that the product should not be disposed of with your general house-hold waste.
Need help?
Do you have a question about the EON VESTA DWF EON VES 13Z SI STSL and is the answer not in the manual?
Questions and answers