
Related Manuals for Hesai PandarXT-32

Summary of Contents for Hesai PandarXT-32
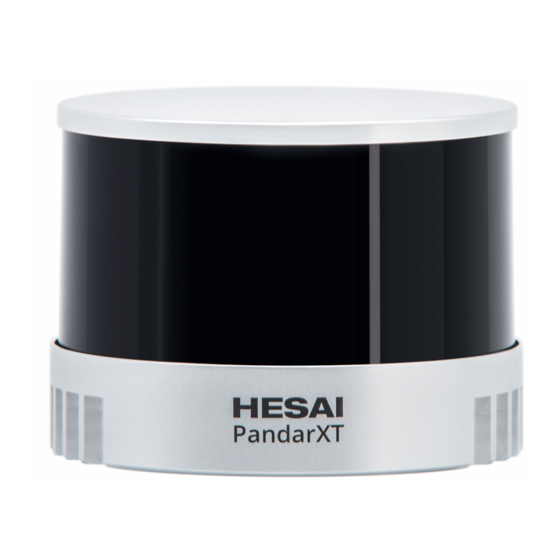
- Page 1 PandarXT-32 32-Channel Medium-Range Mechanical LiDAR User Manual HESAI Wechat...
-
Page 2: Table Of Contents
Contents Safety Notice ....................1 Operation Statistics ..............39 Upgrade ..................40 1 Introduction ................... 4 5 PandarView ..................41 Operating Principle ................ 4 LiDAR Structure ................5 Installation ..................41 Channel Distribution ..............6 Use ....................42 Specifications ................. 7 Features .................. -
Page 3: Safety Notice
There are no user-serviceable parts inside the product. For repairs and maintenance inquiries, please contact an authorized Hesai Technology service provider. ■ Laser Safety Notice - Laser Class 1 This device satisfies the requirements of ·... - Page 4 Power Supply Use only the cables and power adapters provided by Hesai Technology. Only the power adapters that meet the product's power requirements and applicable safety standards can be used. Using damaged cables, adapters or supplying power in a humid environment can result in fire,...
- Page 5 Vibration Strong vibration may cause damage to the product and should be avoided. If you need the mechanical vibration and shock limits of this product, please contact Hesai technical support. Radio Frequency Interference Please observe the signs and notices on the product that prohibit or restrict the use of electronic devices. Although the product is designed, tested, and manufactured to comply with the regulations on RF radiation, the radiation from the product may still influence other electronic devices.
-
Page 6: Introduction
1 Introduction This manual describes the specifications, installation, and data format of PandarXT-32. This manual is under constant revision. To obtain the latest version, please visit the Download page of Hesai's official website, or contact Hesai technical support. Operating Principle Distance Measurement: Time of Flight (ToF) 1) A laser diode emits a beam of ultrashort laser pulses onto the target object. -
Page 7: Lidar Structure
LiDAR Structure Laser emitters and receivers are attached to a motor that rotates horizontally. Figure 1.2 Partial Cross-Sectional Diagram Figure 1.3 Coordinate System (Isometric View) Figure 1.4 Rotation Direction (Top View) The LiDAR's coordinate system is illustrated in Figure 1.3. Z-axis is the axis of rotation. The origin is shown as a red dot in Figure 1.6 on the next page. -
Page 8: Channel Distribution
The offsets are recorded in this LiDAR unit's calibration file, which is provided when shipping the unit. In case you need to obtain the file again: · Send this TCP command PTC_COMMAND_GET_LIDAR_CALIBRATION , as described in Hesai TCP API Protocol (Chapter 6). · Or contact a sales representative or technical support engineer from Hesai. -
Page 9: Specifications
Specifications SENSOR MECHANICAL/ELECTRICAL/OPERATIONAL Mechanical Rotation 905 nm Scanning Method Wavelength Class 1 Eye Safe Channel Laser Class Instrument Range 0.05 to 120 m Ingress Protection IP6K7 80 m @10% reflectivity (Channels 9~24) Height: 76.0 mm Range Capability Dimensions 50 m @10% (Channels 1~8,25~32) Top/Bottom Diameter: 100.0 / 103.0 mm ±1 cm (typical) DC 9 to 36 V... - Page 10 ■ Range Accuracy Definition: the average of the differences between multiple measurements and the target's true distance, measured by a single channel Conditions: 30℃ ambient temperature, outdoors · Solid dot: average among channels · Error bar: best and worst channels Accuracy @50% Reflectivity ·...
- Page 11 ■ Range Precision Definition: the standard deviation among multiple measurements, measured by a single channel Conditions: 30℃ ambient temperature, outdoors Precision @50% Reflectivity Random Sample 1 Random Sample 2 Random Sample 3 0.05 Target Distance (m) Precision @10% Reflectivity Random Sample 1 Random Sample 2 Random Sample 3 0.05...
-
Page 12: Setup
2 Setup Mechanical Installation Figure 2.1 Front View (Unit: mm) -10-... - Page 13 Figure 2.2 Bottom View (Unit: mm) -11-...
- Page 14 ■ Recommended Installation Figure 2.3 Recommended Installation -12-...
-
Page 15: Interfaces
Interfaces Lemo part number: EEG.0T.309.CLN (female socket, on the LiDAR) From the eye to the interface Figure 2.4 Lemo Connector (Female Socket) Pin # Signal Color Voltage Pin # Signal Color Voltage GPS PPS BLACK TTL 3.3V/5V Ethernet TX- GREEN -1 V to 1 V GPS DATA PURPLE... - Page 16 · In case a connector's shell is accidentally pulled off, stop using the connector and contact Hesai technical support. · DO NOT attempt to assemble the connector's shell and cable collet; DO NOT connect a connector without its shell. Doing so may damage the LiDAR's circuits.
-
Page 17: Connection Box (Optional)
Connection Box (Optional) Users may connect the LiDAR directly or using the connection box. The connection box has a power port, a GPS port, and a standard Ethernet port. Lemo part number: FGG.0T.309.CLAC50Z (male plug, on the connection box) Figure 2.6 Connection Box (Unit: mm) -15-... - Page 18 2.3.1 Connection Box Interfaces Figure 2.7 Connection Box (Front) Figure 2.8 Connection Box (Back) Port # Port Name Description Standard Ethernet Port RJ45, 100 Mbps Ethernet Connects to a DC power adapter Power Port External power supply: 9 V to 36 V, at least 30 W Connector part number: JST SM06B-SRSS-TB GPS Port Recommended connector for the external GPS module: JST SHR-06V-S-B...
- Page 19 2.3.2 Connection Figure 2.9 Connection Box - Connection NOTE Refer to Appendix III when PTP protocol is used. -17-...
-
Page 20: Get Ready To Use
To record and display point cloud data, see Chapter 5 (PandarView) To set parameters, check device info, or upgrade firmware/software, see Chapter 4 (Web Control) The SDKs (Software Development Kits) are published on Hesai's official GitHub page. Please find the download links at: www.hesaitech.com/en/download (Product Documentation →... -
Page 21: Data Structure
3 Data Structure The LiDAR outputs Point Cloud Data Packets and GPS Data Packets using 100 Mbps Ethernet UDP/IP. Each data packet consists of an Ethernet header and UDP data. Ethernet Header: 42 bytes Pre-Header: 6 bytes Point Cloud Data Packet: 1122 bytes Header: 6 bytes UDP Data: 1080 bytes Body: 1040 bytes... -
Page 22: Point Cloud Data Packet
Point Cloud Data Packet 3.1.1 Ethernet Header Each LiDAR has a unique MAC address. The source IP is 192.168.1.201 by default, and the destination IP is 255.255.255.255 (broadcast). Point Cloud Ethernet Header: 42 bytes Field Bytes Description Ethernet II MAC 12 bytes Destination: broadcast (0xFF: 0xFF: 0xFF: 0xFF: 0xFF: 0xFF) Source: (xx:xx:xx:xx:xx:xx) - Page 23 3.1.2 UDP Data All the multi-byte values are unsigned and in little endian format. ■ Pre-Header Pre-Header: 6 bytes Field Bytes Description 0xEE SOP (start of packet) 0xFF SOP (start of packet) Protocol Version Major To distinguish between product models 0x06 for the PandarXT series Protocol Version Minor For each product model, to indicate the current protocol version...
- Page 24 ■ Header Header: 6 bytes Field Bytes Description Laser Num 0x20 (32 channels) Block Num 0x08 (8 blocks per packet) First Block Return The first block in this data packet 0x00 - Single Return 0x01 - Last Return in Dual Return mode Dis Unit 0x04 (4 mm) Return Number...
- Page 25 ■ Body Body: 1040 bytes (8 blocks) Block 1 Block 2 Block 3 Block 8 Azimuth 1 Azimuth 2 Azimuth 3 Azimuth 8 Channel 1 Channel 1 Channel 1 Channel 1 Channel 2 Channel 2 Channel 2 Channel 2 Channel 32 Channel 32 Channel 32 Channel 32...
- Page 26 ■ Tail Tail: 24 bytes Field Bytes Description Reserved 0x01 for high temperature; 0x00 for normal operation · When high temperature is detected, the shutdown flag will be set to 0x01, and the system will shut High Temperature down after 60 s. The flag remains 0x01 during the 60 s and the shutdown period Shutdown Flag ·...
- Page 27 The analysis of point cloud UDP data consists of three steps. ■ Analyze the vertical angle, horizontal angle, and distance of a data point Take PandarXT-32's Channel 5 in Block 2 as an example: 1) Vertical angle of Channel 5 is 11°, according to Appendix I (Channel Distribution) ·...
-
Page 28: Gps Data Packet
GPS Data Packet GPS Data Packets are triggered every second. All the multi-byte values are unsigned and in little endian format. Before NMEA messages are available from the external GPS module Each rising edge of the LiDAR's internal 1 Hz signal triggers a GPS Data Packet. The time and date in the GPS Data Packets are unreal, starting from 00 01 01 00 00 00 (year, month, day, hour, minute, second) and increasing with the internal 1 Hz signal. - Page 29 3.2.1 Ethernet Header The source IP is 192.168.1.201 by default. The destination IP address is 255.255.255.255 and in broadcast form. GPS Ethernet Header: 42 bytes Field Bytes Description Ethernet II MAC Destination: broadcast (0xFF: 0xFF: 0xFF: 0xFF: 0xFF: 0xFF) Source: (xx:xx:xx:xx:xx:xx) Ethernet Data Packet Type 0x08, 0x00 Internet Protocol...
- Page 30 3.2.2 UDP Data GPS UDP data: 512 bytes Field Bytes Description GPS Time Data Header 2 bytes 0xFFEE, 0xFF first Date 6 bytes Year, month, and day (2 bytes each, lower byte first) in ASCII Time 6 bytes Second, minute, and hour (2 bytes each, lower byte first) in ASCII μs Time 4 bytes In units of μs (lower byte first)
- Page 31 ■ GPRMC Data Format $GPRMC, <01>, <02>, <03>, <04>, <05>, <06>, <07>, <08>, <09>, <10>, <11>, <12>*hh Field # Field Description <01> UTC Time Hour, minute, and second Typically in hhmmss (hour, minute, second) format <02> Location Status A (hex = 41) for Valid Position V (hex = 56) for Invalid Position NUL (hex = 0) for GPS being unlocked <09>...
- Page 32 ■ GPGGA Data Format $GPGGA, <01>, <02>, <03>, <04>, <05>, <06>, <07>, <08>, <09>, <10>, <11>, <12>*hh Field # Field Description <01> UTC Time Hour, minute, and second Typically in hhmmss (hour, minute, second) format <06> GPS Fix Quality 0 = invalid 1 = GPS fix (SPS) 2 = DGPS fix 3 = PPS fix...
- Page 33 3.2.3 GPS Data Analysis Figure 3.4 GPS Data Packet - UDP Data (Example) Date Field Data (ASCII Code) Characters Meaning Year 0x30 0x32 '0', '2' Month 0x34 0x30 '4', '0' 0x37 0x30 '7', '0' Time Field Data (ASCII Code) Characters Meaning Second 0x38 0x35...
-
Page 34: Web Control
4 Web Control Web control is used for setting parameters, checking device info, and upgrading. To access web control 1) Connect the LiDAR to your PC using an Ethernet cable 2) Set the IP address according to Section 2.4 (Get Ready to Use) 3) Enter this URL into your web browser: 192.168.1.201/index.html NOTE Google Chrome or Firefox is recommended. -
Page 35: Home
Home Spin Rate of the motor (revs per minute) = frame rate (Hz) * 60 GPS (PPS) Status Lock LiDAR's internal clock is in sync with GPS Unlock Not in sync NMEA (GPRMC/GPGGA) Status Lock After receiving a valid NMEA message Unlock No valid NMEA message for over 2 seconds PTP Status... -
Page 36: Settings
Settings 1. Reset All Settings By clicking the "Reset All Settings" button on the top-right corner, all configurable parameters in Settings and Azimuth FOV will be reset to factory defaults. The default values are shown in Section 4.2 and Section 4.3.1. 2. - Page 37 (continued) (continued) Sync Angle 0~360 degrees By default, the LiDAR's 0° position (see Section 1.2) is not in sync with GPS PPS or the whole second of the PTP clock. If syncing is needed, check the checkbox and input a sync angle. Trigger Method Angle-Based / Time-Based Angle-based: lasers fire every 0.09°...
- Page 38 5. Clock Source and PTP Parameters · When GPS is selected as the clock source: GPS Mode GPRMC / GPGGA Clock Source GPS / PTP Format of NMEA data received from the In PTP mode, LiDARs do not output GPS Data external GPS module, see Section 3.2.2 Packets (see Appendix III PTP Protocol) GPS Destination...
-
Page 39: Azimuth Fov
Azimuth FOV To set the Azimuth FOV, users can select one of the two modes: for all channels, or multi-section FOV. 4.3.1 For all channels A continuous angle range, specified by a Start Angle and an End Angle, will be applied to all channels. The LiDAR outputs valid data only within the specified range. - Page 40 4.3.2 Multi-section FOV Users can configure up to five continuous angle ranges for all channels. Each channel outputs valid data only within its specified range. 4.3.3 Note · Click "Save" to apply your settings. · The angles in degrees are accurate to the first decimal place. ·...
-
Page 41: Operation Statistics
Operation Statistics The LiDAR's operation time in aggregate and in different temperature ranges are listed. -39-... -
Page 42: Upgrade
Upgrade Click the "Upload" button, select an upgrade file (provided by Hesai), and confirm your choice in the pop-up window. When the upgrade is complete, the LiDAR will automatically reboot, and the past versions will be logged in the Upgrade Log. -
Page 43: Pandarview
5 PandarView PandarView is a software that records and displays point cloud data from Hesai LiDARs, available in 64-bit Windows 10 and Ubuntu-16.04/18.04. Installation Copy the installation files from the USB disk in the LiDAR's protective case, or download these files from Hesai's official website: www.hesaitech.com/en/download... -
Page 44: Use
Set the PC's IP address according to Section 2.4 (Get Ready to Use) ■ Check Live Data Click on and select your LiDAR model to begin receiving data over Ethernet. ■ Record Point Cloud Data Click on to pop up the "Choose Output File" window. Specify the file directory and click on "Save"... - Page 45 ■ Play Point Cloud Data 1) Open a .PCAP File Click on to pop up the "Choose Open File" window. Select a .PCAP file to open. 2) Import a Correction File Each LiDAR unit has a corresponding calibration file (.CSV), see Section 1.3 (Channel Distribution). We recommend importing the calibration file of this LiDAR unit If the calibration file of this LiDAR unit is temporarily not at hand, into PandarView (File -- Import Correction File), in order to...
- Page 46 3) Play the .PCAP File Button Description Jump to the beginning of the file While paused, jump to the previous frame While playing, rewind. May click again to adjust the rewind speed (2x, 3x, 1/2x, 1/4x, and 1x) After loading a point cloud file, click to play the file While playing, click to pause While paused, jump to the next frame.
-
Page 47: Features
Features ■ Standard Viewpoints ■ Mouse Shortcuts Scroll the mouse wheel up/down Press the mouse wheel and drag Hold the left button and drag The bottom-left coordinate axes to zoom in/out to pan the view to adjust the point of view show the current point of view ■... - Page 48 ■ Return Mode · Both blocks (default): to show the point cloud data from all blocks · Even/Odd Block: to show the point cloud data from even/odd-number blocks NOTE See the definition of blocks in Section 3.1.2 (Point Cloud UDP Data) ■...
- Page 49 ■ Fire Time Correction After opening a .PCAP file, import the fire time correction file of this LiDAR model into PandarView (File -- Import FireTime File). Afterwards, click on to finetune point cloud display using the fire time correction file. Click on again to cancel the finetuning effects.
- Page 50 ■ Point Selection and Data Table Click on and drag the mouse over the point cloud to highlight an area of points. Click on to view the data of the highlighted points, as shown below. Some of the data fields are defined below: Field Description points...
- Page 51 ■ Color Schemes Click on to show the color legend at the lower right corner. Click on to open or close the Color Editor. The default color scheme is intensity based. Users can choose from other colors schemes based on azimuth, azimuth_calib, distance, elevation, laser_id, or timestamp.
-
Page 52: Communication Protocol
6 Communication Protocol To receive Hesai LiDAR's TCP and HTTP API Protocols, please contact Hesai technical support. -50-... -
Page 53: Sensor Maintenance
7 Sensor Maintenance ■ Storage The product has passed the high- and low-temperature storage tests in ISO 16750, in which the test temperature range is -40℃ to 85℃. We recommend storing the product in a dry, well ventilated place, under room temperature (23±5°C) and a relative humidity of 30% to 70%. Please check Section 1.4 (Specifications) for product IP rating, and avoid any ingress beyond that rating. - Page 54 (Continued) 3) Spray the enclosure with warm, neutral solvent using a spray bottle Solvent type 99% isopropyl alcohol (IPA) or 99% ethanol (absolute alcohol) or distilled water Solvent temperature 40 to 60℃ 4) When the stains have loosened, dip a piece of lint-free wipe into the solvent made in Step 3, and gently wipe the enclosure back and forth along its curved surface 5) Should another cleaning agent be applied to remove certain stains, repeat Steps 3 and 4 6) Spray the enclosure with clean water, and gently wipe off the remaining liquid with another piece of lint-free wipe...
-
Page 55: Troubleshooting
8 Troubleshooting In case the following procedures cannot solve the problem, please contact Hesai technical support. Symptoms Points to Check Verify that · power adapter is properly connected and in good condition Indicator light is off on the · connection box is intact connection box ·... - Page 56 · PC's firewall is disabled, or that PandarView is added to the firewall exceptions PandarView · the latest PandarView version (see the Download page of Hesai's official website) is installed on the PC Power on again to check if the symptom persists.
- Page 57 FOV) · If no packet is missing while the point cloud flashes, please update PandarView to the latest version (see the Download page of Hesai's official website) and restart the PC If the point cloud is still abnormal · Try connecting the LiDAR to another PC ·...
-
Page 58: Appendix I Channel Distribution
The Vertical Angles (Elevation) in the table below are design values. The accurate values are in this LiDAR's unit's calibration file, see Section 1.3 (Channel Distribution) and Section 3.1.3 (Point Cloud Data Analysis). PandarXT-32 Channel Distribution (To Be Continued) Channel #... - Page 59 PandarXT-32 Channel Distribution (Continued) Channel # Horizontal Angle Offset Vertical Angle Instrument Range Range (in meters) in UDP Data (Azimuth) (Elevation) (in meters) with Reflectivity 0° -1° 80@10% 0° -2° 80@10% 0° -3° 80@10% 0° -4° 80@10% 0° -5° 80@10% 0°...
-
Page 60: Appendix Ii Absolute Time And Laser Firing Time
Appendix II Absolute Time and Laser Firing Time ■ Absolute Time of Point Cloud Data Packets For PandarXT-32, the Body of each Point Cloud Data Packet contains 8 data blocks, as shown below. Body: 1040 bytes (8 blocks) Block 1... - Page 61 Calculation The absolute time of a Point Cloud Data Packet is calculated as the sum of date, time (accurate to the second) and μs time. · Date and Time can be retrieved either from the current Point Cloud Data Packet (6 bytes, year, month, date, hour, minute, second), or from the previous GPS Data Packet (6 bytes of Date and 6 bytes of time).
- Page 62 ■ Laser Firing Time of Each Channel In each round of firing, the firing sequence is from Channel 1 to Channel 32. Assuming that the start time of Block 6 is t6, the laser firing time of Channel i is t6 + [1.512 * (i-1) + 0.28], i∈{1, 2, ..., 32}.
-
Page 63: Appendix Iii Ptp Protocol
Appendix III PTP Protocol The Precision Time Protocol (PTP) is used to synchronize clocks across a computer network. It can achieve sub-microsecond clock accuracy. ■ LiDAR Connection When Using PTP Figure III.1 Connection When Using PTP -61-... - Page 64 ■ Absolute Packing Time When Using PTP To use PTP as the clock source, connect a third-party PTP master device to get the absolute time. If a PTP clock source is selected, the LiDAR will not transmit GPS Data Packets, but only Point Cloud Data Packets with 4-byte μs timestamps and 6-byte Date &...
-
Page 65: Appendix Iv Power Supply Requirements
Appendix IV Power Supply Requirements ■ Input Voltage To ensure that the input voltage at the LiDAR's Lemo connector is 9~36 V DC, please check the specifications of the power source and the voltage drop over cables. We recommend using 26 AWG cables, which is the thickest wire gauge supported by the LiDAR ·... - Page 66 NOTE When the LiDAR's input voltage approaches 36 V, make sure there is no additional overshoot in the external power system. Even a short period of overvoltage can cause irreversible damage to the LiDAR. ■ Power Consumption The LiDAR's peak power consumption is below 30 W in all operating conditions. ·...
-
Page 67: Appendix V Certification Info
Appendix V Certification Info ■ FCC Declaration FCC ID: 2ASO2PANDARXT This device complies with Part 15 of the FCC Rules. Operation is subject to the following two conditions: (1) this device may not cause harmful interference, and (2) this device must accept any interference received, including interference that may cause undesired operation. Caution The user is cautioned that changes or modifications not expressly approved by the party responsible for compliance could void the user's authority to operate the equipment. - Page 68 ■ IC Statement This device complies with Industry Canada licence-exempt RSS standard(s). Operation is subject to the following two conditions: (1) this device may not cause interference, and (2) this device must accept any interference, including interference that may cause undesired operation of the device. Le présent appareil est conforme aux CNR d'Industrie Canada applicables aux appareils radio exempts de licence.
-
Page 69: Appendix Vi Support And Contact
NOTE Please leave your questions under the corresponding GitHub projects. ■ Legal Notice Copyright 2020 by Hesai Technology. All rights reserved. Use or reproduction of this manual in parts or its entirety without the authorization of Hesai is prohibited. Hesai Technology makes no representations or warranties, either expressed or implied, with respect to the contents hereof and specifically disclaims any warranties, merchantability, or fitness for any particular purpose. - Page 70 Hesai Technology Co., Ltd. Phone: +86 400 805 1233 Business Email: info@hesaitech.com Website: www.hesaitech.com Service Email: service@hesaitech.com Address: Building L2, Hongqiao World Centre, Shanghai, China HESAI Wechat...
Need help?
Do you have a question about the PandarXT-32 and is the answer not in the manual?
Questions and answers