Samsung Galaxy J3 Initial Setup Manual
Hide thumbs
Also See for Galaxy J3:
- User manual (225 pages) ,
- Manual (40 pages) ,
- Quick start manual (11 pages)
Table of Contents
Advertisement
Quick Links
Advertisement
Table of Contents

Related Manuals for Samsung Galaxy J3


Summary of Contents for Samsung Galaxy J3
- Page 1 Samsung Galaxy J3 INITIAL SETUP GUIDE...
-
Page 2: Table Of Contents
HOW-TO VIDEOS and ways to CONTACT US. We’re always happy to help you! We hope you enjoy your new Samsung Galaxy J3. Need More Information? Visit our website at ConsumerCellular.com/Help Call us at (800) 686-4460 TABLE OF CONTENTS Introduction 2–3... -
Page 3: Introduction
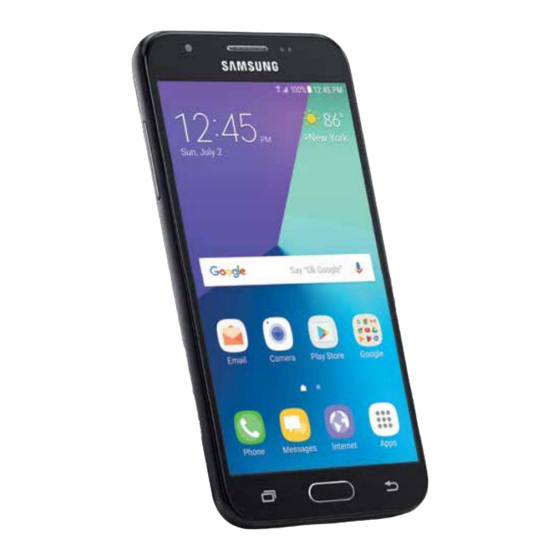
INTRODUCTION Front Wi-Fi Signal Camera Cellular Signal Clock Battery Level Volume Power Button: Up/Down • Press to turn display on/o • Press and hold to turn phone on/o Google Search Bar Play Store (App store) Photos Google Apps Camera Apps Messaging (Tap or swipe up) Phone... -
Page 4: Initial Setup
INITIAL SETUP INITIAL SETUP To begin, press the smartphone’s Power Button, located along the top, right outer edge of the phone. NOTE: This is also the button that you will use to turn your phone o . Press and hold the power button for several seconds until a menu appears, and select Power O . - Page 5 INITIAL SETUP Choose the language that you prefer. Then press Start. You will then be asked to select a Wi-Fi network. Select your Wi-Fi network, then enter your password. You can find more details about how to set up Wi-Fi on page 20. We strongly suggest connecting to Wi-Fi to avoid excess data usage from your Connect Plan.
- Page 6 Google account during the initial setup process. Next you will be asked to review Samsung's terms and conditions. To continue, press Next. GOOGLE ACCOUNT You will be asked to add your Google account if you have one.
-
Page 7: Google Account Setup
GOOGLE ACCOUNT SETUP CREATING A GOOGLE ACCOUNT Enter your first name by selecting the first line. A keyboard will appear. Type your first name, and then select the second line. Use the keyboard to enter your last name. Then press Next. - Page 8 GOOGLE ACCOUNT SETUP Google will now ask you to choose a user name. Select your username, then press Next. Next you will set a password. Select the password line. Type your password, then re-type the password on the second line. Then press Next.
- Page 9 GOOGLE ACCOUNT SETUP You can choose to enter your phone number to recover your account in case you forget your password. Press Next if you would like to add the number shown on the screen, or press Skip if you choose not to.
- Page 10 GOOGLE ACCOUNT SETUP Google will now save your account. This may take a moment. To finish the account setup, press Next. You will next see a list of additional Google services which are included on your phone. To disable any of them, slide the button to the left, then press Next.
-
Page 11: Screen Lock Security Setup
SCREEN LOCK SETUP SCREEN LOCK SECURITY Next you will be able to set up security to protect your phone from others using it without your permission. We recommend selecting a Pattern to secure your phone, but the choice of lock type is up to you. - Page 12 SCREEN LOCK SETUP To set the pattern lock type, use your finger to trace the pattern you wish to use to access your phone. Then, press Continue. You will be shown the pattern you entered for confirmation. You can either RETRY, if you wish to enter a di erent pattern, or press Continue.
- Page 13 Then, press Done. You will now be asked to create a Samsung account to access additional apps on your phone. We recommend skipping this step for now. You can create a Samsung account at any time after the initial setup process is complete.
-
Page 14: Easy Mode
EASY MODE Review additional setup options shown, then press Finish. EASY MODE SETUP The following pages will show the steps to set up Easy mode. Easy mode o ers a simplified home screen layout, providing quick and easy access to essential apps. - Page 15 EASY MODE Press Settings. If you are a first-time smartphone user or just want to simplify the operation of your phone, you can turn on Easy mode at any time. Next, press Advanced Features. Scroll down through the list shown until you reach Easy mode.
- Page 16 EASY MODE Press the Easy mode button to activate it. With Easy mode, all of your apps and features are organized in a customizable, easy to use format. WI FI & DATA SETUP Return to your Home Screen. Then, press Apps.
-
Page 17: Data Tips & Wi-Fi
DATA TIPS & WI FI NOTE BEFORE USING DATA: Your Samsung Galaxy J3 allows you to browse the Internet, access email and check social networking sites. It is important to remember, however, that these activities require data and impact your data usage for each billing cycle. It is recommended that you connect to a Wi-Fi network if you plan to stream video, audio or download large files. - Page 18 DATA TIPS & WI FI Next, press Connections. Press Data usage.
- Page 19 DATA TIPS & WI FI Press Mobile data. Select the check mark to turn o Mobile data. Then, click Data will now be disabled. To use data from your plan, turn data back on by pressing the icon next to Mobile data.
- Page 20 DATA TIPS & WI FI SETTING UP WI FI Return to the Settings menu, and press Connections. Then, press Wi-Fi.
- Page 21 DATA TIPS & WI FI To turn on Wi-Fi, slide the O button to the right. After a few moments you will see a list of available wireless networks. Secured networks will have a lock icon to the left of the network name.
- Page 22 DATA TIPS & WI FI You will need to type in a password if your Wi-Fi network is secured. Select the Password line and a keyboard will appear. Enter your password, then press Connect. Once you are connected, a Wi-Fi icon will appear in the notification bar at the top of your screen.
-
Page 23: Email Setup
EMAIL SETUP EMAIL SETUP GMAIL To access email from an existing Gmail account, you will need to set up the Gmail app. Press the Gmail folder icon on the home screen. To continue with the setup process, press SKIP. - Page 24 EMAIL SETUP If you signed in to or created a Google account at the beginning of this guide, your Gmail address will automatically appear within the Gmail app. Select the account you would like to access, and press Take Me to Gmail. You will then be taken to your email inbox.
- Page 25 EMAIL SETUP Scroll down to the bottom of the menu, and press Settings. Here you can change the settings on your account. You can choose how your inbox is sorted, how you would like to be notified, and more. Once you have chosen your settings, press the back arrow the top, left corner to return to the...
- Page 26 EMAIL SETUP EMAIL SETUP WITHOUT A GOOGLE ACCOUNT If you do not have a Gmail account, you can still access, send and receive emails from your smartphone. On the home screen, press Email. You will be taken to the Set up account screen.
- Page 27 EMAIL SETUP Enter the email address and password for the email account you would like to add, and press Sign In. You will now be taken to your email sign-in. Enter your account information and press Next.
- Page 28 EMAIL SETUP You will now be taken to your email inbox. If you need to adjust any email settings, select the upper left to go to the main email menu Press the “tool” icon shown to access your email settings.
-
Page 29: My Consumer Cellular App
MY CONSUMER CELLULAR APP You have the option to setup or change your Email Settings. You can choose how you want to receive notifications, manage spam, and more. Once you have chosen your settings, press the back arrow the top, left corner to return to the menu, or press the Home Button if you are ready to return to the... - Page 30 MY CONSUMER CELLULAR APP Press Get Started to continue. A keyboard will appear. Type in “My Consumer Cellular” and select My Consumer Cellular the dropdown list that appears.
- Page 31 MY CONSUMER CELLULAR APP You will then be taken to the My Consumer Cellular app page. To download the app, press Install. A menu will appear giving you the option of entering payment information for the future purchase of paid apps (not shown.) You may skip this step at this time, and enter the information later.
- Page 32 MY CONSUMER CELLULAR APP The first screen that appears is your Usage Summary screen. Here you can track your minutes, texts and data usage as well as pay your bill. It’s a good idea to check your usage throughout the month, especially if you plan to use data often.
-
Page 33: Facebook Setup
FACEBOOK SETUP FACEBOOK SETUP Facebook is pre-installed on your phone. To access it, press the Facebook icon on your Home screen. You will then be taken to the Facebook log in screen. To log in, you will need your Facebook credentials. -
Page 34: Quick Tips
QUICK TIPS QUICK TIPS Now that your smartphone is set up and ready to go, you can follow these quick tips for some commonly used features. MAKING A CALL With your smartphone, you always need to dial the area code along with the seven digit number you’re calling. -
Page 35: How-To Videos & Contact Us
HOW-TO VIDEOS & CONTACT US HOW-TO VIDEOS Get to know your Samsung Galaxy J3 with our How-To Videos, located on our website at: ConsumerCellular.com/SamsungGalaxyJ3 Here, you will find simple, easy-to-follow videos that cover topics such as adding to your smartphone's contact list, using Wi-Fi, turning data on or off, downloading apps from the Play Store and much more. - Page 36 ConsumerCellular.com © 2018 Consumer Cellular, Inc. Consumer Cellular and the Consumer Cellular logo are trademarks of Consumer Cellular, Inc. Other company names, product names, and marks mentioned herein are property of their respective owners and may be trademarks or registered trademarks.
Need help?
Do you have a question about the Galaxy J3 and is the answer not in the manual?
Questions and answers