Advertisement
Table of Contents
- 1 Table of Contents
- 2 Safety Precautions
- 3 Specifications and Product Overview
- 4 First Use Preparation and Set-Up
- 5 Spa Set-Up
- 6 Wired Controller Operation
- 7 Water Maintenance and Chemicals
- 8 Drainage, Cleaning and Storage
- 9 Disposal and Environmental Protection
- 10 Troubleshooting
- 11 Mspa Limited Warranty Policy
- Download this manual
www.the-mspa.com
MSpa
ELITE
®
Owner's Manual
EN
DO NOT RETURN MERCHANDISE TO YOUR DEALER STORE DIRECTLY.
CALL MSPA AFTER SALES SERVICE CENTER FOR ANY PRODUCT-RELATED
QUESTIONS OR CONTACT MSPA AT
Due to MSpa continuous product improvement, MSpa reserves the right to change the
product appearance and specifications, which may result in updates to the instruction
manual without notice.
Where Luxury Is Affordable
E-BA049
BAIKAL
E-RE049
RÊVE
info@the-mspa.com
CM
C
US
3127647
Advertisement
Table of Contents

Subscribe to Our Youtube Channel
Related Manuals for mspa ELITE BAIKAL


Summary of Contents for mspa ELITE BAIKAL
- Page 1 CALL MSPA AFTER SALES SERVICE CENTER FOR ANY PRODUCT-RELATED QUESTIONS OR CONTACT MSPA AT info@the-mspa.com Due to MSpa continuous product improvement, MSpa reserves the right to change the product appearance and specifications, which may result in updates to the instruction 3127647...
-
Page 2: Table Of Contents
To guide you in your initial MSpa experience, we are pleased to present you with this instruction manual. Please read this manual carefully before using the product for the first time. We are delighted to welcome you to the MSpa family, and we are looking forward to sharing with you the full spectrum of our expertise. -
Page 3: Safety Precautions
IMPORTANT SAFETY INSTRUCTIONS For your own safety and that of your product, make sure to follow the safety precautions below. Fail to follow the instruction may result in serious injury, property damage or death. Improper installation or operation will void the warranty. READ AND FOLLOW ALL INSTRUCTIONS DANGER DANGER:... - Page 4 WARNING The spa only for use in single-family dwellings. WARNING: WARNING: Risk of electric shock. Insert the plug only to a properly grounded socket. WARNING: The spa must be supplied by an isolating transformer or supplied through a ground-fault circuit interrupter (GFCI) having a rated residual operating current not exceeding 30mA.
- Page 5 WARNING: Do not overexert press down or uplift the control panel device. Do not put any heavy on control panel device after installation. WARNING: Pets should be kept away from spa to avoid damage. WARNING: When the bubble function is going to be in function, make sure the cover of Spa must be opened first.
- Page 6 considered safe for a healthy adult. Lower water temperature is recommended for young children and when spa use exceeds 10 minutes. B. Since excessive water temperatures have a high potential for causing fetal damage during the early months of pregnancy, pregnant or possibly pregnant women should limit spa water temperature to 100°F (38°C).
- Page 7 SAVE THIS INSTRUCTIONS WARNING: CHILDREN SHOULD NOT USE SPAS OR HOT TUBS WITHOUT ADULT SUPERVISION. WARNING: DO NOT USE SPAS OR HOT TUBS UNLESS ALL SUCTION GUARDS ARE INSTALLED TO PREVENT BODY AND HAIR ENTRAPMENT. WARNING: PEOPLE USING MEDICATIONS AND/OR HAVING AN ADVERSE MEDICAL HISTORY SHOULD CONSULT A PHYSICIAN BEFORE USING A SPA OR HOT TUB.
- Page 8 Please carefully read the warning label at the first time you are going to use MSpa. Please post this warning label on where is at a distance to MSpa within 1.5m/5’, people in spa can see it clearly. Please retain this information for future reference.
- Page 9 CAUTION CONSULT YOUR PHYSICIAN FOR RECOMMENDATIONS. CAUTION: The spa should not be setup or left out in temperature lower than 39°F (4°C). CAUTION: Do not use the spa alone. CAUTION: People with infectious diseases should not use a spa. CAUTION: Do not use the spa immediately following strenuous exercise.
-
Page 10: Specifications And Product Overview
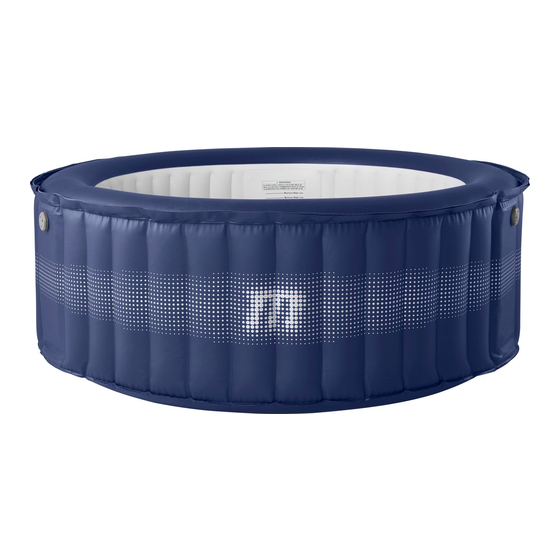
SPECIFICATIONS JET & BUBBLE SPA Model No. Seating Water Outside Inside Shape Height Weight / Code Capacity Capacity Dimensions Dimensions 700Ltr. φ1.80m 1.40m 0.70m 36.5Kg E-BA049 / Baikal Round (184Gal) (71”) (55”) (28”) (80.3lbs) 700Ltr. φ1.80m 1.40m 0.70m 36.5Kg E-RE049 / Rêve Round (184Gal) (71”) - Page 11 PRODUCT OVERVIEW Content of the package ® ® NOTE: Drawings for illustration purpose only. The actual product may vary. Not to scale.
-
Page 12: First Use Preparation And Set-Up
REF. NO. PARTS DESCRIPTION QTY. Spa cover with aluminum foil inside Spa tub Wired controller Heat preservation bubble mat Digital lock Iinflation hose for bladder Filter cartridge*2, cartridge base Inflatable bladder Spa drain valve adaptor Wrench Repair kit Warning label NOTE: When ordering parts, be sure to quote the model number and part numbers. - Page 13 ● Make sure the floor is water resistant and provides non-slip surface. Do not install the spa on a carpet of any other material that could damaged by the moisture. ● Humidity is a naturally side effect of indoor spa installation. The room shall be properly ventilated to allow moisture to escape.
-
Page 14: Spa Set-Up
Lay out all the parts on the ground and make sure all parts are accounted for. Make sure the spa tub is right side up. (*For missing or damaged part, contact the MSpa Service Center) Spread the Heat Preservation Ground Mat over a cleared area. Spread out the spa liner over the ground mat. - Page 15 Yellow Green White When the Yellow section is pushed out, the Spa inflation is completed. You can fill the Spa with water. After water filling is completed, check the air pressure once again to ensure the manometer reaches its Green section. Always ensure the manometer is in the Green section during use. If the White section of the manometer appears, the spa is over inflated.
- Page 16 Water Filling 6.1 Check the spa mark is at the selected area and point the drain valve toward a suitable draining area before inflation. 6.2 Fill the spa tub with fresh water below Maximum line marked on the inside of the spa wall. Do not over fill the spa.
- Page 17 7.1.(1) 7.1.(2) 7.1.(3) ® ® ® 8. JET Button Operation 8.1 Adjust the jet nozzles (a) in the proper direction for your needs. 8.2 Turn the jet control knob (b) clockwise or anticlockwise to change the water stream power. The maximum power combo is air and hydro-jet together.
-
Page 18: Wired Controller Operation
WIRED CONTROLLER OPERATION Jet Button Heater Button Filter Button Bubble Button Timer Button - Adjust the bubble level by pressing the button (L1: 300W, L2: 450W, L3: 700W) Up Button Down Button Celsius/Fahrenheit Ozonator Button Toggle Button Temperature display: Insert the plug into the socket, the current temperature is displayed on the screen. Jet Button: To activate the water jet massage function. - Page 19 operation for safety concern. It cannot be operated within 10 minutes after shutting down. Attention: The bubble function can only be activated when the inflation knob is in <OFF> position. Adjustment Buttons: Press UP or DOWN button, the screen flashes setting temperature. Re-set the temperature within 3 seconds.
-
Page 20: Water Maintenance And Chemicals
ERROR CODE CHART LED READING CAUSE SOLUTION Water temperature is lower than 0°C Change the water or contact the MSpa degree or exceeds 55°C (131°F) Service Center. Temperature sensor failure Water level is not at minimum water line Add water above the minimum line. - Page 21 Water Balance Follow below instructions to maintain the spa water. PARAMETER TEST FREQUENCY CORRECT LEVEL 7.2-7.6 when using Chlorine; Daily 7.2-7.8 when using Bromine Free Chlorine Daily 3-5 ppm Bromine residual Daily 2-4 ppm Total Alkalinity (TA) Weekly 80-120 ppm Total Hardness (TH) Weekly 200-500 ppm...
- Page 22 2. Change the spa water every 3-5 days depends on the spa use. See “Cleaning, draining and storage” section for instruction. 3. Use spa chemicals to maintain proper water conditions. Spa damage resulting from misuse of chemicals and mismanagement of spa water is not covered by the warranty. Consult with your local spa or pool retailer for more information on chemical use.
-
Page 23: Drainage, Cleaning And Storage
DRAINAGE, CLEANING AND STORAGE Spa Drainage 1. Turn off all the buttons (heater, filter and bubble) on the wired controller. 2. Connect the drain valve adapter to a garden hose and point the other end of the garden hose to a suitable draining area with local environmental regulations (Fig.1) 3. -
Page 24: Disposal And Environmental Protection
3. Smooth the surface to remove any air bubbles and allow it dry for 5-10 minutes NOTE: Glue is not included. pin hole pin hole Storage and Prepare for the Next Time Use 1. Drain and clean the spa by following the “Drainage” and the “Spa Cleaning”... -
Page 25: Troubleshooting
NO DISPLAY ON section THE WIRED CONTROLLER GFCI broken Contact the MSpa Service Center Press the Reset button, Control Contact the MSpa Service Center Panel is not displayed Water level is not at the minimum Add more water to the minimum line... - Page 26 Increase filtration frequency WATER NOT CLEAN Dirty filter cartridge Clean or replace the filter cartridge in time Refer to the chemical manufacture's Improper water maintenance instruction CONTACT YOUR LOCAL MSPA DEALER OR SERVICE CENTER FOR ANY PRODUCT RELATED QUESTIONS OR PROBLEMS.
-
Page 27: Mspa Limited Warranty Policy
The warranty period begins from the date of purchase and MSpa requires presentation of the original proof to purchase to ascertain the date. During the warranty period, MSpa will either repair or replace, at its discretion, any defective products. Replacement products or repaired parts will be warranted for only the unexpired portion of the original warranty.
Need help?
Do you have a question about the ELITE BAIKAL and is the answer not in the manual?
Questions and answers