Table of Contents
Advertisement
Advertisement
Table of Contents

Related Manuals for Hisense HV671C60UK


Summary of Contents for Hisense HV671C60UK
- Page 1 Operating instructions Dishwasher HV671C60UK...
-
Page 2: Table Of Contents
Contents Your dishwasher ........................Safety instructions ........................Installation ..........................Winter storage/transport ......................Overflow guard function ......................Packaging ..........................Disposal ............................ Before washing for the first time ................... Water hardness ......................... Set the Water hardness ......................Top up with salt ........................Set the Rinse aid ........................ - Page 3 Remove blockages ........................Troubleshooting ........................Installation ..........................Safety instructions ........................Setup ............................Drainage connection ......................... Connection to water supply ...................... Electrical connection ......................... Service ............................. Technical data and energy labelling ..................Technical data ........................... Information for consumers ......................Information for test institute ......................
-
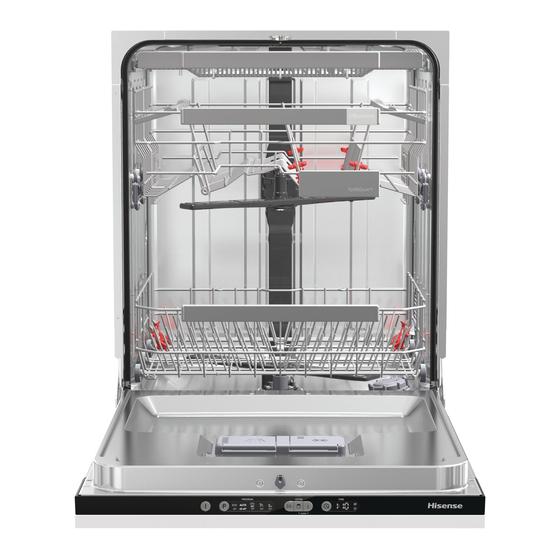
Page 4: Your Dishwasher
Your dishwasher Display Main power switch Install the dishwasher, see the chapter Installation. Following this, open the door and press the main power switch to start using the machine. The first time the dishwasher is switched on, it is important that you choose the right settings to ensure good dishwashing results. -
Page 5: Safety Instructions
Safety instructions Read the operating instructions and keep them in a safe place! Number of standard place settings: 16 Never use the dishwasher for any purpose other than that specified in these operating instructions. Do not load the dishwasher door or dishwasher baskets with anything other than dishes. -
Page 6: Installation
WARNING! Children must be supervised – dishwasher detergent is corrosive! Installation See the chapter Installation. Winter storage/transport Store the dishwasher above freezing and avoid long transport distances in very cold weather. Transport the dishwasher upright or laying on its back. Overflow guard function The overflow protection starts pumping out the machine and turns off the water supply if the water level in the dishwasher exceeds the normal level. -
Page 7: Before Washing For The First Time
Before washing for the first time Water hardness In order to achieve good dishwashing results, the dishwasher needs soft water (water with low mineral content). Hard water leaves a white coating on dishes and the dishwasher. Checking water hardness Water hardness is specified using the German water hardness scale (°dH) or the French water hardness scale (°fH). -
Page 8: Set The Rinse Aid
2. Place the funnel supplied with the dishwasher in the salt compartment top-up hole. First, pour in about 1 l of water. 3. Then add salt, a maximum of 630 gram, until the compartment is full. Use large grain salt or special dishwasher salt. -
Page 9: Greener Dishwashing
Greener dishwashing The dishwasher saves energy and water When using a dishwasher in a residential setting, less energy and water are generally used compared to washing the dishes by hand. Do not rinse under running water Do not rinse the dishes under running water as this will lead to increased energy and water consumption. Simply scrape off large food particles before loading the dishwasher. -
Page 10: Loading The Dishwasher
Loading the dishwasher Fragile dishes Some cookware is not dishwasher safe. This can be for several reasons. Some materials cannot withstand strong heat, others can be damaged by dishwashing detergent. Exercise caution with, for example, handmade items, fragile decoration, crystal/glassware, silver, copper, tin, aluminium, wood and plastic. -
Page 11: Upper Basket
Upper basket Place glasses, cups, bowls, side plates and saucers in the upper basket. All dirty surfaces should face inwards and downwards! Wine glasses are placed on the wine glass shelf and knives are placed in the knife stand on the right (if fitted). Raising and lowering the upper basket 1. -
Page 12: Lower Basket
Lower basket Place plates, side plates, serving dishes and pots in the lower basket. Foldable tines Fold down the foldable tines (plate supports) when dishwashing pots. Release the foldable tines by pressing the catch inwards before adjusting their position. -
Page 13: Using The Dishwasher
Using the dishwasher Add detergent 1. Prewash detergent compartment Press to open 2. Main wash detergent compartment Detergent is added according to water hardness. Follow the instructions on the detergent packaging. This dishwasher is fitted with a water softener, so use detergent and rinse aid doses suitable for soft water. Too much detergent can result in less effective dishwashing and also entails greater environmental impact. -
Page 14: The Main Power Switch
The main power switch Press and hold the main power switch until the display lights up. Also check that the water tap is on. PROGRAM - Select program Select a program to suit the type of dishes and how dirty they are. Eco is always pre-selected. Press the Program selector one or more times until the desired program symbol is activated. -
Page 15: Extra - Select Option
Self-cleaning program Self-cleaning program for hygienic cleaning of the dishwasher tub, spray arms and spray pipes. This program should be run (with no dishes in the machine) using normal dishwasher detergent or citric acid. Special dishwasher cleaners are also available on the market. For the removal of limescale deposits, see Dishwasher tub in the chapter Care and cleaning. -
Page 16: Starting The Dishwasher
1. Press the button once to activate Delayed start. Press the button several times – or hold it in – to set the desired number of hours. 2. Close the door and the dishwasher counts down 1 hour at a time and starts after the selected delay. -
Page 17: Unloading The Dishwasher
Unloading the dishwasher Hot porcelain is more fragile. Leave the dishes to cool in the dishwasher before unloading them. Unload the lower basket first to avoid any water drops from the upper basket falling onto the dishes in the lower basket. -
Page 19: Settings
Settings Open the settings menu: First, open the door. Turn off the machine. Press and hold the main power switch until the display lights up. Within 10 seconds: - press and hold the Program selector and the Speed wash option button until the settings menu opens. - Page 20 Table continued from last page Settings Options Table continued from last page German water French water Recommended hardness scale hardness scale setting 12-14°dH 21-25°fH 2:03 15-19°dH 26-34°fH 2:04 22-24°dH 35-43°fH 2:05 25-29°dH 44-52°fH 2:06 30-39°dH 53-70°fH 2:07 40-49°dH 71-88°fH 2:08 50°dH 89°fH 2:09...
-
Page 21: Care And Cleaning
Care and cleaning Top up with rinse aid When the rinse aid needs topping up, the above symbol lights on the display. After topping up, it may take a while before the symbol goes out. Press to open 1. Open the rinse aid compartment lid. 2. -
Page 22: Cleaning The Filters
Cleaning the filters Coarse filter The coarse filter traps larger food particles, which cannot get past the drainage pump. Empty the coarse filter when necessary. It should be cleaned at regular intervals depending on how often the dishwasher is used. Coarse filter 1. -
Page 23: Cleaning The Spray Arms
NOTE! Dishwashing results may be affected if the coarse and fine filters are incorrectly fitted. The dishwasher must not be used without the filters in place! Cleaning the spray arms Holes and bearings can sometimes become blocked. Remove any debris using a pin or the like. The spray arms also have holes underneath. -
Page 24: Remove Blockages
Display and buttons Keep the display and the buttons clean. If necessary, wipe them with a dry or slightly damp cloth. Never use cleaning products – they may scratch the surface. Use the main power switch to switch off the dishwasher when cleaning the buttons to avoid activating them inadvertently. - Page 25 6. Screw the inlet hose firmly into place. 7. Plug the machine into the wall socket and turn on the water tap. Allow the pressure to settle for a while and check that the connection is watertight. Outer filter on inlet hose Gasket...
-
Page 26: Troubleshooting
Troubleshooting Type of fault on the display Action Overfilling Clear the drainage pump. See the chapter Care and cleaning. If the problem persists, call the service department. Water outlet fault See “Water remains in the dishwasher” in the table “Problem” below. - Page 27 Table continued from last page Problem Possible causes Action The dishwasher does not start. The door is not properly closed. Check. You have opened the dishwash- Close the door and wait. After er to add more dishes while a a while, the dishwasher contin- program is in progress.
- Page 28 Table continued from last page Problem Possible causes Action Old detergent. Detergent is a Avoid large packages. perishable product. Dishes loaded incorrectly. Do not cover porcelain with large bowls or the like. Avoid placing very tall glasses in the corners of the baskets. Glasses and cups have toppled Place dishes to sit steady.
- Page 29 Table continued from last page Problem Possible causes Action The dishes have a sticky Rinse aid dosage setting too Reduce the amount. See the white/blue film. high. sections Before washing for the first time and Settings. If you have very soft water, you may want to dilute the rinse aid 50:50 with water.
- Page 30 Table continued from last page Problem Possible causes Action Grease deposits in the dish- Low temperature programs Select a program with a high washer. have been selected for a pro- temperature to dissolve grease longed period. on very dirty dishes, such as In- tensive wash.
-
Page 31: Installation
Installation [mm] Door length Nominal dimensions. Actual measurements may vary. It is important that you read through and follow the instructions and directions below. Conduct installation and connection in accordance with the separate installation instructions. Safety instructions Connections to electricity, water and drainage must be performed by a qualified professional. Always follow applicable regulations for water, drainage and electricity. -
Page 32: Drainage Connection
Affix the protective film (packed in the document bag) to the underside of the worktop. The protective film is to protect the worktop from moisture. Check that the machine is installed such that the door opens freely, otherwise door lock functionality may be disrupted. - Page 33 The electric wall socket must be placed outside of the installation area to be easily accessible after installing the dishwasher. Do not use an extension cord! NOTE! Electrical cable replacements as well as repairs and maintenance relating to safety or performance must be carried out by the manufacturer's service centre or someone similarly professionally qualified.
-
Page 34: Service
Read the chapter Troubleshooting before contacting the service centre. If you have encountered a problem that you cannot resolve, please contact your nearest service centre for professional help, see www.hisense.com. Our website also has information about spare part availability and what you can repair yourself. -
Page 35: Technical Data And Energy Labelling
Weight can vary due to different specifications. Information for consumers Information about your product can be found at global.hisense.com, where you will also find a link to the European Product Database for Energy Labelling, EPREL. Or else visit https://eprel.ec.europa.eu directly. Follow the instructions to search by model name. - Page 36 825408-a2 We reserve the right to make changes.
Need help?
Do you have a question about the HV671C60UK and is the answer not in the manual?
Questions and answers