Advertisement
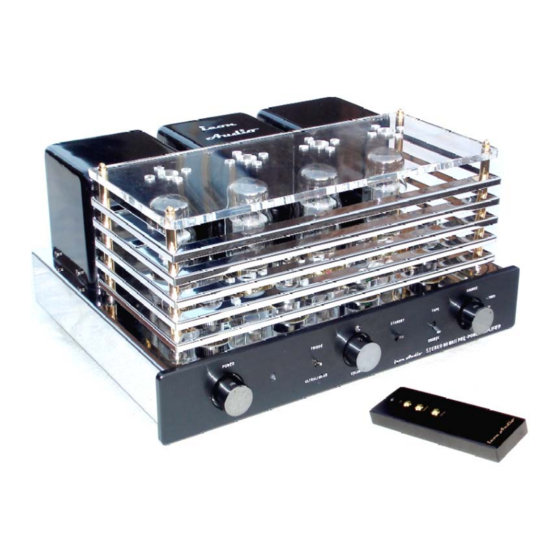
Stereo 60 MK 2
1 Introduction & Final Inspection
4 Getting the best out of your
amplifier
Thank you for purchasing the
60
. A great deal of care has been taken in
the design, selection of components and
production of this amplifier. We are sure that
you will hear the difference.
Stereo 60
The
Ultralinear stereo power amp, capable of
running in either pentode ultralinear, or pure
triode mode, using the excellent KT88 valves
in fixed bias mode. The driver and phase
splitting is all triode. The pre-amp is a high
quality 'Passive' circuit using silver audio
cable and an ALPS 'blue' volume control. It is
sensitive enough to be used with all modern
source equipment having an output of 300mv
or greater. Its simplicity coupled with point to
point wiring hand wiring without the use of
printed circuit board's results in an open
euphoric sound that is wonderfully detailed
and warm sounding.
In order to get the best out of your amplifier,
please read the enclosed notes. Even if you
are experienced with hi fi. We would
icon Audio
Instruction Manual Covering:
Contents
1 Introduction
Stereo
is
a
push-pull
Integrated Amplifier
6 Specifications
recommend that everyone follow the
'quick set up guide'. Should you be
uncertain about anything to do with your
amplifier please contact us for advice.
Hi fi reproduction is a long chain of events
that includes the recording, editing, mixing
etc, before being transferred to a medium
such as LP, CD, or FM, before being played
through your own source unit, the amplifier
and finally loudspeakers.
Your room acoustics will also affect the
sound before it finally reaches your ear.
Whilst the amplifier is arguably the most
important part of a system, it is important to
remember that the weakest link will always
affect
the
final
results
judgements. And not all recordings are
'equal'! Therefore an amplifier which faithfully
reproduces
the
input
reproduce imperfections in the tonal balance
and the recording itself. Therefore setting up
and judgements should be made with a
'clean' well balanced recording.
when
making
signal
will
also
Page 1
Advertisement
Table of Contents

Summary of Contents for icon Audio Stereo 60 MK 2
-
Page 1: Table Of Contents
Audio Instruction Manual Covering: Stereo 60 MK 2 Integrated Amplifier Contents 1 Introduction & Final Inspection 5 Trouble Shooting 2 Quick Set Up Guide 6 Specifications 3 Connecting inputs & outputs 7 Valve Replacement 4 Getting the best out of your... - Page 2 2 Final Inspection - Your Guarantee of Quality To assure you of optimum performance and reliability, this amplifier has passed our rigorous final inspection and listening test by the Icon Audio team in Leicester . During which the final set up and adjustments were made.
-
Page 3: Quick Set Up Guide
2 QUICK SET UP GUIDE 1 Unpack unit carefully. Make sure that it is in adjusted from your preamplifier (although if you’re good condition. If not report to Icon Audio. It is your pre-amplifier is not remote control, you could important... - Page 4 irreparable damage to the transformers which engineer. There are no user serviceable parts would not be covered under warranty. inside. Like other household electrical appliances do not leave unattended whilst 10 Health and Safety. The valves when operating switched on. Do not adjust the KT88 grid bias have high surface temperatures.
-
Page 5: Connecting Inputs & Outputs
Alternatively use good quality ‘banana’ plugs, If you wish to use a turntable you will need a once fitted they are trouble free. suitable phono pre-amp. Icon Audio or your dealer can advise you. Our new all valve phono stage is Speaker polarity. -
Page 6: Trouble Shooting
4 How to get the best out of your amplifier Do not switch from Ultralinear to Triode without first switching off Do not switch off and on without a short rest of 60 seconds (to reset the ‘soft start’) ... -
Page 7: Valve Replacement
use an interconnect which only has the screen or similar, (Valves are very rugged if packed connected at one end. Other causes of low-level properly). hum can be from adjacent equipment, so 6 Specification & Features experiment with moving equipment around to see if this makes the hum better or worse. - Page 8 This is a safe procedure which involves measuring 500mv (or 0.5v) in the four sockets next to Icon Audio are happy to replace valves and check to each KT88 and adjusting if necessary. performance of your amplifier, and advise on the latest upgrades available.
-
Page 9: Guarantee
8, Replacing the small 6SN7/6SL7 valves: Icon Audio are happy to check the valves or amp & The outer pair are 6SN7, the inner pair are 6SL7 these your re-bias your amp free of charge. are double triodes. No set up is required. Care should be taken when removing and inserting not to bend the pins. - Page 10 Caution: This amplifier is very heavy! Lift the amplifier out of its packing by using the two “hand cut-outs” in the bottom packing near the transformers. Or you may find it easier to remove the unit using the following procedure: With the top packing in place, turn the box “upside down”...
Need help?
Do you have a question about the Stereo 60 MK 2 and is the answer not in the manual?
Questions and answers