Advertisement
Quick Links
Aufbauanleitung / assembly instructions mod.
3753 mit Frontauszug (B = 900)
1x
SW6
1.Montagematerial.
1. Fitting material.
3. Vor dem Ausziehen auf beiden Seiten die
schwarzen Bremsschrauben lösen.
3. Before the extension can be pulled out, the two
black screws must be released.
3753 mit Frontauszug (B = 900)
8x
M8 x 25
!
2. Den Oberbau umgedreht auf gepolsterten
Montageböcken ablegen.
2. Put the table-top upside down onto padded
assembling trestles.
4. Den Auszug etwa 20 cm ausziehen.
Die Zierblende der Festseite abschrauben.
4. Drag the pullout approximately 20 cm.
Unscrew the decorative cover of the fixed
side.
1 / 7
Änderungsdatum: 19.04.18
Advertisement

Subscribe to Our Youtube Channel
Related Manuals for Venjakob 3753


Summary of Contents for Venjakob 3753
- Page 1 Aufbauanleitung / assembly instructions mod. 3753 mit Frontauszug (B = 900) M8 x 25 1.Montagematerial. 2. Den Oberbau umgedreht auf gepolsterten 1. Fitting material. Montageböcken ablegen. 2. Put the table-top upside down onto padded assembling trestles. 3. Vor dem Ausziehen auf beiden Seiten die 4.
- Page 2 Fix both table-legs with each two screws and use the provided hex-wrench. 7. Die Traverse wieder anschrauben. 8. Die Zierblende wieder anschrauben. 7. Screw on the traverse again. 8. Screw on the decorative cover again. 2 / 7 3753 mit Frontauszug (B = 900) Änderungsdatum: 19.04.18...
- Page 3 10. Turn the table right-side-up without using the Fix both table-legs with each two screws and feet. Then put the table down on all 4 legs at use the provided hex-wrench. once. 3 / 7 3753 mit Frontauszug (B = 900) Änderungsdatum: 19.04.18...
- Page 4 Then tighten the 13. If needed, also adjust the opposite mount of socket screw again. the extenson-rod. For this purpose the nut can be loosened and after adjusting be tightened. 4 / 7 3753 mit Frontauszug (B = 900) Änderungsdatum: 19.04.18...
- Page 5 15c. Swing out the table-extension by using the klappen, die Höhe rechts erneut kontrollie- leather belt. Check the hight again; if ren und wenn nötig erneut einstellen. necessary adjust again. 5 / 7 3753 mit Frontauszug (B = 900) Änderungsdatum: 19.04.18...
- Page 6 16c. Swing in both pieces of the table-extension at the same time. Use the leather-blet to swing out the table- extension and check the hight again. If necessary, adjust again. 6 / 7 3753 mit Frontauszug (B = 900) Änderungsdatum: 19.04.18...
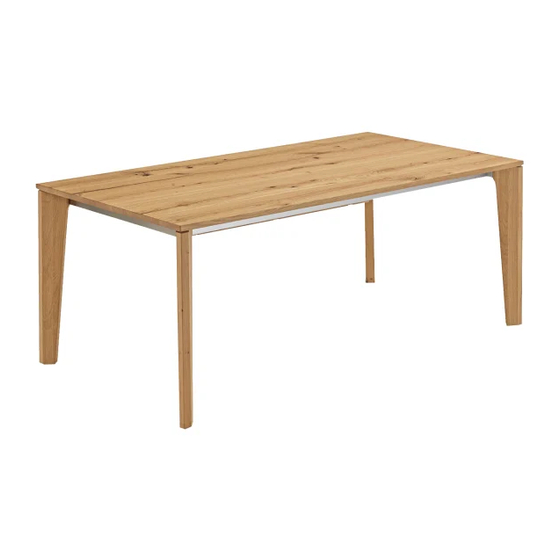
- Page 7 17. Fertiger Tisch; nicht ausgezogen. 17. Finished table; not extended. 18. Fertiger Tisch; ausgezogen. 18. Finished table; extended. 7 / 7 3753 mit Frontauszug (B = 900) Änderungsdatum: 19.04.18...
- Page 8 Aufbauanleitung / assembly instructions mod. 3754, 3755 mit Frontauszug (B = 1.000) M8 x 25 1.Montagematerial. 2. Den Oberbau umgedreht auf gepolsterten 1. Fitting material. Montageböcken ablegen. 2. Put the table-top upside down onto padded assembling trestles. M8 x 25 3.
- Page 9 5. Den Tisch wenden ohne die Füße zu belasten und dann gleichzeitig alle 4 Tischbeine auf dem Boden absetzen. 5. Turn the table right-side-up without using the feet. Then put the table down on all 4 legs at once. 2 / 6 3754, 3755 mit Frontauszug (B = 1.000) Änderungsdatum: 19.04.18...
- Page 10 6. Prüfen ob die Oberkanten des Auszugs und der Hauptplatte innen auf einer Höhe sind. Nur wenn nicht … 6. Check in the middle if the upper surfaces of the board and the extension are on one level. Only if not ... SW13 SW2,5 SW2,5...
- Page 11 9. Prüfen ob die Oberkanten des Auszugs und der Hauptplatte außen auf einer Höhe sind. Wenn nicht … 9. Check at the outer sides, if the upper surfaces of the board and the extension are on one level. If not ... Rechte Seite einstellen: weiße Stellschrauben white adjusting-screws...
- Page 12 Linke Seite einstellen: 11a. Die Klappeinlage fassen und beide Teile 11b. … und beide Halbteile ganz umklappen. gleichzeitig vorsichtig hochklappen... Die Höhe mit einem Kreuz-Schraubendreher 11a. Grab both pieces of the table-extension and an den schwarzen Laschen einstellen. swing out both pieces of the table- 11b.
- Page 13 12. Fertiger Tisch; nicht ausgezogen. 12. Finished table; not extended. 13. Fertiger Tisch; ausgezogen. 13. Finished table; extended. 6 / 6 3754, 3755 mit Frontauszug (B = 1.000) Änderungsdatum: 19.04.18...
Need help?
Do you have a question about the 3753 and is the answer not in the manual?
Questions and answers