
Subscribe to Our Youtube Channel
Related Manuals for PTZ Optics PT30X-NDI-GY


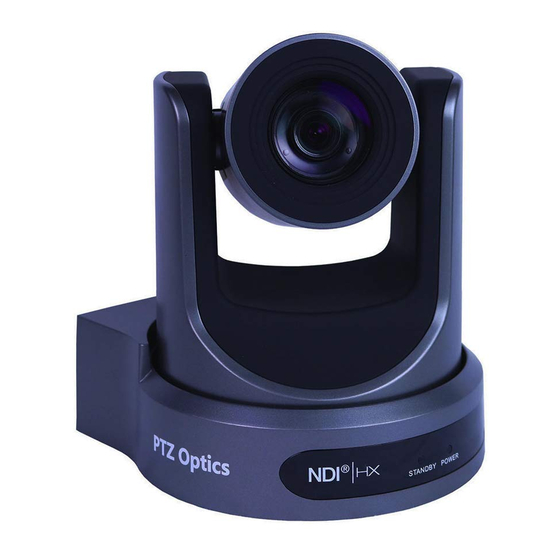
Summary of Contents for PTZ Optics PT30X-NDI-GY
- Page 1 PTZOptics 30x NDI®|HX User Manual Model Nos: PT30X-NDI-GY & PT30X-NDI-WH V1.6 (English) Please check PTZOPTICS.com for the most up to date version of this document Rev 1.6 8/20...
- Page 2 Preface Thank you for using the HD Professional Video Conferencing Camera. This manual introduces the function, installation and operation of the HD camera. Prior to installation and usage, please read the manual thoroughly. Precautions This product can only be used in the specified conditions in order to avoid any damage to the camera: •...
-
Page 3: Table Of Contents
Table of Contents Supplied Accessories………………………………………………………………………………………………………... Notes………………………………………………………………………………………………………………………… Quick Start…………………………………………………………………………………………………………………... Features……………………………………………………………………………………………………………………... Product Specification………………………………………………………………………………………………………... Back of the Camera………………………………………………………………………………………………………….. IR Remote Controller……………………………………………………………………………………………………….. Using the IR Remote Controller…………………………………………………………………………………………….. 10 Dimensional Drawings……………………………………………………………………………………………………… RS-232 Interface…………………………………………………………………………………………………………….. 14 VISCA Command List………………………………………………………………………………………………………. 16 Menu Settings……………………………………………………………………………………………………………….. 30 Exposure……………………………………………………………………………………………………………….. Color…………………………………………………………………………………………………………………… Image…………………………………………………………………………………………………………………... P/T/Z…………………………………………………………………………………………………………………… 31 Noise Reduction……………………………………………………………………………………………………….. -
Page 4: Supplied Accessories
Supplied Accessories When you unpack your camera, check that all the supplied accessories are included: ⚫ Camera ........1 ⚫ AC Power Adaptor ....1 ⚫ Power Cord ......1 ⚫ RS232 Cable ......1 ⚫ IR Remote Controller ... 1 ⚫... -
Page 5: Quick Start
Quick Start Step1. Please check that all connections are correct before powering on the camera. Page 2 of 50 Rev 1.6 8/20... - Page 6 Step2. Set the system select switch for your desired video output resolution and frame rate. For many applications, setting 0 (1080p-60) will provide the best overall performance. For highest possible resolution, use setting 0 (1080p-60) or 6 (1080p-30), however your actual realized frame rate may be limited to a lower value than 60 fps by your software and/or network connection.
-
Page 7: Features
Features • Image Sensor Panasonic 1/2.7”, 2.07 million effective pixels, HD CMOS sensor Olympus high quality telephoto lens supporting 30X optical zoom and optional 16X digital zoom Full HD 1920x1080p resolution up to 60 frames per second 2D & 3D noise reduction with our latest “low noise CMOS sensor” 0.05 Lux @ F1.8 AGC On Wide angle 60.7°... -
Page 8: Product Specification
Product Specifications Model PT30X-NDI-GY and PT30X-NDI-WH Type PTZOptics NDI®|HX HD 1080p Color Video Camera Camera 1080p-60/50/30/25/59.94*/29.97*, 1080i-60/50/59.94*, 720p-60/50/59.94* CVBS: 576i, 480i Video System *Broadcast frame rates are considered BETA features and may not be supported by all platforms Please note: The camera is unable to perform 1080p60 over IP stream & SDI/HDMI simultaneously Sensor 1/2.7", CMOS, Effective Pixel: 2.07M... - Page 9 Input/Output Interface 1 x HDMI: Version 1.3 HD Output 1 x 3G-SDI: BNC type, 800mVp-p, 75Ω, Along to SMPTE 424M standard ® 1 x RJ45 NDI | HX / IP Network streaming 10/100/1000 Ethernet port SD Output 1 x CVBS: RCA jack, 1Vp-p, 75Ω Network Interface 1 x RJ45: 10/100/1000M Adaptive Ethernet ports ®...
-
Page 10: Back Of The Camera
Back of the Camera 1. Audio LINE IN Interface (NDI®|HX, HDMI, IP) 7. Network (NDI®|HX, IP streaming, and control) 2. CVBS (composite video SD) Interface 8. HDMI (Digital Video Output) 3. System select dial (resolution) 9. 3G-SDI (Serial Digital Video Output) 4. -
Page 11: Ir Remote Controller
IR Remote Controller 1. Standby Button Press this button to enter standby mode. Press it again to enter normal mode. NOTE: Power consumption in standby mode is approximately half of the normal mode. 2. Position Buttons To set preset or call preset. 3. - Page 12 12. Multiple Function Buttons Function 1. Set camera IR address Press 3 keys contiguously can set camera IR address as follow: [*] + [#] + [F1]: Address 1 [*] + [#] + [F2]: Address 2 [*] + [#] + [F3]: Address 3 [*] + [#] + [F4]: Address 4 Function 2.
-
Page 13: Using The Ir Remote Controller
Using the IR Remote Controller 2. Zoom Control When the camera is operational, you can use the remote controller to perform panning, tilting, zooming and focusing, as well as store and call back preset positions. Button Instructions: 1. In these instructions, ‘press the button’ means to press and release. - Page 14 4. BACKLIGHT. L/R SET and P/T RST Controls 6. Presets - Setting and Clearing Reverse Pan controls direction: Press and hold [L/R SET] button while pressing [1] aka [STD] button for normal pan controls. Press and hold [L/R SET] button while pressing [2] aka [REV] button for reversed pan controls.
- Page 15 7. Recalling Presets 9. Camera IR Address Set Press 3 buttons in the sequence shown below to set/change the camera’s IR address. This allows up to 4 cameras to be controlled from the same IR remote control. Be sure that only one camera is picking up the IR signal when you perform this function.
-
Page 16: Dimensional Drawings
Dimensional Drawings (mm) Page 13 of 50 Rev 1.6 8/20... -
Page 17: Rs-232 Interface
RS-232 Interface Camera PC/Controller DB-9 1.DTR 1.CD 2.DSR 2.RXD 3.TXD 3.TXD 4.GND 4.DTR 5.RXD 5.GND 6.GND 6.DSR 7.IR OUT 7.RTS 8.NC 8.CTS 9.RI For Control Daisy Chain Camera Camera Mini DIN Function 1.DTR 1.DTR 2.DSR 2.DSR 3.TXD 3.TXD 4.GND 4.GND 5.RXD 5.RXD 6.GND... - Page 18 Serial Communication Control In default working mode, the camera is able to connect to a VISCA controller with an RS232C serial interface. ➢ RS232 Communication Control The camera can be controlled via RS232. The parameters of RS232C are as follows: Baud rate: 2400, 4800, 9600 or 38400 bps.
-
Page 19: Visca Command List
VISCA Command List Part 1: Camera-Issued Messages ACK/Completion Message Function Command Command Packet Comments z0 4y FF Returned when the command is accepted. ACK/Completion (y: Socket No.) Messages z0 5y FF Completion Returned when the command has been executed. (y: Socket No.) Error Messages Function Command... - Page 20 Part 2: VISCA Command List Command Function Command Packet Comments 8x 01 04 00 02 FF CAM_Power Power ON/OFF 8x 01 04 00 03 FF Stop 8x 01 04 07 00 FF Tele (Standard) 8x 01 04 07 02 FF Wide (Standard) 8x 01 04 07 03 FF CAM_Zoom...
- Page 21 pq: Color Temperature position 0x00: 2500K ~ Direct 8x 01 04 20 0p 0q FF 0x37: 8000K Full Auto 8x 01 04 39 00 FF Automatic Exposure mode Manual 8x 01 04 39 03 FF Manual Control mode CAM_AE Shutter priority 8x 01 04 39 0A FF Shutter Priority Automatic Exposure mode Iris priority...
- Page 22 8x 01 06 01 VV WW 03 01 FF Down 8x 01 06 01 VV WW 03 02 FF Left 8x 01 06 01 VV WW 01 03 FF Right 8x 01 06 01 VV WW 02 03 FF Upleft 8x 01 06 01 VV WW 01 01 FF VV: Pan speed 0x01 (low speed) to 0x18 (high Upright...
- Page 23 Return 8x 01 06 06 04 FF High 8x 0B 01 01 FF Medium 8x 0B 01 02 FF CAM_NDIMode 8x 0B 01 03 FF 8x 0B 01 04 FF CAM_MulticastMode Multicast Mode 8x 0B 01 23 0p FF p=1: On, p=2: Off PTZ Motion Sync On 8x 0A 11 13 02 FF CAM_PTZMotionSync...
- Page 24 CAM_ExpCompMod y0 50 02 FF 8x 09 04 3E FF eInq y0 50 03 FF CAM_ExpCompPosI 8x 09 04 4E FF y0 50 00 00 0p 0q FF pq: ExpComp Position CAM_BacklightMode y0 50 02 FF 8x 09 04 33 FF y0 50 03 FF CAM_Nosise2DMode y0 50 02 FF...
- Page 25 y0 50 00 FF CAM_AFZone 8x 09 04 AA FF y0 50 01 FF Center y0 50 02 FF Bottom p: Color Hue setting 0h (− 14 degrees) to Eh ( +14 CAM_ColorHueInq 8x 09 04 4F FF y0 50 00 00 00 0p FF degrees y0 50 00 FF High...
- Page 26 Part 4: VISCA over IP Command List Command Function Command Packet Comments 81 01 04 00 02 FF CAM_Power Power ON/OFF 81 01 04 00 03 FF Stop 81 01 04 07 00 FF Tele (Standard) 81 01 04 07 02 FF Wide (Standard) 81 01 04 07 03 FF CAM_Zoom...
- Page 27 pq: Color Temperature position 0x00: 2500K ~ Direct 81 01 04 20 0p 0q FF 0x37: 8000K Full Auto 81 01 04 39 00 FF Automatic Exposure mode Manual 81 01 04 39 03 FF Manual Control mode CAM_AE Shutter priority 81 01 04 39 0A FF Shutter Priority Automatic Exposure mode Iris priority...
- Page 28 81 01 06 01 VV WW 03 01 FF Down 81 01 06 01 VV WW 03 02 FF Left 81 01 06 01 VV WW 01 03 FF Right 81 01 06 01 VV WW 02 03 FF Upleft 81 01 06 01 VV WW 01 01 FF VV: Pan speed 0x01 (low speed) to 0x18 (high Upright...
- Page 29 Return 81 01 06 06 04 FF High 81 0B 01 01 FF Medium 81 0B 01 02 FF CAM_NDIMode 81 0B 01 03 FF 81 0B 01 04 FF CAM_MulticastMode Multicast Mode 81 0B 01 23 0p FF p=1: On, p=2: Off PTZ Motion Sync On 81 0A 11 13 02 FF CAM_PTZMotionSync...
- Page 30 CAM_ExpCompMod 90 50 02 FF 81 09 04 3E FF eInq 90 50 03 FF CAM_ExpCompPosI 81 09 04 4E FF 90 50 00 00 0p 0q FF pq: ExpComp Position CAM_BacklightMode 90 50 02 FF 81 09 04 33 FF 90 50 03 FF CAM_Nosise2DMode 90 50 02 FF...
- Page 31 90 50 00 FF CAM_AFZone 81 09 04 AA FF 90 50 01 FF Center 90 50 02 FF Bottom p: Color Hue setting 0h (− 14 degrees) to Eh ( +14 CAM_ColorHueInq 81 09 04 4F FF 90 50 00 00 00 0p FF degrees 90 50 00 FF High...
- Page 32 Part 7: Pelco-P Protocol Command List Function Byte1 Byte2 Byte3 Byte4 Byte5 Byte6 Byte7 Byte8 0xA0 Address 0x00 0x08 Pan Speed Tilt Speed 0xAF Down 0xA0 Address 0x00 0x10 Pan Speed Tilt Speed 0xAF Left 0xA0 Address 0x00 0x04 Pan Speed Tilt Speed 0xAF Right...
-
Page 33: Menu Settings
Menu Settings EXPOSURE Mode Auto 1. MENU ExpCompMode Press the [MENU] button to display the On Screen Display Backlight menu on the normal screen, using the arrow button to move Gain Limit the cursor to the item to be set. Press the [HOME] button to Anti-Flicker 60Hz enter the corresponding sub-menu. -
Page 34: Color
3. COLOR 4. IMAGE Move the main menu cursor to [COLOR], and press the Move the main menu cursor to [IMAGE], and press the [HOME] key to enter the color page, as shown in the [HOME] key to enter the image page, as shown in the following figure. -
Page 35: Noise Reduction
P/T/Z NOISE REDUCTION SpeedByZoom NR2D-Level 1 AF-Zone Center NR3D-Level 3 AF-Sense High L/R Set Select Item Display Info Change Value [Menu] Back Image Freeze Digital Zoom NR2D Level: 2D noise reduction, optional items: Close, Call Preset Speed Auto, 1 ~ 5. Pre Zoom Speed NR3D Level: 3D noise reduction, optional items: Off, 1 ~ 8. -
Page 36: Communication Setup
9. RESTORE DEFAULT Auto Focus L: Lock focus in current position, optional items: Off, On Move the main menu cursor to [RESTORE DEFAULT], and press the [HOME] key to enter the restore default page, as OSD TimeOut: Auto close OSD, optional items: 2.5min, shown in the following figure. -
Page 37: Network Connection
Network Connection 1. Operating Environment Operating System: Windows 2000/2003/XP/Vista/7/8.1/10 Network Protocol: TCP/IP Client PC: P4 / 128M RAM / 40GHD / support for scaled graphics card, support for DirectX8.0 or more advanced version. 2. Equipment Installation 1) Connect camera to your network via a CAT5 or CAT6 patch cable or directly to your PC via a CAT5 or CAT6 cross over cable. -
Page 38: Setting Up A Network Video Stream
Setting up a Network Video Stream 1. The first thing you are going to want to do to get your camera up and streaming on your network is to connect your camera to power, an active network port on your network, and finally, power on the camera. 2. - Page 39 6. After assigning an IP address to the camera, you can reach the Web Interface by typing in the camera’s IP address into a web browser. To log in, type in “admin” into the username and password fields. From the Web Interface, you have two (2) ways to view the video feed. a.
-
Page 40: Additional Network Info
Additional Network Info Discovering your Network IP range You can discover the IP range of your network by using the Command Prompt for Windows, or the Terminal app for Macs and following the steps below. Windows 1. Type “CMD” into the search bar in the start menu. 2. -
Page 41: Camera Web Interface
Camera Web Interface The Web Interface allows you to control the camera, view the video feed, and adjust many of the camera’s settings. Menu The Menu allows you to traverse the Web Interface. By default, the “Live” option is selected. Live This tab allows you to view the video feed of the camera. -
Page 42: Video
Video 720p120: Allows camera to output 720p at 120 FPS via the IP Network Stream. Set to ‘On’ or ‘Off’. (Note: Setting to ‘On’ will override and lockout other video settings). Video Format: Supports 50Hz (PAL), 60Hz (NTSC), & Dial Priority formats. -
Page 43: Image
Image Brightness: Brightness slider. Default: 7 Saturation: Saturation slider. Default: 4 Contrast: Contrast slider. Default 10 Sharpness: Sharpness slider. Default: 3 Hue: Hue slider. Default: 7 Flip & Mirror: Check the Flip and/or Mirror buttons to rotate the image accordingly. Audio Audio Switch: Enable / Disable audio embedding Audio Type: AAC... -
Page 44: Network
Network LAN Settings: The Lan Settings section allows you to adjust the IP parameters of the camera. The default IP address of the camera is 192.168.100.99. You cannot change the MAC address. IP Configuration Type: Fixed IP Address (Static) & Dynamic IP Address (DHCP). IP Address: Camera’s IP address. - Page 45 DNS Address: Network Domain Name Server address. MAC Address: The camera’s MAC address. Apply & Cancel Buttons: Apply or cancel the changes made to the LAN Settings section. Port Settings: The Port Settings section allows you to adjust the network ports of the camera. HTTP Port: This port is used for HTTP-CGI control, and for the web application.
-
Page 46: Information
Main Time Show: Enable / Disable Main Time Position: Main Time position Sub Time Show: Enable / Disable Sub Time Position: Sub Time position Apply & Cancel Buttons: Apply or cancel the changes made to the Network Settings section. Information The Information section displays the device information, firmware version, &... - Page 47 Focus Control http://[Camera IP]/cgi-bin/ptzctrl.cgi?ptzcmd&[Action]&[Focus Speed] [Action]: FOCUSIN, FOCUSOUT, FOCUSSTOP [Focus Speed]: 1 (Slowest) – 7 (Fastest) Focus Lock Control http://[Camera IP]/cgi-bin/param.cgi?ptzcmd&[Action]_mfocus [Action]: LOCK, UNLOCK Preset Control http://[Camera IP]/cgi-bin/ptzctrl.cgi?ptzcmd&[Action]&[Position Number] [Action]: POSSET, POSCALL [Position Number]: 0 – 89 (Range 1), 100 – 254 (Range 2) Home Position Recall http://[Camera IP]/cgi-bin/ptzctrl.cgi?ptzcmd&home PT Reset...
- Page 48 OSD Menu Selection Control http://[Camera IP]/cgi-bin/param.cgi?navigate_mode&[Mode] [Mode]: CONFIRM, OSD_BACK HTTP-CGI – Image Adjustment Image Settings Control http://[Camera IP]/cgi-bin/param.cgi?post_image_value&[Mode]&[Level] [Mode]: BRIGHT, SATURATION, CONTRAST, SHARPNESS, HUE [Level]: 0 - 14 Image Orientation Control http://[Camera IP]/cgi-bin/param.cgi?post_image_value&[Mode]&[State] [Mode]: FLIP, MIRROR [State]: 1 (Flip / Mirror), 0 (Default) Default Image Settings http://[Camera IP]/cgi-bin/param.cgi?get_image_default_conf HTTP-CGI –...
-
Page 49: Photobooth Functionality
Photobooth Functionality Your PTZOptics camera can quickly and easily take a series of four (4) still image or video files that are stored on the camera and made accessible with a standard web browser on the same network. Photos You have two (2) options to initiate a series of four (4) still images being captured… You can enter the following HTTP string into any web browser on the same network as the camera to initiate a series of four (4) still images. - Page 50 You can also press the “[F2]” button on your IR remote to initiate a “quick capture” that has, approximately, a four (4) second delay between four (4) ten (10) second videos being captured. To retrieve your series of four (4) videos, you will need to open a standard web browser with network access to the camera and use the following HTTP strings to retrieve the still image files as desired.
-
Page 51: Ndi | Hx Connection
® | HX Connection The NDI ® | HX connection allows you to connect and control your camera through any NDI compatible hardware or ® software on your Local Area Network. Once your camera is setup on a LAN, you can utilize the NDI | HX connection. -
Page 52: Maintenance And Troubleshooting
Maintenance and Troubleshooting Camera Maintenance ⚫ If the camera will not be used for a long time, please turn off the power switch. ⚫ Use a soft cloth or lotion-free tissue to clean the camera body. ⚫ Use a soft dry lint-free cloth to clean the lens. If the camera is very dirty, clean it with a diluted neutral detergent. Do not use any type of solvent or harsh detergent, which may damage the surface. -
Page 53: Page Ii Of
Control ⚫ IR remote controller does not control the camera Does one of the 4 “Camera Select” buttons (top row of remote) light up when you press any button on the remote? If not, change the batteries in the remote. Are the camera and remote set to the same IR address? You can use press [*] + [#] + [F1] (3 buttons in sequence) on the remote to set the camera to address 1.
Need help?
Do you have a question about the PT30X-NDI-GY and is the answer not in the manual?
Questions and answers