Table of Contents
Advertisement
Quick Links
Advertisement
Table of Contents

Subscribe to Our Youtube Channel
Related Manuals for OpenEye MK Series


Summary of Contents for OpenEye MK Series
- Page 1 MK – SERIES CLOUD MANAGED NETWORK SERVER HARDWARE MANUAL...
- Page 2 The information in this publication is provided “as is” without warranty of any kind. The entire risk arising out of the use of this information remains with recipient. In no event shall OPENEYE be liable for any direct, consequential, incidental, special, punitive, or other damages whatsoever (including without...
- Page 3 9. Object and Liquid Entry Points – Never insert foreign objects into the recorder, other than the media types approved by OpenEye, as they may touch dangerous voltage points or short-out parts that could result in a fire or electrical shock. Never spill liquid of any kind on the product.
- Page 4 When the unit exhibits a distinct change in performance - this indicates a need for service. 18. Servicing – Do not attempt to service this product unless instructed to by an OpenEye engineer. Opening or removing covers may expose the user to dangerous voltage or other hazards.
- Page 5 NOTES ON MAINTENANCE This recorder is designed to last for long periods of time. To keep the recorder always operational we recommend regular inspection maintenance (cleaning parts or replacement). For details contact the nearest dealer. NOTES ON MOISTURE CONDENSATION Moisture condensation could damage the recorder. Read the following information carefully. Moisture condensation might occur under the following circumstances: When this product is brought directly from a cool location to a warm location.
- Page 6 EXPLANATION OF GRAPHICAL SYMBOLS The lightning flash with arrowhead symbol, within an equilateral triangle, is intended to alert the user to the presence of un-insulated "dangerous voltage" within the product enclosure that may be of sufficient magnitude to constitute a risk of electric shock to persons. FCC STATEMENT This equipment has been tested and found to comply with the limits for a Class A digital device, pursuant to Part 15 of the FCC Rules.
- Page 7 OpenEye will warrant all otherwise out of warranty replacement parts and repairs for 90 days from the date of OpenEye shipment. The above warranty is the sole warranty made by OpenEye and is in lieu of all other warranties by OpenEye express and implied, including without limitation the warranties of merchantability and fitness for a particular purpose.
-
Page 8: Table Of Contents
TABLE OF CONTENTS INTRODUCTION ........................... 9 Product Description........................... 9 Features ............................10 Controls and Connections ....................... 11 MK-Series Front Panel ..........................11 MK-Series Rear Panel ..........................11 Sensor / Relay Card (Optional Add-On Card) ..................12 GETTING STARTED ..........................13 Box Contents .......................... -
Page 9: Introduction
The OpenEye MK-Series recorder is designed to offer maximum performance and reliability, paired with full integration with OpenEye Web Services (OWS). Complete network setup is fast and easy using Web Connect and eliminates the need for port forwarding using OWS. There is no need to write, remember, or type IP addresses and other network information for remote connections. -
Page 10: Features
FEATURES OpenEye Apex Server MK-Series recorders include the following features: Fully integrated with OpenEye Web Services (OWS) • Complete remote operations and administration with Web Connect • • Up to 192TB on-board storage Record up to 128* channels of IP video per server •... -
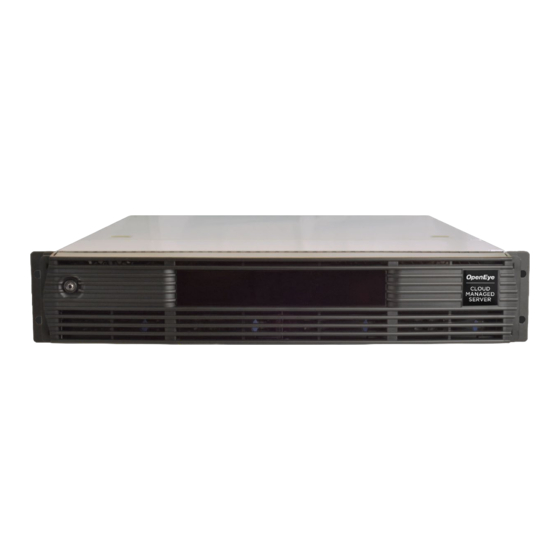
Page 11: Controls And Connections
CONTROLS AND CONNECTIONS MK-SERIES FRONT PANEL MK-SERIES REAR PANEL Camera Client Power Supply DVI-I Network Network Audio In Port Port USB 2.0 DVI-D HDMI ® USB 3.0 Audio Out 35596AD... -
Page 12: Sensor / Relay Card (Optional Add-On Card)
SENSOR / RELAY CARD (OPTIONAL ADD-ON CARD) The sensor / relay card is an optional add-on card that can be installed on the M-Series recorder in an available card slot. Apex Server version 1.2 or higher is required for use of the sensor / relay card. See the Apex Server Software manual for instructions on setting up the sensor / relay card on the software. -
Page 13: Getting Started
GETTING STARTED BOX CONTENTS OpenEye MK-Series recorders come with a power cord, keyboard, mouse, rack mount installation kit, and a recovery USB. A Quick Start Guide and other necessary documentation are also included. Identify the following components to make sure everything has been properly included with your new recorder. If any of the following items are missing, contact the dealer to arrange a replacement. -
Page 14: Keyboard Setup
KEYBOARD SETUP To attach the keyboard, connect the keyboard to a USB port located on the back of the recorder. MOUSE SETUP To attach the mouse to your recorder, connect the mouse to a USB port located on the back of the machine. -
Page 15: Monitor Setup
MONITOR SETUP These connections are available to connect a monitor: ® To TV / Digital Display HDMI Output DVI-I Output To TV / Digital Display DVI-D Output To TV / Digital Display Refer to the monitor manual for detailed information on how to setup and use it. Note The monitor must be capable of a minimum screen resolution of 1024x768 and support 32-bit color. -
Page 16: Connecting Cameras Through The Camera Network Port
The cameras are set to a discoverable IP address - 192.168.51.2 – 254 This is easily accomplished using Network Camera Manager: 1. Download NCM from OpenEye.net 2. Connect your PC to the switch with your cameras 3. Enable ONVIF detection for 3rd party cameras 4. -
Page 17: Setting Up The Recorder For The First Time
SETTING UP THE RECORDER FOR THE FIRST TIME 1. Connect the network cable intended for remote connection to the Client Network Port. Note The Camera Network Port is intended for use with a dedicated camera network. 2. Connect the supplied keyboard and mouse using the USB ports. 3. -
Page 18: Default Username & Password
DEFAULT USERNAME & PASSWORD WINDOWS USERS: NVRAdmin NVRUser WINDOWS PASSWORD: The server serial number is used as the default password for both accounts. Note The serial number can be found on the product label located on the side of the server. Note It is strongly recommended the password is changed during initial setup. -
Page 19: Windows Security Updates
Windows Server Update Services (WSUS) are available on all OpenEye Apex recorders running Windows 10. An OpenEye WSUS utility is included on the desktop of every MK/MH-Series recorder that will allow a user to enable the auto-update service if desired. -
Page 20: Operating Your Recorder
OPERATING YOUR RECORDER TURNING ON THE RECORDER 8. Turn on the monitor connected to your recorder. 9. Use the power button on the front panel to turn the recorder On. 10. The recorder will run a series of self-tests. If asked to respond to any messages, follow the instructions carefully. -
Page 21: Reimaging Your Apex Server Recorder
7. Accept the warning message, and then click Continue. 8. Upon successful completion, click Finish, and wait for the recorder to reach the login screen before removing the USB. Note Call OpenEye Support at 888-542-1103, option #2, for more information regarding the re- imaging process. 35596AD... - Page 22 All rights reserved. No part of this publication may be reproduced by any means without written permission from OpenEye. The information in this publication is believed to be accurate in all respects. However, OpenEye cannot assume responsibility for any consequences resulting from the use thereof.
Need help?
Do you have a question about the MK Series and is the answer not in the manual?
Questions and answers