Table of Contents
Advertisement
Quick Links
THIS MANUAL WILL HELP YOU TO OBTAIN EFFICIENT, DEPENDABLE SERVICE FROM THE HEATER, AND ENABLE YOU
TO ORDER REPAIR PARTS CORRECTLY. KEEP IN A SAFE PLACE FOR FUTURE REFERENCE.
• Please read this entire manual before installation and use of
this appliance. Failure to follow these instructions could result
in property damage, bodily injury, or even death.
• Contact your local building or fire officials about obtaining
permits, restrictions and installation inspection requirements in
your area.
• SAVE THESE INSTRUCTIONS.
• If your heater is not properly installed, a house fire may result.
For everyone's safety, follow all Installation and Operating
Directions. Never use makeshift compromises during the
installation of this appliance. Contact your local building
or fire officials about restrictions and installation inspection
requirements in your area. These Pellet Stove Room Heaters
have been designed for use in the US and Canada and are
suitable for mobile homes.
ALL PICTURES SHOWN ARE FOR ILLUSTRATIVE PURPOSES ONLY.
ACTUAL PRODUCT MAY VARY DUE TO PRODUCT ENHANCEMENT.
This manual is subject to change without notice.
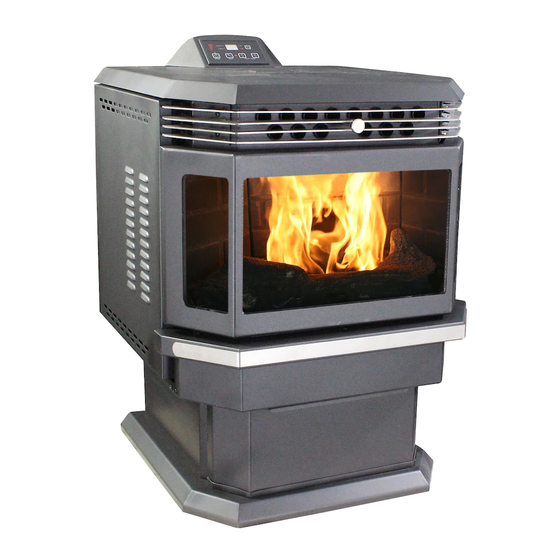
MODEL: AP5660PE
SAVE THESE INSTRUCTIONS
United States Stove Company
227 Industrial Park Rd.,
South Pittsburg, TN 37380
PH: (800) 750-2723
www.usstove.com
Report #: F19-548
Certified to ASTM E1509-12 ( 2017)
and Certified to ULC S627, 2000
This unit is not intended to be used as a
primary source of heat.
U.S. Environmental Protection Agency
Certified to comply with 2020
Ce produit peut vous exposer à des agents chimiques, y compris au monoxyde de
carbone, lesquels sont reconnus dans l'État de la Californie comme causant le cancer et
particulate emissions standards.
des malformations congénitales ou autres dommages au fœtus. Pour obtenir plus de
renseignements, veuillez consulter le site www.P65warnings.ca.gov
CALIFORNIA PROPOSITION 65 WARNING:
This product can expose you to chemicals including carbon monoxide, which
is known to the State of California to cause cancer, birth defects and/or other
reproductive harm. For more information, go to www.P65warnings.ca.gov
R
852070M-0503j
Advertisement
Table of Contents

Related Manuals for United States Stove Company Ashley AP5660PE


Summary of Contents for United States Stove Company Ashley AP5660PE
- Page 1 State of California to cause cancer, birth defects and/or other This manual is subject to change without notice. reproductive harm. For more information, go to www.P65warnings.ca.gov United States Stove Company 227 Industrial Park Rd., South Pittsburg, TN 37380 PH: (800) 750-2723 www.usstove.com...
-
Page 2: Safety Precautions
Safety Precautions • IMPORTANT: Read this entire manual before • Allow the stove to cool before performing any installing and operating this product. Failure to do maintenance or cleaning. Ashes must be disposed so may result in property damage, bodily injury, in a metal container with a tight fitting lid. -
Page 3: Specifications
Specifications Heating Specifications Fuel Burn Rate* (lowest setting) 1.5 lbs./hr. Hopper Capacity 60 lbs. * Pellet size may effect the actual rate of fuel feed and burn times. Fuel feed rates may vary by as much as 20%. Use PFI listed fuel for best results. Dimensions Height 37”... -
Page 4: Installation Options
Installation Attention: DO NOT vent under any porch, deck, awning, or in any semi enclosed or roofed area. Doing so may result in unpredictable airflow at the vent cap under certain conditions and can affect the performance of your stove, as well as, other unforeseeable issues. INSTALLATION OPTIONS Read this entire manual before you install and use your pellet stove. -
Page 5: Venting Requirements
VENTING REQUIREMENTS • Install vent at clearances specified by the vent manufacturer. • Do not connect the pellet vent to a vent serving any other appliance or stove. • Do not install a flue damper in the exhaust venting system of this unit. The following installation guidelines must be followed to ensure conformity with both the safety listing of this stove and to local building codes. -
Page 6: Vent Termination Clearances
VENT TERMINATION CLEARANCES A. Minimum 4-foot (1.22m) clearance below or beside any door or window that opens. B. Minimum 1-foot (0.3m) clearance above any door or window that opens. C. Minimum 3-foot (0.91m) clearance from any adjacent building. D. Minimum 7-foot (2.13m) clearance from any grade when adjacent to public walkways. - Page 7 You have already made the important decision of choosing your U.S. Stove Pellet Burning Room Heater; now your next step is to determine where to install your new pellet stove heater. To get the most efficient use of re- circulated heat, you should consider a room that is centrally located within your home. Choose a room that is large and open.
-
Page 8: Through The Wall Installation
THROUGH THE WALL INSTALLATION (RECOMMENDED INSTALLATION) Canadian installations must conform to CAN/CSA-B365. To vent the unit through the wall, connect the pipe adapter to the exhaust motor adapter. If the exhaust adapter is at least 18 in.(457mm) above ground level, a straight section of pellet vent pipe can be used through the wall. -
Page 9: Mobile Home Installation
69FAK OUTSIDE AIR SUPPLY (OPTIONAL, UNLESS INSTALLING IN A MOBILE HOME) Depending on your location and home construction, outside air may be necessary for optimal performance. 1. With the stove in the operating position, mark and drill a hole to accommodate the 2” flexible hose. 2. -
Page 10: Appliance Controls
Appliance Controls PANEL/REMOTE CONTROLS The blowers and automatic fuel supply are controlled from a panel on the top of the stove. The control panel functions are a follows. ON/OFF SWITCH (“POWER” BUTTON) • When pushed, the stove will automatically ignite. No other fire starter is necessary. The igniter will stay on for at least 10 and up to 12 minutes, depending on when Proof of Fire is reached. -
Page 11: Operation
Operation • DO NOT USE CHEMICALS OR FLUIDS TO START THE FIRE - Never use gasoline, gasoline-type lantern fuel, kerosene, charcoal lighter fluid, or similar liquids to start or “freshen up” a fire in this stove. Keep all such liquids well away from the stove while it is in use. -
Page 12: Damper Control
THE FIRESTARTER 1. Fill hopper and clean burn pot. 2. Press “On/Off” button. Make sure green light comes on. 3. The damper should be completely closed or open no more than ¼ of the way during start-up. This will vary depending on your installation and elevation. -
Page 13: Maintenance
NOTE: On some units, once tripped, like a circuit breaker, the reset button will have to be pushed before restarting your stove. On other units the thermodisc has no reset button and will reset itself once the stove has cooled. The manufacturer recommends that you call your dealer if this occurs as this may indicate a more serious problem. -
Page 14: Left Side
WARNING: FAILURE TO PROPERLY MAINTENANCE THE CLEAN OUTS WILL RESULT IN POOR PERFORMANCE OF THIS STOVE. WARNING: Do not attempt to operate the heat exchange tube cleaner while the pellet stove is in operation or cooling down; wait until pellet stove has cooled completely before performing this procedure. INTERIOR CHAMBERS •... - Page 15 LOCATING THE FRONT CLEANOUTS (CLEAN ANNUALLY) 1. Remove the front glass by releasing the two latches attaching it to the unit. They are located behind the right side panel. 2. Remove the two side brick panels. 3. Remove the two interior side panels. FRONT CLEANOUTS -15-...
- Page 16 FANS DANGER: RISK OF ELECTRIC SHOCK. DISCONNECT POWER BEFORE SERVICING UNIT Over time ash or dust may accumulate on the blades of the circulation & exhaust Auger Motor fans. The fans should be inspected, periodically, and if any accumulation is present Exhaust vacuumed clean as the ash or dust can impede the fans performance.
-
Page 17: Spring Shutdown
FALL START UP Prior to starting the first fire of the heating season, check the outside area around the exhaust and air intake systems for obstructions. Clean and remove any fly ash from the exhaust venting system. Clean any screens on the exhaust system and on the outside air intake pipe. - Page 18 Decorative Log Placement Your decorative logs should come in place, however if this is not the case the following steps depicts the correct location. STEP 1 STEP 2 Locate the Burn Pot. Place log into correct position. Burn Pot Above are the decorative logs in there correct location. -18-...
-
Page 19: Troubleshooting Guide
Trouble Shooting Guide When your stove acts out of the ordinary, the first reaction is to call for help. This guide may save time and money by enabling you to solve simple problems yourself. Problems encountered are often the result of only five factors: 1) poor fuel;... - Page 20 Display is Flashing “E3” Possible Causes Possible Remedies: (Unplug stove first when possible) The hopper is out of pellets Refill the hopper. If on the low setting, you may need to close the dampener The air dampener is too far open for a low feed setting all the way.
- Page 21 The hopper is out of Pellets. Refill the hopper. When operating the unit, be sure the hopper lid is closed so that the hopper safety switch will activate. Check the wires The hopper safety switch has failed or hopper is open. leading from the hopper safety switch to the control panel and auger motor for secure connections.
- Page 22 Smoke Smell Coming Back Into The Home Possible Causes Possible Remedies: (Unplug stove first when possible) Inspect all vent pipe connections. Make sure they are sealed with RTV silicone that has a temperature rating on 500 degree There is a leak in the vent pipe system. F or higher.
- Page 23 High limit switch keeps tripping Possible Causes Possible Remedies: (Unplug stove first when possible) The convection blower is overheating and tripping the Clean any dust off of the windings and fan blades. If oiling the internal temperature shutoff. blower does not help, the blower may be bad. If operating the heater on the highest heat setting, the room The stove is being left on the highest setting for extended temperature could increase enough and lead to potential...
- Page 24 Parts List -24-...
- Page 25 Parts List Part # Description 891995 Magnet 891997 Latch, Ash Pan 891996 Ash Pan 88162 Glass w/Gasket, Side 88161 Glass w/Gasket, Center 891994 Burn Pot 88165 Brick Panel - Right 88163 Brick Panel - Center 88164 Brick Panel - Left 892037 Hearth Trim 69794 Exhaust Grill...
-
Page 26: Wiring Diagram
Wiring Diagram -26-... - Page 27 Notes...
-
Page 28: Service Record
Service Record It is recommended that your heating system is serviced regularly and that the appropriate Service Interval Record is completed. SERVICE PROVIDER Before completing the appropriate Service Record below, please ensure you have carried out the service as described in the manufacturer’s instructions. Always use the manufacturer's specified spare part when replacement is necessary. -
Page 29: How To Order Repair Parts
1. Le numéro de pièce __________________________________________________________________________ 2. La description de la pièce _____________________________________________________________________ 3. Le numéro de modèle ________________________________________________________________________ 4. Le numéro de série ___________________________________________________________________________ United States Stove Company 227 Industrial Park Rd., South Pittsburg, TN 37380 PH: (800) 750-2723...
Need help?
Do you have a question about the Ashley AP5660PE and is the answer not in the manual?
Questions and answers