Table of Contents
Advertisement
Quick Links
Advertisement
Table of Contents

Related Manuals for FIBER FOX Mini 12R+


Summary of Contents for FIBER FOX Mini 12R+
- Page 1 Rev.0.01 This User Manual explains the use, performance characteristics, and cautions about MINI12R+ fusion splicer and how to install and operate it. The primary goal of this manual is to make the user as familiar with the splicer as possible.
- Page 3 Preface Important! We recommend all users to read this manual before operating MINI12R+ fusion splicer. Thank you for choosing MINI12R+ Arc Fusion Splicer. This product delivers ultra fast splicing time and has an incredibly short shrinking time. It uses the profile alignment technique and extremely accurate alignment process to ensure precise splice loss estimation.
-
Page 4: Table Of Contents
Contents Chapter1 Technical Parameters 1.1 Applicable Fiber Type 1.2 Splice Loss 1.3 Splice Mode 1.4 Heat Oven 1.5 Power Supply 1.6 Size and Weight 1.7 Environmental Conditions 1.8 Others Chapter 2 Installation 2.1 Safety Warning and Precautions 2.2 Operational Safety Warnings 2.3 Maintenance and External Care Precautions 2.4 Transport and Storage Precautions 2.5 Installation... - Page 5 Contents 3.6 Preparing the Fiber 3.7 How to Make a Splice 3.8 Inspecting the Fibers 3.9 Splicing 3.10 How to Protect the Splice Chapter 4 Splice Mode 4.1 Displaying the Active Splice Program 4.2 Selecting a Splice Program 4.3 General Splicing Steps 4.4 Parameters for Normal Splicing Process Chapter 5 Splice Option Chapter6 Heater Mode...
- Page 6 Contents Chapter 8 Other Functions & Utilities 8.1 Display Splice Record 8.2 Delete Splice Record 8.3 Cancel Data Storage 8.4 System Setting 8.5 Monitor Position 8.6 Power Save Option 8.7 System Information Appendix A Appendix B Appendix C Battery precautions...
-
Page 7: Chapter1 Technical Parameters
Chapter 1 Technical Parameters 1.1 Applicable Fiber Type SM(ITU-TG.652)/MM(ITU-TG.651)/DS(ITU-TG.653)/NZDS(ITU-TG.655) /ITU- TG.657A/ITU-TG.657B Fiber count: 1 to 12 fibers 1.2 Splice Loss Same fiber is spliced, measured by insertion method relevant to ITU-T standard. The typical values of splice loss are: SM:0.05dB MM:0.02dB DS:0.08dB NZDS:0.08dB... -
Page 8: Environmental Conditions
1.7 Environmental Conditions Operating conditions: altitude: 0 to 5000m, relative humidity: 0 to 95%, temperature: -10 to 50 ℃ , the maximum wind velocity: 15m / s; Storage conditions: relative humidity: 0 to 95%, temperature: -20 to 60 ℃ , battery: -20 to 45 ℃... -
Page 9: Chapter 2 Installation
Fiber Fox assumes no responsibility for those consequences caused by misuse. 2.2 Operational Safety Warnings ① Never operate the splicer in an environment where flammable liquids or vapors exist. -
Page 10: Maintenance And External Care Precautions
Fumes, bad smell, abnormal noise or over heat. Liquid or other matter falls into cabinet The splicer is damaged or dropped. If any of these faults occurs, please contact our service center immediately. Leaving the splicer in a damaged state without any prompt measures may cause equipment failure, electric shock, or fire and may result in injury or death. -
Page 11: Installation
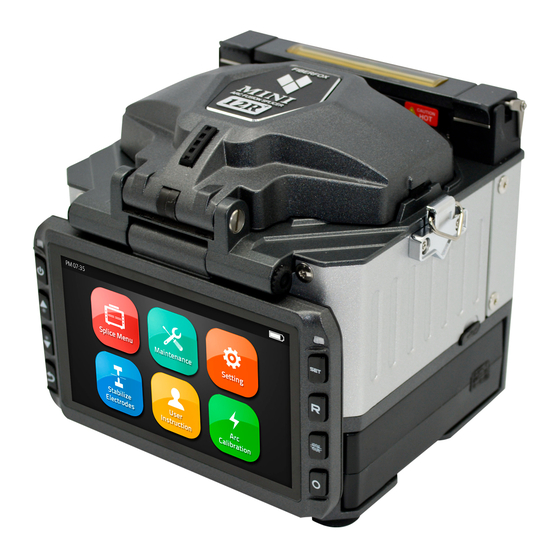
2.5 Installation Important! Follow these instructions carefully. Unpacking the Splicer Hold the handle upwards, and then lift the splicer out of the carrying case. As shown below. 2.6 Splice Overview Heat oven Indicator Handle off button Battery Display... -
Page 12: Power Supply Method
HDMI port Port of battery charge 2.7 Power Supply Method Following is the way of installing a battery. Insert the battery Insert the battery into the power unit dock until it clicks into place. Take out the battery Shut off fusion splicer. Press on release button at lateral, drawing power supply unit out of the... -
Page 13: Charging Methods
2.9 Charging Methods When battery is connected with fusion splicer, charging method is as follows: When battery is separated from fusion splicer, charging method is as follows: Note: Try your best not to charge battery when the battery is working for the running fusion splicer which is splicing or heating fibers for fear of shortening the battery’s life. -
Page 14: Heat Oven
2.12 Heat Oven Heat oven lid open cooling tray... -
Page 15: Chapter 3 Basic Operation
Chapter 3 Basic Operation 3.1 Power Connection Follows are 2 ways of power supply for the fusion splicer, of which the inner slot for power supply unit is able to support: 1. AC adapter, if external power source supply adopted; 2. -
Page 16: Turn On The Splicer
3.3 Turn On the Splicer Press [Power] key on the operation panel, and wait the splicer to be turned on and move to Workbench page. 3.4 Adjust Monitor Position Users can adjust the monitor position by moving it with a desired angle for the clearest display. -
Page 17: Preparing The Fiber
3.6 Preparing the Fiber 4 steps should be carried out before splicing: 1.Clean the fiber Clean optical fiber with alcohol-moistened gauze or lint-free tissue approximately 100mm from the tip. Dust particulates from the fiber coating surface can enter inside the protection sleeve and might result in a future fiber break or attenuation increase. 2.Placing protection sleeve over fiber Place the protection sleeve over the fiber. -
Page 18: How To Make A Splice
4.Cleaving fiber ① To unlock the cutting lever, press it gently and slide the stopper ② Push the slide button until it locks ③ Place the stripped optical fiber on the cleaver ④ Press down the cutting lever. ⑤ Release the pressure on the cutting lever. A spring force will bring it to its open position. -
Page 19: Inspecting The Fibers
Note: Make sure to avoid sliding the fibers along V-grooves, but rather position them over V-grooves and tilt them down into place (as shown in the picture). ③ Clamp the fiber in position by lowering both sets of fiber clamps. ④... -
Page 20: Splicing
Note:The fibers are checked automatically when you press dust on fiber Splice button. The splicer automatically focuses the fibers and checks for damage or dust particles. chip large cleave angle 3.9 Splicing To make a good splice, the optical fiber is observed with the image processing system equipped in the MINI12R+. -
Page 21: How To Protect The Splice
Note: If the splicer is set as “Auto mode”, splicing will start automatically once the safety shield is closed. 3.10 How to Protect the Splice After splicing, protect the joint by using a heat-shrink sleeve and the heat oven which is mounted onto the splicer. “Shrink” process can be activated via pressing the “HEAT”... -
Page 22: Chapter 4 Splice Mode
Chapter 4 Splice Mode MINI12R+ has an intuitive and simple but very powerful program structure to operate. Splice programs define arc currents, splice times as well as various parameters used when performing a splice. Therefore, it is essential to select the correct splice program. -
Page 23: General Splicing Steps
② Select Splice Mode ③ Highlight the program you want to select. ④ Back to initial interface 4.3 General Splicing Steps This section explains the steps involved in automatic splicing process and describes how various program parameters are related to this process. The normal splicing process can be divided into two sections: pre-fusion and fusion. - Page 24 Fusion During fusion, the fibers are joined together and subjected to five different currents as illustrated below. An important parameter, which changes during splicing, is the distance between the fibers. During Pre-fusion, the fibers are apart. With the current phase changing, fibers are spliced gradually. Splicing Process The most important splicing parameters are the time and current, each current phase is shown below, that the name and function and other parameters are...
-
Page 25: Parameters For Normal Splicing Process
4.4 Parameters for Normal Splicing Process parameter description A list of splice modes stored in the splicer database is displayed. Upon inputting the appropriate mode, the selected splice mode Template stored in database area is copied to a selected splice mode in user- programmable area. - Page 26 Set the pre-fuse arc power from the beginning of arc discharging to the beginning of fibers propelling. If “Preheat Arc Value” is set Preheat Arc too low, axial offset may occur if cleaved angles are relatively poor. value If “Preheat Arc Value” is set too high, fiber end faces are fused excessively and splice loss gets worse.
-
Page 27: Chapter 5 Splice Option
Chapter 5 Splice Option As to the Splice Mode setting. ① Select [Splice option] in menu from main menu. ② Select a parameter to be changed. parameter description If “Auto start” is set to ON, splicing starts automatically as soon as Auto start the wind protector is closed. -
Page 28: Chapter6 Heater Mode
Chapter 6 Heater Mode The splicer provides max 32 heat modes including 5 heat modes preset by factory and the rest that can be defined by users. Select a heating mode that best matches with the protection sleeve used. For each type of protection sleeve, MINI12R+ has its optimum heating mode. These modes can be found in the database area for reference. -
Page 29: Edit Heat Mode
③ Touch on Select Heat mode ④ Back to original interface 6.3 Edit Heat Mode Tube-heating conditions stored in heating mode can be edited or changed. ① Enter edit heat mode menu via touching on heater mode menu. 6.4 Deleting Heat Mode ①... -
Page 30: Heat Mode Parameters
6.5 Heat Mode Parameters parameter description Set the templates of heat modes. Lists of all heat modes are Template displayed. Selected mode will be copied to a user-programmable area. Name Use some characters to show a kind of heating mode. The note of the heating mode will be displayed on the upper right of note the monitor. -
Page 31: Chapter 7 Maintenance Menu
Chapter 7 Maintenance Menu The splicer has a function to perform routine maintenance. This section describes how to use the maintenance menu. ① Press Menu button, and select [Maintenance menu]. ② Select a function to perform. 7.1 Replace Electrodes As electrodes are worn out during the splicing process, oxide generated on the tips of electrodes should be regularly eliminated. -
Page 32: Stabilize Electrodes
⑤ We recommend all users to do stabilizing electrodes and arc calibration after electrodes replacing to keep good splice results and splice strength (Details are described below). 7.2 Stabilize Electrodes In the event of sudden change in environmental conditions, especially when the splicer is moved from lower altitudes to higher altitudes, the arc power may become unstable, resulting in higher splice loss. -
Page 33: Dust Check
② Execute [Diagnostic test], then the following checks will be made. Parameter Description LED calibration Measure and adjust the brightness of the LED. Motor Calibration Automatically calibrate the speed of 3 motors. Automatically calibrate the arc power factor and fiber Arc Calibration splicing position. -
Page 34: Arc Calibration
7.6 Arc Calibration Atmospheric conditions such as temperature, humidity and pressure are constantly changing, which creates variability in the arc temperature. MINI12R+ is equipped with temperature and pressure sensors that are used in a constant feedback monitoring control system to maintain the arc power at a stable level. However, changes in arc power due to electrode wear and glass adhesion cannot be calibrated automatically. -
Page 35: Quick Optimize
Electrode Replace Electrodes” is displayed when turning on the splicer. warning Fiber Fox recommends that this parameter should be set to “3500” . 7.8 Quick Optimize 1.Select “update software” in “system setting”. 2.Connect the USB driver with the copy of upgrade files to the Mini HDMI port. -
Page 36: Chapter 8 Other Functions & Utilities
Chapter 8 Other Functions & Utilities 8.1 Display Splice Record Splicing results stored in the splicer can be displayed. Select Data Storage Menu and Select Display Splice Record to view. 8.2 Delete Splice Record Splicing results can be cleared by part or whole. ①... -
Page 37: Monitor Position
8.5 Monitor Position The direction of the splicer display before shipping from the factory is set to “Front”, but users can change it to “Rear”. When [Monitor position] is changed, the direction of the arrow keys is reversed. Changing monitor position ①... -
Page 38: System Information
8.7 System Information Select “System information”. The following information is displayed. parameter description Machine Serial Display the fusion splicer’s serial number. Number Software Display the fusion splicer’s software version. Version CPLD Display CPLD’s version. FPGA Display FPGA’s version. Total Arc Count Display total number of arc discharges. Display the date of last maintenance. - Page 39 Appendix A High Splice loss: Cause and solutions Symptom Name Cause Remedy There’s dust in Fiber core Clean the V-grooves and V-grooves and axial offset fiber hammer fiber hammer There’s dust in Clean the V-grooves and V-grooves and fiber hammer Fiber core fiber hammer angle error...
- Page 40 Fiber stuffing too Decrease [Overlap] and much Perform [Arc Calibration]. Arc power not Perform [Arc Calibration]. adequate Thin Some arc Adjust [Pre-fuse Power], parameters not [Pre-fuse Time] or adequate [Overlap]. Some arc Adjust [Pre-fuse Power], Splicing line parameters not [Pre-fuse Time] or adequate [Overlap] Note:...
- Page 41 Appendix B High Splice loss: Cause and solutions During the splice operating process, if the error messages are shown on the screen, please follow the solution precisely as shown in the list below. If it is not possible to solve the problem, the splicer may require service by a qualified service center. In this case, please contact sales agents.
- Page 42 Error Message Cause Solution Shock occurred to the Carry out “motor calibration”. If the Focus Motor Home splicer during the splicing problem still exists, please contact sales position Error process. agent. Too much [Overlap] setting Adjust [Overlap] parameter setting. Fiber End face Gap Wrong The motor is not calibrated Perform [Motor Calibration].
- Page 43 Error Message Cause Solution Too much [Overlap] setting Adjust “Overlap” parameter setting. Fat Splicing Point The motor is not calibrated. Perform “Motor Calibration”. Arc power is too low Perform “Arc Calibration”. The level of pre-discharge Decrease pre-discharge or pre-discharge is set too high time.
- Page 44 Appendix C Questions and Troubleshooting The following gives the solution of some of the common problems for reference. If you cannot solve the problems, please contact the manufacturer directly. 1 .Power does not turn off when press “ON/OFF” button. • Press and hold the key “ON/OFF” until the LED flashes, release the button, and the splicer will be turned off.
- Page 45 turned off 10. Fiber protection sleeve adhered to heating plate after shrinking • Use a cotton swab or a similar soft tip object to push and remove the sleeve. 11. Forgot passwords • Contact your nearest sales agency. 12. No arc power change after [Arc Calibration] •...
-
Page 46: Battery Precautions
Battery precautions 1.Do not touch or hit battery with pointed or sharp items. 2.Do not transport or store the battery together with metals. 3.Do not throw, drop, impact, or bend battery, or any knock or stomp on the battery is forbidden. 4.Do not connect the anode and cathode terminals of the battery with metals such as electric wire for fear of short circuit trouble. - Page 47 The End * Products models and specifications are subject to change without prior notice.
Need help?
Do you have a question about the Mini 12R+ and is the answer not in the manual?
Questions and answers