Table of Contents
Advertisement
Quick Links
Advertisement
Table of Contents

Subscribe to Our Youtube Channel
Related Manuals for SPEC DESIGNER AUDIO RPA-W3EX


Summary of Contents for SPEC DESIGNER AUDIO RPA-W3EX
- Page 1 REAL-SOUND POWER AMPLIFIER RPA-W3...
- Page 2 Safety Precautions Operating Environment Operating environment temperature and humidity: +5 °C to +35 °C (+41 °F to +95 °F); less than 85 %RH (cooling vents not blocked) Do not install this unit in a poorly ventilated area, or in locations exposed to high humidity or direct sunlight (or strong artificial CAUTION: TO REDUCE THE RISK OF ELECTRIC SHOCK, DO...
-
Page 3: Table Of Contents
Contents Chapter 1 Introduction Chapter 4 How to Operate Check included items ............3 Playback steps ..............12 Installing this product ............3 Chapter 5 Other Regarding installation ............3 Troubleshooting .............. 13 Chapter 2 Connections Care and maintenance ..........13 Connections diagram ............4 Specifications .............. -
Page 4: Chapter 2 Connections
Connections Chapter 2 Connections diagram Important • When connecting devices or making changes, be sure to turn the POWER switch OFF and disconnect the power cord from the electrical outlet. Plug in the power cord last. • If an extremely loud signal is input to this product, there is a danger that noise will be generated and cause damage. In such a case, lower the input signal level. - Page 5 Connections Chapter 2 2. When MONO 1 mode (mono connection) • When a playback device is connected directly, connecting a preamplifier (separately sold) to the EX-VOL CONT terminals allows you to adjust the volume of this product. ( page 11) • Connect speaker 1 when this mode is selected.
- Page 6 Connections Chapter 2 3. When MONO (bi-amplifier connection) • The output of both L (left side) and R (right side) are the same for mono input. • When a playback device is connected directly, connecting a preamplifier (separately sold) to the EX-VOL CONT terminals allows you to adjust the volume of this product.
- Page 7 Connections Chapter 2 4. When MONO BTL mode • For BTL mode, we recommend using speakers with a nominal impedance of 8 to 16 Ω. • When a playback device is connected directly, connecting a preamplifier (separately sold) to the EX-VOL CONT terminals allows you to adjust the volume of this product.
-
Page 8: How To Connect The Speaker Cords
Connections Chapter 2 How to connect the speaker cords How to connect XLR cables The connection terminals are red for positive (+) and black Connect the left and right XLR input terminals of this for negative (–). product to the respective left and right balanced output terminals of the product to be connected. -
Page 9: How To Connect Audio Cords
Connections Chapter 2 How to connect audio cords Caution • The power cord for this product is removable, but please Connect the white RCA plug (for left) to the left side input refrain from using power cords other than the cord included terminal with the white or black line, and the red RCA plug (3P plug-in socket type with electrical current capacity: 7 A). -
Page 10: Part Names
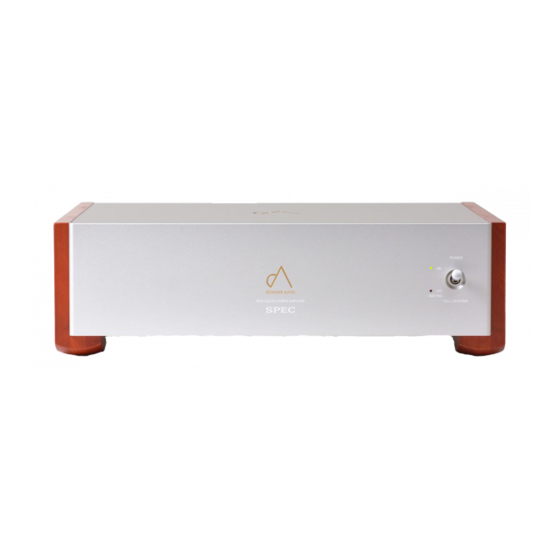
Part Names Chapter 3 Front panel POWER switch Turns power ON and OFF. Pulling the power switch releases the lock. To turn on the power, raise up the power switch while pulling out on it. To turn off the power, lower the power switch while pulling out on it. -
Page 11: Rear Panel
MONO 1, MONO(BI-AMP) : EX-VOL CONTROL terminal Set this to use this product as a mono Connect a SPEC preamplifier (separately sold). Use the amplifier. Input the INPUTS to the L channel. included mini plug connection cable for the connection. -
Page 12: How To Operate
How to Operate Chapter 4 Playback steps Turn on the power of the playback device. Check that the volume level of this product is turned down, and lift up the front panel POWER switch while pulling out on it to turn on the power. Check that the ON indicator on the body front panel is lit. -
Page 13: Chapter 5 Other
Other Chapter 5 Troubleshooting If you think this product may be broken, check the following troubleshooting items. Some minor operational errors can make the product appear to be broken. Potential causes other than this product should also be considered. Check the other devices being used as well as all simultaneously operated electrical devices. -
Page 14: Specifications
Other Chapter 5 Specifications „ Amplifier Maximum output ........100 W × 2 (4 Ω) Frequency response ........10 Hz - 30 kHz ±1 dB (6 Ω, 1 W) Harmonic distortion ratio ......0.02 % (at 1 kHz, 80% output) Input sensitivity, gain .........300 mVrms, 37.3 dB (at MAX volume, 6 Ω, 1 kHz, unbalanced input) Line input terminal ........Balanced input: 1 RCA unbalanced input: 1 Speaker terminal ........1 „... -
Page 15: Warranty And After Sales Service
2. If you cannot ask the store where you purchased it for repairs (e.g. if z Malfunctions you have moved or the product was a gift), please consult with SPEC If the product malfunctions in the course of normal CORPORATION. - Page 16 4th FL.NIHOMBASHI NAKAYA BUILDING,12-12 NIHOMBASHI- KOBUNA-CHO,CHUO-KU,TOKYO 103-0024,JAPAN 2019...
Need help?
Do you have a question about the DESIGNER AUDIO RPA-W3EX and is the answer not in the manual?
Questions and answers