
Related Manuals for MD SPORTS BL090Y19020


Summary of Contents for MD SPORTS BL090Y19020
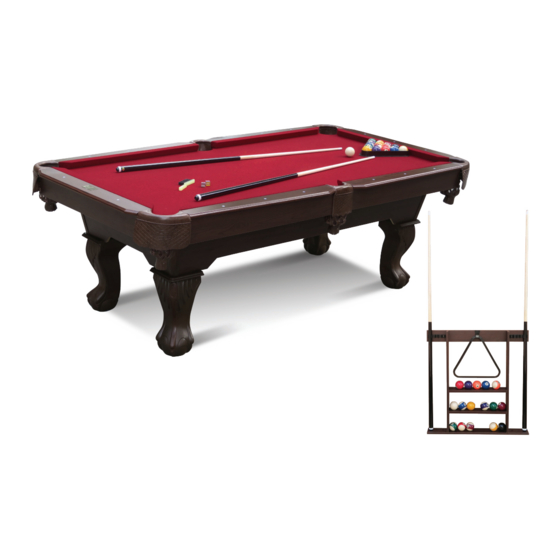
- Page 1 MODEL/MODELO Sears#: 006-25223 M#: BL090Y19020 Sears USA SUMMERDALE 90 INCH BILLIARD TABLE WITH CUE RACK MESA DE BILLAR DE 228.60 CM CON ESTANTE PARA TACO UPC#: 821735002257 877-472-4296 www.medalsports.com...
- Page 2 WE ARE READY ESTAMOS LISTOS TO HELP PARA AYUDAR DO NOT RETURN TO STORE NO DEVOLVERLO A LA TIENDA Please Contact Por favor Contacto MD SPORTS Customer Service Servicio al Cliente Toll Free Llamados gratuitos 877-472-4296 Mon.-Fri., Lunes a Viernes, 9:00 a.m.
- Page 3 English Español TOOLS REQUIRED HERRAMIENTAS NECESARIAS Phillips Screwdriver - Not Included Destornillador Phillips - No incluido Standard (Flat Head - Not Included Destornillador de Cabeza - No incluido Screwdriver) Plana Wrench - Included Llave Inglesa - Incluido Power Tools: Set to Low Torque / Herramientas eléctricas: RECOMMENDED Establecer bajo par de torsión...
- Page 4 English Español PARTS IDENTIFIER IDENTIFICADOR DE PIEZAS PART NUMBER FIG NUMBER FOR FIG. 14 NÚMERO DE PIEZA NÚMERO DE FIG PART PIEZA QUANTITY CANTIDAD NOMBRE DE PIEZA PART NAME Mainframe Unidad Principal FOR FIG. 7 FOR FIG. 7 FOR FIG. 2 FOR FIG.
- Page 5 English Español ACCESSORIES ACCESORIOS Taco Chalk Tiza Triangle Triángulo Brush Cepillo Billiard Ball Set Bola de billar HARDWARE HARDWARE FOR FIG. 2 FOR FIG. 2, 11 FOR FIG. 2 FOR FIG. 6, 9 Arandela de M8 Spring M8x41mm Bolt Perno M8x41mm Cerradura M8 Washer Arandela M8...
-
Page 6: Montaje
English Español PRE-INSTALLED PARTS PIEZAS PREINSTALADAS FOR FIG. 14 FOR FIG. 14 FOR FIG. 13 FOR FIG. 7 Corner Pocket Bolsillo de esquina Side Pocket Bolsillo lateral M5 T - Nut T - Tuerca M5 M8x10mm Nut Tuerca M8x10mm FOR FIG. 2, 11 FOR FIG. - Page 7 English Español ASSEMBLY MONTAJE FIG. 3 Note: For plastic legs - A, B (7 & 8), please follow the illustration and the picture accordingly, lock them together in the order of 1, 2, 3, 4, 5, 6, 7. / Nota: Para las piernas plásticas - A, B (7 y 8), siga la ilustración y la foto en consecuencia, encerrarlos en conjunto al orden de 1, 2, 3, 4, 5, 6, 7.
- Page 8 English Español ASSEMBLY MONTAJE FIG. 4 Note: For plastic legs - E, D (11 & 10), please follow the illustration and the picture accordingly, lock them together in the order of 1, 2, 3, 4. / Nota: Para las piernas plásticas - E, D (11 y 10), siga la ilustración y la foto en consecuencia, encerrarlos en conjunto al orden de 1, 2, 3, 4.
- Page 9 English Español ASSEMBLY MONTAJE FIG. 5 FIG. 4 Assembly / Ensamblaje FIG. 4 Note: For plastic legs - C (9), please follow the illustration and the picture accordingly, lock them together in the order of 1, 2, 3, 4. / Nota: Para las piernas plásticas - C (9), siga la ilustración y la foto en consecuencia, encerrarlos en conjunto al orden de 1, 2, 3, 4.
- Page 10 English Español ASSEMBLY MONTAJE FIG. 6 FIG. 2 Assembly / Ensamblaje FIG. 2 FIG. 3 Assembly / Ensamblaje FIG. 3 FIG. 5 Assembly / Ensamblaje FIG. 5 006-25223 (Continued on the next page) (Continúe en la siguiente página) www.medalsports.com...
- Page 11 English Español ASSEMBLY MONTAJE FIG. 7 Note: Apply the Glue (27) onto the grooves of the Side and End Top Boards (17 & 18). / Nota: Aplicar el Pegamento (27) en las ranuras de las Tablas Lateraly Tablero Superior Lateral (17 & 18). 17 &...
- Page 12 English Español ASSEMBLY MONTAJE FIG. 9 FIG. 10 Note: Make sure “FLAPS” on Top Leg Panels are FLUSH AGAINST APRONS before inserting Screws. / Nota: Asegúrese los protectores “FLAPS” sobre los Paneles de la Pata superior estén A RAS CONTRA LOS FALDONES antes de insertar los tornillos.
- Page 13 English Español ASSEMBLY MONTAJE FIG. 11 FIG. 6 Assembly / Ensamblaje FIG. 6 Pre-installed Note: After this step, tighten the Bolts (A11) (See FIG. 2). / Nota: Después de este paso, apretes los Cerrojos (A11) (Vea la Fig. 2). 006-25223 (Continued on the next page) (Continúe en la siguiente página) www.medalsports.com...
- Page 14 English Español ASSEMBLY MONTAJE FIG. 12 Note: Avoid sideways pressure Legs when turning over. Nota: Evite presión lateral sobre las Piernas cuando dando vueltas. Note: Go back and make sure that all connections are tight. / Nota: Vuelva y asegúrese que todas las conexiones están apretadas. HOLD BY THE TABLETOP CABINET DO NOT HOLD THE TABLE...
- Page 15 English Español ASSEMBLY MONTAJE FIG. 13 Note: P3 on the back. / Nota: P3 está en la espalda. Pre-installed Note: Please note that Adjustable Bracket (28) and Support Boards (16) must be parallel with each other. / Nota: Favor notar que los Corchete Regulable (28) y las Placas de Soporte (16) deben venire enparalelo.
- Page 16 English Español ASSEMBLY MONTAJE FIG. 14 Pre-installed Pre-installed NOTE: DO NOT lift the table by the pockets. If you move the table, do not lift it by placing your hands beneath the pockets and do not lean or put pressure on them. Do not lean or sit on the end or side rails as this may damage the table.
- Page 17 English Español HOW TO LEVEL YOUR TABLE CÓMO NIVELAR SU MESA FIG. 15A Level (Not Included) / Nivel (No incluido) Note: Turn clockwise to raise and counterclockwise to lower. Raise Lower / Subir / Bajar / Nota: Dar vuelta en el sentido del reloj para subir y en el sentido contrario del reloj para bajar.
- Page 18 English Español ASSEMBLE THE CUE RACK RACK PARA ACCESORIOS FIG. 16 FIG. 17 006-25223 (Continued on the next page) (Continúe en la siguiente página) www.medalsports.com...
- Page 19 English Español ASSEMBLE THE CUE RACK RACK PARA ACCESORIOS FIG. 18 FIG. 19 006-25223 (The last page) (La ultima página) www.medalsports.com...
- Page 20 www.medalsports.com...
Need help?
Do you have a question about the BL090Y19020 and is the answer not in the manual?
Questions and answers