Table of Contents
Advertisement
Quick Links
YARDMAX�
Walk-Behind Lawn Mower
Operator's Manual
MODEL NUMBER
YG0542
SERIAL NUMBER
PURCHASE DATE
Both model number and serial
number may be found on the
label.(SeePqe2,Fi,ure 1)
main
You should record both of them
in a safe place for future use.
READ AND UNDERSTAND THE ENTIRE MANUAL BEFORE OPERATING MACHINE. FAILURE
TO COMPLY WITH THE SAFET Y INSTRUCTIONS IN THE MANUAL MAY RESULT IN PERSONAL
A
WARNING
INJURY.
Save This Manual for Future Reference
Tame the Great Outdoors·
Advertisement
Table of Contents

Related Manuals for YARDMAX YG0542


Summary of Contents for YARDMAX YG0542
- Page 1 Save This Manual for Future Reference YARDMAX� Walk-Behind Lawn Mower Operator's Manual MODEL NUMBER YG0542 SERIAL NUMBER PURCHASE DATE Both model number and serial number may be found on the label.(SeePqe2,Fi,ure 1) main You should record both of them in a safe place for future use.
-
Page 2: Table Of Contents
J A robust warranty supports all products mower! J Budget-friendly prices make it practical Discover the YARD MAX Advantage At YARDMAX, we understand that land ownership definitely has its privileges, but it also comes with a great deal of responsibility. When duty calls and you YARDMAX�... - Page 3 DISCLAIMER information, go www.P65Warnings.ca.gov. YARDMAX reserves the right to discontinue, change, and improve its products at any time without notice ENVIRONMENTAL or obligation to the purchaser. The descriptions and Recycle unwanted materials instead of specifications contained in this manual were in effect at disposing of them as waste.
- Page 4 SUPPORT Have questions about your YARD MAX equipment? Call us at 847-327-0566 or 844-YARDMAX, email us at support@yardmax.com, or contact us via your favorite social media site. Introduction...
-
Page 5: Specifications
Walk-Behind Lawn Mower » Operator's Manual SPECIF I CATI ON Model# YG0542 Mower Type Manual Push Cutting Options Mulch, Side Discharge Cutting Width 20" Max. Cutting Height 3.75" Min. Cutting Height 1.25" Cutting Height Options 7 positions Deck Material 16Gauge... -
Page 6: Symbols
SYMBOLS The rating plate on your machine may show symbols. These represent important information about the product or instructions on its use. • DANGER Gasoline and its vapors are extremely flammable and explosive. Never fuel WARNING the machine indoors or while the �... -
Page 7: Safety
Walk-Behind Lawn Mower » Operator's Manual SAFETY The definitions below give the level of severity for each signal word. This symbol points out safety T h i s s ym b o l p o i n t s o u t WARNING DANGER instructions. - Page 8 Do not operate the machine while under the influence of drugs, the muffler is missing or defective. A defective muffler increases alcohol, or any medication that could affect your ability to use it the noise level and the risk of fire. Examine the muffler regularly properly.
- Page 9 Walk-Behind Lawn Mower » Operator's Manual Store fuel in a cool, well-ventilated area, safely away from sparks, • the product is incorrectly repaired. open flames, or other sources of ignition. • the product is repaired with parts that are not from the manufacturer or not approved by the manufacturer.
- Page 10 If the equipment should start to vibrate abnormally, stop Be careful when you go near hidden corners and objects that can the engine and check immediately for the cause. Vibration is prevent your view. generally a warning of trouble. Maintain a high level of caution when you reverse or pull the This manual cannot include all situations that can occur when product in your direction.
-
Page 11: Contents Supplied
Walk-Behind Lawn Mower • Operator's Manual CONTENTS SUPPLIED Your YARD MAX lawn mower comes partially assembled and contains thefollowlng: r -- ---------- , < -�71 P" 1. Intermediate Connecting Handlebar (1 pair) 10. Tools for Spark Plug Assembly 2. Upper Handle 11. -
Page 12: Assembly
ASSEMBLY This lawn mower was partially assembled at the factory. To assemble your machine follow the below instructions. LOWER HANDLE WHEELS Align the holes in the lower handlebar with the holes in the mowing Assemble the four wheels by securing with four MlO nuts and housing. - Page 13 Walk-Behind Lawn Mower » Operator's Manual INTERMEDIATE CONNECTING HANDLEBARS UPPER HANDLE Align the holes in the connecting handlebars and lower handle. Insert Align the holes in the upper handle and the holes in connecting the carriage bolts and secure with star shaped head clamping nuts handlebars to set a comfortable height position for the handle, then knobs.
- Page 14 CABLE POSITIONING 1. Hold the engine start/stop control lever against the upper handle. 2. Slowly pull starter rope handle from engine and slip starter rope into the rope guide. 3. Tighten rope guide knob. 4. Use cable tie to secure engine stop cable. Figure 7 SHIELD-TRAILING Attach the shield-trailing to the machine.
-
Page 15: Know Your Machine
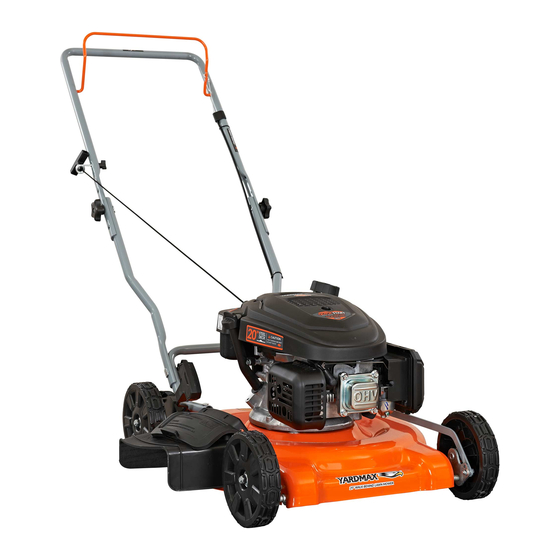
Walk-Behind Lawn Mower » Operator's Manual KNOW YOUR MACHINE FEATURES AND CONTROLS 4@§ffiiiffiNiMiMfitffi • �y \� ��- lifttiHM Cutting Height Adju5trnent Lever Side Discharge Chute l@Mi-M ----------- � ldt,1ffiffi ------------ � Know Your Machine I 14... - Page 16 Engine Start/Stop Control Side Discharge Chute The engine start/stop control is attached to the upper Your mower is shipped as a mulcher. To discharge handle of the mower. Depress and squeeze it against the grass clippings to the side instead, follow the the upper handle to operate the unit.
-
Page 17: Operation
Walk-Behind Lawn Mower » Operator's Manual OPERATION ADDING GASOLINE TO ENGINE This unit is shipped without � NOTE gasoline or oil in the engine. Gasoline is highly flammable Be certain to service engine with gasoline and oil as WARNING and explosive. You can be instructed in the Engine Operator's Manual before burned or seriously injured when handling fuel. - Page 18 STARTING THE ENGINE CUTTING HEIGHT ADJUSTMENT Be sure no one other than The cutting height can be adjusted to 7 different positions. Raise WARNING the operator is standing near wheels for low cut and lower wheels for high cut. Adjust cutting height to suit your requirements.
- Page 19 Walk-Behind Lawn Mower » Operator's Manual BLADE CONTROL STOPPING THE MACHINE Release the engine start/stop control lever to stop the engine and 1. Standing behind the mower, squeeze the engine start/stop blade. (See Figure 11) control lever against upper handle. 2.
-
Page 20: Maintenance
MAINTENANCE MAINTENANCE SCHEDULE Always stop engine, allow WARNING In the maintenance schedule you can see which parts of your engine to cool, disconnec t machine require maintenance, and at which intervals it should take spark plug, and ground against engine before place. - Page 21 Walk-Behind Lawn Mower » Operator's Manual CHANGING THE ENGINE OIL 2. T he transmission is pre-lubricated and sealed at the factory and does not require lubrication. See Maintenance schedule on page 19 for more information about 3. Follow the Engine Operator's Manual for lubrication schedule when to change the oil.
- Page 22 4. Tip the machine onto its side (so that the air filter is up) to drain BLADE CARE the used oil from the oil-fill tube. (See Figure Always stop the engine before WARNING you do work on the blade. The blade continues to rotate after the throttle has been released.
- Page 23 Walk-Behind Lawn Mower Operator's Manual » will need a torque wrench � NOTE CAUTION Use only a replacement to install the blade properly. b l a d e a p p r o v e d b y t h e manufacturer of your mower.
-
Page 24: Transport & Storage
TRANSPORTANDSTORAGE The following steps should be taken to prepare your lawn mower for storage. Keep all equipment safe during transportation to prevent damage and accidents. For storage, keep equipment in a lockable area away from children and persons that are not approved. Do not store next to corrosive materials, such as fertilizer. -
Page 25: Troubleshooting
Walk-Behind Lawn Mower » Operator's Manual TROUBLESHOOTING Problem Cause Remedy 1. Blade control disengaged. 1. Engage blade control. 2. Spark plug boot disconnected. 2. Connect wire to spark plug boot. 3. Fuel tank empty or stale fuel. 3. Fill tank with clean, fresh gasoline. Engine fails to start 4. -
Page 26: Parts Diagram
PARTS DIAGRAM � I;:: � " · u � �. · · · · 1� � 25 I Parts Diagram... - Page 27 Walk-Behind Lawn Mower » Operator's Manual PARTS LIST Description Description Engine NutM5 Intermediate Connnecting Handlebar Nut M10 Washer 14 Star Shaped Head Clamping Nuts Knob Wheel Upper Handle Front Wheel Axle Rope Guide Rear Wheel Axle Guide Knob Screw ST3.5*13 Height Adjustment Handlebar Engine Start/Stop Control Cable Knob-Right...
- Page 28 Tame the Great Outdoors· YARDMAX::lat :z-; 847-327-0566 or 844-YARDMAX info@yardmax.com...
Need help?
Do you have a question about the YG0542 and is the answer not in the manual?
Questions and answers