Advertisement
Quick Links
Advertisement

Subscribe to Our Youtube Channel
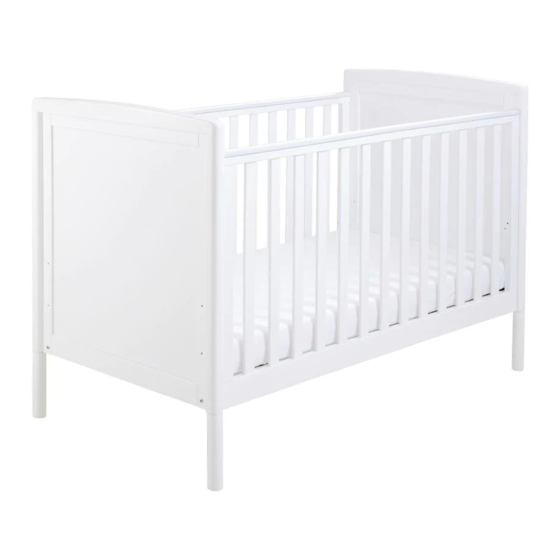
Summary of Contents for Babymore MILO COT / BED
- Page 1 INSTRUCTIONS MILO COT / BED MILO: V1/18 Babymore Ltd. 2018 <30m 1 | P a g e...
-
Page 2: Instructions For Safe Use
• WARNING: Do not use the cot/bed if any part is broken, torn or missing and use only spare parts approved by Babymore. • WARNING: Do not leave anything in the cot or place the cot close to another product which could provide a foothold or present a danger of suffocation or strangulation, e.g. - Page 3 Thank you for purchasing Babymore If you need assistance, spare parts or you are unhappy with the goods Call : 020 3475 5588 Or email us at customerservices@babymore.co.uk Improper assembly can result in damage to your furniture or cause harm. Proper assembly is critical to safe end result.
-
Page 4: Item Description
COMPONENTS Item Description Cot End Panel Foot Fixed Side Base Slat Base Support Bar Drop Side 4 | P a g e... - Page 5 ASSEMBLING THE COT Step 1 Step 2 Top Position Middle Position Bottom Position Bolts 55mm x 8 B x8 B / Barrel Nut x 8 Do not fully tighten until step 8 A x8 5 |P a g e...
- Page 6 ASSEMBLING THE COT Step 3 C x8 C / Blots 25mm x 8 Step 4 A x4 A / Bolts 55mm x 4 Do not fully tighten until step 8 6 |P a g e...
- Page 7 ASSEMBLING THE COT The Second Hole Step 5 D / Lower Pin x2 E x2 E / Upper Pin x2 D x2 Step 6 IMORTANT: Ensure correct way (Outside/Inside) of Dropside Panel. "PUSH" label face outside Align and insert top gilde pin into top recess of dropside panel, if required,...
- Page 8 ASSEMBLING THE COT Step 7 Rotate the bottom of dropside panels, align lower recess ot the lower pins of cot end, Push down the top of retractable pin, insert it to lower recess. IMPORTANT: Ensure both pins insert into the long groove of recess.
- Page 9 ASSEMBLING THE COT Step 9 USE THE DROP SIDE Lift the drop side to Step 1 top, hold, while use your leg push lower centre of panel inward, then allow the panel to slide down / up until it clicks into loscking position.
- Page 10 CONVERT TO DAY / BED Step 2 Remove cot feet and Upper pins E x2 D x2 Step 3 Change the base to middle position. BED READY FOR USE Middle Position 10 |P a g e...
-
Page 11: Care And Maintenance
This in no way affects your statutory rights. Each Babymore item is a unique piece, made of high quality wood and material. Due to the hand crafted nature of our products and our use of natural material, each piece is unique and may contain irregular qualities, there will occasionally be natural markings, minuscule burrs, or slight discolorations.


Need help?
Do you have a question about the MILO COT / BED and is the answer not in the manual?
Questions and answers