Table of Contents
Advertisement
Quick Links
Advertisement
Table of Contents

Subscribe to Our Youtube Channel
Related Manuals for Snap-On EEWH326A


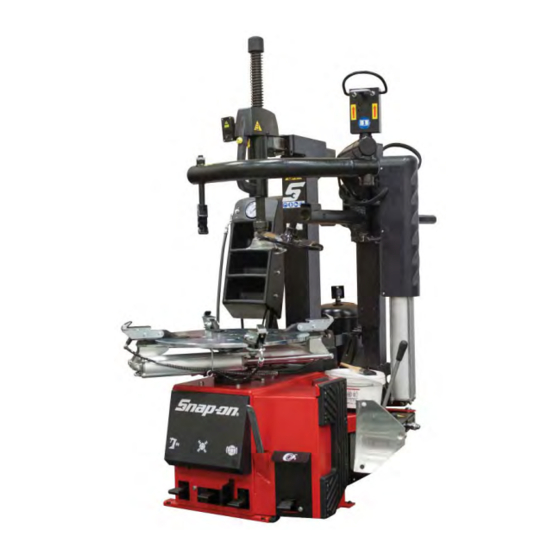
Summary of Contents for Snap-On EEWH326A
- Page 1 EEWH326A Air/Electric Tire Changer Operation Instructions Form ZEEWH326A3 Rev F...
- Page 2 EEWH326A Air-Electric Tire Changer Page 2 Operation Manual...
- Page 3 It is assumed that, prior to using the EEWH326A Air-Electric Tire Changer, the operator has a thorough understanding of the wheels and tires being changed. In addition, it is assumed he has a thorough knowledge of the operation and safety features of the rack, lift, or fl...
- Page 4 EEWH326A Air-Electric Tire Changer SAFETY INSTRUCTIONS IMPORTANT!! SAVE THESE INSTRUCTIONS!! Overinfl ated tires or tires mounted on the wrong sized rims can explode producing hazardous fl ying debris. Read Operator’s Manual before using this Tire Changer. Never mount tire on rim with different sized diameter.
- Page 5 EEWH326A Air-Electric Tire Changer Risk of crushing. Stand clear of bead breaker arm during operation. Warning ! Read and understand the operation instructions before using this tire changer. Become familiar with all controls before proceeding with operation. Stand away from the bead breaker arm when in operation.
- Page 6 EEWH326A Air-Electric Tire Changer Tires and rims that are not the same diameter are mismatched. NEVER attempt to mount or infl ate any tire and rim that are mismatched. ALWAYS check to see that tire and rim diameters are the same.
-
Page 7: Table Of Contents
EEWH326A Air-Electric Tire Changer TABLE OF CONTENTS Safety Statements ........................ Page Table Of Contents ......................... Page Introduction ........................... Page Specifi cations And Features ....................Page Nomenclature ........................Page 1.2.1 Turntable & Cabinet Features ....................Page Accessories and Consumables .................... Page Floor and Space Requirements .................... -
Page 8: Introduction
With a minimum of maintenance and care your EEWH326A Air-Electric Tire Changer will provide many years of trouble-free operation. Please read this manual thoroughly before operating the unit. -
Page 9: Turntable & Cabinet Features
EEWH326A Air-Electric Tire Changer 1.2.1 TURNTABLE & CABINET FEATURES EEWH326A INTEGRATED BEAD SEATING JETS - Air infl ation jets are integrated into LIFETIME LUBRICATED POLYMER VALVES - Critical foot valves fabricated the turntable clamping jaws to insure full bead seating force directly into the from glass/fi... -
Page 10: Accessories And Consumables
EEWH326A Air-Electric Tire Changer ACCESSORIES AND CONSUMABLES Figure 1.4-1 Item Image Description EEWH326A EAA0304G32A Light Truck Adaptors (4 each) optional EAA0329G53A Motorcycle/ATV Adapters 8" - 24" (4 ea) optional +4" Adaptors (4 each, use with EAA0331G91A standard EAA0304G80A) EAA0304G80A +4" Offset Mount/Dismount Head... -
Page 11: Floor And Space Requirements
EEWH326A Air-Electric Tire Changer FLOOR AND SPACE REQUIREMENTS INSTALLATION Your new EEWH326A Air-Electric Tire Changer requires a simple installation procedure requiring only a few moments. Follow these instructions carefully to insure proper and safe operation. The Tire Changer is delivered mounted to a wooden skid. -
Page 12: Air Installation
EEWH326A Air-Electric Tire Changer 2.2 AIR INSTALLATION INSTALLATION OF THE MOUNT/DISMOUNT HEAD LASER GUIDE 1. Install the batteries into the unit. THE AIR INSTALLATION MUST BE MADE ONLY BY QUALIFIED PERSONNEL. • Remove the four screws securing the front of the unit. -
Page 13: Calibration Of The Mount/Dismount Head Laser Guide
EEWH326A Air-Electric Tire Changer CALIBRATION OF THE MOUNT/DISMOUNT HEAD LASER GUIDE 1. Mount an average size rim without a tire onto the tire changer turntable. A seven or eight inch width is desired. 2. Position the mounting/demounting tool in the fully down position as it would be when servicing a wheel. -
Page 14: Controls
EEWH326A Air-Electric Tire Changer C Press down and hold, the second pedal from the right: CONTROLS the turntable turns clockwise. 1. 3/4 down approximately, the turntable rotates at the minimum speed (7 RPM). The torque is maximum in this condition. - Page 15 EEWH326A Air-Electric Tire Changer To unlock and let the slide with the tool go up: push the To lock: push the button fi rmly with the thumb (Fig. 3.0-4). button fi rmly with the forefi nger, in the direction of the arrow (Fig.
-
Page 16: Presetting Of Clamping Jaws
EEWH326A Air-Electric Tire Changer PRESETTING OF CLAMPING JAWS MAKE SURE ALL FOUR CLAMPING JAWS ARE POSITIONED IDENTICALLY (FIG. 3.1-1, ITEMS 1 OR 2). OTHERWISE THE RIM MIGHT NOT BE CLAMPED PROPERLY, COME OFF THE CHUCK AND HURT THE OPERATOR! A Depress fi rst pedal from the left smoothly up to the centre position. -
Page 17: Mounting And Demounting Precautions
EEWH326A Air-Electric Tire Changer 4.0 MOUNTING AND DEMOUNTING PRECAUTIONS B. Break both beads. Hold open the Bead Breaker, roll the tire/rim into the IMPORTANT! Breaker area (Fig. 4.1-2). Ensure that the tire/rim BEFORE MOUNTING A TIRE ON A RIM, PAY assembly is fl... - Page 18 EEWH326A Air-Electric Tire Changer D. Liberally lubricate both beads. Place the wheel WITH Gently position the mount/demount head in contact with DROP CENTER UP (Fig. 4.1-3a) on the turntable, and the rim edge and lock it into place: the tool automatically clamp in position.
- Page 19 EEWH326A Air-Electric Tire Changer YOUR MACHINE IS SHIPPED WITH SEVERAL G. Rotate the turntable clockwise (7 RPM Pedal Position) REPLACEMENT PLASTIC INSERTS (INSIDE and, at the same time, push down on the tire sidewall to move the bead into the drop center of the rim (Fig. 4.1-6).
-
Page 20: Mounting Tubeless Tires
EEWH326A Air-Electric Tire Changer 4.2 MOUNTING TUBELESS TIRES NOTICE! SOME TIRES HAVE A COLOR DOT THAT IS TO BE A. Clean entire rim surface (Fig. 4.2-1). KEPT ON THE OUTSIDE OF THE WHEEL AND IS TO BE ALIGNED WITH THE VALVE STEM. IF THIS IS THE CASE BE SURE TO ATTAIN PROPER ALIGNMENT PRIOR TO TIRE INFLATION. -
Page 21: If The Top Tire Bead Is Difficult To Mount
EEWH326A Air-Electric Tire Changer 4.3 IF THE TOP TIRE BEAD IS DIFFICULT TO MOUNT 4.4 INFLATION OF TUBELESS TIRES. Make sure that both beads are properly lubricated. Follow these instructions using the Bead Holding Clamp (optional) or the PBA device. -
Page 22: Demounting Tube Type Tires
EEWH326A Air-Electric Tire Changer B. Connect the infl ation hose to the valve stem. 5.0 DEMOUNTING TUBE-TYPE TIRES C. Lift the tire with both hands so that the upper bead is A. For breaking the bead operate as described for the seated to the rim edge (Fig. -
Page 23: Inflating Tube-Type Tires
EEWH326A Air-Electric Tire Changer 5.2 INFLATING TUBE-TYPE TIRES. C. Infl ate the tube slightly: if held with the index fi nger it should bend a little (Fig. 5.1-2). Make sure that both beads are properly lubricated. BEFORE INFLATING A TIRE, CHECK THE CONDITION OF THE TIRE AND THE RIM. -
Page 24: Operating The Pneumatic Bead Assist
(Fig. 5.3-2). The EEWH326A Air-Electric Models is equipped with a specially designed “Pneumatic Bead Assist Device” (referred to as the PBA). The PBA offers the combined benefi... -
Page 25: Mounting And Demounting Motorcycles Tires
EEWH326A Air-Electric Tire Changer 5.4 MOUNTING AND DEMOUNTING MOTORCYCLE C. Weekly clean the teeth of the jaws (1 Fig. 6.0-2) with TIRES a wire brush, check the nylon clamping jaw insert (2) and replace if worn. To mount and demount motorcycle/ ATV or motor-scoter wheels it is necessary to utilize the optional 8”... -
Page 26: Maintenance Of The Laser Guide
EEWH326A Air-Electric Tire Changer I. Check the automatic air lubricator oil level weekly. When 4. Close the cover with the four screws. Checking and adding oil to the lubricator, disconnect the air supply fi rst, resetting the calibration After each time the batteries are remove the fi... - Page 27 EEWH326A Air-Electric Tire Changer NOTES Page 27 Operation Manual...
-
Page 28: Warranty/Service And Repair
Notice: The information contained in this document is subject to change without notice. Snap-on makes no warranty with regard to this material. Snap-on shall not be liable for errors contained herein or for incidental consequential damages in connection with furnishings, performance, or use of this material.
Need help?
Do you have a question about the EEWH326A and is the answer not in the manual?
Questions and answers