
Subscribe to Our Youtube Channel
Related Manuals for Hyco Zen Spa Series

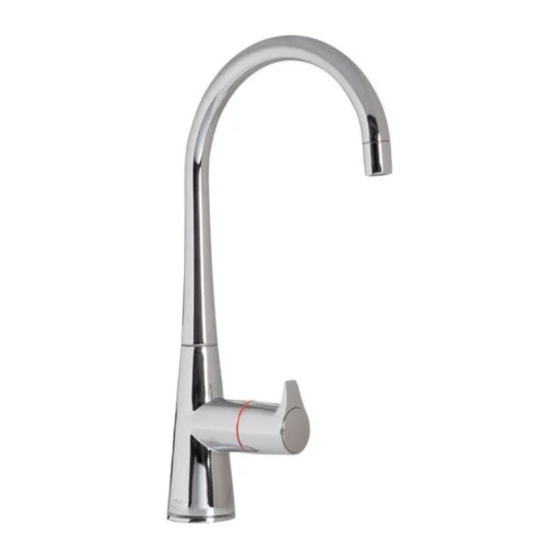
Summary of Contents for Hyco Zen Spa Series
- Page 1 Product Instruction Manual Zen Spa SPA3L, SPA6L, SPA3LUC1, SPA6LUC1 2 in 1 Boiling and Chilled Tap v19.12.1...
-
Page 2: Key Features
Overview Thank you for purchasing a Zen Spa 2 in 1 Boiling and Chilled Tap. The Zen Spa is a hot and cold drinks station that provides boiling water and filtered cold (ambient) drinking water. If desired an undersink chiller can be purchased to provide filtered chilled drinking water. In the home it replaces the need for a kettle and provides high quality cold drinking water. - Page 3 The boiling tank must be placed on a solid surface where it will not be knocked over causing damage to the water hoses or electrical connections. The boiling tank must not be used in an area subject to flammable vapours such as paint, solvent or petrol.
-
Page 4: Box Contents
Box Contents For Zen Spa with chiller (UC1 models) chiller sent separately. Zen Spa tap Zen tank Expansion vessel Manifold Expanssion vessel fixing bracket and metal band Pressure relief valve Scale filter Cold drinking water filter Hose ‘manifold to exp vessel’ Hose ‘manifold to tank’... - Page 5 1 x 3-way 3/8” to 1/4” PF 1/4” x 1/4” PF 2 x 1/2” BSP to 15mm 2 x 1/2” female to 3/8” PF 2 x Black rubber washer 1 x Large and 3 x small white washer 1.5 m x 1/4” and 3/8” tubing 6 x Large locking collar and 5 x small...
- Page 6 1. Installation Important Installation Information The tank must be sited vertically and on a flat level surface. The supplied scale filter must be fitted and changed at least every 6 months, otherwise the lifespan of the product could be seriously reduced and the warranty may be void.
- Page 8 Step 1 - Prepare and Site the Tap • Choose a suitable location to mount the tap, this may be an existing hole in your sink or countertop. • If a new hole is required check that the reach of the spout will be appropriate for your sink before drilling the tap hole in the sink or worktop.
- Page 9 Diagram 2...
- Page 10 Step 2 - Prepare Manifold Connections • It is imperative that no fittings, other than those specified in the instructions, are installed within the ‘expansion zone’ . This is everything beyond the check valve, located within the manifold. See Diagram 3. •...
- Page 11 Step 3 - Mount Manifold and Connect Expansion Vessel • Orientation of the manifold is optional, but the direction of flow must follow the arrow on the manifold. The red handle is a service valve (boiling water isolation lever) for future maintenance. •...
- Page 12 • Ensure all tubing is pushed fully into PF connectors and that locking collars are used to prevent inadvertant removal. • Use a suitable length of 3/8” tubing (cut using sharp knife, ensuring a clean straight cut) to connect from mains supply to t-piece supplied. •...
- Page 13 Step 6 - Connect Cold Drinking Water Filter • If you are installing a chiller proceed to section 2. • Select a suitable location for the drinking water filter housing ensuring easy access for future maintenance. • Do not locate the filter above an electrical socket or other electrical device. •...
- Page 14 2. Install Optional Water Chiller with Cold Drinking Water Filter Ensure you read separate chiller instructions for all important safety points and instructions before installation. Before commencing installation, ensure the location is a flat level surface that will allow for adequate airflow around all sides of the appliance. •...
-
Page 16: Electrical Connection
3. Commission and Check Water Connections • Before plugging the tank into the power socket, the system must be full of water and tested for leaks. Open all water valves to allow water to flow to the boiling water tank. •... -
Page 17: Operation
If the status light begins flashing red this indicates a fault has been detected. The unit should be isolated from the power supply and the water supply shut off before contacting Hyco for further advice. Status Ring Summary Water is heating... -
Page 18: Operating The Tap
Operating the Tap • The tap handle has a safety lock mechanism on the boiling side. To release the safety lock, pull the handle away from the tap body. To dispense boiling water, rotate towards the red marker. • To dispense cold filtered drinking water rotate tap towards the blue marker. Releasing the safety lock is not required to dispense cold drinking water. - Page 19 6. Change Temperature Setting and Thermal Cut-out Reset • It is important to isolate the product from the mains power supply by unplugging but is not necessary to isolate the water supply. • Open the boiling side of the tap until water runs cold. •...
- Page 20 3L Model PC Board Diagram 5 6L Model PC Board Diagram 6...
-
Page 21: Maintenance
Regularly inspect the appliance for any signs of water leaks or damage. If a leak or damage is discovered, discontinue use, isolate the water supply and drain down immediately. Contact Hyco. • The relief valve must be regularly tested. To do this twist the red cap until water flows from the valve. -
Page 22: Descaling The Tank
When re-installing follow the original installation instructions. 10. Descaling the Tank A service cartridge can be used to descale the boiling water tank. These are available from Hyco, please contact our service department for further information. 11. Specification 230V ~ 50Hz... -
Page 23: Troubleshooting
Thermal cut out has tripped Reset using cut out button. See lights Section 5 or 6 Tank not heating and red light Software error Contact Hyco flashing Water dripping from the tap Tap fault Contact Hyco Low flow from the cold side of... - Page 24 If you experience a problem with this product you should first contact our service department on 01924 225 200 before taking any further action. Experience has shown that issues can often be resolved without the need to return or uninstall the product. Hyco Manufacturing Ltd Normandy Court Express Way...
Need help?
Do you have a question about the Zen Spa Series and is the answer not in the manual?
Questions and answers