Advertisement

Quick Links

• Read all instructions before assembly and use
of the product.
• Keep instructions for future use.
• Adult assembly is required. No tools needed
for assembly.
• Requires three AA (LR6) alkaline batteries
(not included) for electronic toy. Tool needed
to install batteries: Phillips screwdriver.
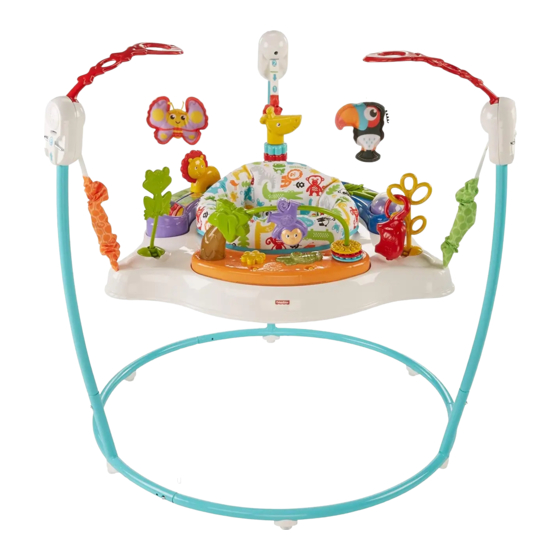
• Product features and decorations may vary
from photos.
FFJ00
FVC13
• Lee estas instrucciones antes de ensamblar
y usar este producto.
• Guarda estas instrucciones para
futura referencia.
• Requiere montaje por un adulto. No es
necesario usar herramientas para el montaje.
• El juguete electrónico funciona con 3 pilas
alcalinas AA (LR6) x 1,5V (no incluidas).
Herramienta necesaria para instalar las pilas:
desatornillador de cruz.
• Las características y decoración pueden
variar de las mostradas.
fisher-price.com
1

Advertisement

Table of Contents
loading

Summary of Contents for Fisher-Price FFJ00

  • Page 1 FFJ00 FVC13 • Read all instructions before assembly and use • Lee estas instrucciones antes de ensamblar of the product. y usar este producto. • Keep instructions for future use. • Guarda estas instrucciones para • Adult assembly is required. No tools needed futura referencia.
  • Page 2 WARNING To prevent serious injury or death: • Use only for a child who is able to hold head upright unassisted and who is not able to walk or climb out of product. • Never leave child unattended. Always keep child in view while in product. •...
  • Page 3 Parts Piezas 3 Base Tubes 3 tubos de base Frame Armazón Seat Pad Seat Ring Almohadilla Aro del asiento Electronic Toy Juguete electrónico Before beginning assembly, you may want to install batteries into the electronic toy. Refer to the Battery 2 Hanging Toys Installation section in these instructions.
  • Page 4 CONSUMER ASSISTANCE CO SU SS S ATENCIÓN AL CLIENTE 1-800-432-5437 (US) Fisher-Price, Inc., 636 Girard Avenue, East Aurora, NY 14052. Hearing-impaired consumers/Clientes con problemas auditivos 1-800-382-7470. Centro de Servicio en México: 59-05-51-00 Ext. 5206 ó 01-800-463-59-89 MÉXICO COLOMBIA Importado y distribuido por Mattel de México, Mattel Colombia, S.A., Calle 123#7-07 P.5,...
  • Page 5: Battery Installation

    Battery Installation Colocación de las pilas For longer life, use alkaline batteries. Para una mayor duración, usar solo pilas alcalinas. 1,5V x 3 Protect the environment by not disposing of AA (LR6) this product or any batteries with household waste. This symbol indicates that this product shall not be treated as household waste.
  • Page 6: Montaje

    Assembly Montaje PRESS PRESIONAR Base Tubes Tubos de base PRESS PRESIONAR • While pressing the button on the free end of the base tube assembly, insert it into the remaining free end of the assembly. Continue • While pressing the button on a base tube, to slide the base tube until you hear a “click”.
  • Page 7: Back View

    Assembly Montaje Seat Pad Red Tabs PRESS PRESS Lengüetas rojas de PRESIONAR PRESIONAR la almohadilla Seat Ring Aro del asiento BACK VIEW VISTA DE ATRÁS • Position the seat pad with the red tabs toward you and the seat ring with the instructional labels toward you.
  • Page 8 Assembly Montaje Seat Silla FRONT VIEW VISTA DEL FRENTE • Turn the seat ring around so that the front faces you. • "Snap" the remaining four tabs on the seat pad to the pegs on the seat ring. • Voltea el aro del asiento que el frente apunte hacia ti.
  • Page 9 Assembly Montaje Hanging Toys Juguetes colgantes Giraffe Toy Jirafa Elephant Toy Frog Teether Toy Elefante Rana mordedera Link Tree Árbol que se conecta • Insert and "snap" the hanging toys into the slots in the hubs. • Inserta y ajusta los juguetes colgantes en las ranuras de las conexiones.
  • Page 10: Setup And Use

    Setup and Use Preparación y uso WARNING To prevent serious injury or death: • Use only for a child who is able to hold head upright unassisted and who is not able to walk or climb out of product. • Never leave child unattended. Always keep child in view while in product. •...
  • Page 11 Seat Height Adjustment Ajuste de altura de la silla IMPORTANT! This product is shipped with the straps in the middle height position . Please be sure you adjust the height of the frame for your child. ¡IMPORTANTE! Este producto viene de fábrica con los cinturones en la posición del medio .
  • Page 12 Seat Height Adjustment Ajuste de altura de la silla While feeding the strap into the slot on Mientras introduces el cinturón en la ranura the inside of the hub, pull the strap on the del interior de la conexión, jala el cinturón en outside of the hub.
  • Page 13 Jump on in & explore around with music, lights & sounds! ¡Siéntate y explora a tus alrededores con música, luces y sonidos! Power/Volume Switch Mode Switch Interruptor de Interruptor de encendido/volumen modalidad • Slide the power/volume switch to: • Poner el interruptor de encendido/volumen en: ON with low volume ENCENDIDO con volumen bajo ON with high volume...
  • Page 14: Mantenimiento

    Care Mantenimiento • The seat pad is machine washable. Wash it separately in cold water on the gentle cycle. Do not use bleach. Tumble dry separately on PRESS PRESS low heat and remove promptly. PRESIONAR PRESIONAR • The frame, seat ring and toys may be wiped clean using a mild cleaning solution and damp cloth.
  • Page 15 Battery Safety Information Información de seguridad acerca de las pilas In exceptional circumstances, batteries may En circunstancias excepcionales, las pilas leak fluids that can cause a chemical burn pueden derramar líquido que puede causar injury or ruin your product. To avoid quemaduras o dañar el producto.
  • Page 16: Fcc Statement (United States Only)

    Consumer Information Información al consumidor FCC STATEMENT (UNITED STATES ONLY) si no se instala y utiliza según lo estipulado en This equipment has been tested and found las instrucciones, puede causar interferencia to comply with the limits for a Class B digital dañina a radiocomunicaciones.

This manual is also suitable for:

Fvc13

Table of Contents