Table of Contents
Advertisement
Quick Links
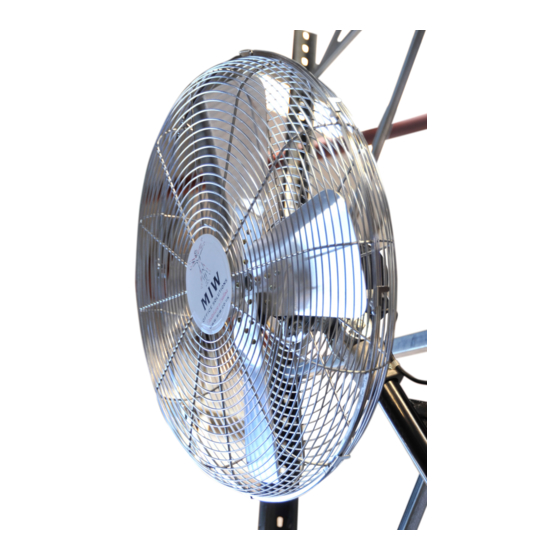
1 - Guard screw
2 - Guard ring
3 - Front guard
4 - Screw blade
5 - Fan blade
6 - Screw motor
7 - Rear guard
8 - Motor shaft
9 - Motor assembly
10 - Wall bracket
11 - Screw base.
a. Fix the wall bracket (No.10) firmly with screw base (No.11).
b. Hang motor assembly (No.9) wall bracket (No.10).
c. Fix the rear guard (No.7) on the motor assembly (No.9) with the screw of
motor (No.6).
d. Insert fan blade (No.5) to motor shaft (No.8), lock fan blade with screw
(No.4).
e. Hold the front guard (No.3) with logo in an upright position. Fix guard
ring (No.2) on rear guard. Secure the tow guards properly with guard
screw (no.1) to avoid front guard from falling down.
3 SPEED OSCILLATING WALL FAN
MODEL: KWP-2460
SPECIFICATION
Watts (W)
Volts
Low
Medium
110V / 50Hz
107
120
240V / 50Hz
99
114
READ AND SAVE THESE INSTRUCTIONS
Amps (A)
High
Low
Medium
152
1.00
1.13
146
0.42
0.48
High
1.50
0.63
Advertisement
Table of Contents

Related Manuals for MIW KWP-2460


Summary of Contents for MIW KWP-2460
- Page 1 3 SPEED OSCILLATING WALL FAN MODEL: KWP-2460 1 - Guard screw 2 - Guard ring 3 - Front guard 4 - Screw blade 5 - Fan blade 6 - Screw motor 7 - Rear guard 8 - Motor shaft 9 - Motor assembly 10 - Wall bracket 11 - Screw base.
- Page 2 OSCILLATING WALL FAN OPERATING INSTRUCTIONS ASSEMBLY AND OPERATING INSTRUCTIONS TO ADJUST AIRFLOW UPWARD OR DOWNWARD: READ AND SAVE THESE INSTRUCTIONS Tilt fan head to the desired angle. Loosen THE POSITION SCREW first and then loosen the knob. Tilt fan head to the CAUTION: desired angle then firmly tighten THE POSITION SCREW first and then tighten the Read and follow all intructions before operating fan.
Need help?
Do you have a question about the KWP-2460 and is the answer not in the manual?
Questions and answers