Table of Contents
Advertisement
Advertisement
Table of Contents

Subscribe to Our Youtube Channel
Related Manuals for Rainier R4400


Summary of Contents for Rainier R4400
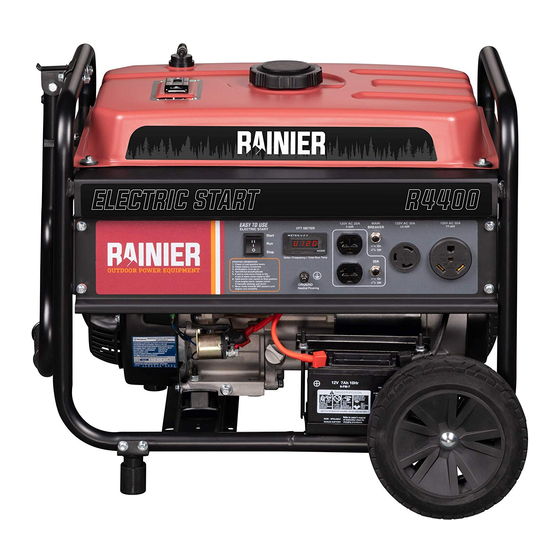
- Page 1 R4400 OPEN FRAME Generator 3600 Running Watts | 4400 Peak Watts...
-
Page 2: R4400 Technical Specifications
No part of this publication may be reproduced or used in any form by any means – graphic, electronic or mechanical, including photocopying, recording, taping or information storage and retrieval systems – without the written permission of Rainier Outdoor Power Equipment, LLC. DANGER This manual contains important instructions for operating this generator. -
Page 3: Product Registration
IMPORTANT: KEEP YOUR PURCHASE RECEIPT TO ENSURE TROUBLE-FREE WARRANTY COVERAGE. PRODUCT REGISTRATION To ensure trouble-free warranty coverage, it is important you register your Rainier generator. You can register your generator by either: 1. Filling in the product registration form below and mailing to:... -
Page 4: Table Of Contents
TABLE OF CONTENTS R4400 TECHNICAL SPECIFICATIONS ... . 2 Checking Engine Oil ..... 18 PRODUCT REGISTRATION . -
Page 5: Safety
SAFETY SAFETY DEFINITIONS SAFETY SYMBOL DEFINITIONS The words DANGER, WARNING, CAUTION and NOTICE are used throughout this manual to highlight important information. Be certain that the meanings of these alerts are known to all who work on or near the equipment. -
Page 6: General Safety Rules
SAFETY GENERAL SAFETY RULES DANGER Never use the generator in a location that is wet or damp. Never expose the generator to rain, snow, water spray or standing water while in use. Protect the generator from all hazardous weather conditions. Moisture or ice can cause a short circuit or other malfunction in the electrical circuit. -
Page 7: Assembly
ASSEMBLY INSTALLING WHEELS AND FEET INSTALLING WHEELS TO FRAME BEFORE ASSEMBLING THE 1. Insert axle pin through washer and wheel. GENERATOR, REVIEW THE SAFETY SECTION STARTING ON PAGE 5. CAUTION Never lift the generator without assistance. The generator is heavy and lifting without assistance could result in personal injury. -
Page 8: Installing The Battery
ASSEMBLY INSTALLING THE BATTERY 4. Pull back the black boot and securely attach the negative (-) battery cable (black boot) to the negative (-) WARNING battery post. Replace the black boot so it protects the cable lug and battery post. To avoid electric shock: •... -
Page 9: Features
FEATURES Electric Start: Used to start the generator. Oil Drain Plug: Must be removed to drain engine oil. Fuel Cap: Close until clicking sound is heard. Never Flat Wheels: For easy portability. Control Panel: Contains the circuit breakers Single Piece Handle: Includes rubber grip. Allows and outlets. - Page 10 FEATURES Fuel Gauge: Indicates gas level. Spark Plug Boot (Wire): Must be removed when servicing the engine or the spark plug. CARB Canister: Required for models sold into and used in California. Muffler and Spark Arrester: Avoid contact until engine is cooled down. Spark arrestor prevents sparks from exiting the muffler.
-
Page 11: Control Panel Features
FEATURES CONTROL PANEL FEATURES Electric Start Switch: Hold in Start position to start 120-Volt, 30 Amp Twistlock Outlet (L5-30R): generator. Switch to STOP to stop the engine. Outlet can supply 120V output. Data Center: The VFT Meter is an LED display 120-Volt 30 Amp Outlet (TT-30R): Travel Trailer that will rotate through volts, frequency, and outlet can supply a maximum of 30 amps and 120... -
Page 12: Operation
OPERATION BEFORE STARTING THE GENERATOR Weather – Never operate your generator outdoors during rain, snow or any combination of weather conditions that BEFORE STARTING THE GENERATOR, could lead to moisture collecting on, in or around the REVIEW SAFETY SECTION STARTING ON generator. -
Page 13: Powercord
Using Extension Cords Rainier Outdoor Power Equipment assumes no responsibility for the content within this table. The use of this table is the responsibility of the user only. This table is intended for reference only. The results produced by using this table are not guaranteed to be correct or applicable in all situations as the type and construction of cords are highly variable. -
Page 14: Engine Fluids And Fuel
OPERATION ADDING / CHECKING ENGINE ADDING GASOLINE TO THE FUEL TANK FLUIDS AND FUEL BEFORE ADDING/CHECKING ENGINE FLUIDS AND FUEL, REVIEW SAFETY BEFORE ADDING/CHECKING ENGINE SECTION STARTING ON PAGE 5. FLUIDS AND FUEL, REVIEW SAFETY SECTION STARTING ON PAGE 5. WARNING DANGER Never refuel the generator while the engine is... -
Page 15: Starting The Generator
OPERATION BEFORE STARTING THE GENERATOR 5. If engine is cold, move the choke lever to the ON position. If engine is warm move the choke to the BEFORE STARTING THE GENERATOR, OFF position. REVIEW SAFETY SECTION STARTING ON PAGE 5. Before attempting to start the generator, verify the following: •... -
Page 16: Stopping The Generator
OPERATION STOPPING THE GENERATOR Normal Operation START During normal operation, use the following steps to stop your generator: 1. Remove any connected loads from the control panel receptacles. STOP 2. Allow the generator to run at “no load” to reduce and stabilize engine and alternator temperatures. -
Page 17: Maintenance
MAINTENANCE MAINTENANCE SCHEDULE WARNING CAUTION Failure to perform periodic Avoid skin contact with engine maintenance or not following oil or gasoline. Prolonged skin maintenance procedures can cause contact with engine oil or gasoline the generator to malfunction and can be harmful. Frequent and could result in death or serious injury. -
Page 18: Engine Oil Maintenance
MAINTENANCE ENGINE OIL MAINTENANCE 6. Check oil level: When checking the engine oil, remove the oil fill plug/dipstick and wipe it clean. Engine Oil Specification Thread the oil fill plug/dipstick all the way back in and 1. Only use the engine oil specified in graphic below. then remove and check the oil level on the oil fill plug/ dipstick. -
Page 19: Changing Engine Oil
MAINTENANCE CHANGING ENGINE OIL AIR FILTER MAINTENANCE WARNING 1. Stop the engine. Never use gasoline or other flammable 2. Let engine sit and cool for several minutes (allow solvents to clean the air filter. Use only crankcase pressure to equalize). household detergent soap to clean the 3. -
Page 20: Cleaning The Air Filter
MAINTENANCE Cleaning the Air Filter - Continued NOTICE Never dispose of soap cleaning solution used to clean the air filter by dumping the solution into a sewer, on the ground, or into ground water or waterways. Always be environmentally responsible. Follow the guidelines of the EPA or other governmental agencies for proper disposal of hazardous materials. -
Page 21: Checking And Adjusting Valve Lash
MAINTENANCE CHECKING AND ADJUSTING VALVE LASH CLEANING THE GENERATOR It is important to inspect and clean the generator before CAUTION every use. Checking and adjusting valve lash Clean All Engine Air Inlet and Outlet Ports – Make must be done when the engine is cold. sure all engine air inlet and outlet ports are clean of any dirt and debris to ensure the engine does not run hot. -
Page 22: Storage
MAINTENANCE 5. With the fuel shut off valve open, start the engine 9. Replace the spark plug. and allow the generator to run until all the remaining 10. Move the generator to a clean, dry place for storage. gasoline in the fuel lines and carburetor is consumed and the engine shuts off. - Page 23 TROUBLESHOOTING 1. Fuel shutoff valve is in the OFF position. 1. Move the fuel shut off valve to the ON position. 2. Generator is out of gasoline. 2. Add gasoline to the generator. 3. Fuel flow is obstructed. 3. Inspect and clean fuel delivery passages. 4.
-
Page 24: Warranty
RAINIER OUTDOOR POWER EQUIPMENT’S RESPONSIBILITY Rainier Outdoor Power Equipment warrants to the original purchaser that its Rainier line of generators will be free from defects in material and workmanship. Under normal use and maintenance from the date of purchase, Rainier Outdoor Power Equipment agrees to repair or replace at Rainier Outdoor Power Equipment’s discretion, any defective product free of charge at any authorized Rainier Outdoor Power... - Page 25 There are no warranties extended other than as provided herein. This limited warranty may be modified only by Rainier Outdoor Power Equipment. Any implied warranties allowed by law shall be limited in duration to the terms of the express warranty provided herein.
- Page 26 26 |...
- Page 27 RainierPower.com Version 07.05.18KD Rev2 | 27...
Need help?
Do you have a question about the R4400 and is the answer not in the manual?
Questions and answers
need a recoil rope starter. for my R4400 rainier generator where can I purchase one
You can find parts and spares for the Rainier R4400 generator, including a recoil rope starter, at generatorguru.com under the Rainier R4400 section.
This answer is automatically generated