
Subscribe to Our Youtube Channel
Related Manuals for Sencore OmniHub CMP100


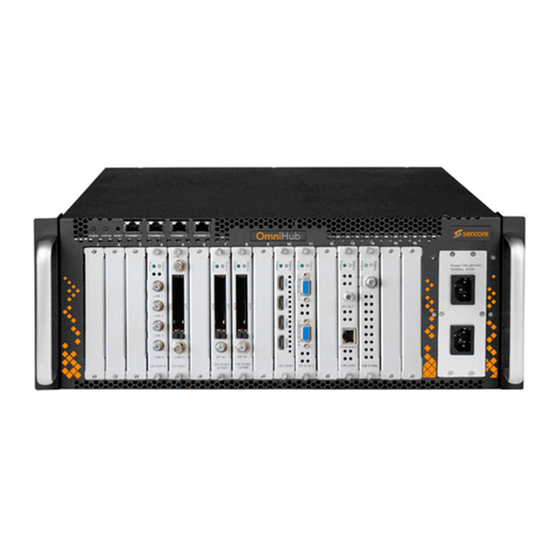
Summary of Contents for Sencore OmniHub CMP100
- Page 1 OmniHub CMP100 Media Platform User Manual January 2020 www.sencore.com | 1.605.978.4600 Revision 1.6...
-
Page 2: Copyright
Sencore Inc. assumes no responsibility or liability for any errors or inaccuracies. Sencore, Sencore Inc, and the Sencore logo are trademarks or registered trademarks in the United States and other countries. All other products or services mentioned in this document are identified by the trademarks, service marks, or product names as designated by the companies who market those products. -
Page 3: Revision History
OmniHub CMP100 – User Manual Revision History Date Version Description Author 08/24/17 First Version 06/06/18 Add New Modules, New Features and Adjust Management Page 11/15/18 Modify the Product Picture 02/15/19 Add New Modules, New Features and Adjust Management Page 04/02/19... - Page 4 Replacement Parts: When replacement parts are required, be sure the service • technician uses replacement parts specified by Sencore, or parts having the same operating characteristics as the original parts. Unauthorized part substitutions made may result in fire, electric shock or other hazards.
- Page 5 OmniHub CMP100 – User Manual SAFETY PRECAUTIONS There is always a danger present when using electronic equipment. Unexpected high voltages can be present at unusual locations in defective equipment and signal distribution systems. Become familiar with the equipment that you are working with and observe the following safety precautions.
- Page 6 Package Contents The following is a list of the items that are included: 1. OmniHub CMP100 chassis 2. OmniHub CMP100 Quick Start Guide 3. AC power cables 4. Breakout or adapter cables depending on option modules If any of these items were omitted from the packaging please email ProCare@Sencore.com...
-
Page 7: Table Of Contents
OmniHub CMP100 – User Manual Table of Contents COPYRIGHT .............................. 2 ABOUT SENCORE ............................2 REVISION HISTORY ........................... 3 TABLE OF CONTENTS ..........................7 SECTION 1 OVERVIEW ..........................9 ........................10 RODUCT NTRODUCTION ........................10 RONT ANEL VERVIEW ........................11 ANEL VERVIEW ......................11... - Page 8 OmniHub CMP100 – User Manual 3.3.19 CM-ISDBT-R01/R01A ......................77 ............................79 UNCTION ODULES 3.3.20 CP-EAS-00 ..........................79 3.3.21 CP-CAM-00 ..........................82 SECTION 4 APPENDICES .......................... 85 APPENDIX A - A ......................86 CRONYMS AND LOSSARY APPENDIX B - A M SE C ..............87 ONROE ONFIGURATION AND...
-
Page 9: Section 1 Overview
OmniHub CMP100 – User Manual Section 1 Overview SECTION 1 OVERVIEW ..........................9 ........................10 RODUCT NTRODUCTION ........................10 RONT ANEL VERVIEW ........................11 ANEL VERVIEW ......................11 PTION ODULE VERVIEW Page 9 of 106... -
Page 10: Product Introduction
OmniHub CMP100 – User Manual Product Introduction OmniHub CMP100 is a new generation of Compact Media Platform in modular design that focuses on both cost-effective commercial TV market and traditional DTV market. Thanks to the benefit of high-density, strong-performance and large-flexibility, OmniHub CMP100 product can meet all the major video delivery requirements of signal receiving, descrambling, encoding, multiplexing, modulation and IP processing in one unit. -
Page 11: Rear Panel Overview
OmniHub CMP100 – User Manual Rear Panel Overview The OmniHub CMP100 have 3 exhaust fans at the back of the unit. Please mind not to obstruct the air intake at the front and air exhaust at the back. Option Module Overview This describe the CMP100 platform and all available modules that can expand the functionality of the CMP100 platform. - Page 12 OmniHub CMP100 – User Manual * CR-DVBS2FTA-00, CR-DVBS2FTA-00A are Different Hardware but share the same Software. Encoder Modules Description CE-HDMI-00 4 channel HDMI encoding module, supports H.264 HD/SD, MPEG-2 SD, MPEG1L2, AC3/AAC. CE-HDMI-R01 4 channel HDMI encoding module, supports H.264 HD/SD, MPEG-2 SD, MPEG1L2, AC3/AAC.
- Page 13 OmniHub CMP100 – User Manual Modulator Module Description CM-QAMA-R00 16 channel QAM modulator module, Annex A/C, non-adjacent output, and 1 RF female port for output CM-QAMB-R00 16 channel QAM modulator module, Annex B, non-adjacent output, and 1 RF female port for output...
- Page 14 OmniHub CMP100 – User Manual CM-8VSB-R01A 8 channel 8VSB 9ATSC) modulation module, adjacent output, and 1 RF female port for output. *All -R01 model share the same hardware, and all -R01A models share the same hardware. Function Modules Description CP-EAS-00...
-
Page 15: Section 2 Installation
OmniHub CMP100 – User Manual Section 2 Installation SECTION 2 INSTALLATION ........................15 ..........................16 NSTALLATION AC P ........................16 OWER ONNECTION Page 15 of 106... -
Page 16: Rack Installation
Rack Installation The OmniHub CMP100 is designed to be mounted in a standard 19” rack. It takes 480mm x 177mm x 345mm (W x H x D) or 4RU of rack space. To install it into a rack, please use the following steps: •... - Page 17 OmniHub CMP100 – User Manual When you take the equipment from a cold condition into a much warmer and humid condition, the equipment should be acclimated to the warm and humidity condition for at least 30 minutes. Powering up a non-acclimated unit may lead to shortcut or other damage to electronic components.
-
Page 18: Section 3 Web Interface Operation
OmniHub CMP100 – User Manual Section 3 Web Interface Operation SECTION 3 WEB INTERFACE OPERATION ....................18 CMP100 W ...................19 NTERFACE VERVIEW 3.1.1 Connecting to the Management Port ..................19 3.1.2 CMP100 W ..................19 OGGING INTO THE NTERFACE ..........................19 TATUS VERVIEW 3.2.1... -
Page 19: Omnihub Cmp100 Web Interface Overview
OmniHub CMP100 – User Manual OmniHub CMP100 Web Interface Overview 3.1.1 Connecting to the Management Port CMP100 has an embedded gigabit switch inside the chassis. The four network ports are respectively used for managing and data reception/streaming over IP network. From left to right, port 1 and port 2 are used for management purposes and, port 3 and port 4 are used for IP reception/streaming. -
Page 20: Status
OmniHub CMP100 – User Manual 3.2.1 Status This Menu allow the user to access the following: Device Status • Device Information • Device Status will show once you login on the CMP100 management GUI as shown in the picture above. It also shows the front view image of CMP100 with friendly label that show the status of each module connected in the 16 slots. - Page 21 OmniHub CMP100 – User Manual for the chassis. To avoid IP addresses conflict when you set baseboard IP address, observe occupied IP section displayed in this page on the top blue area. Click the Apply button on the right side to make the change takes effect.
- Page 22 OmniHub CMP100 – User Manual Click the Apply button on the right side to make the change takes effect. Password page user can reset login password. Click the Apply button on the right side to make the change takes effect SNMP page is for user to Disable or enable the SNMP function.
-
Page 23: Ip Input
OmniHub CMP100 – User Manual 3.2.3 IP Input This menu allows the user to configure and access the IP input: Status • Settings • Service Configuration • Clicking on the “IP Input” gear allows to go into page where user can access Status, Setting, Batch Setting and Service Configuration tabs. - Page 24 OmniHub CMP100 – User Manual Fill the key words of PID, Bit rate, bandwidth, table type or service name using the search box to check the info you want to find. Click Reset Counter button to clear continuity count error and restart counting.
- Page 25 OmniHub CMP100 – User Manual In order to create or edit a larger number of IP inputs, use the Batch Setting button. Click the Apply button on the right side to make the change takes effect. Service Configuration is used to route a whole stream or service/s from the IP input towards the output channel (stream).
-
Page 26: Ip Output
OmniHub CMP100 – User Manual To use Multiplexing mode on service level click on pencil icon on the right side in the line with the proper servicename. In the next step, select the output stream (channel) where service will be multiplexed. - Page 27 OmniHub CMP100 – User Manual Clicking on the button will display information on the services included in the transport stream. Click the service name to check the detail info of particular service. Clicking on the button will display information on the structure of the...
- Page 28 OmniHub CMP100 – User Manual Fill the key words of PID, Bit rate, bandwidth, table type or service name using the search box to check the info you want to find. Click button to clear continuity count error and restart counting.
- Page 29 OmniHub CMP100 – User Manual In order to create or edit a larger number of IP outputs, use the button. Batch configuration allows to auto assign IP address or UDP/RTP port. Click the Apply button on the right side to make the change takes effect.
- Page 30 OmniHub CMP100 – User Manual Click the button on the right side to make the change takes effect. 3.2.5 Admin Click Admin you can choose to go into Password setting page or Log Out. Page 30 of 106...
-
Page 31: Module Configuration
OmniHub CMP100 – User Manual Module Configuration Receiver Modules 3.3.1 CR-DVBC-00 CR-DVBC-00 is a 4-channel DVBC receiving and descrambling module with 1 RF female connector and 2 CI slots. It can receive 4 RF channels signal simultaneously and support 2 CAM cards for descrambling. - Page 32 OmniHub CMP100 – User Manual The TS Analysis is same for Baseboard IP input Status and All modules Status. This can show you the details like PID, of the received channel, and last is Service List that show the list of services on the received Channel.
- Page 33 OmniHub CMP100 – User Manual 3.3.1.2 Module CI For the encrypted services on DVBC receiver, CI slot is needed to decrypt the services and to be able to re-broadcast the services. The CR-DVBC-00 have 2 CAM slot and can decrypt services depending on the capability of the Smart Card. You can select the CAM Max Bit Rate from 48 Mbps to 108 Mbps which you can choose in pull-down list.
- Page 34 OmniHub CMP100 – User Manual 1. Bypass mode routes whole input transport stream towards IP or RF output. Bypass mode activation cause output channel will be occupied only by this stream. Any attempt of routing other stream/service towards this channel will show error.
- Page 35 OmniHub CMP100 – User Manual multiple service in same channel or output same service in multiple channel. Do not forget to click the Apply button on the right side to make the change takes effect. To clear the whole routing table click button.
-
Page 36: Cr-Dvbc-01
OmniHub CMP100 – User Manual 3.3.2 CR-DVBC-01 CR-DVBC-01 is a 4-channel DVBC Annex B/ISDBT receiving and descrambling module with 1 RF female connector and 2 CI slots. It can receive 4 RF channels signal simultaneously and support 2 CAM cards descrambling. Configuration of the module is very much similar with CR-DVBC-00, please refer to this module for the configuration procedures at page 31 to 35. -
Page 37: Cr-Dvbs2Fta-00/00A
OmniHub CMP100 – User Manual 3.3.4 CR-DVBS2FTA-00/00A CR-DVBS2FTA-00/00A is a 4/8-channel DVB-S/S2 receiving module with 4/8 RF connectors, it supports internal signal pass through from one tuner to the others. CR-DVBS2FTA have a similar Status interface with CR-DVBS2CI. With these 2 modules. -
Page 38: Module Status
OmniHub CMP100 – User Manual 3.3.5.1 Module Status To display the status of the 8VSB receiver, select the module of interest from the list of modules on the left. Then click on the Status button visible in the top bar of the 8VSB navigation buttons. - Page 39 OmniHub CMP100 – User Manual CH2 57MHz, CH3 63MHz, CH4 69MHz ~ CH133 849MHz, CH134, 855MHz, CH135 861MHz CH2 55.75MHz, CH3 61.75MHz, CH4 67.75MHz~ CH133847.75MHz, CH134 853.75MHz, CH135 859.75MHz 3.3.5.3 Modules Service Configuration Service Configuration page is where you manage the received service and output them to their designated interface.
- Page 40 OmniHub CMP100 – User Manual Do not forget to click the Apply button on the right side to make the change takes effect. To use Multiplexing mode on service level click on (pencil) icon. There will have always a BaseBoard selection for the IP output and other Output option depending on the module inserted.
- Page 41 OmniHub CMP100 – User Manual After login is enabled, additional control buttons will be displayed: - clean log, clean screen, export logs, filter dialog box Page 41 of 106...
-
Page 42: Cr-Dvbt2Ci-00
OmniHub CMP100 – User Manual 3.3.6 CR-DVBT2CI-00 CR-DVBT2CI-00 is a 4-channel DVBT/T2 receiving and descrambling module with 1 RF female connector and 2 CI slots. It can receive 4 RF channels signal simultaneously and support 2 CAM cards descrambling. 3.3.6.1... - Page 43 OmniHub CMP100 – User Manual 3.3.6.2 Module Settings To input the parameters of the source you want to receive in CR-DVBT2-00. Click the Settings and input the Frequency and Bandwidth. The tables below show the range of Frequency and Bandwidth for the settings parameters.
-
Page 44: Encoder Modules
OmniHub CMP100 – User Manual Encoder Modules 3.3.7 CE-HDMI-00/R01 CE-HDMI-00/R01 is a 4-channel HDMI input encoder which support H.264 HD/SD or MPEG-2 SD encoding. The module supports MPEG1-L2, AAC and AC3 audio encoding. 3.3.7.1 Module Status Module Status for HDMI encoder show the Bitrate on each port when HDMI source is connected. - Page 45 OmniHub CMP100 – User Manual You can check the service details in each channel under Service info by clicking the icon under Service List to check the service information of all the inputs. You can also check program details by clicking the Service Name.
- Page 46 OmniHub CMP100 – User Manual Name Range Name Range Video Type H264, MPEG2 GOP Close Disable, Enable Video Bitrate (Kbps) 600~20000 PCR PID 32~8190 Video Mode CBR, VBR PMT PID 32~8190 Video Max Bitrate 20000 Service Name Length is 1~16...
- Page 47 OmniHub CMP100 – User Manual Audio Encoder Range Audio Encoder Range Details Details Encoding Type Audio Sampling MPEG1_Layer2 Bitrate (KHz) MPEG2_AAC MPEG4_AAC Audio Mode Dual Channel Audio PID 32~8190 Mono Stereo Encoding 128~384 (AC3) Volume Bitrate(Kbps) 64~384(MPEG1_Layer2) 32~384(MPEG2_AAC/ MPEG4_AAC) CE-HDMI-R01 is like CE-HDMI-00, there are a few differences on parameter setting range.
- Page 48 OmniHub CMP100 – User Manual 3.3.7.3 IP Output This feature is specifically for single program encoding and output directly to IP. By using this setting, it will not occupy baseboard multicast bandwidth. If you want to use IP output channel in the encoder module and baseboard IP module at same time, you should avoid the multicast IP addresses confliction.
- Page 49 OmniHub CMP100 – User Manual • LOGO setting: you can upload several pictures at the same time, and pick one to show on the screen, when you click the one you want to show that picture field will turn to green.
- Page 50 OmniHub CMP100 – User Manual QR Code setting: QR Code picture picking method is same to LOGO setting. • LOGO Parameter Range LOGO Parameter Range Position X 0~1920 (Dual) Position Y 0~1080 (Dual) Size width 0~1920 (Dual) Size Height 0~1080 (Dual) 3.3.7.5...
-
Page 51: Ce-Hdmi-02
OmniHub CMP100 – User Manual 3.3.7.6 EAS Settings Settings for the EAS feature need to be made on the encoder module so that when the EAS source is triggered, the Audio and Video from the encoder will be replace by the Audio and Video from AES module. - Page 52 OmniHub CMP100 – User Manual 3.3.8.1 Module Status Module Status for HDMI encoder show the Bitrate on each port when HDMI source is connected. The Status for CE-HDMI-02 is same with CE-HDMI-00. The diferece are the number of channel shown in the status and some other parameters not in CE-HDMI-00 like Audio2 Bitrate and the input/output video resolution.
- Page 53 OmniHub CMP100 – User Manual Video Encoder Range Name Range Details Video Type H264 , MPEG2 GOP Size 18~48 Video Bitrate (Kbps) 2000~18000 PCR PID 32~8190 Video Mode PMT PID 32~8190 Video Max Bitrate 18000 Service Name Length is 1~16...
- Page 54 OmniHub CMP100 – User Manual 3.3.8.3 Module IP Output This feature is specifically for single program encoding and IP output directly. By using this way to output, it will not occupy baseboard multicast bandwidth. If you want to use IP output channel in the encoder module and baseboard IP module at same time, you should avoid the multicast IP addresses confliction.
-
Page 55: Ce-Hdmi-02C
OmniHub CMP100 – User Manual EAS module settings 3.3.8.5 Service Configuration and System Operation Service Configuration and System Operation please refer to CR-DVBC-00 at page 33 to 3.3.9 CE-HDMI-02C CE-HDMI-02C is a 2-channel HDMI or component HD encoder, supports H.264 / MPEG- 2 HD/SD, MPEG1L2, AAC, AC3 audio, support CC subtitle and analog audio input. - Page 56 OmniHub CMP100 – User Manual 3.3.9.2 Module Settings In module Setting, there are Basic and Advance Parameters. In basic Parameters, here you can edit or modify the parameter in Video (resolution, GO P, etc.), audio (bitrate, volume, etc.) and Service parameters (PID of Video, audio, PMT etc.)
- Page 57 OmniHub CMP100 – User Manual Advanced Parameters Click All Configurable Parameters in the line to set encoding parameters. Video Encoder Range Name Range Details Input TS Source HDMI, Component Video Type H264 , MPEG2 GOP Size 18~48 Video Bitrate (Kbps)
- Page 58 OmniHub CMP100 – User Manual The CE-HDMI-02C module support total two sets of audio and video input. Each set includes 1 HDMI port/1 component port and1 analog port. If video comes from HDMI, there are three options for encoding dual audio: 1.
-
Page 59: Ce-Hdmi-05/05A
OmniHub CMP100 – User Manual 3.3.9.5 Service Configuration and System Operation Please see CR-DVBC-00 module at page 34 to 35 for the reference. 3.3.10 CE-HDMI-05/05A CE-HDMI-05/05A module is a 4/8 channel HDMI encoding mdoule that support H.264, Mpeg1L2, AC3 and AAC audio and support OSD Subtitle, logo picture and QR code overlay. - Page 60 OmniHub CMP100 – User Manual 3.3.10.2 Module Settings For the Module Setting, please refer to CE-HDMI-01 at page 45 for reference. See below screenshot of the module Setting page. Page 60 of 106...
- Page 61 OmniHub CMP100 – User Manual 3.3.10.3 Module OSD Settings For the Module OSD, Please refer to CE-HDMI-01 at page 46. See below screenshot for the Module OSD page. 3.3.10.4 Module IP Output Please see CE-HDMI-00/R01 IP Output at page 48 for reference 3.3.10.5...
-
Page 62: Ce-Sdi-00
OmniHub CMP100 – User Manual 3.3.11 CE-SDI-00 CE-SDI-00 module supports 2 CH H.264/AVC HD/SD (up to 1080p60) or MPEG-2 HD/SD (up to 1080i60) encoding via SDI/CVBS input. MPEG1-L2, AAC and AC3 audio encoding, 2×BNC, 2×6-pins interfaces for analog audio inputs 3.3.11.1... - Page 63 OmniHub CMP100 – User Manual Video Encoder Details Range Name Range Input Source Type CVBS, SDI GOP Size 18~48 Video Type H264 , MPEG2 PCR PID 32~8190 Video Bit Rate (Kbps) 2000~18000 PMT PID 32~8190 Video Mode Program Name Length is 1~31...
- Page 64 OmniHub CMP100 – User Manual 3.3.11.3 IP Output Please see CE-HDMI-00/R01 IP Output at page 48 for reference 3.3.11.4 EAS Settings Settings for the EAS feature need to be made on the encoder module so that when the EAS source is triggered, the Audio and Video from the encoder will be replace by the Audio and Video from AES module.
-
Page 65: Ce-Cvbs-00/R01/R01A
OmniHub CMP100 – User Manual EAS Module settings 3.3.11.5 Service Configuration and System Operation Please see CR-DVBC-00 module at page 33 to 35 for the reference. 3.3.12 CE-CVBS-00/R01/R01A CE-CVBS-00/R01/R01A is the 6/8/16-channel CVBS encoder with 2/2/4 DB15 connectors each for 3/4/4 channels. It supports H.264/MPEG-2 SD encoding and MPEG1-L2 audio. - Page 66 OmniHub CMP100 – User Manual CE-CVBS-R01A (16 CH) Just like all modules. CE-CVBS Status show the bitrate on each channel and can be check the TS Analysis and Service List. See picture below 3.3.12.1 Module Settings Click All Configurable Parameters to see all parameters you can modify and check what specific parameters you want to set and see.
- Page 67 OmniHub CMP100 – User Manual Click All Configurable Parameters in the line to set encoding parameters. Name Range Name Range Video Type H264 , MPEG2 Service Name Length is 1~16 Video Bitrate (Kbps) Service Provider 600~20000 Length is 1~16 Name...
- Page 68 OmniHub CMP100 – User Manual Name Range Name Range Video Type Service Name H.264 Length is 1~16 Video Bitrate (Kbps) 600~6000 Service Provider Length is 1~16 Name Video Mode Brightness 0~255 GOP Size 1~99 Contrast 0~255 Profile Main/High Saturation 0~255...
-
Page 69: Modulation Modules
OmniHub CMP100 – User Manual Modulation Modules 3.3.13 CM-QAMA-00/R00 CM-QAM-00 / R00 / R01 / R01A module supports modulating 16 non-adjacent channels with 1 RF port and 1 RJ45 network port that is reserved for future use. QAM A and B share the same Hardware but Different Software. - Page 70 OmniHub CMP100 – User Manual Click the Apply button in the right side to make the change take effect. Name Range Name Range QAM Mode ANNEX A/ ANNEX B RF level 0~63 Bandwidth 6M, 7M, 8M Frequency (KHz) 48000~858000 Symbol Rate (KBaud)
- Page 71 OmniHub CMP100 – User Manual Clicking on the con icon will show you the NIT setting where you can create and add NIT Network and NIT Stream. For NIT Stream, you can create Cable Descriptor and Logical Channel Number LCN.
- Page 72 OmniHub CMP100 – User Manual One important information we need is to know what frequency and what TS we will create the Cable Descriptor. Once we know what frequency, we need to create the TSID that we are currently using. If we have 4 frequency output on the Network, we need to create 4 TSID as shown below.
-
Page 73: Cm-Qama-R01/R01A
OmniHub CMP100 – User Manual 3.3.14 CM-QAMA-R01/R01A CM-QAMA-R01 and CM-QAMA-R01A are 4 channel and 8 channel modulators respectively. The module shares the same hardware but different software. For the Status, Settings, Service Configuration and System Operation. Please refer to previous module CM-QAMA-00/R00 at page 69 to 72. - Page 74 OmniHub CMP100 – User Manual 3.3.15.1 Module Status Please see CR-DVBC-00 at page 31 for reference. See also image for QAMB Status. 3.3.15.2 Module Settings This page allows the customer to input the output parameter for the QAM required by the network.
-
Page 75: Cm-Qamb-R01/R01A
OmniHub CMP100 – User Manual 3.3.16 CM-QAMB-R01/R01A CM-QAMB-R01 is a 4 channel QAM B Modulator module while CM-QAMB-R01A is an 8 channel QAM B modulator. The Status, Setting Service Configuration and System Operation for these two modules are same with the CM-QAM-00/R00. See page 69 to 72 for reference. -
Page 76: 3.3.18 Cm-Ofdm-R01/R01A
OmniHub CMP100 – User Manual 3.3.17.2 Service Configuration TS setting: Please refer to IP output service configuration at page 26 for reference. Select the modulation mode: Analog, SCTE_Mode 1, SCTE_Mode 2, or ATSC (8VSB) 3.3.18 CM-OFDM-R01/R01A CM-OFDM-R01 / R01A module supports up to 4/8 adjacent frequencies modulating with 1 RF female connector for output. -
Page 77: Cm-Isdbt-R01/R01A
OmniHub CMP100 – User Manual Module Settings is where we input the source parameters. Once done, click on apply for the changes to take effect and check on the status in the channel signal is Locked. Name Range Name Range... - Page 78 OmniHub CMP100 – User Manual Name Range Name Range Bandwidth (MHZ) RF level 90~110 Frequency (KHz) 48000~862000 FFT Mode GI Mode 1/4, 1/8, 1/16, 1/32 RF Level Gain(dB) 45~55 QAM Mode QPSK Convolutional 1/2, 2/3, 3/ Coding 16QAM 4, 5/6, 7/8 64QAM 3.3.19.2...
-
Page 79: Function Modules
OmniHub CMP100 – User Manual • Click plus icon of Descriptor and add the LCN Descriptor in. Then check all the programs which are contained in this frequency. Then set programs LCN. • Do same operations to add next TS (frequency) until NIT streams of all the frequencies have been included. - Page 80 OmniHub CMP100 – User Manual When the EAS is actively replacing the encoder outputs the output will show “Paved” status in the web-interface. The CMP will then router the EAS IP, ASI, or RCA input to replace the other Encoder module output.
- Page 81 OmniHub CMP100 – User Manual Encoder Settings section is for the RCA / Analog-AV inputs. When the takeover content is provided in this fashion it must be encoded to MPEG “.TS” Transport Stream data. The Video, Audio, and Bitrate settings are used to configure the format.
- Page 82 OmniHub CMP100 – User Manual Video Type H.264, MPEG-2 Audio Type AC3, Mpeg-1 Layer 2 Mpeg2-AAC, Mpeg4-AAC Video Bit rate(Kbps) 1500~20000 Audio Bit rate 128, 192, 2 (Kbps) 56,384 Volume -10~10 Example of the EAS module Status Page Page 82 of 106...
-
Page 83: Cp-Cam-00
OmniHub CMP100 – User Manual 3.3.21 CP-CAM-00 CP-CAM-00 is used to decrypt and encrypt service. It has 2 independent CI card slots, compatible with mainstream CAM cards, support only Xcrypt CAM CAS for encryption and support mainstream CAS decryption. 3.3.21.1... - Page 84 OmniHub CMP100 – User Manual 3.3.21.3 Service Configuration For the Service Configuration. You can select the service either Descrambling or No Descrambling for the service before you output it certain output. To configure the service to output, please refer to other Modules service configuration procedures.
-
Page 85: Section 4 Appendices
OmniHub CMP100 – User Manual Section 4 Appendices SECTION 4 APPENDICES .......................... 85 APPENDIX A - A ......................86 CRONYMS AND LOSSARY APPENDIX B - A M SE C ..............87 ONROE ONFIGURATION AND ESTING APPENDIX C - S .........................91 PECIFICATION APPENDIX D - W ......................... -
Page 86: Appendix A - Acronyms And Glossary
OmniHub CMP100 – User Manual APPENDIX A - Acronyms and Glossary Advanced Audio Coding AC-3 Also known as Dolby Digital Audio Engineering Society ATSC Advanced Television Systems Committee Audio Video Bouquet Association Table Bit Error Ratio Bit Rate The rate at which the compressed bit stream is delivered... -
Page 87: Appendix B - A Monroe One Net Se Configuration And Testing
OmniHub CMP100 – User Manual SNMP Simple Network Management Protocol Signal Noise Ration SPTS Single Program Transport Stream Time and Date Table Transport Stream Variable Bitrate APPENDIX B - A Monroe OneNetSE Configuration and Testing For development and testing purposes, the Monroe OneNetSE will be used to supply the SCTE18 messages and the EAS substitution audio and video. - Page 88 OmniHub CMP100 – User Manual 1. The webpage for the Monroe box requires login. The Monroe box has been configured with this login information (The capital “A” in the username is required): User: Admin Password: sencore12 2. Once logged into the unit, browse to the Setup tab and select Net Alerts.
- Page 89 OmniHub CMP100 – User Manual 5. Make sure Client 0 is enabled and then input the unicast of multicast address into the “Remote Host Unicast or Multicast IP Address” text box. It is suggested the unicast normally be used, so what should be put in this box is the management IP address of the CMP100.
- Page 90 OmniHub CMP100 – User Manual DVS644-SCTE18 Page (Monroe R189SE) 9. Click the Accept Changes button and that should be the last of the configuration. EAS Testing with Monroe Box 1. To force the Monroe box to do a test and send an SCTE18 message, press the Select button on the front panel of the unit TW0 TIMES.
-
Page 91: Appendix C - Specification
OmniHub CMP100 – User Manual APPENDIX C - Specification CMP100- Base unit Includes - 4RU chassis/case, power supply/line cord Systems - Chassis Dimension 445mm x 177mm x 428mm (HxWxD), 4RU Front Panel 16 Hot swappable Slots Single/Dual Redundant Power Supplies... - Page 92 OmniHub CMP100 – User Manual Descrambled channel quantity depends on CAM capability, 2 CAMs could be different QAM mode Annex A/C Frequency Range 47 ~ 862MHz Bandwidth 6/7/8MHz Constellation 16QAM / 32QAM / 64QAM / 128QAM / 256QAM Symbol Rate 3.6 ~ 6.952Ms/s...
- Page 93 OmniHub CMP100 – User Manual ISDB-T Receiver Input 4 channels via 1 RF Female connector 2 x PCMCIA CI slots Descrambled channel quantity depends on CAM capability, 2 CAMs could be different Frequency Range 177.143~863.143 MHz Bandwidth 6/7/8MHz Constellation DQPSK, QPSK, 16QAM, 64QAM...
- Page 94 OmniHub CMP100 – User Manual 2 x PCMCIA CI slots Descrambled channel quantity depends on CAM capability, 2 CAMs could be different Frequency Range 47 ~ 862MHz Bandwidth 6/7/8MHz Constellation DVB-T: QPSK / 16QAM / 64QAM DVB-T2: QPSK / 16QAM / 64QAM /...
- Page 95 OmniHub CMP100 – User Manual DVB-S/S2 FTA Receiver Input C/Ku Band, 8 channels via 8 RF female connectors LNB Power Independent power supplies for LNB-1 & 3, LNB-5 & LNB-7 LNB Current 13V / 18V LNB Current Max. 400mA Constellation...
- Page 96 OmniHub CMP100 – User Manual Output 4/8 frequencies via 1 RF female connector 75Ω Standard ETSI EN 300744 Frequency Range 47 ~ 862MHz Bandwidth 8MHz Constellation QPSK / 16QAM / 64QAM Guard Intervals 1/4, 1/8, 1/16, 1/32 FFT Size 2K, 8K...
- Page 97 OmniHub CMP100 – User Manual QAMA Modulation Output 4/8 frequencies via 1 RF female connector 75Ω Standard ITU-T J.83 Annex A/C Frequency Range 47 ~ 862MHz Bandwidth 6/7/8MHz Constellation 16QAM / 32QAM / 64QAM / 128QAM / 256QAM Symbol Rate 3.6~6.9Ms/s...
- Page 98 OmniHub CMP100 – User Manual Constellation 16QAM / 32QAM / 64QAM / 128QAM / 256QAM Symbol Rate 3.6~6.9Ms/s Output Level Max. 106dBuV >40dB ISDB-T Modulation Output 4/8 frequencies via 1 RF female connector, 75Ω Standard ARIB STD-B31 Frequency Range 57 - 860MHz...
- Page 99 OmniHub CMP100 – User Manual Bitrate Control Video Bitrate 600 ~ 12,000Kbps GOP Structure IPPP GOP Size 1~99 Aspect Ratio Automatic or Manual Audio MPEG-1 Layer II, AAC , AC3 Audio Bitrate 32~384Kbps Audio Mode Stereo (2.0, including downmix) Audio Sampling Rate...
- Page 100 OmniHub CMP100 – User Manual Input 2 channels via 2 HDMI or 2 component female connectors (HDMI 1.4) CC/Component input via DB15 port Video H.264/AVC HD: MP/HP@L4.0, SD: MP/HP@L3.0 MPEG-2 SD: MP@ML HD: MP@HL Resolution SD: 576i50, 480i59.94f HD: 1080p25/30/50/59.94/60,...
- Page 101 OmniHub CMP100 – User Manual Audio MPEG-1 Layer II, AAC , AC3 . Support AC3 pass-through ad dual audio encoding Audio Mode Stereo (2.0, including downmix) Audio Sampling Rate 48KHz SDI Encoder Input 2 channels via 2 SDI or CVBS...
- Page 102 OmniHub CMP100 – User Manual Resolution HD: 1080p-29.97 / 30 / 50 / 59.94 / 60 1080i-29.97 / 30 / 50 / 59.94 / 60 720p-50 /59.94 / 60 SD: 576i-50 576p-50 460i-59.84 / 60 460p-59.84 / 60 *Output supports progressive only, and...
- Page 103 OmniHub CMP100 – User Manual Audio Mode Stereo 2.0 Audio Sampling Rate 48KHz Audio Volume Leveling -20dB~20dB OSD overlay Text, Image, QR Code CVBS Encoder (Commercial) Input 8 channels via 2 DB15 connectors, each DB15 for 4 channels 2 x RCA-DB15 adaptor cables come along with the module.
- Page 104 OmniHub CMP100 – User Manual GOP Size 6~63 Aspect Ratio Automatic or Manual Audio MPEG-1 Layer II Audio Bitrate 32~384Kbps Audio Mode Stereo (2.0, including downmix) Audio Sampling Rate 48KHz Audio Volume Leveling -20dB~20dB CVBS Encoder (Professional) Input 16 channels via 4 DB15 connector,...
- Page 105 OmniHub CMP100 – User Manual Audio L/R input via 2*RCA connector TS input via 1*BNC connector Video H.264 SD: MP/HP@L3.0 MPEG-2 SD: MP @ML (by default) Resolution SD: 480i59.94fps 500Kbps to 100Mbps Contact Closure 3PIN Connector with dry Contact or...
-
Page 106: Appendix D - Warranty
4.4.1 Returning for Service or Calibration The Omnihub CMP100 is a delicate piece of equipment and needs to be serviced and repaired by Sencore. Periodically it is necessary to return a product for repair or calibration. In order to expedite this process please carefully read the instructions below.
Need help?
Do you have a question about the OmniHub CMP100 and is the answer not in the manual?
Questions and answers