Table of Contents
Advertisement
Quick Links
Quick Start Guide
About This Quick Start Guide
This guide is for helping new customers get their Sencore OmniHub CMP100 setup
and running as quickly and easily as possible.
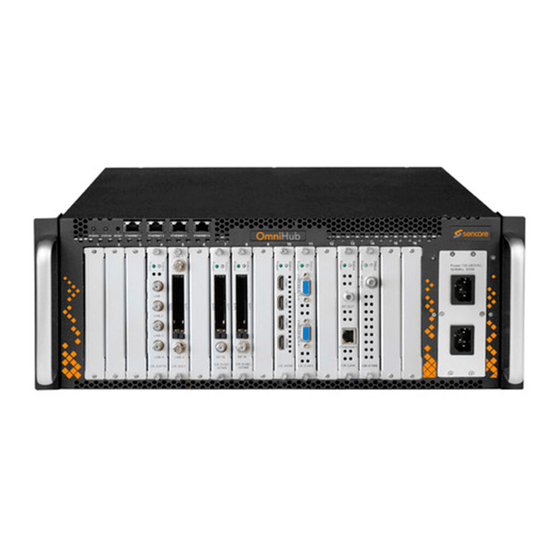
The CMP100 allows users to Encode Signal via CVBS, SDI and HDMI; Receive
Signal from DVBC, DVBS/S2, DVBT and 8VSB; Modulate to QAMA/B, 8VSB, OFDM,
and ISDBT; and some other Function like EAS and CAM.
Download the Full User's Manual
The current versions of the full user's manuals can be obtained from the Download
tab of the CMP100 product page on our website:
Sencore ProCare support at procare@sencore.com.
Unpack the Equipment
Check that there are no signs of damage to equipment due to transport. If the
equipment appears to be damaged, please contact Sencore ProCare for support.
In addition to the Sencore CMP100 Chassis hardware itself, the box should include
two power cables, and adapter cables depending on the Option Modules included.
Equipment Installation and Power Up
The CMP100 is designed for rack installation and should be securely connected to the
rack using screws suitable for the rack type. Note that there should be sufficient room
for air to freely flow around the unit, ensuring proper cooling. The CMP100 requires
front-to-back airflow.
When the equipment is installed, it should be powered by connecting both power
cables to power outlets. If one of the redundant power supplies is disconnected from
power, the unit will still work. Re-establish power to the second power supply is
recommended for the smooth performance of the unit. The CMP100 can operate in
the range 90–240VAC.
Sencore OmniHub CMP100
www.sencore.com
or by emailing
Version 1.0 - December 2019
Figure 1: IP Port Connectors
Establish Web Connection to the CMP100
In order to access the CMP100 web user interface, it is necessary to establish an
Ethernet connection to the device.
Using the Pre-Set Management IP Address
The Sencore CMP100 is shipped with the following factory settings for management
port 1 and 2(the same IP address is assigned to both ports):
Management Port 1 and 2 IP address:
Management Port 1 and 2 subnet mask:
In order to connect to management port 1 or 2, the PC used for setup should have
corresponding network settings. Connect a PC directly to the device's management
port using an Ethernet cable.
For Windows, the network parameters are set in the Control Panel — Network and
Internet — Network and Sharing Center — Network Connection — Properties —
Internet Protocol Version 4 Properties view, as shown in figure 2. Select the user
defined address and set the PC's IP address to 192.168.1.xx (xx is not 10 to 26) and
the subnet mask to 255.255.255.0.
When the IP address of the PC has been set in the same subnet as the CMP100's
factory setting, a web browser can be used to access the web user interface at
192.168.1.10.
192.168.1.10
255.255.255.0
Page 1
Advertisement
Table of Contents

Subscribe to Our Youtube Channel
Related Manuals for Sencore OmniHub CMP100


Summary of Contents for Sencore OmniHub CMP100
- Page 1 Sencore OmniHub CMP100 About This Quick Start Guide This guide is for helping new customers get their Sencore OmniHub CMP100 setup and running as quickly and easily as possible. The CMP100 allows users to Encode Signal via CVBS, SDI and HDMI; Receive Signal from DVBC, DVBS/S2, DVBT and 8VSB;...
- Page 2 • Type the management IP address of the CMP100 in the browser URL field and press Support ENTER. The web UI will be displayed. Contact Sencore ProCare for support, if required. Email: procare@sencore.com Phone: +1-605-978-4600 Figure 3: CMP100 Login Web UI Version 1.0 - December 2019...
Need help?
Do you have a question about the OmniHub CMP100 and is the answer not in the manual?
Questions and answers