Table of Contents
Advertisement
Quick Links
Advertisement
Table of Contents

Related Manuals for BaBylissPro Volare X2 FX811U


Summary of Contents for BaBylissPro Volare X2 FX811U
- Page 1 Cord/Cordless Auto Voltage Professional Hair Clipper Model FX811U/FXB811U...
-
Page 2: Important Safety Instructions
IMPORTANT SAFETY INSTRUCTIONS When using an electrical appliance, basic safety precautions should always be taken, including the following: READ ALL INSTRUCTIONS BEFORE USING KEEP AWAY FROM WATER DANGER – To reduce the risk of death or injury by electric shock: 1. - Page 3 4. Never operate this appliance if it has a damaged cord or plug, if it is not working properly, if it has been dropped or damaged, or if it has been dropped in water. Return the ap‑ pliance to BaByliss PRO for examination or repair. 5.
-
Page 4: Parts Identification
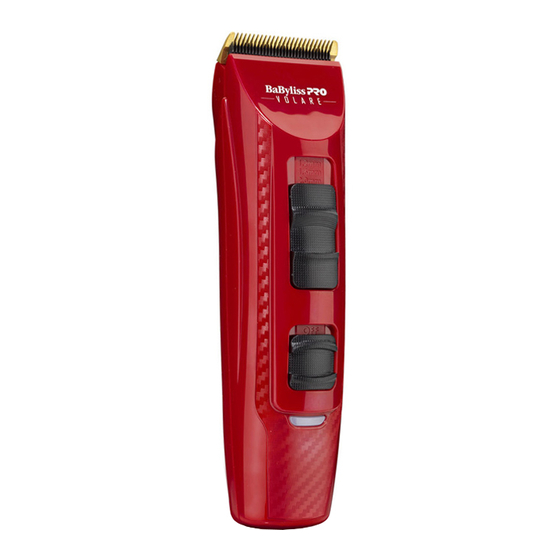
PARTS IDENTIFICATION Main body AC adapter Trimming height indicator #1 comb attachment – ", 3 mm Length adjustment #2 comb attachment – 1/4", 6 mm Power switch (ON–OFF) #3 comb attachment – ", 10 mm LED indicator #4 comb attachment – 1/2", 13 mm Blade #5 comb attachment –... - Page 5 IMPORTANT BEFORE USE This clipper is designed for professional use to trim hair and beards. Charge it for 3 hours before use for the first time in order to activate the built‑in rechargeable batteries. It can be operated on either the AC adapter or the rechargeable batteries. Read all instructions carefully before use.
- Page 6 • Before each use, apply oil at the places marked with arrows (see page 12). • Do not allow permanent wave lotion, hair restorer or hairspray to come into contact with the main body or the blades. Doing so may result in cracking, discoloring or corrosion. •...
-
Page 7: Charging The Clipper
CHARGING THE CLIPPER Slide the power switch to 0FF position. Connect the plug from the AC adapter to the unit. The LED will turn red to indicate charging. Place the unit on the stand or on a counter. • It will take approximately 3 hours for the clipper to fully charge, as indicated by the blue LED light. -
Page 8: Using The Clipper
AC OPERATION You can use your clipper even when the battery capacity is low. 1. Make sure the power switch is off before connecting the adapter. 2. Connect the AC adapter in the same way as for charging. The red charging light will come on. 3. - Page 9 Removing the Attachment from the Clipper 1. Remove the attachment as illustrated. Removing the Blade 1. Be sure to turn off the power before you remove the blade. 2. Hold the clipper with the switch facing upward and push the blade with your thumb while catching the blade in your other hand.
- Page 10 Mounting the Blade 1. Set the taper control to 2.0mm. You cannot mount the blade in any other position or you will damage the engagement. 2. Fit the mounting tab into the blade tongue on the clipper and push in until it clicks.
- Page 11 CLIPPER CARE Cleaning the Blade 1. Brush off any hairs from the clipper and from around the blade. 2. Remove the blade and brush off hairs from the blade edge. 3. Brush the hairs out from between the fixed comb blade and the moving cutter blade while pressing down on the cleaning lever to raise the moving cutter blade.
-
Page 12: Very Important
Lubrication 1. Apply a few drops of the oil to the space between the fixed comb blade and moving cutter blade. Apply the oil to the clip‑ per before and after each use. VERY IMPORTANT Blades must be cleaned and oiled on a regular basis so they will function properly. - Page 13 UK GUARANTEE This BaByliss PRO appliance is guaranteed for salon use for 2 years. This guarantee covers defects under normal use from date of purchase and ceases to be valid in the event of altera‑ tion or repair by unauthorised persons. If the appliance does not perform satisfactorily due to defects in materials or manufacture, it will be repaired or replaced through the Conair UK After Sales Service.
- Page 14 SAFE DISPOSAL symbol on the product or on its packaging indicates that this product may not be treated as household waste. In‑ stead it should be handed to an appropriate collection point for the recycling of Electrical and Electronic equipment. By ensur‑ ing this product is disposed of correctly, you will help prevent potential negative consequences for the environment and human health, which could otherwise be caused by inappropriate waste...
Need help?
Do you have a question about the Volare X2 FX811U and is the answer not in the manual?
Questions and answers