Table of Contents
Advertisement
Quick Links
Advertisement
Table of Contents

Related Manuals for Directed Electronics WASP 718W


Summary of Contents for Directed Electronics WASP 718W
- Page 1 Model 718W Owner's Guide...
-
Page 3: Limited One-Year Consumer Warranty
DEI, shipping prepaid with a clear, legible copy of the bill of sale or other dated proof of purchase bearing the following information: consumer’s name, telephone number and address;... - Page 4 This warranty gives you specific legal rights and you may also have other rights that vary from State to State. DEI does not and has not authorized any person or entity to create for it any other obligation, promise, duty or obli- gation in connection with this security system.
-
Page 5: Table Of Contents
Table of Contents Limited One-Year Consumer Warranty ......i What Is Included . -
Page 6: Transmitter Configuration
Transmitter Configuration Disarm Panic Shock Sensor Adjustment Silent Mode Shock Sensor Adjustment 1999 Directed Electronics, Inc. ©... -
Page 7: What Is Included
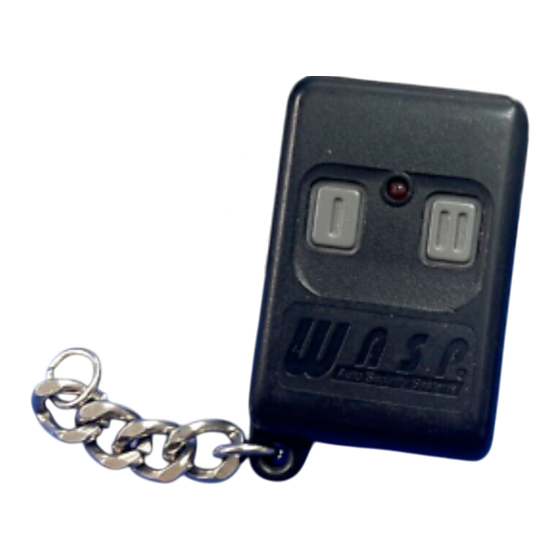
What is Included The control module A pair of two-button transmitters A siren on-board the control module A Stinger ® DoubleGuard ® dual-stage shock/impact sensor, on- board the control module The red status LED indicator light Important Information Congratulations on the purchase of your state-of-the-art vehicle security system. -
Page 8: System Maintenance
System Maintenance The system requires no specific maintenance. Your remote control is powered by a miniature 12V battery, type GP23A, that will last approximately one year under normal use. When the battery weak- ens, operating range will be reduced and the LED on the remote will dim when pressed. -
Page 9: Using Your System
Using Your System Arming You can turn on, or arm, the system by pressing mitter for one second. When the system arms, you will hear a short siren sound, or chirp. The system is now protecting your vehicle. When armed, your vehicle is protected in the following ways: Light impacts will trigger the Warn Away gered, the siren will chirp for a few seconds. -
Page 10: High Security Disarm
High Security Disarm Your system includes a High Security Disarm feature. During the trigger sequence, using the transmitter to disarm the system will only stop the trigger sequence (the siren will stop). However, the system will remain armed. This is extremely useful if you must stop the system from sounding, but are unable to visually check the vehicle. -
Page 11: Shock Sensor Adjustment
Shock Sensor Adjustment The system features a Doubleguard ® shock sensor inside the control unit. All adjustments to the sensor are made using the transmitter. Adjusting the Shock Sensor Warn-Away Disarm the system by pressing Within five seconds, press and hold until the unit generates a long chirp. -
Page 12: Adjusting The Shock Sensor Full Trigger
Adjusting the Shock Sensor Full Trigger Arm the system by pressing Within five seconds, press and hold until the unit generates a long chirp. Release on the transmitter. To Test and Adjust the Current Full Trigger Setting Strike the vehicle to test the current setting. If the impact is detected the unit will chirp three or four times. -
Page 13: Code Hopping
Code Hopping The receiver and transmitters each use a mathematical formula called an algorithm to change their code each time the transmit- ter is used. This technology has been developed to increase the security of the unit. The control unit knows what the next codes should be. -
Page 14: Glossary Of Terms
Glossary of Terms Control Unit: The “brain” of your system. Usually hidden under- neath the dash area of the vehicle. It houses the microprocessor which monitors your vehicle and controls the alarm's functions. LED: Red light mounted somewhere in the vehicle. It is used to indicate the status of your system. - Page 15 Notes 1999 Directed Electronics, Inc. ©...
- Page 16 Notes 1999 Directed Electronics, Inc. ©...
-
Page 17: Quick Reference Guide (Removable)
QUICK REFERENCE GUIDE: To arm using your remote You can activate, or arm, the system by pressing for one second. When the system arms, you will hear a short siren sound, or chirp. To disarm using your remote To disarm the system, press again. - Page 20 The recipient of more than 20 patents in the field of advanced electronic technology, DEI is ISO 9001 registered. Quality Directed Electronics products are sold and serviced throughout North America and around the world.
Need help?
Do you have a question about the WASP 718W and is the answer not in the manual?
Questions and answers