Table of Contents

Subscribe to Our Youtube Channel
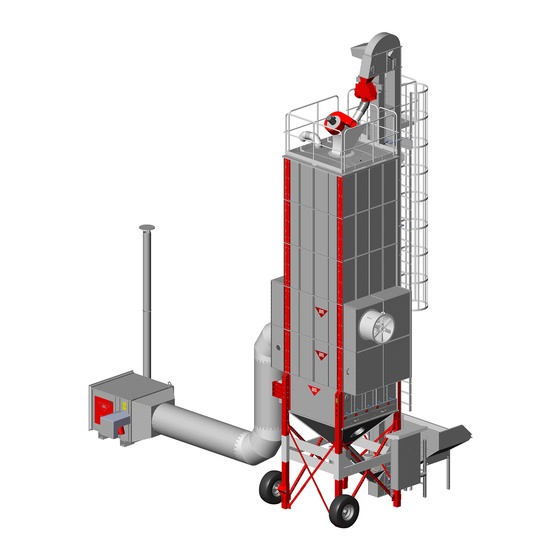
Related Manuals for ANTTI Plug&Dry

Summary of Contents for ANTTI Plug&Dry
- Page 1 Installation and Operating Instructions ANTTI GRAIN DRYER Antti Plug&Dry 408116 (en) ANTTI-TEOLLISUUS OY Koskentie 89 FI-25340 Kanunki, Salo Tel. +358 2 774 4700 E-mail: antti@antti-teollisuus.fi 03-2020 www.antti-teollisuus.fi...
-
Page 2: Table Of Contents
THE SPACE REQUIRED FOR THE INSTALLATION ..................... 5 PRESENTATION OF THE MACHINE ........................5 SAFETY .................................. 6 INSTALLATION OF THE ANTTI PLUG&DRY ......................6 Principle drawings of different dryer types with accessories .................. 8 Installing the electric cabinet and the bracket for the frequency transformer ............11 Principle drawing of the cable routing........................ - Page 3 Cooling ................................. 51 DRYING TECHNICS ............................52 MAINTENANCE AND OPERATING ADJUSTMENTS ..................53 ECONOMICAL DRYING ............................54 POSSIBLE MALFUNCTIONS ..........................57 SERVICE AND WINTER MAINTENANCE ......................57 GUARANTEE ............................... 58 EU Declaration of Conformity ..........................59 Antti-Teollisuus Oy 408116 03-2020...
-
Page 4: Antti Plug&Dry
ANTTI PLUG&DRY Read the Installation and Instruction Manual carefully before installing the machine and putting it into operation. SELECTING LOCATION FOR THE DRYER Locate the grain dryer as a part of the farm's centre of operations, taking into account possible traffic, noise and dust problems. -
Page 5: The Space Required For The Installation
This manual is intended for professional farmers. The use of the machine requires normal skills and general knowledge of farming. Grain dryer type This manual deals with installation and use of ANTTI PLUG&DRY. PRESENTATION OF THE MACHINE Grain dryers are intended for drying of grain and seeds. -
Page 6: Safety
Follow the local instructions for occupational safety. INSTALLATION OF THE ANTTI PLUG&DRY Refer to the erecting instructions 408076 for the dryer for installation of the sections and the other basic components. These instructions deal with the installation of the Plug&Dry dryer's model-specific components. - Page 7 – use M10 bolts for fixing the vertical supports. Lift this large sub-assembly on top of the base or the lower-lying sections. NOTE! The total weight of the sub-assembly is several tonnes, so a heavy crane is required. Verify the load-bearing ca- pacity of the soil, before the lifting. Antti-Teollisuus Oy 408116 03-2020...
-
Page 8: Principle Drawings Of Different Dryer Types With Accessories
Principle drawings of different dryer types with accessories Principle drawing of the assembly Cable ladder Elevator support Frequency transformer Control System STANDARD POSITION 23MF2-ohje kuvaan_1.pdf Antti-Teollisuus Oy 408116 03-2020... - Page 9 Cable ladder Temperature sensor Gas-fuelled heaters, direct driven: LTM Vacuum sensor Vacuum sensor Cable ladder, keep the wiring off hot surfaces Cable ladder 23MF2-ohje kuvaan_2.pdf Antti-Teollisuus Oy 408116 03-2020...
- Page 10 Antti-Teollisuus Oy 408116 03-2020...
-
Page 11: Installing The Electric Cabinet And The Bracket For The Frequency Transformer
Installing the electric cabinet and the bracket for the frequency transformer Antti-Teollisuus Oy 408116 03-2020... -
Page 12: Principle Drawing Of The Cable Routing
F1, F2, F3… Axial blower Fx_TZ_CX1 Fire thermostat TE2_CX1 Outlet temperature sensor green Precleaner green LS1 Limit sensor black Burner black LTM_CX1 PS_CX1 black Differential pressure switch black TE1_CX1 Inlet temperature sensor blue black Cable ladder yellow Antti-Teollisuus Oy 408116 03-2020... -
Page 13: Unit-Specific Cabling
Unit-specific cabling yellow green black Cable ladder yellow Antti-Teollisuus Oy 408116 03-2020... -
Page 14: Example Of Connector Ids
The location of the elevator with respect to the electric cabinet, the default location of the electric cabinet. Antti-Teollisuus Oy 408116 03-2020... -
Page 15: Electric Installations
The electricity supply to the grain dryer – like to any other building on the farm – must be protected with a fault current switch in accordance with the valid legislation. It is recommended that the electricity supply be protected by means of proper overvoltage protection. Antti-Teollisuus Oy 408116 03-2020... -
Page 16: Installation
For example: if the maximum allowed operating temperature of the heater is100 °C, set the temperature limiter to 120 °C. The after-cooling system shall always be set to 45 °C. A – Temperature limiter (LIMIT) B – After-cooling (FAN) Antti-Teollisuus Oy 408116 03-2020... -
Page 17: Installing The Temperature Transmitter And The Fire Thermostat In The Axial Blower
Installation of the temperature transmitter installation of the tire thermostat The fire thermostat and the outlet temperature sensor shall be installed in their designated installation points as shown in the adjacent drawings Antti-Teollisuus Oy 408116 03-2020... - Page 18 Antti-Teollisuus Oy 408116 03-2020...
-
Page 19: Installing The Vacuum Sensor
2–3 of the change-over contact will be switched on, even if the air adjuster plate is in its minimum position. If the change-over switch is not switched on, the oil burner will not start. Antti-Teollisuus Oy 408116 03-2020... -
Page 20: Installing The Upper Limit Sensor (Capacitive, Adjustable)
Therefore, some space must be reserved for the pre-cleaner. Fix the height position of the sensor using the wing screw. Over time, the sensor's head may get dirty and start transmitting wrong data. Due to the above reason, the sensor head should be cleaned from time to time. Antti-Teollisuus Oy 408116 03-2020... -
Page 21: Installing The Temperature Transmitter In The Duct
Fix the installation flange at the hole in the pipe, using self-tapping screws (2). Insert the sensor of the temperature transmitter into the pipe through the installation flange, and tighten it in place with the lock screw (5). Antti-Teollisuus Oy 408116 03-2020... - Page 22 Antti-Teollisuus Oy 408116 03-2020...
-
Page 23: Installing The Fire Thermostat In The Duct
The fire thermostat shuts down all the operations of the dryer immediately after the pre-set temperature has been reached, for example, as a result of fire inside the dryer. The fire thermostat is delivered with the blowers. A fire thermostat is installed in every outlet pipe from the blower. Antti-Teollisuus Oy 408116 03-2020... - Page 24 Antti-Teollisuus Oy 408116 03-2020...
- Page 25 Antti-Teollisuus Oy 408116 03-2020...
- Page 26 Antti-Teollisuus Oy 408116 03-2020...
- Page 27 Antti-Teollisuus Oy 408116 03-2020...
- Page 28 Antti-Teollisuus Oy 408116 03-2020...
- Page 29 Antti-Teollisuus Oy 408116 03-2020...
- Page 30 Antti-Teollisuus Oy 408116 03-2020...
-
Page 31: Piping The Heaters With A Grain Pocket
Piping the heaters with a grain pocket Piping the heaters with a grain pocket Antti-Teollisuus Oy 408116 03-2020... -
Page 32: Dimensioning Of The Basic Parts Viewed From The Side
Dimensioning of the basic parts viewed from the side Antti-Teollisuus Oy 408116 03-2020... -
Page 33: Dimensioning Of The Basic Parts With A Small Intake Pit Viewed From Above
Dimensioning of the basic parts with a small intake pit viewed from above Mittakuva 2 Antti-Teollisuus Oy 408116 03-2020... -
Page 34: Principle Dimensioning Drawings For The 10 M³ And 17M³ Intake Pits
Principle dimensioning drawings for the 10 m³ and 17m³ intake pits Antti-Teollisuus Oy 408116 03-2020... -
Page 35: Dimensioning Of The Intake Pit To Be Used With A Chain Conveyor
Dimensioning of the intake pit to be used with a chain conveyor Mittakuva 4 Antti-Teollisuus Oy 408116 03-2020... -
Page 36: Installing The Base And The Legs
The top tanks and the sections can all be joined together while still on the ground, and lifted up in one go. NOTE! Observe the weight. Refer to the specific assembly instructions for the top tanks, provided separately for each model. Antti-Teollisuus Oy 408116 03-2020... -
Page 37: Installing The Elevator And The Ladder
Installing the elevator and the ladder Assembly in accordance with the instructions 408010. Bolt-assembled hopper 10m³ / 17m³ Assembly in accordance with the instructions 408110. The intake pit with Skandia conveyor To be assembled in accordance with the instructions 408115. Antti-Teollisuus Oy 408116 03-2020... -
Page 38: Wire Control Of The 3-Way Divider
See drawing: "Operating principle of the wire control" Install the circulation pipes between the elevator and the dryer. Make sure that the fall angle of the piping is 45° (1:1). Antti-Teollisuus Oy 408116 03-2020... - Page 39 WARNING! Debris in the suction air of the heater constitutes a fire hazard! Example drawings presenting how to install the air ducts with optimised extension legs (see pages 40–46) Antti-Teollisuus Oy 408116 03-2020...
- Page 40 Antti-Teollisuus Oy 408116 03-2020...
- Page 41 Antti-Teollisuus Oy 408116 03-2020...
- Page 42 Antti-Teollisuus Oy 408116 03-2020...
- Page 43 Antti-Teollisuus Oy 408116 03-2020...
- Page 44 Antti-Teollisuus Oy 408116 03-2020...
- Page 45 Antti-Teollisuus Oy 408116 03-2020...
- Page 46 Antti-Teollisuus Oy 408116 03-2020...
-
Page 47: Fuel Pipes
It pays to route the debris pipe of the pre-cleaner to a cyclone (option) that separates the dust and debris from the air. This helps keep the surroundings of the dryer clean and tidy. The dust cyclones can be purchased from Antti-Teollisuus Antti-Teollisuus Oy... -
Page 48: Starting Up
Check the operation of the electronic underspeed guard by removing the guard's sensor. Start the elevator. The elevator should first start and then stop after about 8 seconds of operation. Pre-cleaner Start the pre-cleaner. Check and, as required, change the direction of rotation of the pre-cleaner. Antti-Teollisuus Oy 408116 03-2020... -
Page 49: Feeder
The burner shall now stop, and the blower shall continue to run. As soon as the temperature of the inlet air drops below 45 °C, the burner shall restart. After having finished the test, return the setting of the overheat protection to the value mentioned above. Antti-Teollisuus Oy 408116 03-2020... -
Page 50: Thermal Insulation
Partek PV-80 AVM. To make the insulation work easier, you can download the installation instructions 408061 for the StandAlone dryer from our material bank on the website of Antti-Teollisuus. You can even purchase the installation kit from Antti-Teollisuus. OPERATION INSTRUCTIONS FOR THE DRYER MACHINERY (detailed in-... -
Page 51: Cooling
1–2 hours, readjust the settings for the next batches taking into account that the entire grain volume must have time to circulate inside the dryer at least one full round. (To measure the circulation time in the most reliable way, empty the dryer at the circulation speed and measure the time). Antti-Teollisuus Oy 408116 03-2020... -
Page 52: Drying Technics
10 °C, and/or an interval of 24 hours be kept to allow the moisture to even out. If the peas are really moist, we recommend drying them at intervals, keeping the heat on for two hours, and cooling for half an hour. Antti-Teollisuus Oy 408116 03-2020... -
Page 53: Maintenance And Operating Adjustments
In connection with change of variety to be dried, the elevator boot, the bottom suction fan and the feeder shall be cleaned, and for some time air blown into the empty dryer by means of the dryer heater. Antti-Teollisuus Oy 408116... -
Page 54: Economical Drying
In this case, you need throttle the air flow as much as is necessary to make the temperature of the drying air rise. This way you will be able to improve both the dryer's output and economy. Antti-Teollisuus Oy 408116... - Page 55 Do not let this happen, as it would drastically reduce the efficiency of the drying process, and strain the dryer heater clearly more than if the production of heat was constant. For remedy, increase the air flow or reduce the oil flow. Antti-Teollisuus Oy 408116 03-2020...
- Page 56 Make sure that the elevator lifts the grain at full power during the filling and the emptying. Keep the output setting of the pre-cleaner's blower as high as possible keeping in mind the limit for the variety in question. Antti-Teollisuus Oy 408116 03-2020...
-
Page 57: Possible Malfunctions
SERVICE AND WINTER MAINTENANCE Lubricate once a week elevator bearings feeder bearings transmission arms of the feeder (2–3 drops of oil) Annually maintenance of the oil burner (assign a specialist) checking the feeder motor gearbox (check oil leaks) Antti-Teollisuus Oy 408116 03-2020... -
Page 58: Guarantee
GUARANTEE The guarantee period for the Antti-dryers is one (1) operating season. The guarantee covers defects in material and workmanship. Separate guarantee terms issued by the respective importer apply to the electric motors. -
Page 59: Eu Declaration Of Conformity
EU Declaration of Conformity ANTTI-TEOLLISUUS OY Koskentie 89 FI-25340 KANUNKI; SALO Tel.: +358 (0)2 7744700 declares that ANTTI PLUG&DRY DRYER conforms with the provisions of the following directives: Machine Directive 2006/42/EC Salo 21.02.2020 Kalle Isotalo Managing Director Compiler of technical file...
Need help?
Do you have a question about the Plug&Dry and is the answer not in the manual?
Questions and answers